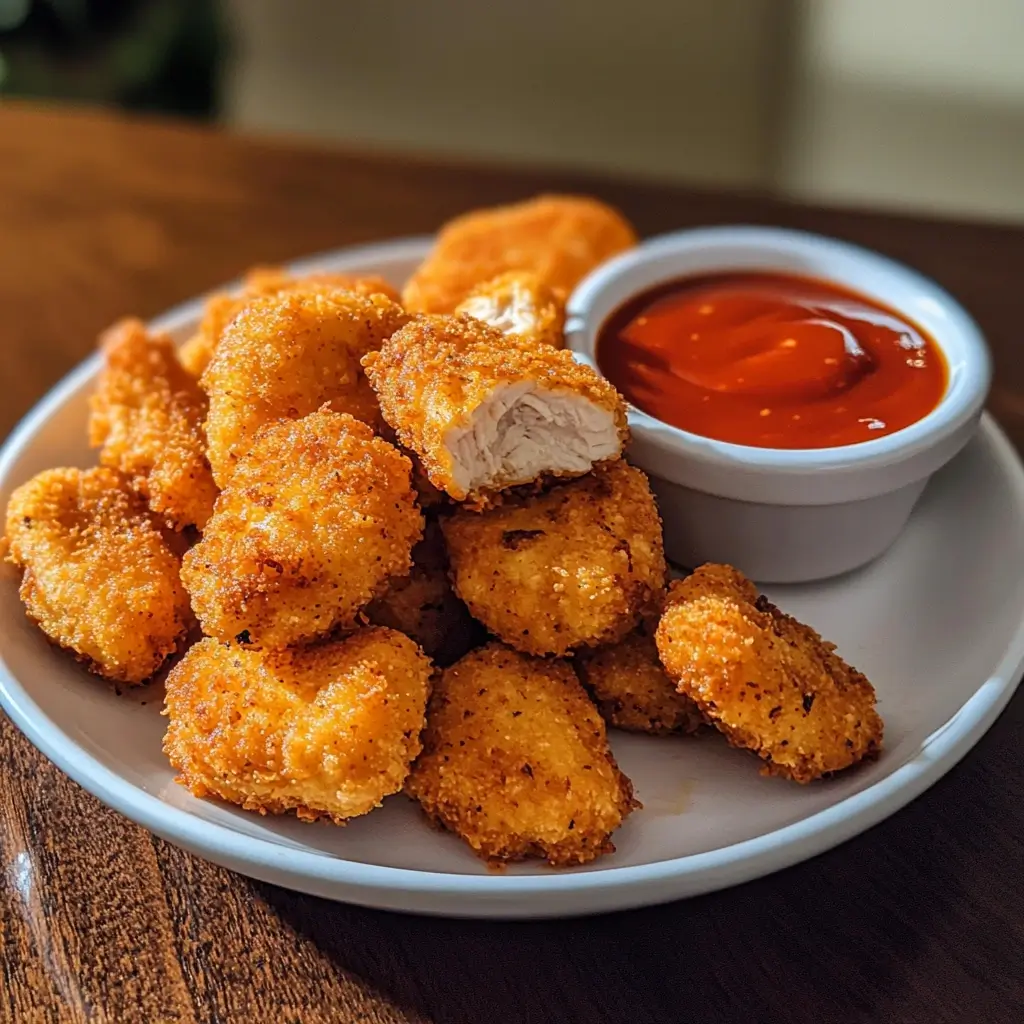
Oh, chicken nuggets. Just the words conjure up images of happy kids, quick dinners, and that satisfying crunch. In our house, chicken nuggets are a certified love language, spoken fluently by both the little ones and, dare I admit, the grown-ups too! For years, like many busy families, we relied on the convenience of store-bought nuggets. They were easy, quick, and the kids devoured them without complaint. But then, a nagging thought started to creep in – what exactly was in those nuggets? The ingredient lists were often long and filled with things I couldn’t pronounce, let alone feel good about feeding my family regularly. That’s when I decided to embark on a homemade nugget adventure. Let me tell you, it was a game-changer! The first batch I made was met with resounding cheers – even louder than usual nugget night! They were juicier, crispier, and tasted a million times better than anything we had ever bought from a freezer bag. The best part? I knew exactly what was going into them – wholesome chicken breast and simple, flavorful seasonings. Since that day, homemade chicken nuggets have become a staple in our kitchen, and I’m thrilled to share my foolproof recipe with you. Get ready to ditch the processed stuff and experience the joy of truly delicious, homemade chicken nuggets that will have everyone asking for seconds (and thirds!).
Ingredients You’ll Need: The Building Blocks of Nugget Perfection
Let’s talk ingredients. Making truly exceptional homemade chicken nuggets starts with quality components. Forget the mystery meat and questionable additives of store-bought versions; we’re using real, wholesome ingredients to create nuggets that are not only delicious but also something you can feel good about serving your family. Here’s everything you’ll need to embark on your nugget-making journey:
- Chicken Breast (1 lb, boneless, skinless): This is the star of the show, the foundation of our nuggets. Opt for boneless, skinless chicken breasts for ease of preparation. One pound is a good starting point and will yield a generous batch of nuggets, perfect for a family meal or even leftovers for lunch the next day. When selecting your chicken, consider looking for air-chilled chicken if available. Air-chilled chicken tends to be less watery, which will result in better browning and crispier nuggets. If you’re looking to save a bit of money, you can also use chicken thighs, but be sure to trim off any excess fat and consider that they may have a slightly different texture and cook time than breast meat. For the best nuggets, fresh chicken is always preferable to frozen and thawed, as it will retain more moisture and flavor.
- All-Purpose Flour (½ cup): Flour is the first layer of our breading process. It acts as a crucial base for the egg wash to adhere to, ensuring that the breadcrumbs stick properly and create that beautiful, crispy crust we all crave. All-purpose flour is readily available and works perfectly for this purpose. If you are looking for a gluten-free option, you can substitute with a gluten-free all-purpose flour blend. Just be aware that gluten-free flours can sometimes absorb moisture differently, so you may need to adjust the amount slightly or let the coated nuggets rest for a few minutes before frying or baking to allow the coating to set.
- Eggs (2 large, beaten): Eggs are the binder in our breading station. The beaten eggs create a wet layer that allows the breadcrumbs to cling to the flour-coated chicken. Large eggs are standard in most recipes, but if you only have medium eggs on hand, you can use three to ensure you have enough egg wash to coat all the nuggets evenly. Make sure to beat the eggs thoroughly until the yolks and whites are fully combined and slightly frothy. This will create a smoother egg wash and a more even coating on your nuggets.
- Breadcrumbs (1 cup): Ah, the breadcrumbs – the magic ingredient that transforms our chicken into crispy, golden nuggets! Here’s where you have a delightful choice to make, impacting the final texture of your nuggets:
- Panko Breadcrumbs (for extra crunch): Panko breadcrumbs are Japanese-style breadcrumbs that are larger and flakier than regular breadcrumbs. This unique texture is what gives panko its legendary crunch. If you are a true crispiness enthusiast, panko is your best friend. They create an incredibly satisfying, shatteringly crispy crust that is just irresistible. Panko breadcrumbs are widely available in most supermarkets, usually in the Asian foods aisle or with other breadcrumbs.
- Regular Breadcrumbs (for a softer texture): If you prefer a slightly softer, more traditional nugget texture, regular breadcrumbs are the way to go. They create a lovely, golden crust that is still crispy but not quite as intensely crunchy as panko. Regular breadcrumbs are also typically finer in texture, which can result in a slightly denser coating. You can use store-bought regular breadcrumbs, or you can even make your own by toasting and then pulsing day-old bread in a food processor until you reach the desired crumb consistency.
- Gluten-Free Breadcrumbs: For a gluten-free option, there are many excellent gluten-free breadcrumb varieties available. Look for brands that are specifically designed for breading and frying, as some gluten-free breadcrumbs can be a bit finer and may not provide the same level of crispiness as panko or regular breadcrumbs.
- Seasonings: Seasonings are what take our nuggets from bland to bursting with flavor! This recipe provides a solid foundation of classic seasonings, but feel free to get creative and tailor them to your taste preferences.
- Salt: Essential for enhancing the flavor of the chicken and all the other seasonings. Use kosher salt or sea salt for the best flavor. The amount of salt can be adjusted to your preference, but start with about ¾ teaspoon and taste as you go.
- Pepper: Black pepper adds a touch of warmth and complexity. Freshly ground black pepper is always preferred for the most robust flavor, but pre-ground pepper will also work. Start with about ½ teaspoon and adjust to taste.
- Garlic Powder: Garlic powder provides a savory, aromatic depth that is classic in chicken nuggets. It’s a pantry staple for a reason! Use about 1 teaspoon of garlic powder, or more if you are a garlic lover.
- Paprika: Paprika adds a subtle smoky sweetness and a beautiful reddish hue to the nuggets. Smoked paprika will intensify the smoky flavor, while sweet paprika offers a milder, sweeter note. Use about 1 teaspoon of paprika, and feel free to experiment with different types.
- Optional Add-ons: Elevating Your Nugget Game
- Grated Parmesan Cheese (¼ cup): Parmesan cheese adds a wonderful umami richness and a slightly salty, nutty flavor that pairs beautifully with chicken. Finely grated Parmesan cheese is best as it will incorporate evenly into the breadcrumb mixture. If you’re a cheese enthusiast, don’t hesitate to add a bit more than ¼ cup!
- Dried Herbs (1 teaspoon, such as oregano or parsley): Dried herbs bring a touch of freshness and aromatic complexity. Oregano offers a slightly peppery, Mediterranean flavor, while parsley provides a brighter, more herbaceous note. You can also experiment with other dried herbs like thyme, basil, or rosemary, depending on your preference. Finely chop the dried herbs before adding them to the breadcrumb mixture to ensure they are evenly distributed.
- Cayenne Pepper or Chili Powder (¼ teaspoon): For those who like a little kick, a pinch of cayenne pepper or chili powder can add a subtle warmth and spiciness to your nuggets. Start with a small amount, especially if you are making these for children, and adjust to your desired level of heat.
- Onion Powder (½ teaspoon): Similar to garlic powder, onion powder adds another layer of savory depth and aroma. It complements the garlic powder beautifully and enhances the overall flavor profile of the nuggets.
- Lemon Zest (from ½ lemon): For a brighter, more zesty flavor, a bit of lemon zest can be a fantastic addition. The citrusy notes cut through the richness of the chicken and breading, adding a refreshing element. Make sure to only zest the yellow part of the lemon peel, avoiding the bitter white pith underneath.
Now that we’ve gathered our ingredients and explored some exciting customization options, let’s move on to the step-by-step guide to transforming these components into golden, crispy, homemade chicken nugget perfection!
Step-by-Step Guide to Preparing Chicken Nuggets: From Chicken to Crispy
Making homemade chicken nuggets might seem a bit more involved than simply opening a freezer bag, but trust me, the process is surprisingly straightforward and incredibly rewarding. Follow these simple steps, and you’ll be enjoying a batch of fresh, delicious nuggets in no time.
1. Prep the Chicken: The Foundation for Flavor and Texture
- Pat Chicken Pieces Dry with Paper Towels: This seemingly small step is actually crucial for achieving crispy nuggets. Excess moisture on the surface of the chicken will hinder the breading from adhering properly and can lead to soggy nuggets. Take a few paper towels and gently pat each chicken piece dry, ensuring you remove as much surface moisture as possible. This creates a drier surface that the flour will cling to, setting the stage for a perfect breading.
- Cut Chicken into 1.5-inch Chunks for the Perfect Nugget Size: Nugget size matters! Cutting the chicken into roughly 1.5-inch chunks ensures that they cook evenly and are the ideal size for dipping and enjoying. If you cut them too small, they may dry out during cooking. If you cut them too large, they may not cook through completely before the outside becomes overly browned. Aim for consistent sizing for even cooking. You can use a sharp knife or kitchen shears to cut the chicken into nugget-sized pieces. Don’t worry about perfect uniformity; slightly irregular shapes are part of the charm of homemade nuggets!
2. Set Up Your Breading Station: The Assembly Line for Crispy Goodness
A well-organized breading station is key to a smooth and efficient nugget-making process. Think of it as an assembly line for deliciousness! You’ll need three bowls, each dedicated to a different stage of the breading process:
- Bowl 1: Flour Mixture (Dry Coating Base): In the first bowl, combine the all-purpose flour with a pinch of salt and pepper. The salt and pepper season the flour layer, adding flavor from the very first step. Whisk the flour, salt, and pepper together to ensure they are evenly distributed. This flour mixture serves as the initial dry coating that helps the egg wash adhere to the chicken.
- Bowl 2: Beaten Eggs (Wet Binder): In the second bowl, place the beaten eggs. As mentioned earlier, ensure the eggs are well beaten until the yolks and whites are fully combined and slightly frothy. The beaten eggs act as the “glue” that binds the flour and breadcrumbs to the chicken. This wet layer is essential for the breadcrumbs to stick and create a cohesive, crispy coating.
- Bowl 3: Breadcrumb Mixture (Crispy Crust Finale): In the third bowl, combine the breadcrumbs (panko or regular), paprika, and garlic powder. This is where the magic of flavor and texture truly comes together. The paprika adds color and a subtle smoky note, while the garlic powder provides savory depth. If you’re using Parmesan cheese or dried herbs, add them to this bowl as well and mix everything together thoroughly. This breadcrumb mixture is the final layer that creates the signature crispy crust of our homemade nuggets.
3. Coat the Nuggets: The Breading Ballet
Now for the fun part – the breading process! This is where we transform our plain chicken pieces into beautifully coated nuggets, ready for cooking. It’s a simple three-step process, but each step is important for achieving perfect results:
- Dredge Each Piece in the Flour, Ensuring Even Coating: Take a piece of chicken and place it into the bowl of flour mixture (Bowl 1). Use your fingers (it’s helpful to designate one hand for dry ingredients and the other for wet to minimize mess!) or tongs to toss the chicken in the flour, making sure it is completely and evenly coated on all sides. Shake off any excess flour. The flour coating should be light and even, not thick and clumpy. This initial flour layer is crucial for the egg wash to adhere properly.
- Dip into the Egg Wash, Letting Any Excess Drip Off: Next, carefully transfer the flour-coated chicken piece to the bowl of beaten eggs (Bowl 2). Submerge the chicken in the egg wash, ensuring it is fully coated. Lift the chicken out of the egg wash and let any excess egg drip back into the bowl. You don’t want the chicken to be dripping wet with egg, as this can make the breadcrumb coating soggy. A thin, even coating of egg wash is ideal.
- Roll in the Breadcrumb Mix, Pressing Lightly to Ensure Solid Coating: Finally, transfer the egg-washed chicken piece to the bowl of breadcrumb mixture (Bowl 3). Roll the chicken in the breadcrumbs, pressing lightly to ensure a solid and even coating on all sides. You want the breadcrumbs to adhere well and create a nice, thick layer. Make sure to coat all surfaces of the nugget, including the sides and edges. Once coated, place the breaded nugget on a clean plate or baking sheet.
Repeat this breading process for all the remaining chicken pieces. As you bread each nugget, arrange them in a single layer on a plate or baking sheet. Once all the nuggets are breaded, they are ready to be cooked!
Cooking Methods: Frying, Baking, and Air Frying
Now that our nuggets are beautifully breaded, it’s time to cook them to golden perfection. You have a few excellent cooking options to choose from, each offering slightly different results:
- Frying (For Classic Crispy Nuggets): Frying is the traditional method for achieving that classic, deeply golden, and incredibly crispy nugget texture. It’s a bit more indulgent but delivers undeniably delicious results.
- Heat Oil: Pour about ½ inch of vegetable oil, canola oil, or peanut oil into a large skillet or deep fryer. Heat the oil over medium-high heat until it reaches 350°F (175°C). You can use a thermometer to check the temperature, or you can test it by dropping a breadcrumb into the oil – it should sizzle gently and brown within a few seconds.
- Fry in Batches: Carefully add the breaded nuggets to the hot oil in batches, being careful not to overcrowd the pan. Overcrowding will lower the oil temperature and result in soggy nuggets. Fry the nuggets for about 3-4 minutes per side, or until they are golden brown and cooked through. The internal temperature of the chicken should reach 165°F (74°C).
- Drain Excess Oil: Once cooked, remove the nuggets from the oil with a slotted spoon or tongs and place them on a wire rack lined with paper towels to drain excess oil. This helps maintain their crispiness.
- Baking (For a Healthier Option): Baking is a healthier alternative to frying, using significantly less oil while still achieving crispy and delicious nuggets.
- Preheat Oven: Preheat your oven to 400°F (200°C). Line a baking sheet with parchment paper or foil for easy cleanup.
- Bake Nuggets: Arrange the breaded nuggets in a single layer on the prepared baking sheet. For extra crispiness, you can lightly spray the nuggets with cooking spray (olive oil or avocado oil spray works well).
- Bake Time: Bake for 20-25 minutes, flipping the nuggets halfway through, or until they are golden brown and cooked through. Again, ensure the internal temperature reaches 165°F (74°C).
- Air Frying (For Speedy Crispiness): Air frying is a fantastic option for achieving fried-like crispiness with even less oil than baking and in a shorter amount of time.
- Air Fryer Prep: Preheat your air fryer to 400°F (200°C). Some air fryers require preheating, while others do not, so consult your air fryer’s instructions.
- Air Fry Nuggets: Arrange the breaded nuggets in a single layer in the air fryer basket. Avoid overcrowding. You may need to cook in batches depending on the size of your air fryer. Lightly spray the nuggets with cooking spray for extra crispiness.
- Air Fry Time: Air fry for 10-15 minutes, flipping the nuggets halfway through, or until they are golden brown, crispy, and cooked through. Check for an internal temperature of 165°F (74°C).
No matter which cooking method you choose, remember to let the cooked nuggets cool slightly before serving. They will be incredibly hot right out of the fryer, oven, or air fryer. And get ready to enjoy the most delicious, homemade chicken nuggets you’ve ever tasted!
Nutrition Facts: Servings and Calories per Serving (Estimated)
It’s always good to have an idea of the nutritional content of what we’re eating. Please remember that these are estimated values and can vary based on specific ingredients used, cooking method, and portion sizes. This is a rough guide for informational purposes.
- Servings: This recipe yields approximately 4-6 servings, depending on serving size. A serving size of 4-5 nuggets is a reasonable estimate.
- Calories per Serving (Estimated, Baked Nuggets): Approximately 300-400 calories per serving.
- Breakdown (approximate per serving):
- Protein: 25-35 grams (from chicken)
- Fat: 15-25 grams (depending on cooking method and oil used)
- Carbohydrates: 20-30 grams (from breading)
- Breakdown (approximate per serving):
Important Notes:
- Frying vs. Baking/Air Frying: Fried nuggets will be higher in calories and fat due to oil absorption. Baking and air frying significantly reduce fat content.
- Ingredient Variations: Using different types of breadcrumbs, cheeses, or adding extra oil can affect the nutritional values.
- Serving Size: Adjust serving sizes to your needs and appetite, and calorie counts will adjust accordingly.
Homemade Advantage:
While homemade chicken nuggets still contain calories and fat, they offer a significant nutritional advantage over many store-bought processed nuggets. Homemade versions are typically:
- Lower in Sodium: You control the amount of salt added.
- Free from Artificial Additives: No preservatives, artificial flavors, or colors.
- Made with Whole Chicken Breast: Higher quality protein source compared to processed chicken products.
- Potentially Lower in Unhealthy Fats: Especially when baked or air-fried.
Making homemade chicken nuggets allows you to make informed choices about the ingredients and cooking methods, leading to a more wholesome and nutritious meal option compared to many commercially available alternatives.
Preparation Time: From Prep to Plate (Estimate)
Let’s break down the time commitment for making these delicious homemade nuggets. The beauty of this recipe is that while it requires a bit more effort than opening a freezer bag, it’s still quite manageable, especially for a weekend meal or a fun family cooking project.
- Prep Time: 20-25 minutes
- This includes:
- Gathering ingredients and equipment.
- Cutting chicken into nugget pieces.
- Setting up the breading station (mixing flour, eggs, breadcrumbs).
- Breading the chicken nuggets.
- This includes:
- Cooking Time:
- Frying: 10-15 minutes (depending on batch size and oil temperature)
- Baking: 20-25 minutes
- Air Frying: 10-15 minutes (depending on air fryer and batch size)
- Total Time (Approximate): 30-45 minutes
Time-Saving Tips:
- Prep Ahead: You can cut the chicken into nugget pieces and even prepare the breading station components ahead of time. Store the cut chicken in the refrigerator and the dry breading mixtures at room temperature.
- Assembly Line Efficiency: Once you get into the rhythm of the breading process, it becomes quite efficient. Working in batches and having everything organized in your breading station speeds things up.
- Freezer-Friendly: Homemade chicken nuggets freeze beautifully! Make a double batch and freeze half for a super quick and easy meal another time. Simply bread the nuggets, then freeze them on a baking sheet in a single layer. Once frozen solid, transfer them to a freezer bag or container. You can cook them directly from frozen, adding a few extra minutes to the cooking time.
While it might take slightly longer than pre-made nuggets, the fresh, homemade taste and the satisfaction of creating something delicious from scratch are well worth the time investment. Plus, the active prep and cooking time is actually quite reasonable, making it a feasible option for a weeknight meal with a little planning.
Serving Suggestions: Ways to Enjoy Your Homemade Nuggets
Homemade chicken nuggets are incredibly versatile and can be enjoyed in so many delicious ways! Here are some serving suggestions to get your culinary creativity flowing:
- Classic Dipping Sauces: No nugget experience is complete without dipping sauces! Offer a variety to please everyone’s palate:
- Ketchup: The timeless classic, loved by kids and adults alike.
- Honey Mustard: A perfect balance of sweet and tangy.
- BBQ Sauce: Smoky, sweet, and savory – a great complement to chicken.
- Ranch Dressing: Creamy, herby, and always a crowd-pleaser.
- Sweet Chili Sauce: For a touch of Asian-inspired sweetness and spice.
- Buffalo Sauce: For those who like a fiery kick.
- Homemade Garlic Aioli: Elevate your dipping game with a creamy, garlicky aioli.
- Side Dish Pairings: Create a complete and satisfying meal by pairing your nuggets with delicious side dishes:
- French Fries or Sweet Potato Fries: A classic nugget companion.
- Mashed Potatoes or Potato Wedges: Comfort food perfection.
- Mac and Cheese: Creamy, cheesy, and always a hit.
- Coleslaw or Potato Salad: Fresh and tangy sides to balance the richness of the nuggets.
- Steamed or Roasted Vegetables: Add some healthy greens like broccoli, green beans, or carrots.
- Corn on the Cob or Creamed Corn: Sweet and summery sides.
- Simple Salad: A light and refreshing green salad with a vinaigrette dressing.
- Nugget Meals Beyond Dipping: Think outside the dipping sauce box! Nuggets can be the star of creative and fun meals:
- Nugget Salad: Top a bed of mixed greens with sliced nuggets, your favorite veggies, and a dressing of your choice.
- Nugget Wraps or Tacos: Fill tortillas or wraps with nuggets, lettuce, tomato, cheese, and your favorite sauce for a quick and easy meal.
- Nugget Bowls: Create a bowl with a base of rice, quinoa, or couscous, topped with nuggets, roasted vegetables, and a flavorful sauce.
- Chicken Nugget Pizza Topping: Dice cooked nuggets and use them as a fun and kid-friendly pizza topping.
- Nugget Skewers: Thread cooked nuggets onto skewers with vegetables like bell peppers, onions, and cherry tomatoes for a fun and interactive appetizer or meal.
- Kid-Friendly Lunch Boxes: Homemade nuggets are a fantastic addition to kids’ lunch boxes! Pack them with a small container of dipping sauce and some healthy sides like carrot sticks, apple slices, or grapes.
- Party Appetizer: Serve homemade nuggets as a crowd-pleasing appetizer at parties or gatherings. They are always a hit with both kids and adults. Arrange them on a platter with a variety of dipping sauces for guests to choose from.
No matter how you choose to serve them, homemade chicken nuggets are sure to be a delicious and satisfying meal or snack. Get creative, experiment with different sauces and sides, and enjoy the versatility of these crispy bites!
Ashley’s Top Tips for Perfect Homemade Chicken Nuggets
After countless batches of homemade chicken nuggets (and plenty of happy taste testers!), I’ve gathered some top tips to ensure your nuggets are always crispy, juicy, and utterly irresistible:
- Pat the Chicken Dry – Seriously!: I can’t stress this enough! Removing excess moisture from the chicken is the #1 secret to crispy breading. Don’t skip this step. The drier the chicken, the better the breading will adhere and the crispier your nuggets will be. Use paper towels and gently but thoroughly pat each piece dry before starting the breading process.
- Don’t Overcrowd the Pan (or Air Fryer Basket): Whether you’re frying, baking, or air frying, avoid overcrowding. Overcrowding lowers the temperature of the cooking oil or air, which can lead to steaming rather than browning and crisping. Cook in batches to ensure each nugget has enough space to cook properly and get crispy on all sides.
- Use Panko Breadcrumbs for Maximum Crunch: If you’re a true crispy nugget aficionado, panko breadcrumbs are your secret weapon. Their larger, flakier texture creates an unparalleled level of crunch that is simply divine. While regular breadcrumbs are perfectly fine, panko elevates the crispiness to a whole new level.
- Season Every Layer: Don’t just season the breadcrumbs! Season each layer of the breading process – the flour mixture, the egg wash (you can add a pinch of salt and pepper to the eggs), and the breadcrumb mixture. Seasoning each layer ensures that the flavor is distributed throughout the nugget and not just on the surface. This results in more flavorful and well-rounded nuggets.
- Let the Nuggets Rest Briefly Before Serving: Once cooked, let the nuggets rest on a wire rack for a few minutes before serving. This allows the excess oil to drain off and the breading to set and crisp up even further. Plus, it prevents you from burning your mouth on super hot nuggets! A few minutes of rest makes a noticeable difference in the final texture and enjoyment of your homemade nuggets.
Frequently Asked Questions About Homemade Chicken Nuggets (FAQ)
Got questions about making homemade chicken nuggets? You’re not alone! Here are some frequently asked questions to help you navigate the nugget-making process with confidence:
Q1: Can I use frozen chicken breast for this recipe?
A: While fresh chicken breast is ideal for the best texture and flavor, you can use frozen chicken breast if needed. Make sure to thaw the chicken completely before starting the recipe. Thaw it in the refrigerator overnight or use the defrost setting on your microwave. Pat the thawed chicken very thoroughly dry with paper towels to remove excess moisture, as frozen chicken tends to release more water when thawed.
Q2: Can I make these nuggets ahead of time and freeze them?
A: Absolutely! Homemade chicken nuggets freeze beautifully. This is a great way to meal prep or have a quick and easy meal ready whenever you need it. To freeze, bread the nuggets as instructed, then place them in a single layer on a baking sheet lined with parchment paper. Freeze for about 2-3 hours, or until solid. Once frozen, transfer the nuggets to a freezer bag or airtight container. To cook from frozen, bake or air fry at the same temperature but increase the cooking time by about 5-10 minutes, or until cooked through and crispy. Frying from frozen is not recommended as it can lower the oil temperature too much.
Q3: Can I bake or air fry these nuggets instead of frying?
A: Yes, definitely! Baking and air frying are excellent healthier alternatives to frying and still produce delicious, crispy nuggets. Baking will take a bit longer than frying or air frying, but it’s a great option for a lower-fat version. Air frying is a fantastic option for achieving fried-like crispiness in less time and with less oil. Refer to the “Cooking Methods” section above for detailed instructions on baking and air frying.
Q4: What are some variations I can try with this recipe?
A: The possibilities are endless! Get creative and experiment with different seasonings, breadcrumbs, and add-ins. Try:
- Spicy Nuggets: Add cayenne pepper, chili powder, or hot sauce to the breadcrumb mixture.
- Italian Herb Nuggets: Use Italian breadcrumbs and add dried oregano, basil, and Parmesan cheese.
- Lemon Pepper Nuggets: Add lemon zest and lemon pepper seasoning to the breadcrumb mixture.
- Ranch Seasoned Nuggets: Use ranch seasoning powder in the breadcrumb mixture.
- Everything Bagel Seasoning Nuggets: Coat the nuggets in everything bagel seasoning for a unique flavor.
Q5: My breading keeps falling off. What am I doing wrong?
A: Breading falling off can be frustrating, but it’s usually easily fixed. Common causes include:
- Chicken Not Dry Enough: As mentioned before, patting the chicken dry is crucial.
- Flour Coating Too Thick: Ensure the flour coating is light and even, not thick and clumpy. Shake off excess flour.
- Egg Wash Not Coating Evenly: Make sure the chicken is fully submerged in the egg wash and evenly coated.
- Breadcrumb Coating Not Pressed On: Press the breadcrumbs gently onto the chicken to help them adhere properly.
- Oil Not Hot Enough (for frying): If frying, ensure the oil is at the correct temperature (350°F/175°C). Oil that is too cool will result in soggy breading that is more likely to fall off.
By following these tips and troubleshooting common issues, you’ll be well on your way to mastering homemade chicken nuggets and enjoying crispy, delicious bites every time! Happy nugget making!
Print
Homemade Chicken Nuggets Recipe
Ingredients
- Chicken Breast (1 lb, boneless, skinless): This is the star of the show, the foundation of our nuggets. Opt for boneless, skinless chicken breasts for ease of preparation. One pound is a good starting point and will yield a generous batch of nuggets, perfect for a family meal or even leftovers for lunch the next day. When selecting your chicken, consider looking for air-chilled chicken if available. Air-chilled chicken tends to be less watery, which will result in better browning and crispier nuggets. If you’re looking to save a bit of money, you can also use chicken thighs, but be sure to trim off any excess fat and consider that they may have a slightly different texture and cook time than breast meat. For the best nuggets, fresh chicken is always preferable to frozen and thawed, as it will retain more moisture and flavor.
- All-Purpose Flour (½ cup): Flour is the first layer of our breading process. It acts as a crucial base for the egg wash to adhere to, ensuring that the breadcrumbs stick properly and create that beautiful, crispy crust we all crave. All-purpose flour is readily available and works perfectly for this purpose. If you are looking for a gluten-free option, you can substitute with a gluten-free all-purpose flour blend. Just be aware that gluten-free flours can sometimes absorb moisture differently, so you may need to adjust the amount slightly or let the coated nuggets rest for a few minutes before frying or baking to allow the coating to set.
- Eggs (2 large, beaten): Eggs are the binder in our breading station. The beaten eggs create a wet layer that allows the breadcrumbs to cling to the flour-coated chicken. Large eggs are standard in most recipes, but if you only have medium eggs on hand, you can use three to ensure you have enough egg wash to coat all the nuggets evenly. Make sure to beat the eggs thoroughly until the yolks and whites are fully combined and slightly frothy. This will create a smoother egg wash and a more even coating on your nuggets.
- Breadcrumbs (1 cup): Ah, the breadcrumbs – the magic ingredient that transforms our chicken into crispy, golden nuggets! Here’s where you have a delightful choice to make, impacting the final texture of your nuggets:
- Panko Breadcrumbs (for extra crunch): Panko breadcrumbs are Japanese-style breadcrumbs that are larger and flakier than regular breadcrumbs. This unique texture is what gives panko its legendary crunch. If you are a true crispiness enthusiast, panko is your best friend. They create an incredibly satisfying, shatteringly crispy crust that is just irresistible. Panko breadcrumbs are widely available in most supermarkets, usually in the Asian foods aisle or with other breadcrumbs.
- Regular Breadcrumbs (for a softer texture): If you prefer a slightly softer, more traditional nugget texture, regular breadcrumbs are the way to go. They create a lovely, golden crust that is still crispy but not quite as intensely crunchy as panko. Regular breadcrumbs are also typically finer in texture, which can result in a slightly denser coating. You can use store-bought regular breadcrumbs, or you can even make your own by toasting and then pulsing day-old bread in a food processor until you reach the desired crumb consistency.
- Gluten-Free Breadcrumbs: For a gluten-free option, there are many excellent gluten-free breadcrumb varieties available. Look for brands that are specifically designed for breading and frying, as some gluten-free breadcrumbs can be a bit finer and may not provide the same level of crispiness as panko or regular breadcrumbs.
- Seasonings: Seasonings are what take our nuggets from bland to bursting with flavor! This recipe provides a solid foundation of classic seasonings, but feel free to get creative and tailor them to your taste preferences.
- Salt: Essential for enhancing the flavor of the chicken and all the other seasonings. Use kosher salt or sea salt for the best flavor. The amount of salt can be adjusted to your preference, but start with about ¾ teaspoon and taste as you go.
- Pepper: Black pepper adds a touch of warmth and complexity. Freshly ground black pepper is always preferred for the most robust flavor, but pre-ground pepper will also work. Start with about ½ teaspoon and adjust to taste.
- Garlic Powder: Garlic powder provides a savory, aromatic depth that is classic in chicken nuggets. It’s a pantry staple for a reason! Use about 1 teaspoon of garlic powder, or more if you are a garlic lover.
- Paprika: Paprika adds a subtle smoky sweetness and a beautiful reddish hue to the nuggets. Smoked paprika will intensify the smoky flavor, while sweet paprika offers a milder, sweeter note. Use about 1 teaspoon of paprika, and feel free to experiment with different types.
- Optional Add-ons: Elevating Your Nugget Game
- Grated Parmesan Cheese (¼ cup): Parmesan cheese adds a wonderful umami richness and a slightly salty, nutty flavor that pairs beautifully with chicken. Finely grated Parmesan cheese is best as it will incorporate evenly into the breadcrumb mixture. If you’re a cheese enthusiast, don’t hesitate to add a bit more than ¼ cup!
- Dried Herbs (1 teaspoon, such as oregano or parsley): Dried herbs bring a touch of freshness and aromatic complexity. Oregano offers a slightly peppery, Mediterranean flavor, while parsley provides a brighter, more herbaceous note. You can also experiment with other dried herbs like thyme, basil, or rosemary, depending on your preference. Finely chop the dried herbs before adding them to the breadcrumb mixture to ensure they are evenly distributed.
- Cayenne Pepper or Chili Powder (¼ teaspoon): For those who like a little kick, a pinch of cayenne pepper or chili powder can add a subtle warmth and spiciness to your nuggets. Start with a small amount, especially if you are making these for children, and adjust to your desired level of heat.
- Onion Powder (½ teaspoon): Similar to garlic powder, onion powder adds another layer of savory depth and aroma. It complements the garlic powder beautifully and enhances the overall flavor profile of the nuggets.
- Lemon Zest (from ½ lemon): For a brighter, more zesty flavor, a bit of lemon zest can be a fantastic addition. The citrusy notes cut through the richness of the chicken and breading, adding a refreshing element. Make sure to only zest the yellow part of the lemon peel, avoiding the bitter white pith underneath.
Instructions
1. Prep the Chicken: The Foundation for Flavor and Texture
- Pat Chicken Pieces Dry with Paper Towels: This seemingly small step is actually crucial for achieving crispy nuggets. Excess moisture on the surface of the chicken will hinder the breading from adhering properly and can lead to soggy nuggets. Take a few paper towels and gently pat each chicken piece dry, ensuring you remove as much surface moisture as possible. This creates a drier surface that the flour will cling to, setting the stage for a perfect breading.
- Cut Chicken into 1.5-inch Chunks for the Perfect Nugget Size: Nugget size matters! Cutting the chicken into roughly 1.5-inch chunks ensures that they cook evenly and are the ideal size for dipping and enjoying. If you cut them too small, they may dry out during cooking. If you cut them too large, they may not cook through completely before the outside becomes overly browned. Aim for consistent sizing for even cooking. You can use a sharp knife or kitchen shears to cut the chicken into nugget-sized pieces. Don’t worry about perfect uniformity; slightly irregular shapes are part of the charm of homemade nuggets!
2. Set Up Your Breading Station: The Assembly Line for Crispy Goodness
A well-organized breading station is key to a smooth and efficient nugget-making process. Think of it as an assembly line for deliciousness! You’ll need three bowls, each dedicated to a different stage of the breading process:
- Bowl 1: Flour Mixture (Dry Coating Base): In the first bowl, combine the all-purpose flour with a pinch of salt and pepper. The salt and pepper season the flour layer, adding flavor from the very first step. Whisk the flour, salt, and pepper together to ensure they are evenly distributed. This flour mixture serves as the initial dry coating that helps the egg wash adhere to the chicken.
- Bowl 2: Beaten Eggs (Wet Binder): In the second bowl, place the beaten eggs. As mentioned earlier, ensure the eggs are well beaten until the yolks and whites are fully combined and slightly frothy. The beaten eggs act as the “glue” that binds the flour and breadcrumbs to the chicken. This wet layer is essential for the breadcrumbs to stick and create a cohesive, crispy coating.
- Bowl 3: Breadcrumb Mixture (Crispy Crust Finale): In the third bowl, combine the breadcrumbs (panko or regular), paprika, and garlic powder. This is where the magic of flavor and texture truly comes together. The paprika adds color and a subtle smoky note, while the garlic powder provides savory depth. If you’re using Parmesan cheese or dried herbs, add them to this bowl as well and mix everything together thoroughly. This breadcrumb mixture is the final layer that creates the signature crispy crust of our homemade nuggets.
3. Coat the Nuggets: The Breading Ballet
Now for the fun part – the breading process! This is where we transform our plain chicken pieces into beautifully coated nuggets, ready for cooking. It’s a simple three-step process, but each step is important for achieving perfect results:
- Dredge Each Piece in the Flour, Ensuring Even Coating: Take a piece of chicken and place it into the bowl of flour mixture (Bowl 1). Use your fingers (it’s helpful to designate one hand for dry ingredients and the other for wet to minimize mess!) or tongs to toss the chicken in the flour, making sure it is completely and evenly coated on all sides. Shake off any excess flour. The flour coating should be light and even, not thick and clumpy. This initial flour layer is crucial for the egg wash to adhere properly.
- Dip into the Egg Wash, Letting Any Excess Drip Off: Next, carefully transfer the flour-coated chicken piece to the bowl of beaten eggs (Bowl 2). Submerge the chicken in the egg wash, ensuring it is fully coated. Lift the chicken out of the egg wash and let any excess egg drip back into the bowl. You don’t want the chicken to be dripping wet with egg, as this can make the breadcrumb coating soggy. A thin, even coating of egg wash is ideal.
- Roll in the Breadcrumb Mix, Pressing Lightly to Ensure Solid Coating: Finally, transfer the egg-washed chicken piece to the bowl of breadcrumb mixture (Bowl 3). Roll the chicken in the breadcrumbs, pressing lightly to ensure a solid and even coating on all sides. You want the breadcrumbs to adhere well and create a nice, thick layer. Make sure to coat all surfaces of the nugget, including the sides and edges. Once coated, place the breaded nugget on a clean plate or baking sheet.
Repeat this breading process for all the remaining chicken pieces. As you bread each nugget, arrange them in a single layer on a plate or baking sheet. Once all the nuggets are breaded, they are ready to be cooked!
Cooking Methods: Frying, Baking, and Air Frying
Now that our nuggets are beautifully breaded, it’s time to cook them to golden perfection. You have a few excellent cooking options to choose from, each offering slightly different results:
- Frying (For Classic Crispy Nuggets): Frying is the traditional method for achieving that classic, deeply golden, and incredibly crispy nugget texture. It’s a bit more indulgent but delivers undeniably delicious results.
- Heat Oil: Pour about ½ inch of vegetable oil, canola oil, or peanut oil into a large skillet or deep fryer. Heat the oil over medium-high heat until it reaches 350°F (175°C). You can use a thermometer to check the temperature, or you can test it by dropping a breadcrumb into the oil – it should sizzle gently and brown within a few seconds.
- Fry in Batches: Carefully add the breaded nuggets to the hot oil in batches, being careful not to overcrowd the pan. Overcrowding will lower the oil temperature and result in soggy nuggets. Fry the nuggets for about 3-4 minutes per side, or until they are golden brown and cooked through. The internal temperature of the chicken should reach 165°F (74°C).
- Drain Excess Oil: Once cooked, remove the nuggets from the oil with a slotted spoon or tongs and place them on a wire rack lined with paper towels to drain excess oil. This helps maintain their crispiness.
- Baking (For a Healthier Option): Baking is a healthier alternative to frying, using significantly less oil while still achieving crispy and delicious nuggets.
- Preheat Oven: Preheat your oven to 400°F (200°C). Line a baking sheet with parchment paper or foil for easy cleanup.
- Bake Nuggets: Arrange the breaded nuggets in a single layer on the prepared baking sheet. For extra crispiness, you can lightly spray the nuggets with cooking spray (olive oil or avocado oil spray works well).
- Bake Time: Bake for 20-25 minutes, flipping the nuggets halfway through, or until they are golden brown and cooked through. Again, ensure the internal temperature reaches 165°F (74°C).
- Air Frying (For Speedy Crispiness): Air frying is a fantastic option for achieving fried-like crispiness with even less oil than baking and in a shorter amount of time.
- Air Fryer Prep: Preheat your air fryer to 400°F (200°C). Some air fryers require preheating, while others do not, so consult your air fryer’s instructions.
- Air Fry Nuggets: Arrange the breaded nuggets in a single layer in the air fryer basket. Avoid overcrowding. You may need to cook in batches depending on the size of your air fryer. Lightly spray the nuggets with cooking spray for extra crispiness.
- Air Fry Time: Air fry for 10-15 minutes, flipping the nuggets halfway through, or until they are golden brown, crispy, and cooked through. Check for an internal temperature of 165°F (74°C).
Nutrition
- Serving Size: One Normal Portion
- Calories: 300-400
- Fat: 15-25 grams
- Carbohydrates: 20-30 grams
- Protein: 25-35 grams