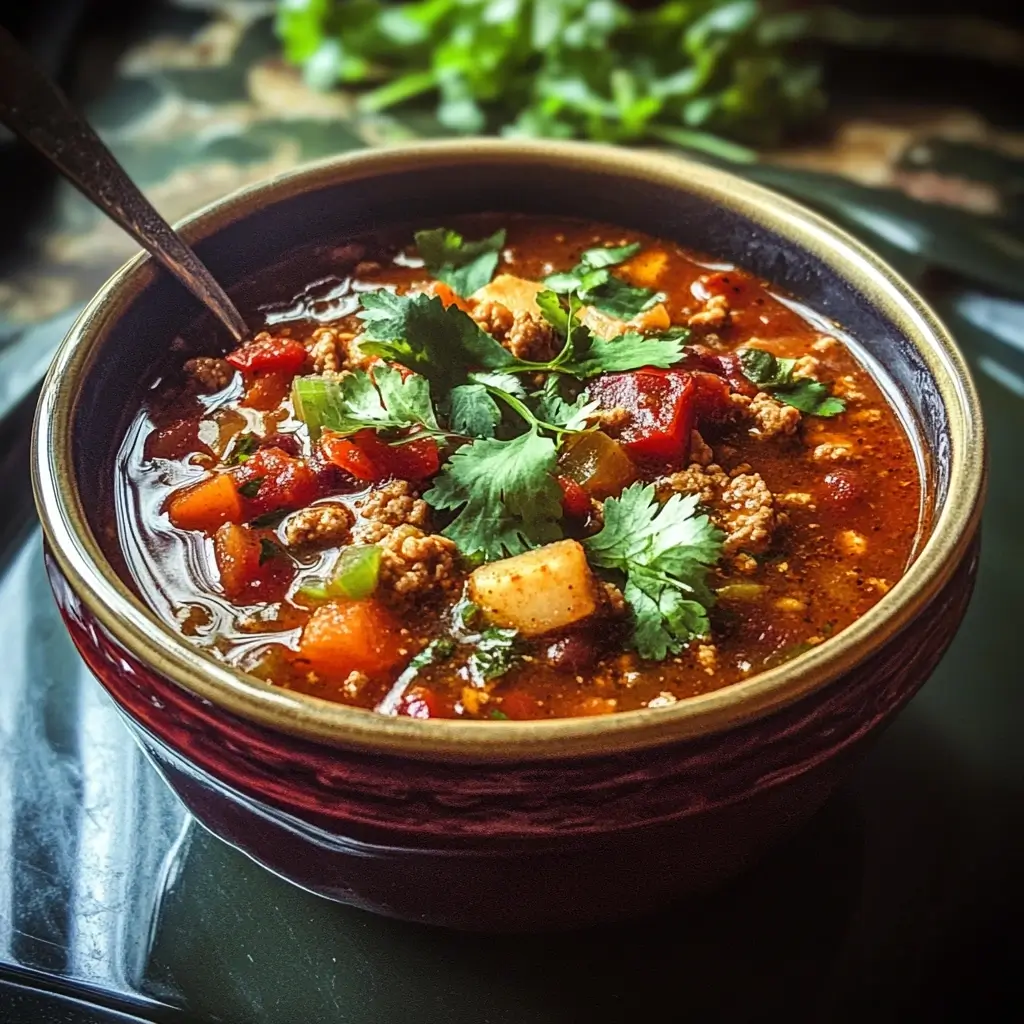
It’s a cold evening, the kind where the wind howls just a little too loudly and all you crave is comfort in a bowl. For my family, that comfort comes in the form of Turkey Chili. This isn’t just any chili; it’s our chili. Over the years, it’s evolved from a basic recipe into something truly special, a dish that’s requested at least once a month, sometimes more. It’s the perfect balance of hearty, flavorful, and healthy, thanks to the lean ground turkey and abundance of vegetables. Even my pickiest eater, who usually eyes anything remotely resembling a vegetable with suspicion, devours a bowl of this chili without a second thought. The aroma that fills the house as it simmers is intoxicating, a promise of warmth and satisfaction to come. It’s become our go-to for potlucks, weeknight dinners, and even casual weekend gatherings. And the best part? It’s incredibly easy to make, forgiving, and always a crowd-pleaser. If you’re searching for a chili recipe that’s both nutritious and deeply satisfying, look no further. This Turkey Chili is about to become your new family favorite too.
Ingredients
Creating the perfect Turkey Chili starts with quality ingredients. Each component plays a crucial role in building layers of flavor and texture that make this dish so irresistible. Here’s a comprehensive list of everything you’ll need, with notes on substitutions and considerations to help you customize it to your liking.
- Ground Turkey (2 lbs): The star of our dish! Opt for lean ground turkey (93% lean or leaner) to keep it healthy without sacrificing flavor. Ground turkey provides a lighter, healthier alternative to beef while still offering a robust, meaty base for the chili. You can use ground turkey breast for an even leaner option, but a slightly higher fat content (like 85% lean) will contribute to a richer, more flavorful chili. If you prefer, ground chicken can also be substituted, though it will alter the overall flavor profile slightly. For a vegetarian option, consider using lentils or a plant-based ground meat substitute.
- Olive Oil (2 tablespoons): Used for sautéing, olive oil adds a subtle fruity note and is a healthier fat option. Extra virgin olive oil is preferred for its richer flavor and higher antioxidant content, but regular olive oil or even avocado oil will work just as well. If you’re watching your fat intake, you can reduce the amount to 1 tablespoon or even use cooking spray, though a little oil helps to build flavor and prevent sticking.
- Yellow Onion (1 large, chopped): The aromatic foundation of many great dishes, yellow onion provides a mild, sweet flavor when cooked. Make sure to chop it into uniform pieces so it cooks evenly. If you’re out of yellow onions, white onions or even shallots can be used as substitutes, although they will have slightly different flavor profiles. Red onion can also be used for a sharper, more pungent flavor.
- Green Bell Pepper (1 large, chopped): Bell peppers add sweetness, a slight crunch, and vibrant color to the chili. Green bell peppers offer a slightly more bitter flavor than red or yellow, which works well in savory dishes. Feel free to mix in other colors of bell peppers (red, yellow, orange) for a sweeter chili and a more visually appealing dish.
- Red Bell Pepper (1 large, chopped): Red bell peppers bring a sweeter, fruitier note compared to green peppers. They also contribute to the overall visual appeal of the chili. Like with green peppers, ensure they are chopped into uniform sizes for even cooking. You can adjust the ratio of green to red bell peppers based on your preference for sweetness.
- Jalapeño Pepper (1-2, minced, seeds removed for less heat): Jalapeños provide a crucial kick of heat. Start with one jalapeño and taste as you go, adding more if you prefer a spicier chili. Remember to remove the seeds and membranes for a milder heat level; these are the parts that contain most of the capsaicin. If you’re very sensitive to spice, you can omit the jalapeño altogether, or substitute with a milder chili pepper like poblano for a subtle smoky flavor without significant heat. Always wash your hands thoroughly after handling jalapeños to avoid eye irritation.
- Garlic (4 cloves, minced): Garlic is essential for adding depth and complexity of flavor. Freshly minced garlic is always best, but pre-minced garlic from a jar can be used for convenience. If you don’t have fresh garlic, you can substitute with garlic powder (about 1 teaspoon), but the flavor will be less intense. Roasting the garlic beforehand can mellow out its sharpness and add a sweeter, caramelized note to the chili.
- Canned Diced Tomatoes (28 oz can, undrained): Diced tomatoes form the liquid base of the chili and provide acidity and body. Undrained tomatoes are used to retain the juices, which add moisture and flavor. You can use fire-roasted diced tomatoes for a smoky depth, or crushed tomatoes for a smoother texture. For a richer tomato flavor, consider using San Marzano tomatoes.
- Tomato Paste (6 oz can): Tomato paste is a concentrated form of tomatoes that intensifies the tomato flavor and adds richness and depth to the chili. It also helps to thicken the chili. A 6-ounce can is standard, but you can adjust the amount slightly to control the intensity of the tomato flavor.
- Kidney Beans (15 oz can, drained and rinsed): Kidney beans are a classic chili bean, providing a meaty texture and mild, slightly sweet flavor. Draining and rinsing removes excess sodium and helps prevent the beans from becoming mushy. You can use light or dark kidney beans, or a combination.
- Black Beans (15 oz can, drained and rinsed): Black beans add a slightly different texture and flavor profile compared to kidney beans, contributing to the overall complexity of the chili. They are also a good source of fiber and protein. Again, draining and rinsing is recommended.
- Pinto Beans (15 oz can, drained and rinsed): Pinto beans are another popular chili bean choice, offering a creamy texture and nutty flavor. Using a mix of kidney, black, and pinto beans creates a more interesting and flavorful chili than using just one type. Feel free to experiment with other types of beans like cannellini beans or Great Northern beans for different textures and flavors.
- Chicken Broth (2 cups, low sodium preferred): Chicken broth adds liquid to the chili and enhances the savory flavors. Low sodium broth is recommended to control the salt content. You can also use vegetable broth for a vegetarian version, or beef broth for a richer, deeper flavor. The amount of broth can be adjusted to achieve your desired chili consistency – add more for a thinner chili, less for a thicker one.
- Chili Powder (2 tablespoons): Chili powder is a blend of spices that provides the signature chili flavor. The exact blend can vary between brands, so taste your chili powder and adjust the amount accordingly. For a milder chili, start with 1 tablespoon and add more to taste.
- Ground Cumin (2 teaspoons): Cumin adds a warm, earthy, and slightly smoky flavor that is essential in chili. Freshly ground cumin has a more potent flavor than pre-ground.
- Dried Oregano (1 teaspoon): Oregano brings a slightly peppery and herbaceous note that complements the other spices. Mexican oregano is often preferred in chili for its slightly stronger flavor, but regular oregano works well too.
- Smoked Paprika (1 teaspoon): Smoked paprika adds a delicious smoky depth and a touch of sweetness to the chili. It’s a key ingredient for adding complexity. If you don’t have smoked paprika, regular paprika can be used, but the smoky element will be missing. For an even smokier flavor, consider using chipotle powder in adobo sauce (use sparingly as it can be quite spicy).
- Salt and Black Pepper (to taste): Essential seasonings to enhance all the flavors. Season generously throughout the cooking process, tasting and adjusting as needed. Start with a teaspoon of salt and half a teaspoon of black pepper and adjust to your preference. Remember that salt levels can be adjusted at the end, but it’s harder to correct if you’ve undersalted initially.
Instructions
Making this hearty and flavorful Turkey Chili is surprisingly straightforward. Follow these step-by-step instructions for a guaranteed delicious result. Each step is designed to maximize flavor and ensure your chili is cooked to perfection.
- Brown the Ground Turkey: In a large, heavy-bottomed pot or Dutch oven, heat the olive oil over medium-high heat. Add the ground turkey and cook, breaking it up with a spoon, until it is browned and no longer pink. Browning the turkey is crucial for developing rich, savory flavors in your chili. Don’t just steam it; ensure it gets a nice brown color. Drain off any excess grease after browning. This step typically takes about 5-7 minutes.
- Sauté the Vegetables: Add the chopped onion, green bell pepper, red bell pepper, and minced jalapeño to the pot with the browned turkey. Cook, stirring occasionally, until the vegetables are softened, about 5-7 minutes. Sautéing the vegetables softens them and releases their natural sugars, enhancing the overall flavor of the chili. Don’t rush this step; allow the vegetables to become tender and slightly translucent.
- Add Garlic and Spices: Stir in the minced garlic, chili powder, cumin, oregano, and smoked paprika. Cook for 1 minute more, stirring constantly, until fragrant. Cooking the spices with the vegetables and turkey “blooms” them, releasing their aromatic oils and intensifying their flavors. Be careful not to burn the garlic or spices; cooking them for just a minute is sufficient.
- Incorporate Tomato Paste: Add the tomato paste to the pot and cook, stirring constantly, for 1-2 minutes. Cooking the tomato paste deepens its flavor and reduces its acidity, adding a richer, more complex tomato taste to the chili. Ensure the tomato paste is fully incorporated into the mixture.
- Add Remaining Ingredients: Pour in the canned diced tomatoes (undrained), kidney beans, black beans, pinto beans, and chicken broth. Stir well to combine all ingredients. At this stage, ensure everything is nicely mixed and the liquid is distributed evenly.
- Simmer the Chili: Bring the chili to a simmer, then reduce the heat to low, cover, and let it simmer for at least 30 minutes, or up to 1 hour, stirring occasionally. Simmering allows the flavors to meld together and deepen, resulting in a more complex and flavorful chili. The longer it simmers, the better the flavor will be. If you have time, simmering for 1 hour or even longer will yield even more delicious results. Keep an eye on the chili and add a little more chicken broth if it becomes too thick during simmering.
- Season and Serve: After simmering, taste the chili and season with salt and black pepper to taste. Adjust the seasoning as needed – you might want to add a pinch more salt, pepper, or even a touch more chili powder or cumin depending on your preference. Once seasoned to your liking, the chili is ready to serve. Ladle into bowls and garnish with your favorite toppings (see “How to Serve” section below for topping ideas).
Nutrition Facts
This Turkey Chili is not only delicious but also packed with nutrients. Here’s a general overview of the nutritional information. Please note that these values are estimates and can vary based on specific ingredients and serving sizes.
- Servings: Approximately 8 servings
- Calories per Serving (estimated): 350-400 calories
Approximate Nutritional Breakdown per Serving (estimated):
- Protein: 30-35 grams
- Fat: 10-15 grams (depending on the leanness of the ground turkey)
- Saturated Fat: 2-4 grams
- Cholesterol: 70-90 mg
- Sodium: 600-800 mg (can be reduced by using low-sodium broth and rinsing beans thoroughly)
- Carbohydrates: 40-45 grams
- Fiber: 10-12 grams
- Sugar: 8-10 grams (naturally occurring sugars from tomatoes and vegetables)
Key Nutritional Benefits:
- High in Protein: Ground turkey and beans provide a significant amount of lean protein, essential for muscle building and satiety.
- Good Source of Fiber: Beans and vegetables contribute to a high fiber content, promoting digestive health and helping to keep you feeling full.
- Rich in Vitamins and Minerals: Tomatoes, bell peppers, and beans are excellent sources of vitamins (like Vitamin C and Vitamin A) and minerals (like iron and potassium).
- Lower in Fat and Calories Compared to Beef Chili: Using lean ground turkey makes this chili a healthier option than traditional beef chili.
Note: For more precise nutritional information, you can use online nutrition calculators, inputting the specific brands and quantities of ingredients you use.
Preparation Time
The beauty of this Turkey Chili is that while it tastes like it’s been simmering all day, the actual hands-on preparation time is quite manageable.
- Prep Time: 25-30 minutes (This includes chopping vegetables, mincing garlic, and gathering ingredients)
- Cook Time: 45-60 minutes (This includes browning turkey, sautéing vegetables, simmering)
- Total Time: Approximately 1 hour 10 minutes – 1 hour 30 minutes
While the total time might seem a bit lengthy, much of it is hands-off simmering time, allowing you to do other things while the chili develops its rich flavors. You can also break up the prep work by chopping vegetables ahead of time. The chili is also even more flavorful the next day, making it an excellent make-ahead meal.
How to Serve
Turkey Chili is a versatile dish that can be enjoyed in many ways. Here are some delicious serving suggestions and topping ideas to elevate your chili experience:
Classic Toppings:
- Shredded Cheese: Cheddar, Monterey Jack, Colby Jack, or a Mexican cheese blend are all fantastic choices.
- Sour Cream or Greek Yogurt: Adds a cool and creamy contrast to the warmth and spice of the chili.
- Chopped Green Onions or Chives: Provide a fresh, mild oniony bite and a pop of color.
- Diced Red Onion: For a sharper, more pungent onion flavor.
- Fresh Cilantro: Adds a bright, herbaceous note.
- Avocado or Guacamole: Creamy avocado or guacamole complements the chili beautifully and adds healthy fats.
- Tortilla Chips or Strips: For added crunch and texture.
- Lime Wedges: A squeeze of fresh lime juice brightens up the flavors.
- Hot Sauce: For those who like extra heat, add a few dashes of your favorite hot sauce.
Sides and Accompaniments:
- Cornbread: A classic pairing with chili, cornbread is perfect for soaking up the flavorful broth.
- Dinner Rolls or Crusty Bread: For dipping and scooping.
- Side Salad: A simple green salad with a light vinaigrette provides a refreshing counterpoint to the rich chili.
- Baked Potato or Sweet Potato: Top a baked potato with chili for a hearty and satisfying meal.
- Rice or Quinoa: Serve chili over a bed of rice or quinoa for a grain-based meal.
Serving Occasions:
- Weeknight Dinners: Quick and easy to prepare, perfect for busy weeknights.
- Game Day Gatherings: A crowd-pleasing dish for football games, tailgates, and parties.
- Potlucks and Cookouts: Chili is always a hit at potlucks and outdoor gatherings.
- Cold Weather Comfort Food: Ideal for warming up on chilly days and evenings.
- Meal Prep: Makes a great make-ahead lunch or dinner for the week.
Additional Tips for Perfect Turkey Chili
To take your Turkey Chili from good to outstanding, consider these helpful tips:
- Don’t Skimp on the Simmer Time: While 30 minutes of simmering is good, allowing the chili to simmer for a full hour or even longer will significantly enhance the depth of flavor. The longer it simmers, the more the flavors meld and deepen. Low and slow is key for maximum flavor development.
- Taste and Adjust Seasoning Frequently: Chili is all about balance. Taste it throughout the cooking process and adjust seasonings as needed. You might need more salt, pepper, chili powder, cumin, or even a touch of sweetness (a pinch of brown sugar or maple syrup can work wonders). Don’t be afraid to experiment and personalize the flavors to your liking.
- Use Quality Spices and Fresh Garlic: Freshly minced garlic and high-quality spices make a noticeable difference in the overall flavor. If your spices have been sitting in your pantry for a long time, they might have lost their potency. Consider replacing them every 6-12 months for optimal flavor.
- Make it Ahead of Time: Chili is one of those dishes that actually tastes better the next day. The flavors continue to meld and deepen overnight in the refrigerator. Making it a day ahead is a great way to save time and ensure maximum flavor when you’re ready to serve. It also makes meal prepping a breeze.
- Freeze for Future Meals: Turkey Chili freezes beautifully. Make a big batch and freeze individual portions in airtight containers or freezer bags for quick and easy meals later on. Thaw overnight in the refrigerator or use the defrost setting on your microwave. Frozen chili tastes just as good, if not better, than freshly made.
FAQ About Turkey Chili
Here are some frequently asked questions to help you make the best Turkey Chili:
Q1: Can I make this chili spicier?
A: Absolutely! To increase the heat, you can:
- Add more jalapeños or use serrano peppers instead for a hotter kick.
- Leave some of the seeds and membranes in the jalapeños (that’s where most of the heat is).
- Incorporate a pinch of cayenne pepper or red pepper flakes.
- Add a dash of hot sauce to the chili during cooking or serve it on the side.
- Use chili powder that contains hotter chili peppers.
Q2: Can I make this chili in a slow cooker?
A: Yes, slow cookers are perfect for chili! To adapt this recipe for a slow cooker:
- Brown the ground turkey and sauté the vegetables in a skillet on the stovetop as instructed in steps 1-3.
- Transfer the browned turkey, sautéed vegetables, spices, tomato paste, diced tomatoes, beans, and chicken broth to your slow cooker.
- Cook on low for 6-8 hours or on high for 3-4 hours, or until the flavors have melded and the chili has thickened to your desired consistency.
- Season with salt and pepper to taste before serving.
Q3: Can I make this chili vegetarian or vegan?
A: Yes, easily! To make this chili vegetarian or vegan:
- Omit the ground turkey entirely.
- Increase the amount of beans or add lentils or a plant-based ground meat substitute (like textured vegetable protein or crumbled veggie burgers) for added protein and texture.
- Ensure you are using vegetable broth instead of chicken broth.
- For toppings, skip sour cream and cheese, and opt for avocado, vegan sour cream, or nutritional yeast for a cheesy flavor.
Q4: What if my chili is too thick or too thin?
A: Adjusting the consistency is simple:
- Too Thick: Add more chicken broth or water, a little at a time, until you reach your desired consistency. Simmer for a few more minutes to allow the flavors to meld.
- Too Thin: Simmer uncovered for a longer period to allow some of the liquid to evaporate. Alternatively, you can mix a tablespoon of cornstarch with two tablespoons of cold water to create a slurry. Stir this into the chili and simmer for a few minutes until it thickens. You can also mash some of the beans against the side of the pot to naturally thicken the chili.
Q5: Can I use different types of beans?
A: Absolutely! Feel free to experiment with different types of beans based on your preferences and what you have on hand. Great options include:
- Cannellini beans
- Great Northern beans
- Navy beans
- Anasazi beans
- Cranberry beans
You can use a mix of your favorite beans to create a unique flavor and texture profile.
Print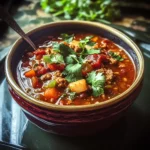
Turkey Chili Recipe
Ingredients
- Ground Turkey (2 lbs): The star of our dish! Opt for lean ground turkey (93% lean or leaner) to keep it healthy without sacrificing flavor. Ground turkey provides a lighter, healthier alternative to beef while still offering a robust, meaty base for the chili. You can use ground turkey breast for an even leaner option, but a slightly higher fat content (like 85% lean) will contribute to a richer, more flavorful chili. If you prefer, ground chicken can also be substituted, though it will alter the overall flavor profile slightly. For a vegetarian option, consider using lentils or a plant-based ground meat substitute.
- Olive Oil (2 tablespoons): Used for sautéing, olive oil adds a subtle fruity note and is a healthier fat option. Extra virgin olive oil is preferred for its richer flavor and higher antioxidant content, but regular olive oil or even avocado oil will work just as well. If you’re watching your fat intake, you can reduce the amount to 1 tablespoon or even use cooking spray, though a little oil helps to build flavor and prevent sticking.
- Yellow Onion (1 large, chopped): The aromatic foundation of many great dishes, yellow onion provides a mild, sweet flavor when cooked. Make sure to chop it into uniform pieces so it cooks evenly. If you’re out of yellow onions, white onions or even shallots can be used as substitutes, although they will have slightly different flavor profiles. Red onion can also be used for a sharper, more pungent flavor.
- Green Bell Pepper (1 large, chopped): Bell peppers add sweetness, a slight crunch, and vibrant color to the chili. Green bell peppers offer a slightly more bitter flavor than red or yellow, which works well in savory dishes. Feel free to mix in other colors of bell peppers (red, yellow, orange) for a sweeter chili and a more visually appealing dish.
- Red Bell Pepper (1 large, chopped): Red bell peppers bring a sweeter, fruitier note compared to green peppers. They also contribute to the overall visual appeal of the chili. Like with green peppers, ensure they are chopped into uniform sizes for even cooking. You can adjust the ratio of green to red bell peppers based on your preference for sweetness.
- Jalapeño Pepper (1-2, minced, seeds removed for less heat): Jalapeños provide a crucial kick of heat. Start with one jalapeño and taste as you go, adding more if you prefer a spicier chili. Remember to remove the seeds and membranes for a milder heat level; these are the parts that contain most of the capsaicin. If you’re very sensitive to spice, you can omit the jalapeño altogether, or substitute with a milder chili pepper like poblano for a subtle smoky flavor without significant heat. Always wash your hands thoroughly after handling jalapeños to avoid eye irritation.
- Garlic (4 cloves, minced): Garlic is essential for adding depth and complexity of flavor. Freshly minced garlic is always best, but pre-minced garlic from a jar can be used for convenience. If you don’t have fresh garlic, you can substitute with garlic powder (about 1 teaspoon), but the flavor will be less intense. Roasting the garlic beforehand can mellow out its sharpness and add a sweeter, caramelized note to the chili.
- Canned Diced Tomatoes (28 oz can, undrained): Diced tomatoes form the liquid base of the chili and provide acidity and body. Undrained tomatoes are used to retain the juices, which add moisture and flavor. You can use fire-roasted diced tomatoes for a smoky depth, or crushed tomatoes for a smoother texture. For a richer tomato flavor, consider using San Marzano tomatoes.
- Tomato Paste (6 oz can): Tomato paste is a concentrated form of tomatoes that intensifies the tomato flavor and adds richness and depth to the chili. It also helps to thicken the chili. A 6-ounce can is standard, but you can adjust the amount slightly to control the intensity of the tomato flavor.
- Kidney Beans (15 oz can, drained and rinsed): Kidney beans are a classic chili bean, providing a meaty texture and mild, slightly sweet flavor. Draining and rinsing removes excess sodium and helps prevent the beans from becoming mushy. You can use light or dark kidney beans, or a combination.
- Black Beans (15 oz can, drained and rinsed): Black beans add a slightly different texture and flavor profile compared to kidney beans, contributing to the overall complexity of the chili. They are also a good source of fiber and protein. Again, draining and rinsing is recommended.
- Pinto Beans (15 oz can, drained and rinsed): Pinto beans are another popular chili bean choice, offering a creamy texture and nutty flavor. Using a mix of kidney, black, and pinto beans creates a more interesting and flavorful chili than using just one type. Feel free to experiment with other types of beans like cannellini beans or Great Northern beans for different textures and flavors.
- Chicken Broth (2 cups, low sodium preferred): Chicken broth adds liquid to the chili and enhances the savory flavors. Low sodium broth is recommended to control the salt content. You can also use vegetable broth for a vegetarian version, or beef broth for a richer, deeper flavor. The amount of broth can be adjusted to achieve your desired chili consistency – add more for a thinner chili, less for a thicker one.
- Chili Powder (2 tablespoons): Chili powder is a blend of spices that provides the signature chili flavor. The exact blend can vary between brands, so taste your chili powder and adjust the amount accordingly. For a milder chili, start with 1 tablespoon and add more to taste.
- Ground Cumin (2 teaspoons): Cumin adds a warm, earthy, and slightly smoky flavor that is essential in chili. Freshly ground cumin has a more potent flavor than pre-ground.
- Dried Oregano (1 teaspoon): Oregano brings a slightly peppery and herbaceous note that complements the other spices. Mexican oregano is often preferred in chili for its slightly stronger flavor, but regular oregano works well too.
- Smoked Paprika (1 teaspoon): Smoked paprika adds a delicious smoky depth and a touch of sweetness to the chili. It’s a key ingredient for adding complexity. If you don’t have smoked paprika, regular paprika can be used, but the smoky element will be missing. For an even smokier flavor, consider using chipotle powder in adobo sauce (use sparingly as it can be quite spicy).
- Salt and Black Pepper (to taste): Essential seasonings to enhance all the flavors. Season generously throughout the cooking process, tasting and adjusting as needed. Start with a teaspoon of salt and half a teaspoon of black pepper and adjust to your preference. Remember that salt levels can be adjusted at the end, but it’s harder to correct if you’ve undersalted initially.
Instructions
- Brown the Ground Turkey: In a large, heavy-bottomed pot or Dutch oven, heat the olive oil over medium-high heat. Add the ground turkey and cook, breaking it up with a spoon, until it is browned and no longer pink. Browning the turkey is crucial for developing rich, savory flavors in your chili. Don’t just steam it; ensure it gets a nice brown color. Drain off any excess grease after browning. This step typically takes about 5-7 minutes.
- Sauté the Vegetables: Add the chopped onion, green bell pepper, red bell pepper, and minced jalapeño to the pot with the browned turkey. Cook, stirring occasionally, until the vegetables are softened, about 5-7 minutes. Sautéing the vegetables softens them and releases their natural sugars, enhancing the overall flavor of the chili. Don’t rush this step; allow the vegetables to become tender and slightly translucent.
- Add Garlic and Spices: Stir in the minced garlic, chili powder, cumin, oregano, and smoked paprika. Cook for 1 minute more, stirring constantly, until fragrant. Cooking the spices with the vegetables and turkey “blooms” them, releasing their aromatic oils and intensifying their flavors. Be careful not to burn the garlic or spices; cooking them for just a minute is sufficient.
- Incorporate Tomato Paste: Add the tomato paste to the pot and cook, stirring constantly, for 1-2 minutes. Cooking the tomato paste deepens its flavor and reduces its acidity, adding a richer, more complex tomato taste to the chili. Ensure the tomato paste is fully incorporated into the mixture.
- Add Remaining Ingredients: Pour in the canned diced tomatoes (undrained), kidney beans, black beans, pinto beans, and chicken broth. Stir well to combine all ingredients. At this stage, ensure everything is nicely mixed and the liquid is distributed evenly.
- Simmer the Chili: Bring the chili to a simmer, then reduce the heat to low, cover, and let it simmer for at least 30 minutes, or up to 1 hour, stirring occasionally. Simmering allows the flavors to meld together and deepen, resulting in a more complex and flavorful chili. The longer it simmers, the better the flavor will be. If you have time, simmering for 1 hour or even longer will yield even more delicious results. Keep an eye on the chili and add a little more chicken broth if it becomes too thick during simmering.
- Season and Serve: After simmering, taste the chili and season with salt and black pepper to taste. Adjust the seasoning as needed – you might want to add a pinch more salt, pepper, or even a touch more chili powder or cumin depending on your preference. Once seasoned to your liking, the chili is ready to serve. Ladle into bowls and garnish with your favorite toppings (see “How to Serve” section below for topping ideas).
Nutrition
- Serving Size: one normal portion
- Calories: 350-400
- Sugar: 8-10 grams
- Sodium: 600-800 mg
- Fat: 10-15 grams
- Saturated Fat: 2-4 grams
- Carbohydrates: 40-45 grams
- Fiber: 10-12 grams
- Protein: 30-35 grams
- Cholesterol: 70-90 mg