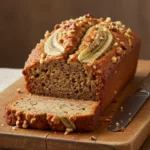
The aroma that fills the house when these Southern Tea Cakes are baking is nothing short of magic. It’s a scent I associate deeply with warmth, comfort, and generations of family gatherings. The first time I baked a batch following my grandmother’s slightly vague, lovingly handwritten notes, the results weren’t perfect, but the feeling they evoked was undeniable. They were simple, unassuming little cakes, not quite a cookie, not quite a cake, but occupying a delightful space in between. When my kids tried them, their eyes lit up – the same way mine probably did years ago. They aren’t overly sweet or flashy, but their tender, slightly crisp-edged, soft-centered texture and delicate vanilla-nutmeg flavor are universally loved. They’ve become a staple for lazy Sunday afternoons, potlucks, and moments when we just need a taste of simple, honest-to-goodness baking. Sharing this recipe feels like sharing a piece of history, a comforting hug in edible form, and I hope they bring as much joy to your kitchen as they do to mine.
A Journey into Southern Comfort: Understanding Tea Cakes
Before diving into the mixing bowls and preheating the oven, let’s take a moment to appreciate what Southern Tea Cakes truly represent. They are more than just a simple baked good; they are a culinary heirloom, deeply woven into the fabric of Southern, particularly African American, history and culture. Unlike their fancier European namesakes often associated with high tea, Southern Tea Cakes are humble, born from resourcefulness and the desire to create something special from basic pantry staples.
Their origins are often traced back to enslaved Africans in the American South, who adapted European baking techniques using available ingredients like flour, sugar, butter or lard, eggs, and milk. Spices like nutmeg, readily available through trade routes, added a touch of warmth and distinction. These weren’t elaborate pastries; they were sturdy, satisfying treats meant to provide comfort and sustenance. They became symbols of hospitality, celebration, and resilience, often served at church functions, family reunions, and community gatherings.
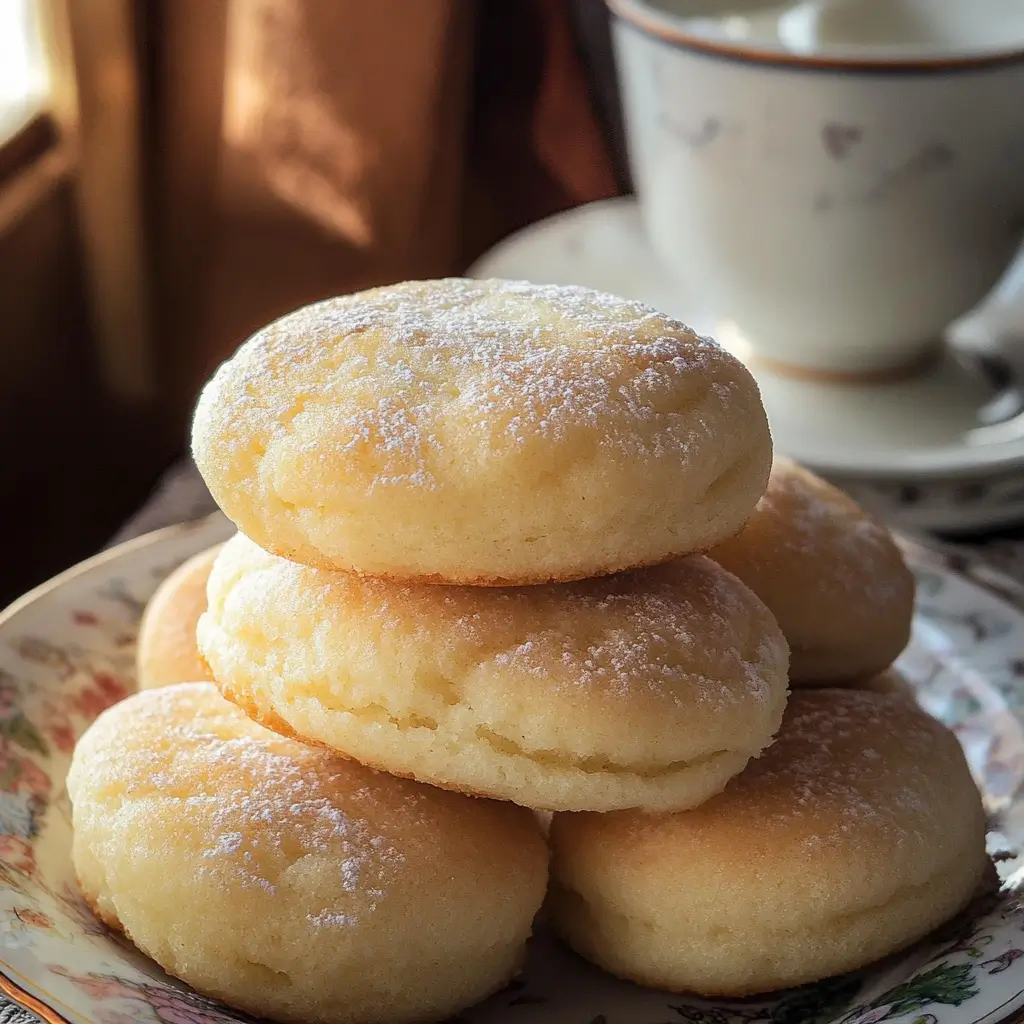
The defining characteristic of a true Southern Tea Cake lies in its unique texture. It straddles the line between a soft cookie and a dense, miniature cake. They shouldn’t be thin and crispy like a sugar cookie, nor light and airy like a cupcake. The ideal tea cake has slightly crisp edges giving way to a tender, yielding center with a delicate crumb. The flavor is typically subtle – buttery, with notes of vanilla and often a whisper of nutmeg – allowing the quality of the simple ingredients to shine through. Over the generations, recipes have been passed down, often orally or through treasured, sometimes amended, handwritten notes, leading to slight variations from family to family, but the essence of comforting simplicity remains constant. Baking them is, in many ways, connecting with a rich culinary past.
Southern Tea Cakes: The Quintessential Recipe
This recipe aims to capture that classic taste and texture – simple, comforting, and utterly delicious. It yields a generous batch, perfect for sharing.
Ingredients You’ll Need
Gather these pantry staples to create your own batch of Southern comfort:
- Butter: 1 cup (2 sticks or 226g) unsalted butter, softened to room temperature
- Granulated Sugar: 1 ¾ cups (350g)
- Eggs: 2 large, at room temperature
- All-Purpose Flour: 3 ¼ cups (about 400-410g), plus more for dusting
- Baking Soda: 1 teaspoon
- Salt: ½ teaspoon
- Buttermilk: ¼ cup (60ml), room temperature (or whole milk with ¼ tsp white vinegar added and left to sit for 5 minutes)
- Vanilla Extract: 1 ½ teaspoons pure vanilla extract
- Nutmeg: ¼ teaspoon freshly grated nutmeg (optional, but highly recommended for authentic flavor)
Why These Ingredients Matter:
- Softened Butter: Using butter that’s truly softened (not melted, not cold) is crucial for creaming properly with the sugar. This process incorporates air, contributing to the final texture. Unsalted butter allows you to control the saltiness.
- Granulated Sugar: Provides sweetness, contributes to browning, and affects the spread and texture of the cookies.
- Room Temperature Eggs: Like softened butter, room temperature eggs incorporate more easily and fully into the batter, creating a more uniform emulsion and preventing the butter from seizing.
- All-Purpose Flour: The backbone of the tea cakes. Measuring correctly (spooning into the cup and leveling off, rather than scooping) prevents adding too much flour, which can make the cakes tough and dry.
- Baking Soda: The primary leavening agent, reacting with the acidic buttermilk (or acidified milk) to create carbon dioxide, giving the tea cakes a slight lift and tenderness.
- Salt: Balances the sweetness and enhances the other flavors, especially the butter and vanilla.
- Buttermilk: Adds a subtle tang that complements the sweetness, and its acidity activates the baking soda. It also contributes moisture and tenderness. If you don’t have buttermilk, the milk-vinegar substitute works well.
- Vanilla Extract: Provides the classic, warm aromatic flavor base. Use pure extract for the best taste.
- Nutmeg: The signature spice in many traditional tea cake recipes. Freshly grated nutmeg offers a far superior, warmer, and more complex flavor than pre-ground. Even a small amount makes a noticeable difference.
Step-by-Step Baking Instructions
Follow these steps carefully for tea cake perfection. Patience, especially during the chilling phase, is key!
- Cream Butter and Sugar: In the bowl of a stand mixer fitted with the paddle attachment, or in a large bowl using a hand mixer, beat the softened butter on medium speed until smooth and creamy (about 1 minute). Gradually add the granulated sugar and continue beating on medium-high speed for 3-4 minutes, scraping down the sides of the bowl occasionally. The mixture should become light in color and fluffy in texture. This step is vital for incorporating air.
- Add Eggs and Vanilla: Add the room temperature eggs one at a time, beating well after each addition until fully incorporated. Scrape down the bowl again. Beat in the vanilla extract and optional nutmeg until combined.
- Combine Dry Ingredients: In a separate medium bowl, whisk together the all-purpose flour, baking soda, and salt. This ensures the leavening and salt are evenly distributed, preventing pockets of baking soda flavor or saltiness.
- Alternate Wet and Dry: With the mixer on low speed, add about one-third of the flour mixture to the butter mixture, mixing just until barely combined. Pour in half of the buttermilk and mix until just incorporated. Add another third of the flour mixture, mix briefly, then add the remaining buttermilk, mixing briefly. Finally, add the last third of the flour mixture and mix only until the flour streaks just disappear. Crucially, do not overmix at this stage. Overmixing develops the gluten in the flour, resulting in tough tea cakes instead of tender ones.
- Chill the Dough: The dough will be soft. Scrape the dough out onto a large piece of plastic wrap, form it into two flattish discs (this helps it chill faster and more evenly), and wrap tightly. Refrigerate the dough for at least 1 hour, or preferably 2 hours, until firm. Chilling is essential – it prevents the tea cakes from spreading too much during baking, makes the dough much easier to handle, and allows the flavors to meld. You can chill the dough for up to 3 days.
- Preheat and Prepare: When ready to bake, position oven racks in the upper and lower thirds of the oven and preheat to 350°F (175°C). Line two large baking sheets with parchment paper or silicone baking mats. This prevents sticking and promotes even browning.
- Roll and Cut: Lightly flour a clean work surface and a rolling pin. Take one disc of chilled dough out of the refrigerator (leave the other chilled). Unwrap it and place it on the floured surface. Lightly flour the top of the dough. Roll the dough out evenly to approximately ¼-inch thickness. If the dough becomes sticky, add a tiny bit more flour, but avoid adding too much. Use a round cookie cutter (about 2.5 to 3 inches in diameter is traditional) to cut out circles. Press firmly and try to cut cleanly without twisting the cutter, which can seal the edges.
- Arrange on Baking Sheets: Carefully transfer the cut-out dough circles to the prepared baking sheets, leaving about 1.5 to 2 inches between them to allow for slight spreading. Gather the dough scraps, gently re-roll once (overworking makes them tough), and cut out more circles. Repeat with the second disc of dough.
- Bake: Bake in the preheated oven for 10-13 minutes, rotating the baking sheets halfway through (top to bottom, front to back) for even baking. The tea cakes are done when the edges are lightly golden brown, and the centers look set but are still pale and soft. They will puff up slightly. Be careful not to overbake, as this will make them dry and hard rather than tender.
- Cool: Let the tea cakes cool on the baking sheets for 5 minutes. They will continue to set slightly during this time. Then, carefully transfer them using a spatula to wire racks to cool completely.
Nutritional Information (Approximate)
Please note that these values are estimates and can vary based on specific ingredient brands, exact cookie size, and potential variations.
- Servings: This recipe yields approximately 30-36 tea cakes, depending on the size of your cutter and the thickness you roll the dough.
- Calories per serving (1 tea cake): Approximately 130-160 calories.
Breakdown Considerations:
The primary calorie contributors are the butter, sugar, and flour. While not a low-calorie food, they are a simple, relatively wholesome treat compared to heavily processed snacks.
Time Commitment: From Pantry to Plate
Understanding the time involved helps plan your baking session:
- Preparation Time: 20-25 minutes (Mixing the dough)
- Chill Time: 1-2 hours (Minimum, longer is fine)
- Baking Time: 10-13 minutes per batch (Allow for multiple batches if needed)
- Cooling Time: 15-20 minutes
- Total Time: Approximately 1 hour 45 minutes to 2 hours 45 minutes (including chilling)
The hands-on time is relatively short, but the chilling period is crucial and cannot be skipped for the best results.
Serving Suggestions: Elevating Your Tea Cakes
Southern Tea Cakes are wonderfully versatile. While perfect on their own, here are some ways to enjoy them:
- Classic Companion:
- Serve alongside a hot cup of black tea (like English Breakfast or Earl Grey).
- Pair with a tall glass of cold milk – a childhood favorite for many.
- Enjoy with your morning coffee or afternoon espresso.
- Simple Enhancements:
- Dust lightly with powdered sugar just before serving for a touch of elegance.
- Serve slightly warm for an extra comforting, melt-in-your-mouth experience (reheat gently in a low oven or microwave for a few seconds).
- With Fruit:
- Serve with a side of fresh berries (strawberries, raspberries, blueberries).
- Accompany a bowl of sliced peaches or fruit salad.
- Spread a thin layer of lemon curd or fruit preserves between two tea cakes for a sandwich cookie.
- As Part of a Spread:
- Include them on a dessert platter with other simple cookies or pastries.
- Serve as part of a brunch or afternoon tea spread.
- They make a lovely addition to holiday cookie tins.
- A La Mode (A Bit Decadent!):
- Place a warm tea cake in a bowl and top with a small scoop of vanilla bean ice cream and perhaps a drizzle of caramel sauce for an indulgent dessert.
Their beauty lies in their simplicity, so often, the best way to serve them is exactly as they are, allowing their subtle flavors and comforting texture to take center stage.
Pro Tips for Perfect Tea Cakes Every Time
Achieve tea cake mastery with these essential tips:
- Master the Creaming: Don’t rush the process of creaming the butter and sugar. Beating for a full 3-4 minutes until light and fluffy incorporates air, which is essential for a tender texture, preventing dense, heavy cakes. Scrape the bowl often!
- Respect the Chill: Chilling the dough is non-negotiable. It solidifies the butter, preventing the tea cakes from spreading excessively in the oven and creating greasy puddles. It also makes the soft dough manageable for rolling and cutting. Aim for at least one hour, but two is even better. Firm, cold dough leads to perfectly shaped, tender tea cakes.
- Measure Flour Accurately: How you measure flour significantly impacts the outcome. Spoon the flour lightly into your measuring cup until it overflows, then sweep the excess off with a straight edge. Scooping directly from the bag compacts the flour, resulting in too much flour being added, which leads to dry, tough tea cakes.
- Don’t Overmix After Adding Flour: Once you start alternating the wet and dry ingredients, mix only until the ingredients are just combined. A few streaks of flour remaining before the final addition is okay. Overmixing develops gluten, making the tea cakes tough instead of tender and cakey. Mix on low speed.
- Watch the Bake Time Closely: Tea cakes go from perfectly tender to dry and hard quickly. Bake just until the edges are lightly golden brown and the centers look set but are still pale. They will continue to cook slightly as they cool on the baking sheet. Aim for under-baking slightly rather than over-baking for that signature soft texture.
Frequently Asked Questions About Southern Tea Cakes
Here are answers to some common questions about making and enjoying these classic treats:
- Q: What exactly are Southern Tea Cakes? How are they different from sugar cookies?
- A: Southern Tea Cakes are a traditional Southern baked good, particularly significant in African American culinary history. They occupy a unique space between a soft cookie and a small, dense cake. Unlike typical sugar cookies which are often thinner, crispier, and sweeter (sometimes decorated elaborately), tea cakes are generally thicker, softer, more tender, and less sweet, with a more delicate flavor profile often featuring vanilla and nutmeg. Their texture is key – slightly crisp edges yielding to a soft, almost cake-like center. They are valued for their comforting simplicity rather than elaborate decoration.
- Q: My tea cakes spread too much and became flat. What went wrong?
- A: The most common culprits for excessive spreading are:
- Insufficiently Chilled Dough: The butter was too warm when it went into the oven, causing it to melt rapidly and spread the dough out before it could set. Ensure dough is chilled for at least 1-2 hours until truly firm.
- Butter Too Soft/Melted: If the butter was overly soft or partially melted when creamed, it couldn’t hold air properly. Use butter that is softened to room temperature but still holds its shape.
- Oven Temperature Too Low: An oven that isn’t hot enough allows the cookies to spread too much before the structure sets. Use an oven thermometer to verify accuracy.
- Greased Pans: Using greased pans instead of parchment paper or silicone mats can encourage spreading.
- A: The most common culprits for excessive spreading are:
- Q: Can I add other flavors or mix-ins to this recipe?
- A: Absolutely! While the classic flavor is simple, you can certainly experiment. Consider adding:
- Citrus Zest: 1-2 teaspoons of lemon or orange zest added along with the sugar can brighten the flavor wonderfully.
- Other Spices: A pinch of cinnamon or ground ginger alongside or instead of nutmeg could be delicious.
- Extracts: A touch of almond extract (about ¼ tsp) could complement the vanilla.
- Keep it Simple: Avoid adding large mix-ins like chocolate chips or nuts, as this would change the fundamental nature and texture of a traditional tea cake. Focus on aromatic additions.
- A: Absolutely! While the classic flavor is simple, you can certainly experiment. Consider adding:
- Q: How should I store Southern Tea Cakes? How long do they last?
- A: Store completely cooled tea cakes in an airtight container at room temperature. Layering them between sheets of wax paper can prevent sticking if humidity is high. They are best enjoyed within 3-4 days for optimal texture. After that, they may start to become a bit dry, though still edible (and good for dunking!).
- Q: Can I freeze Southern Tea Cakes?
- A: Yes, tea cakes freeze well! You have two options:
- Freezing Baked Tea Cakes: Allow the baked tea cakes to cool completely. Place them in a single layer on a baking sheet and freeze until solid (about 1 hour). Transfer the frozen tea cakes to an airtight container or freezer bag, separating layers with wax paper. They can be frozen for up to 2-3 months. Thaw at room temperature.
- Freezing the Dough: Wrap the discs of dough tightly in plastic wrap, then place them inside a freezer-safe bag or container. The dough can be frozen for up to 3 months. Thaw the dough overnight in the refrigerator before rolling, cutting, and baking as directed.
- A: Yes, tea cakes freeze well! You have two options:

Southern Tea Cakes Recipe
Ingredients
- Butter: 1 cup (2 sticks or 226g) unsalted butter, softened to room temperature
- Granulated Sugar: 1 ¾ cups (350g)
- Eggs: 2 large, at room temperature
- All-Purpose Flour: 3 ¼ cups (about 400-410g), plus more for dusting
- Baking Soda: 1 teaspoon
- Salt: ½ teaspoon
- Buttermilk: ¼ cup (60ml), room temperature (or whole milk with ¼ tsp white vinegar added and left to sit for 5 minutes)
- Vanilla Extract: 1 ½ teaspoons pure vanilla extract
- Nutmeg: ¼ teaspoon freshly grated nutmeg (optional, but highly recommended for authentic flavor)
Instructions
- Cream Butter and Sugar: In the bowl of a stand mixer fitted with the paddle attachment, or in a large bowl using a hand mixer, beat the softened butter on medium speed until smooth and creamy (about 1 minute). Gradually add the granulated sugar and continue beating on medium-high speed for 3-4 minutes, scraping down the sides of the bowl occasionally. The mixture should become light in color and fluffy in texture. This step is vital for incorporating air.
- Add Eggs and Vanilla: Add the room temperature eggs one at a time, beating well after each addition until fully incorporated. Scrape down the bowl again. Beat in the vanilla extract and optional nutmeg until combined.
- Combine Dry Ingredients: In a separate medium bowl, whisk together the all-purpose flour, baking soda, and salt. This ensures the leavening and salt are evenly distributed, preventing pockets of baking soda flavor or saltiness.
- Alternate Wet and Dry: With the mixer on low speed, add about one-third of the flour mixture to the butter mixture, mixing just until barely combined. Pour in half of the buttermilk and mix until just incorporated. Add another third of the flour mixture, mix briefly, then add the remaining buttermilk, mixing briefly. Finally, add the last third of the flour mixture and mix only until the flour streaks just disappear. Crucially, do not overmix at this stage. Overmixing develops the gluten in the flour, resulting in tough tea cakes instead of tender ones.
- Chill the Dough: The dough will be soft. Scrape the dough out onto a large piece of plastic wrap, form it into two flattish discs (this helps it chill faster and more evenly), and wrap tightly. Refrigerate the dough for at least 1 hour, or preferably 2 hours, until firm. Chilling is essential – it prevents the tea cakes from spreading too much during baking, makes the dough much easier to handle, and allows the flavors to meld. You can chill the dough for up to 3 days.
- Preheat and Prepare: When ready to bake, position oven racks in the upper and lower thirds of the oven and preheat to 350°F (175°C). Line two large baking sheets with parchment paper or silicone baking mats. This prevents sticking and promotes even browning.
- Roll and Cut: Lightly flour a clean work surface and a rolling pin. Take one disc of chilled dough out of the refrigerator (leave the other chilled). Unwrap it and place it on the floured surface. Lightly flour the top of the dough. Roll the dough out evenly to approximately ¼-inch thickness. If the dough becomes sticky, add a tiny bit more flour, but avoid adding too much. Use a round cookie cutter (about 2.5 to 3 inches in diameter is traditional) to cut out circles. Press firmly and try to cut cleanly without twisting the cutter, which can seal the edges.
- Arrange on Baking Sheets: Carefully transfer the cut-out dough circles to the prepared baking sheets, leaving about 1.5 to 2 inches between them to allow for slight spreading. Gather the dough scraps, gently re-roll once (overworking makes them tough), and cut out more circles. Repeat with the second disc of dough.
- Bake: Bake in the preheated oven for 10-13 minutes, rotating the baking sheets halfway through (top to bottom, front to back) for even baking. The tea cakes are done when the edges are lightly golden brown, and the centers look set but are still pale and soft. They will puff up slightly. Be careful not to overbake, as this will make them dry and hard rather than tender.
- Cool: Let the tea cakes cool on the baking sheets for 5 minutes. They will continue to set slightly during this time. Then, carefully transfer them using a spatula to wire racks to cool completely.
Nutrition
- Serving Size: One Normal Portion
- Calories: 130-160