

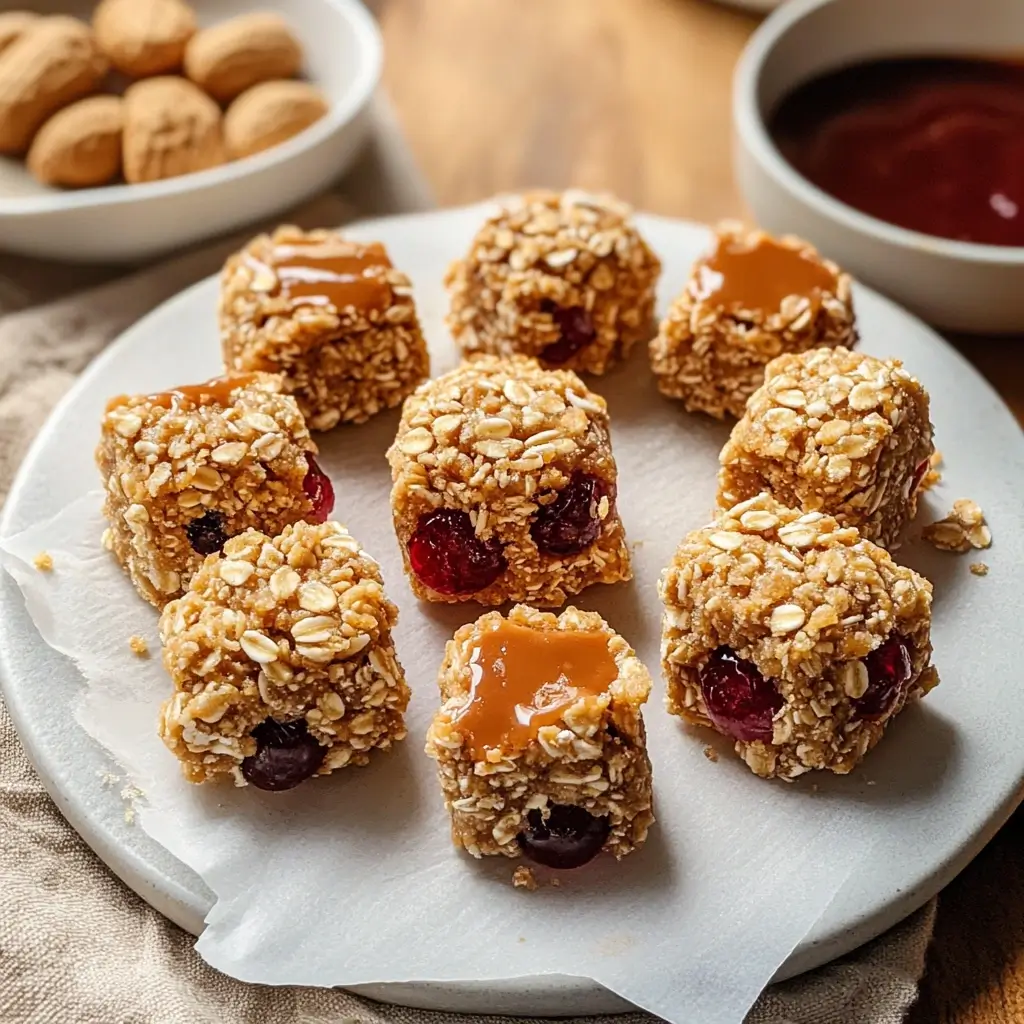

These Peanut Butter and Jelly Bites have become an absolute staple in our household, and I’m beyond excited to share this recipe with you. The first time I made them, I was looking for a quick, no-fuss snack that would satisfy both the kids’ afternoon hunger pangs and my own craving for something sweet yet somewhat wholesome. I remember my youngest, usually a picky eater, eyeing them suspiciously. But one bite, and his face lit up! Now, they’re requested weekly. They’ve saved me on busy school mornings when breakfast needs to be grab-and-go, they’ve been a hit at impromptu playdates, and honestly, they’re my secret weapon for a pre-workout energy boost. What I love most is their sheer simplicity and the nostalgic comfort they bring, reminiscent of childhood lunches but in a perfectly poppable, modern form. They strike that perfect balance between a treat and a sensible snack, and the fact that they require no baking is a huge bonus, especially during warmer months or when I’m short on time. Prepare to fall in love with this delightful, easy, and utterly satisfying recipe!
Why These Peanut Butter and Jelly Bites Are a Must-Try
Before we dive into the nuts and bolts (and jellies!) of this recipe, let’s talk about why these little morsels of joy deserve a permanent spot in your snacking repertoire. In a world of complicated recipes and fleeting food trends, Peanut Butter and Jelly Bites stand out for their timeless appeal and incredible versatility.
- Nostalgia in a Bite: Let’s be honest, the combination of peanut butter and jelly is iconic. It’s a flavor profile that transports many of us back to simpler times, packed lunches, and carefree days. These bites capture that beloved taste in a new, exciting, and convenient format.
- Unbelievably Easy to Make: This is a recipe for everyone, from seasoned kitchen pros to absolute beginners. There’s no baking involved, no complicated techniques, and the ingredient list is wonderfully straightforward. You can whip up a batch in mere minutes!
- Perfectly Portioned: The “bite-sized” nature makes them ideal for portion control. Whether you’re looking for a small treat to satisfy a sweet craving or a couple to tide you over until your next meal, they’re just right.
- Kid-Approved, Adult-Friendly: While kids adore these (making them a fantastic lunchbox addition or after-school snack), adults find them equally irresistible. They’re sophisticated enough for a grown-up palate but playful enough for the little ones.
- Customizable Galore: As you’ll see, this base recipe is a fantastic canvas for your creativity. You can swap nut butters, experiment with different jams, add mix-ins, or try various coatings. The possibilities are nearly endless!
- Great for On-the-Go: Life is busy, and we often need snacks that can keep up. These bites are portable, hold up well, and don’t require refrigeration for short periods, making them perfect for backpacks, gym bags, or office desks.
- Energy Boosting: Packed with protein from peanut butter and carbohydrates from oats and sweetener, these bites provide a nice little energy lift, making them an excellent pre-workout snack or a pick-me-up during an afternoon slump.
These are more than just a snack; they’re a solution – a delicious, easy, and adaptable solution to everyday cravings and on-the-go needs.
Peanut Butter and Jelly Bites: The Complete Recipe
This recipe focuses on a no-bake energy bite style, which is incredibly popular and easy to adapt.
Yields: Approximately 20-24 bites
Prep time: 20 minutes
Chill time: 30 minutes (minimum)
Ingredients
- For the Peanut Butter Oat Base:
- 1 ½ cups (135g) rolled oats (old-fashioned oats, not instant; use certified gluten-free if needed)
- ½ cup (128g) creamy peanut butter (natural, unsweetened preferred, or your favorite brand)
- ⅓ cup (112g) honey or maple syrup (adjust to desired sweetness)
- 2 tablespoons ground flaxseed (flax meal) or chia seeds (optional, for an extra nutritional boost)
- 1 teaspoon vanilla extract
- Pinch of salt (especially if using unsalted peanut butter)
- For the Jelly Filling/Swirl:
- ¼ cup (80g) your favorite jelly or jam (strawberry, grape, raspberry, or apricot work well; seedless is often preferred for a smoother texture)
- Optional for Coating (choose one or mix and match):
- ¼ cup finely chopped peanuts
- ¼ cup shredded unsweetened coconut
- 2 tablespoons powdered sugar (for dusting)
- 2 tablespoons cocoa powder (for a chocolatey twist)
Instructions: Crafting Your Perfect PB&J Bites
Follow these simple steps to create these delightful no-bake treats.
- Prepare Your Workstation: Line a baking sheet or a large plate with parchment paper or wax paper. This will prevent the bites from sticking and make cleanup easier.
- Combine Dry Ingredients (for the base): In a medium to large mixing bowl, add the rolled oats, ground flaxseed or chia seeds (if using), and the pinch of salt. Stir with a spoon or spatula to combine everything evenly.
- Combine Wet Ingredients (for the base): In a separate, smaller microwave-safe bowl, combine the peanut butter and honey (or maple syrup). Microwave for about 20-30 seconds. This isn’t to cook it, but just to soften the peanut butter and honey slightly, making them easier to mix thoroughly. If you prefer not to microwave, you can gently warm them in a small saucepan over low heat, stirring constantly until just loosened.
- Add Vanilla: Stir the vanilla extract into the warmed peanut butter and honey mixture until well incorporated.
- Mix Wet with Dry: Pour the wet peanut butter mixture into the bowl with the dry oat mixture. Using a sturdy spatula or wooden spoon, mix everything together until a sticky, cohesive dough forms. It might take a bit of effort to ensure everything is well combined, and there are no dry patches of oats.
- Chill the Dough (Crucial Step!): Cover the bowl with plastic wrap or a lid and place it in the refrigerator for at least 30 minutes. This step is very important. Chilling the dough firms it up, making it much less sticky and far easier to roll into balls. If you’re short on time, you can pop it in the freezer for about 10-15 minutes, but keep an eye on it.
- Prepare the Jelly: While the dough is chilling, give your jelly or jam a good stir. If it’s very thick, you might want to slightly warm it for a few seconds in the microwave (or a tiny saucepan) to make it a bit more pliable for filling or swirling. Be careful not to make it too hot or runny.
- Shape the Bites – Method 1 (Jelly Center):
- Once the dough is chilled, scoop out portions using a small cookie scoop (about 1 tablespoon size) or a regular spoon.
- Roll the portion between your palms to form a smooth ball.
- Using your thumb or the back of a small spoon (like a ¼ teaspoon measuring spoon), gently press an indentation into the center of each ball.
- Carefully spoon a small amount (about ½ teaspoon) of jelly or jam into each indentation.
- Shape the Bites – Method 2 (Jelly Swirl – slightly messier but delicious):
- Once the dough is chilled, you can gently fold or swirl the ¼ cup of jelly into the peanut butter oat mixture. Don’t overmix, or the jelly will completely blend in; you want visible swirls.
- Scoop and roll the mixture into balls as described above. This method incorporates the jelly throughout the bite.
- Optional Coating: If you’re using a coating, place your chosen coating (chopped peanuts, shredded coconut, etc.) on a small plate or in a shallow bowl. Gently roll each finished bite (either jelly-filled or jelly-swirled) in the coating until it’s lightly covered. Press gently to help the coating adhere.
- Final Chill (Recommended): Place the finished Peanut Butter and Jelly Bites on the prepared baking sheet. For the best texture, especially if you’ve filled them with jelly, return them to the refrigerator for another 15-30 minutes to allow them to firm up completely. This also helps the jelly set a bit.
- Store: Transfer the bites to an airtight container. They are best stored in the refrigerator.
Enjoy your delicious homemade Peanut Butter and Jelly Bites!
Nutrition Facts
- Servings: Approximately 20-24 bites (depending on size)
- Calories per serving (1 bite, estimated): Approximately 80-110 calories.
Disclaimer: The nutritional information provided is an estimate and can vary significantly based on the specific brands of ingredients used (especially peanut butter and sweeteners), the exact size of the bites, and any optional additions or substitutions made. For precise nutritional data, it’s recommended to use an online calculator with your specific ingredients.
Factors influencing calorie count include:
- Type of Peanut Butter: Natural, unsweetened peanut butter will generally have fewer added sugars and potentially slightly different calorie counts than conventional brands.
- Sweetener: Honey and maple syrup have different caloric densities. The amount used also plays a big role.
- Jelly/Jam: Sugar content in jams and jellies varies widely. Low-sugar or sugar-free options will reduce calories.
- Add-ins: Ingredients like chia seeds, flax meal, or coatings will add to the nutritional profile and calorie count.
These bites offer a good balance of carbohydrates for energy, protein from peanut butter and oats, and healthy fats from peanut butter and flax/chia seeds (if used). They also provide some fiber, especially when using whole rolled oats and seeds.
Preparation Time
- Active Preparation Time: 15-20 minutes (mixing ingredients, rolling balls)
- Chilling Time (Dough): 30 minutes (minimum)
- Chilling Time (Finished Bites, optional but recommended): 15-30 minutes
- Total Time (including minimum chilling): Approximately 1 hour to 1 hour 20 minutes
The hands-on time is minimal, making this a very quick recipe to assemble. The majority of the time is passive chilling, which is essential for the best texture and ease of handling. If you’re in a real hurry, a shorter freezer chill can work, but refrigeration generally yields better results.
How to Serve Your Peanut Butter and Jelly Bites
These versatile bites can be enjoyed in a multitude of ways, fitting into various parts of your day and different occasions. Here are some serving suggestions:
- As an Everyday Snack:
- Keep a container in the fridge for a quick grab-and-go snack when hunger strikes between meals.
- Perfect for an afternoon pick-me-up with a cup of tea or coffee.
- For Kids’ Lunchboxes:
- A fun and nutritious alternative to a traditional PB&J sandwich.
- Their bite-sized nature makes them easy for little hands to manage.
- After-School Power-Up:
- Provide a boost of energy for homework sessions or after-school activities.
- Serve with a glass of milk or a piece of fruit for a more rounded snack.
- Pre- or Post-Workout Fuel:
- The combination of carbs and protein makes them great for energy before exercise or for recovery afterwards.
- On-the-Go Breakfast:
- When you’re rushing out the door, a couple of these bites can serve as a quick, albeit small, breakfast. Pair with a yogurt or fruit for more substance.
- Party Platters and Gatherings:
- Arrange them attractively on a platter for potlucks, parties, or casual get-togethers. They’re always a crowd-pleaser.
- Consider making mini versions for a more elegant presentation at events.
- Dessert Bites:
- For a healthier dessert option, serve a few bites after dinner.
- They pair wonderfully with a small scoop of vanilla ice cream or a dollop of whipped cream for a more indulgent treat.
- Hiking and Travel Snacks:
- Pack them in a container for hikes, road trips, or flights. They travel relatively well (though keep them cool if possible, especially if filled with jelly).
- Gift Giving:
- Package them in a decorative box or jar for a thoughtful homemade food gift for friends, neighbors, or teachers.
Serving Presentation Tips:
- Use colorful cupcake liners: Place individual bites in mini cupcake liners for a neat and appealing presentation, especially for parties.
- Dust with powdered sugar: A light dusting just before serving can make them look extra special.
- Arrange with fresh fruit: Serve alongside fresh berries or sliced apples for a vibrant and healthy snack platter.
- Drizzle with melted chocolate: For an extra decadent touch, lightly drizzle melted dark or white chocolate over the bites before the final chill.
No matter how you choose to serve them, these Peanut Butter and Jelly Bites are sure to be a hit!
Additional Tips for PB&J Bite Perfection
To ensure your Peanut Butter and Jelly Bites turn out perfectly every time and to explore some creative tweaks, here are five additional tips:
- Don’t Skip the Chill (Seriously!): This has been mentioned, but it’s worth re-emphasizing. Chilling the peanut butter oat mixture for at least 30 minutes in the refrigerator (or 10-15 minutes in the freezer) is paramount. It allows the oats to absorb some moisture and the peanut butter to firm up, transforming a sticky mess into a manageable dough. Trying to roll warm or room-temperature dough will likely result in frustration and very sticky hands.
- Dealing with Dough Consistency:
- Too Sticky? If your dough still feels overly sticky even after chilling, it might be due to very runny peanut butter or too much liquid sweetener. Try adding a tablespoon or two more of rolled oats or a bit more ground flaxseed to help absorb excess moisture. Chill again for 10-15 minutes.
- Too Crumbly? If the mixture seems too dry and isn’t holding together, it might need a little more binder. Add a teaspoon more of peanut butter or honey/maple syrup, mix well, and see if it comes together. Sometimes, just pressing it firmly in your hands helps it cohere.
- Uniformity with a Scoop: For perfectly uniform bites, use a small cookie scoop (usually a 1-tablespoon or 1.5-tablespoon capacity). This not only ensures they all look the same but also helps with consistent portioning for nutritional estimates and even “cooking” (or in this case, chilling and setting).
- Get Creative with Jams & Preserves: Don’t limit yourself to just grape or strawberry! Explore other fruit preserves like apricot, raspberry, fig jam, or even a citrus marmalade for a different flavor profile. Using a higher quality jam or preserve with real fruit pieces can elevate the taste significantly. For a healthier twist, look for low-sugar or naturally sweetened jams, or even make a quick chia seed jam.
- Storage Smarts for Longevity:
- Refrigerate: These bites are best stored in an airtight container in the refrigerator. They will typically last for up to 1 week. The coolness also helps them maintain their firm texture.
- Freezer-Friendly: For longer storage, Peanut Butter and Jelly Bites freeze beautifully. Arrange them in a single layer on a parchment-lined baking sheet and freeze until solid. Then, transfer them to a freezer-safe bag or container. They can be frozen for up to 2-3 months. Thaw in the refrigerator or enjoy them partially frozen for a chewier texture. This is great for meal prepping snacks in advance.
By keeping these tips in mind, you’ll not only master the basic recipe but also feel confident experimenting and making these PB&J Bites truly your own.
FAQ Section: Your PB&J Bite Questions Answered
Here are answers to some frequently asked questions about making Peanut Butter and Jelly Bites:
- Q: Can I use crunchy peanut butter instead of creamy?
- A: Absolutely! Crunchy peanut butter will add a lovely textural contrast with the little peanut pieces. The overall texture of the bite will be less smooth but will have an enjoyable crunch throughout. The recipe instructions remain the same. Just ensure it’s well-stirred if it’s natural crunchy peanut butter, as the oil can separate.
- Q: How can I make these bites gluten-free?
- A: It’s very simple! The main ingredient to watch is the rolled oats. Ensure you use certified gluten-free rolled oats. Oats are naturally gluten-free but are often processed in facilities that also handle wheat, barley, and rye, leading to cross-contamination. Certified GF oats guarantee they are safe for those with celiac disease or gluten sensitivity. All other typical ingredients (peanut butter, honey/maple syrup, jelly, vanilla, flax/chia) are usually gluten-free, but it’s always wise to check labels if you’re concerned.
- Q: My mixture seems too dry/crumbly or too sticky. What did I do wrong and how can I fix it?
- A: This is a common issue and easily fixable!
- Too Dry/Crumbly: This usually means there isn’t enough binder or moisture. Try adding a little more peanut butter (1 teaspoon at a time) or a touch more liquid sweetener (honey/maple syrup, ½ teaspoon at a time). Mix well after each addition until the dough comes together. The type of peanut butter (e.g., very thick natural vs. runnier conventional) can affect this.
- Too Sticky: This often happens if your peanut butter is very oily/runny, or you’ve added a bit too much liquid sweetener. The first line of defense is the chilling step – ensure you’ve chilled it sufficiently. If it’s still too sticky after chilling, try adding a bit more rolled oats (1 tablespoon at a time) or ground flaxseed/chia seeds to absorb the excess moisture. Mix and chill again briefly.
- A: This is a common issue and easily fixable!
- Q: Can I substitute the honey/maple syrup with another sweetener?
- A: Yes, with some considerations.
- Agave Nectar: This can usually be substituted 1:1 for honey or maple syrup and will provide a similar binding consistency.
- Date Paste/Syrup: This is a great natural sweetener option. You might need to adjust the quantity slightly based on its thickness and sweetness. Date paste will also add more fiber.
- Granulated Sugars (Brown Sugar, Coconut Sugar): These won’t provide the same liquid binding quality as honey or maple syrup. If you try to use them, the bites might be drier and more crumbly. You might need to add a bit more peanut butter or a tiny amount of liquid (like a teaspoon of milk or water) to help them bind, but the texture will differ.
- Sugar-Free Liquid Sweeteners: Some liquid sugar-free sweeteners might work, but their binding properties can vary. It’s best to experiment in small batches.
The key is that honey and maple syrup don’t just add sweetness; they are crucial liquid binders that help hold the bites together.
- A: Yes, with some considerations.
- Q: How long do these bites last and do they need to be refrigerated?
- A: Yes, refrigeration is highly recommended. Stored in an airtight container in the refrigerator, these Peanut Butter and Jelly Bites will stay fresh and delicious for up to 1 week. The chilling helps them maintain their shape and texture, especially if they have a jelly center. While they can sit out at room temperature for a few hours (like in a lunchbox), for longer storage and best quality, keep them chilled. They can also be frozen for up to 2-3 months (see storage tips for freezing instructions).
Peanut Butter and Jelly Bites Recipe
Ingredients
- For the Peanut Butter Oat Base:
- 1 ½ cups (135g) rolled oats (old-fashioned oats, not instant; use certified gluten-free if needed)
- ½ cup (128g) creamy peanut butter (natural, unsweetened preferred, or your favorite brand)
- ⅓ cup (112g) honey or maple syrup (adjust to desired sweetness)
- 2 tablespoons ground flaxseed (flax meal) or chia seeds (optional, for an extra nutritional boost)
- 1 teaspoon vanilla extract
- Pinch of salt (especially if using unsalted peanut butter)
- For the Jelly Filling/Swirl:
- ¼ cup (80g) your favorite jelly or jam (strawberry, grape, raspberry, or apricot work well; seedless is often preferred for a smoother texture)
- Optional for Coating (choose one or mix and match):
- ¼ cup finely chopped peanuts
- ¼ cup shredded unsweetened coconut
- 2 tablespoons powdered sugar (for dusting)
- 2 tablespoons cocoa powder (for a chocolatey twist)
Instructions
- Prepare Your Workstation: Line a baking sheet or a large plate with parchment paper or wax paper. This will prevent the bites from sticking and make cleanup easier.
- Combine Dry Ingredients (for the base): In a medium to large mixing bowl, add the rolled oats, ground flaxseed or chia seeds (if using), and the pinch of salt. Stir with a spoon or spatula to combine everything evenly.
- Combine Wet Ingredients (for the base): In a separate, smaller microwave-safe bowl, combine the peanut butter and honey (or maple syrup). Microwave for about 20-30 seconds. This isn’t to cook it, but just to soften the peanut butter and honey slightly, making them easier to mix thoroughly. If you prefer not to microwave, you can gently warm them in a small saucepan over low heat, stirring constantly until just loosened.
- Add Vanilla: Stir the vanilla extract into the warmed peanut butter and honey mixture until well incorporated.
- Mix Wet with Dry: Pour the wet peanut butter mixture into the bowl with the dry oat mixture. Using a sturdy spatula or wooden spoon, mix everything together until a sticky, cohesive dough forms. It might take a bit of effort to ensure everything is well combined, and there are no dry patches of oats.
- Chill the Dough (Crucial Step!): Cover the bowl with plastic wrap or a lid and place it in the refrigerator for at least 30 minutes. This step is very important. Chilling the dough firms it up, making it much less sticky and far easier to roll into balls. If you’re short on time, you can pop it in the freezer for about 10-15 minutes, but keep an eye on it.
- Prepare the Jelly: While the dough is chilling, give your jelly or jam a good stir. If it’s very thick, you might want to slightly warm it for a few seconds in the microwave (or a tiny saucepan) to make it a bit more pliable for filling or swirling. Be careful not to make it too hot or runny.
- Shape the Bites – Method 1 (Jelly Center):
- Once the dough is chilled, scoop out portions using a small cookie scoop (about 1 tablespoon size) or a regular spoon.
- Roll the portion between your palms to form a smooth ball.
- Using your thumb or the back of a small spoon (like a ¼ teaspoon measuring spoon), gently press an indentation into the center of each ball.
- Carefully spoon a small amount (about ½ teaspoon) of jelly or jam into each indentation.
- Shape the Bites – Method 2 (Jelly Swirl – slightly messier but delicious):
- Once the dough is chilled, you can gently fold or swirl the ¼ cup of jelly into the peanut butter oat mixture. Don’t overmix, or the jelly will completely blend in; you want visible swirls.
- Scoop and roll the mixture into balls as described above. This method incorporates the jelly throughout the bite.
- Optional Coating: If you’re using a coating, place your chosen coating (chopped peanuts, shredded coconut, etc.) on a small plate or in a shallow bowl. Gently roll each finished bite (either jelly-filled or jelly-swirled) in the coating until it’s lightly covered. Press gently to help the coating adhere.
- Final Chill (Recommended): Place the finished Peanut Butter and Jelly Bites on the prepared baking sheet. For the best texture, especially if you’ve filled them with jelly, return them to the refrigerator for another 15-30 minutes to allow them to firm up completely. This also helps the jelly set a bit.
- Store: Transfer the bites to an airtight container. They are best stored in the refrigerator.
Nutrition
- Serving Size: One Normal Portion
- Calories: 80-110


