


Oh my goodness, you guys! Let me tell you about this shake. As someone who adores the crunchy, peanut-buttery, chocolatey goodness of a Butterfinger candy bar, but also tries to keep things on the healthier side, especially when it comes to sugar and carbs, I thought my Butterfinger days were relegated to wistful memories. Then, I stumbled upon this recipe – and let me just say, it’s been a revolution in my dessert life.
My family? They are equally obsessed. My kids, who are usually suspicious of anything “healthy” or “low carb,” devour this shake without a second thought. My husband, who has a serious sweet tooth, actually prefers this to traditional milkshakes now! It’s creamy, it’s crunchy, it’s intensely flavorful, and most importantly, it satisfies that Butterfinger craving without the sugar crash and guilt. If you’re looking for a decadent treat that aligns with your low-carb or keto lifestyle, or simply want a healthier dessert option that doesn’t compromise on taste, prepare to have your world rocked. This Low Carb Butterfinger Shake is about to become your new best friend. Trust me on this one – you NEED to try it!
Ingredients: The Low Carb Magic Behind the Butterfinger Bliss
This recipe isn’t just about throwing things in a blender; it’s about carefully selecting ingredients that mimic the iconic Butterfinger flavor and texture while keeping the carb count impressively low. Let’s break down each component and understand why they’re so crucial to the success of this shake:
- ½ cup 2% or Nonfat Cottage Cheese (Daisy Brand Recommended): Cottage cheese in a milkshake? I know, it sounds a little unusual, but trust me, this is the secret weapon for an incredibly creamy and protein-packed shake. Don’t worry, you won’t taste the cottage cheese at all! It blends seamlessly into the shake, providing a luxurious texture that rivals any high-fat milkshake. Using 2% or nonfat cottage cheese keeps the fat content in check, perfectly aligning with a healthier approach. Why Daisy brand? Personally, I find Daisy cottage cheese to be particularly smooth and less watery than some other brands, which is ideal for achieving that perfect milkshake consistency. However, feel free to use your favorite brand. If you’re truly averse to cottage cheese, you could experiment with plain Greek yogurt (though it will be tangier), but cottage cheese is really the star for texture here.
- 1 ½ – 2 cups Ice Cubes: Ice is essential for that frosty, milkshake-like thickness. The amount of ice you use will determine the final consistency. Start with 1 ½ cups for a thicker shake, and add more, up to 2 cups, if you prefer a slightly thinner consistency. Using ice also ensures your shake is wonderfully cold and refreshing, especially perfect on a warm day. Don’t be tempted to skip the ice or use less; it’s crucial for achieving the right texture and temperature.
- 1 cup Unsweetened Almond Milk, Carton Coconut Milk, or Cashew Milk: The liquid base of our shake needs to be low in carbs and calories while still contributing to the creamy texture. Unsweetened almond milk is my go-to choice because it’s readily available, very low in calories and carbs, and has a neutral flavor that doesn’t overpower the other ingredients. Carton coconut milk (not canned – canned is much higher in fat and calories) is another fantastic option, adding a subtle hint of coconut that complements the other flavors beautifully. Unsweetened cashew milk is also a great alternative, offering a naturally creamy texture and mild flavor. Avoid regular dairy milk as it significantly increases the carb and sugar content. Experiment with these different milk alternatives to find your personal preference.
- 2 tablespoons Natural (Sugar-Free) Peanut Butter or 1 tablespoon Peanut Flour: This is where the Butterfinger magic truly begins! Peanut butter provides that signature nutty, slightly salty, and oh-so-satisfying flavor that is quintessential to a Butterfinger. It also adds healthy fats and a bit more protein. Crucially, make sure you use natural, sugar-free peanut butter. Many commercial peanut butters are loaded with added sugars and oils, which we want to avoid. Look for peanut butter where the only ingredients are peanuts and maybe salt. Alternatively, peanut flour is a fantastic low-fat option that still delivers intense peanut flavor. It’s essentially defatted peanut butter, so it’s lower in calories and fat but still packs a peanutty punch. If using peanut flour, you might want to slightly increase the amount of liquid to achieve the desired consistency.
- 1 teaspoon Vanilla Extract: Vanilla extract is a flavor enhancer that elevates the overall taste profile of the shake. It adds a touch of warmth and sweetness without adding any sugar. Use pure vanilla extract for the best flavor; avoid imitation vanilla, which can have a slightly artificial taste. A good quality vanilla extract makes a noticeable difference in the final result.
- 2 teaspoons THM Sweet Blend or 1 tablespoon Truvia or Sweetener of Your Choice to Taste: Sweetness is essential in a dessert shake, but we need to achieve it without sugar! This recipe offers a few excellent low-carb sweetener options. THM Sweet Blend is a popular blend of erythritol, stevia, and monk fruit, known for its pleasant taste and minimal aftertaste. Truvia is another erythritol and stevia-based sweetener that works well. You can also use other low-carb sweeteners like erythritol, monk fruit sweetener, or stevia extract. The key is to adjust the amount of sweetener to your personal preference. Start with the recommended amount and then taste and add more if needed. Remember, different sweeteners have varying levels of sweetness, so adjust accordingly.
- ½ teaspoon Butterscotch, Butter, or Caramel Extract: This is another flavor booster that takes our shake closer to that Butterfinger profile. Butterscotch extract provides a rich, warm, and slightly caramelized flavor that is reminiscent of butterscotch candy, a key component of Butterfinger. Butter extract adds a subtle buttery note, enhancing the richness. Caramel extract offers a sweet, caramelized flavor that complements the peanut butter and chocolate perfectly. I personally love butterscotch extract for the most authentic Butterfinger-esque flavor. These extracts are potent, so a little goes a long way. Start with ½ teaspoon and adjust to taste.
- ½ ounce Stevia Sweetened Chocolate, or 85% Dark Chocolate (Aldi’s Brand Small Bar Recommended) or Skinny Chocolate: Chocolate is the final piece of the Butterfinger puzzle. We need that decadent chocolate element without the added sugar. Stevia-sweetened chocolate is an excellent low-carb option. There are many brands available now that offer delicious sugar-free chocolate bars, chips, or even syrups. Alternatively, 85% dark chocolate is naturally lower in sugar and higher in antioxidants. Aldi’s brand small bar is a convenient and affordable option. Skinny chocolate, often referring to sugar-free chocolate syrups or powders, can also be used. The important thing is to choose a chocolate option that is low in sugar and carbs but still delivers that rich chocolate flavor we crave. You’ll be adding this in chunks during the last few seconds of blending to create those delightful chocolate flecks throughout the shake.
- 2 tablespoons Coconut Caramel Crunch: This is the crunch factor that truly mimics the texture of a Butterfinger candy bar! Coconut caramel crunch adds a delightful textural contrast to the creamy shake and provides a hint of caramel and coconut flavor that enhances the overall experience. Look for sugar-free or low-carb coconut caramel crunch options. You can often find these in the baking aisle or online. If you can’t find coconut caramel crunch, you could experiment with other low-carb crunchy toppings like chopped nuts, cocoa nibs, or even crushed low-carb cookies, but coconut caramel crunch is definitely the closest in flavor and texture to a Butterfinger.
Instructions: Blending Your Way to Butterfinger Perfection
Creating this Low Carb Butterfinger Shake is incredibly simple and quick. Here’s a step-by-step guide to blending your way to Butterfinger bliss:
- Gather Your Ingredients: First, make sure you have all your ingredients measured and ready to go. This will make the blending process smooth and efficient. It’s always a good idea to have everything prepped before you start.
- Combine Base Ingredients in Blender: Add all the ingredients except for the chocolate and coconut caramel crunch to your blender. This includes the cottage cheese, ice cubes, almond milk (or your chosen milk alternative), peanut butter (or peanut flour), vanilla extract, sweetener, and butterscotch (or butter/caramel) extract.
- Blend Until Smooth and Creamy: Secure the lid on your blender and blend on high speed until the mixture is perfectly smooth and creamy. This usually takes about 30-60 seconds, depending on your blender’s power. You want to ensure there are no lumps of cottage cheese or ice remaining. Pause and scrape down the sides of the blender if needed to ensure everything is fully incorporated. The mixture should be thick and have a milkshake-like consistency at this stage.
- Add Chocolate and Caramel Crunch Last: In the last few seconds of blending, add in the stevia-sweetened chocolate (or dark chocolate) and the coconut caramel crunch. Blend for just a few seconds more, pulse if necessary, until the chocolate and crunch are just broken up and dispersed throughout the shake. You don’t want to over-blend at this stage, or the chocolate and crunch will become too finely ground and lose their textural appeal. We want those delightful little flecks of chocolate and satisfying crunch in every sip!
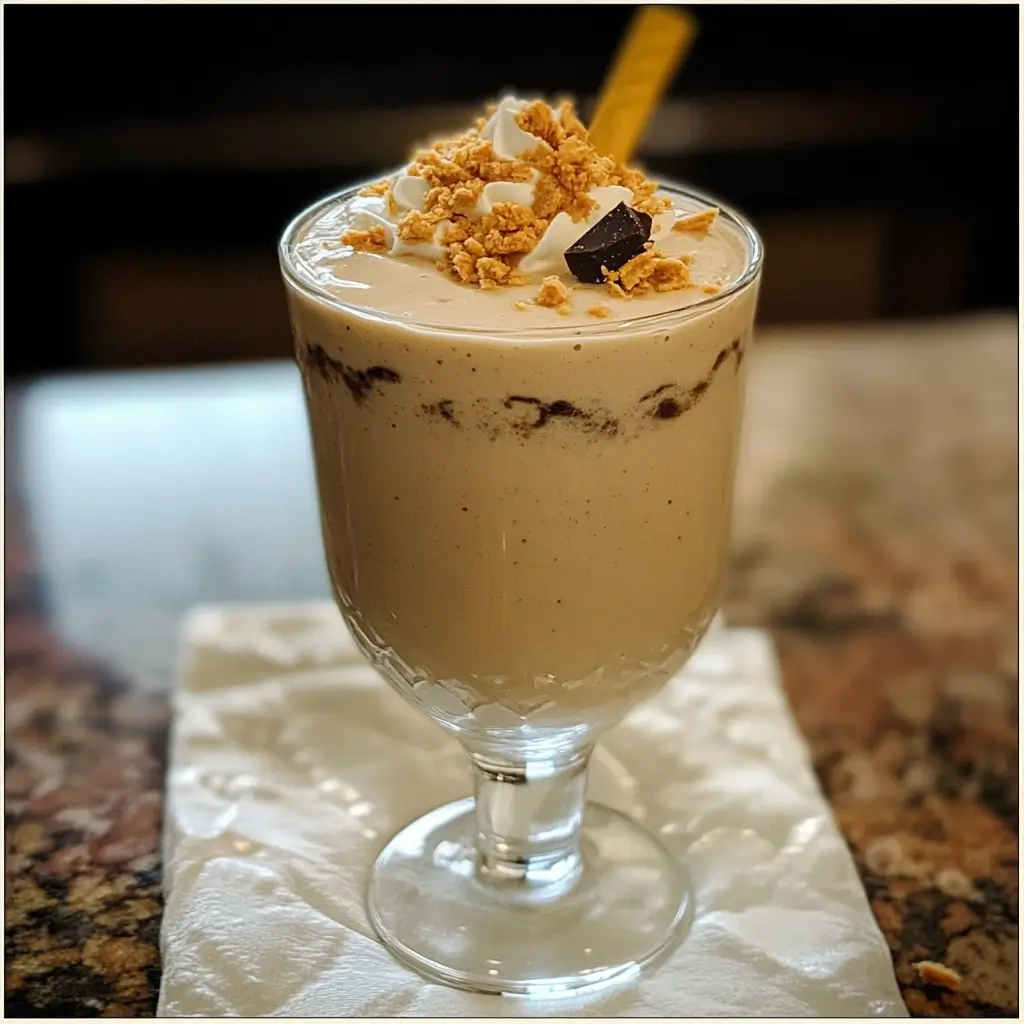
- Pour and Garnish: Pour the shake immediately into two glasses. For an extra touch of decadence and visual appeal, garnish with stevia-sweetened whipped cream (optional), chocolate curls (made with sugar-free chocolate), and a sprinkle of more coconut caramel crunch on top.
- Indulge and Enjoy! Grab a spoon and enjoy your incredibly delicious and guilt-free Low Carb Butterfinger Shake! Savor every creamy, crunchy, peanut-buttery, chocolatey sip. This shake is best enjoyed immediately for optimal texture and flavor.
Nutrition Facts: Guilt-Free Goodness
This Low Carb Butterfinger Shake is not only delicious but also surprisingly nutritious, especially compared to a traditional milkshake or candy bar. Here’s a breakdown of the approximate nutritional information per serving (based on using nonfat cottage cheese, almond milk, peanut flour, and stevia-sweetened chocolate):
- Servings: 2
- Calories per serving: Approximately 250-300 calories (depending on specific ingredients and sweetener amount)
- Net Carbs per serving: Approximately 5-7 grams (Net carbs = Total carbs – Fiber – Sugar Alcohols)
- Protein per serving: Approximately 20-25 grams
- Fat per serving: Approximately 15-20 grams (primarily from healthy fats in peanut butter and coconut)
- Fiber per serving: Approximately 3-5 grams
Important Note: These are estimates, and the exact nutritional values will vary based on the specific brands and ingredients you use. Always check the nutrition labels of your chosen ingredients for the most accurate information, especially if you are strictly tracking macros. However, in general, this shake is a fantastic source of protein, relatively low in carbs, and contains healthy fats, making it a much healthier and more satisfying dessert option than traditional sugary treats.
Preparation Time: Dessert in Minutes
One of the best things about this recipe is how incredibly quick and easy it is to make!
- Prep time: 5 minutes (gathering ingredients and measuring)
- Cook time: 0 minutes (no cooking required!)
- Blend time: 2-3 minutes
- Total time: Approximately 5-10 minutes
From start to finish, you can have a decadent and satisfying Low Carb Butterfinger Shake in your hands in under 10 minutes! This makes it perfect for a quick dessert craving, a post-workout protein boost, or a healthy treat any time of day.
How to Serve Your Low Carb Butterfinger Shake: Elevate the Experience
While this shake is delicious straight out of the blender, a few simple serving suggestions can elevate the experience and make it feel even more special:
- Classic Milkshake Glass: Serve your shake in tall milkshake glasses or mason jars for a classic diner feel.
- Whipped Cream Topping: A dollop of stevia-sweetened whipped cream on top adds extra creaminess and indulgence without the sugar.
- Chocolate Shavings or Curls: Garnish with sugar-free chocolate shavings or curls for a beautiful and flavorful touch. Use a vegetable peeler to create curls from a bar of sugar-free chocolate.
- Extra Coconut Caramel Crunch: Sprinkle a little extra coconut caramel crunch on top for added texture and visual appeal.
- Peanut Butter Drizzle: A thin drizzle of melted sugar-free peanut butter over the top adds even more peanut butter goodness and visual flair.
- Dusting of Cocoa Powder: A light dusting of unsweetened cocoa powder can enhance the chocolate flavor and add a sophisticated touch.
- Serve Immediately: For the best texture and flavor, serve your Low Carb Butterfinger Shake immediately after blending.
Additional Tips for Butterfinger Shake Success
Want to ensure your Low Carb Butterfinger Shake is absolutely perfect every time? Here are five helpful tips:
- Use Cold Ingredients: Starting with cold ingredients, especially the cottage cheese and almond milk, will help your shake blend up thicker and colder. You can even chill your blender jar in the freezer for a few minutes before blending for an extra frosty shake.
- Adjust Sweetness to Your Preference: Sweetness is subjective. Start with the recommended amount of sweetener and then taste your shake after blending. If you prefer it sweeter, add a little more sweetener, a teaspoon at a time, and blend again until you reach your desired level of sweetness.
- Experiment with Extracts: Don’t be afraid to play around with the extracts. If you love a strong butterscotch flavor, add a little more butterscotch extract. If you prefer a more caramel-forward shake, increase the caramel extract and reduce the butterscotch. You can also try adding a tiny pinch of sea salt to enhance the sweetness and balance the flavors.
- Make it a Protein Powerhouse: For an even bigger protein boost, you can add a scoop of your favorite low-carb vanilla or peanut butter protein powder to the shake. This is a great option for a post-workout recovery drink or a more substantial meal replacement. Adjust the liquid slightly if adding protein powder to maintain desired consistency.
- Don’t Over-Blend: Be careful not to over-blend once you’ve added the chocolate and coconut caramel crunch. Over-blending can make the chocolate and crunch too finely ground and lose their desirable texture. A few quick pulses or a very short blend at the end is all you need to disperse them throughout the shake.
Frequently Asked Questions (FAQ) – Your Butterfinger Shake Queries Answered
Got questions about making the perfect Low Carb Butterfinger Shake? Here are some frequently asked questions to help you along the way:
Q1: I don’t like cottage cheese. Can I substitute it with something else?
A: While cottage cheese is truly the magic ingredient for texture in this shake, you can try substituting it with plain Greek yogurt. However, Greek yogurt will have a tangier flavor and may result in a slightly less creamy texture. Silken tofu is another dairy-free alternative that can provide creaminess, but it will alter the flavor profile. Honestly, I urge you to try it with cottage cheese as directed – you really won’t taste it, and it makes all the difference in texture!
Q2: Can I make this shake dairy-free and/or vegan?
A: Yes, absolutely! To make this shake dairy-free, simply ensure you use a dairy-free milk alternative like almond milk, coconut milk, or cashew milk. Cottage cheese is the dairy component, so for a dairy-free and vegan version, you can try substituting it with silken tofu. Make sure to use stevia-sweetened chocolate that is also dairy-free and vegan-friendly. Double-check the ingredients of your coconut caramel crunch to ensure it’s vegan as well.
Q3: Can I use a different sweetener?
A: Yes, you can use any low-carb sweetener you prefer. Erythritol, monk fruit sweetener, stevia extract, and allulose are all good options. Keep in mind that different sweeteners have varying levels of sweetness, so you may need to adjust the amount accordingly. Start with the recommended amount in the recipe and adjust to taste.
Q4: My shake isn’t thick enough. What did I do wrong?
A: The most common reason for a thin shake is not using enough ice. Make sure you are using at least 1 ½ cups of ice cubes. You can also add more ice, up to 2 cups, to achieve a thicker consistency. Ensure your ingredients are cold as well. If you’ve added too much liquid, you can try adding a few more ice cubes and blending again to thicken it up.
Q5: Can I store leftover shake?
A: While this shake is best enjoyed immediately, you can store leftovers in an airtight container in the refrigerator for up to 24 hours. However, the texture may change slightly, and it may become a bit less creamy as the ice melts. You may need to re-blend it with a few more ice cubes to restore the original texture before serving. For the best experience, I recommend making only as much as you plan to consume immediately.
There you have it – your ultimate guide to creating the most delicious and guilt-free Low Carb Butterfinger Shake! Go ahead, blend up a batch, indulge your cravings, and let me know in the comments how much you love it! Don’t forget to share this recipe with your friends and family who are also looking for healthy and delicious dessert options! Enjoy!
Print
Low Carb Butterfinger Shake Recipe
Ingredients
- ½ cup 2% or Nonfat Cottage Cheese (Daisy Brand Recommended): Cottage cheese in a milkshake? I know, it sounds a little unusual, but trust me, this is the secret weapon for an incredibly creamy and protein-packed shake. Don’t worry, you won’t taste the cottage cheese at all! It blends seamlessly into the shake, providing a luxurious texture that rivals any high-fat milkshake. Using 2% or nonfat cottage cheese keeps the fat content in check, perfectly aligning with a healthier approach. Why Daisy brand? Personally, I find Daisy cottage cheese to be particularly smooth and less watery than some other brands, which is ideal for achieving that perfect milkshake consistency. However, feel free to use your favorite brand. If you’re truly averse to cottage cheese, you could experiment with plain Greek yogurt (though it will be tangier), but cottage cheese is really the star for texture here.
- 1 ½ – 2 cups Ice Cubes: Ice is essential for that frosty, milkshake-like thickness. The amount of ice you use will determine the final consistency. Start with 1 ½ cups for a thicker shake, and add more, up to 2 cups, if you prefer a slightly thinner consistency. Using ice also ensures your shake is wonderfully cold and refreshing, especially perfect on a warm day. Don’t be tempted to skip the ice or use less; it’s crucial for achieving the right texture and temperature.
- 1 cup Unsweetened Almond Milk, Carton Coconut Milk, or Cashew Milk: The liquid base of our shake needs to be low in carbs and calories while still contributing to the creamy texture. Unsweetened almond milk is my go-to choice because it’s readily available, very low in calories and carbs, and has a neutral flavor that doesn’t overpower the other ingredients. Carton coconut milk (not canned – canned is much higher in fat and calories) is another fantastic option, adding a subtle hint of coconut that complements the other flavors beautifully. Unsweetened cashew milk is also a great alternative, offering a naturally creamy texture and mild flavor. Avoid regular dairy milk as it significantly increases the carb and sugar content. Experiment with these different milk alternatives to find your personal preference.
- 2 tablespoons Natural (Sugar-Free) Peanut Butter or 1 tablespoon Peanut Flour: This is where the Butterfinger magic truly begins! Peanut butter provides that signature nutty, slightly salty, and oh-so-satisfying flavor that is quintessential to a Butterfinger. It also adds healthy fats and a bit more protein. Crucially, make sure you use natural, sugar-free peanut butter. Many commercial peanut butters are loaded with added sugars and oils, which we want to avoid. Look for peanut butter where the only ingredients are peanuts and maybe salt. Alternatively, peanut flour is a fantastic low-fat option that still delivers intense peanut flavor. It’s essentially defatted peanut butter, so it’s lower in calories and fat but still packs a peanutty punch. If using peanut flour, you might want to slightly increase the amount of liquid to achieve the desired consistency.
- 1 teaspoon Vanilla Extract: Vanilla extract is a flavor enhancer that elevates the overall taste profile of the shake. It adds a touch of warmth and sweetness without adding any sugar. Use pure vanilla extract for the best flavor; avoid imitation vanilla, which can have a slightly artificial taste. A good quality vanilla extract makes a noticeable difference in the final result.
- 2 teaspoons THM Sweet Blend or 1 tablespoon Truvia or Sweetener of Your Choice to Taste: Sweetness is essential in a dessert shake, but we need to achieve it without sugar! This recipe offers a few excellent low-carb sweetener options. THM Sweet Blend is a popular blend of erythritol, stevia, and monk fruit, known for its pleasant taste and minimal aftertaste. Truvia is another erythritol and stevia-based sweetener that works well. You can also use other low-carb sweeteners like erythritol, monk fruit sweetener, or stevia extract. The key is to adjust the amount of sweetener to your personal preference. Start with the recommended amount and then taste and add more if needed. Remember, different sweeteners have varying levels of sweetness, so adjust accordingly.
- ½ teaspoon Butterscotch, Butter, or Caramel Extract: This is another flavor booster that takes our shake closer to that Butterfinger profile. Butterscotch extract provides a rich, warm, and slightly caramelized flavor that is reminiscent of butterscotch candy, a key component of Butterfinger. Butter extract adds a subtle buttery note, enhancing the richness. Caramel extract offers a sweet, caramelized flavor that complements the peanut butter and chocolate perfectly. I personally love butterscotch extract for the most authentic Butterfinger-esque flavor. These extracts are potent, so a little goes a long way. Start with ½ teaspoon and adjust to taste.
- ½ ounce Stevia Sweetened Chocolate, or 85% Dark Chocolate (Aldi’s Brand Small Bar Recommended) or Skinny Chocolate: Chocolate is the final piece of the Butterfinger puzzle. We need that decadent chocolate element without the added sugar. Stevia-sweetened chocolate is an excellent low-carb option. There are many brands available now that offer delicious sugar-free chocolate bars, chips, or even syrups. Alternatively, 85% dark chocolate is naturally lower in sugar and higher in antioxidants. Aldi’s brand small bar is a convenient and affordable option. Skinny chocolate, often referring to sugar-free chocolate syrups or powders, can also be used. The important thing is to choose a chocolate option that is low in sugar and carbs but still delivers that rich chocolate flavor we crave. You’ll be adding this in chunks during the last few seconds of blending to create those delightful chocolate flecks throughout the shake.
- 2 tablespoons Coconut Caramel Crunch: This is the crunch factor that truly mimics the texture of a Butterfinger candy bar! Coconut caramel crunch adds a delightful textural contrast to the creamy shake and provides a hint of caramel and coconut flavor that enhances the overall experience. Look for sugar-free or low-carb coconut caramel crunch options. You can often find these in the baking aisle or online. If you can’t find coconut caramel crunch, you could experiment with other low-carb crunchy toppings like chopped nuts, cocoa nibs, or even crushed low-carb cookies, but coconut caramel crunch is definitely the closest in flavor and texture to a Butterfinger.
Instructions
- Gather Your Ingredients: First, make sure you have all your ingredients measured and ready to go. This will make the blending process smooth and efficient. It’s always a good idea to have everything prepped before you start.
- Combine Base Ingredients in Blender: Add all the ingredients except for the chocolate and coconut caramel crunch to your blender. This includes the cottage cheese, ice cubes, almond milk (or your chosen milk alternative), peanut butter (or peanut flour), vanilla extract, sweetener, and butterscotch (or butter/caramel) extract.
- Blend Until Smooth and Creamy: Secure the lid on your blender and blend on high speed until the mixture is perfectly smooth and creamy. This usually takes about 30-60 seconds, depending on your blender’s power. You want to ensure there are no lumps of cottage cheese or ice remaining. Pause and scrape down the sides of the blender if needed to ensure everything is fully incorporated. The mixture should be thick and have a milkshake-like consistency at this stage.
- Add Chocolate and Caramel Crunch Last: In the last few seconds of blending, add in the stevia-sweetened chocolate (or dark chocolate) and the coconut caramel crunch. Blend for just a few seconds more, pulse if necessary, until the chocolate and crunch are just broken up and dispersed throughout the shake. You don’t want to over-blend at this stage, or the chocolate and crunch will become too finely ground and lose their textural appeal. We want those delightful little flecks of chocolate and satisfying crunch in every sip!
- Pour and Garnish: Pour the shake immediately into two glasses. For an extra touch of decadence and visual appeal, garnish with stevia-sweetened whipped cream (optional), chocolate curls (made with sugar-free chocolate), and a sprinkle of more coconut caramel crunch on top.
- Indulge and Enjoy! Grab a spoon and enjoy your incredibly delicious and guilt-free Low Carb Butterfinger Shake! Savor every creamy, crunchy, peanut-buttery, chocolatey sip. This shake is best enjoyed immediately for optimal texture and flavor.
Nutrition
- Serving Size: One Normal Portion
- Calories: 250-300
- Fat: 15-20 grams
- Carbohydrates: 5-7 grams
- Fiber: 3-5 grams
- Protein: 20-25 grams


