In our busy household, finding snacks that are both healthy and appealing to everyone, especially the kids, can sometimes feel like a Herculean task. Store-bought options are often loaded with sugar and artificial ingredients, leaving me feeling less than satisfied with my choices. That’s why discovering this simple recipe for homemade yogurt tubes was a game-changer. Not only are they incredibly easy to whip up in just minutes, but they are also completely customizable, allowing me to control exactly what goes into them. My kids absolutely adore these frozen treats – they think they’re getting a special ice pop, while I know they’re enjoying a nutritious snack packed with yogurt and fruit. From school lunchboxes to after-school treats, and even a quick breakfast on the go, these homemade yogurt tubes have become a staple in our refrigerator and freezer. The best part? The recipe is so straightforward that even my little ones can help in the kitchen, making it a fun and collaborative activity. If you’re looking for a healthy, budget-friendly, and delicious snack that the whole family will love, look no further – these homemade yogurt tubes are the answer!
Ingredients for Homemade Yogurt Tubes
Creating your own yogurt tubes at home requires just two basic ingredients, making it an incredibly accessible and cost-effective snack option. Let’s break down each component to ensure you’re using the best ingredients for optimal flavor and nutrition.
- Plain Yogurt: The foundation of our yogurt tubes is, of course, yogurt! Plain yogurt is the star here because it offers a blank canvas for flavor customization and allows you to control the sweetness level. Opting for plain yogurt over flavored varieties significantly reduces added sugars and artificial flavors that are commonly found in store-bought yogurt tubes.
- Yogurt Types: You have a wonderful array of yogurt options to choose from.
- Greek Yogurt: For a thicker, creamier texture and an extra boost of protein, Greek yogurt is an excellent choice. Its strained nature removes whey, resulting in a richer consistency and higher protein content, which helps keep you feeling fuller for longer. Greek yogurt also tends to be tangier, which can balance the sweetness of the fruit beautifully.
- Regular Yogurt (American-style): This yogurt is lighter in texture compared to Greek yogurt. It’s still a fantastic base for yogurt tubes and provides a classic yogurt flavor. If you prefer a slightly thinner consistency in your tubes, regular yogurt is a great choice.
- Whole Milk Yogurt: Using whole milk yogurt will result in the richest and creamiest yogurt tubes. The higher fat content contributes to a luxurious texture and can be particularly satisfying. This is a great option for younger children or anyone who enjoys a richer treat.
- Low-Fat or Non-Fat Yogurt: If you’re watching your fat intake, low-fat or non-fat yogurt will work perfectly well. Keep in mind that these options might be slightly less creamy than whole milk or Greek yogurt, but they still provide the nutritional benefits and delicious flavor.
- Dairy-Free Yogurt Alternatives: For those with dairy sensitivities or following a vegan diet, there are fantastic plant-based yogurt alternatives available.
- Coconut Yogurt: Coconut yogurt is naturally creamy and adds a subtle coconut flavor, which pairs wonderfully with tropical fruits like mango and pineapple, as well as berries.
- Almond Yogurt: Almond yogurt is a lighter option with a slightly nutty flavor. It’s a good source of vitamin E and is lower in calories than coconut yogurt.
- Soy Yogurt: Soy yogurt has a smooth texture and a neutral flavor, making it a versatile base for any fruit combination. It’s also a good source of protein.
- Oat Yogurt: Oat yogurt is known for its creamy texture and slightly sweet, oaty flavor. It’s often well-tolerated and a good source of fiber.
- Choosing the Right Yogurt: When selecting your yogurt, read the ingredient list to ensure there are minimal additives, thickeners, or added sugars. Plain, unsweetened yogurt is always the best starting point. You can then control the sweetness and flavor profile yourself.
- Yogurt Types: You have a wonderful array of yogurt options to choose from.
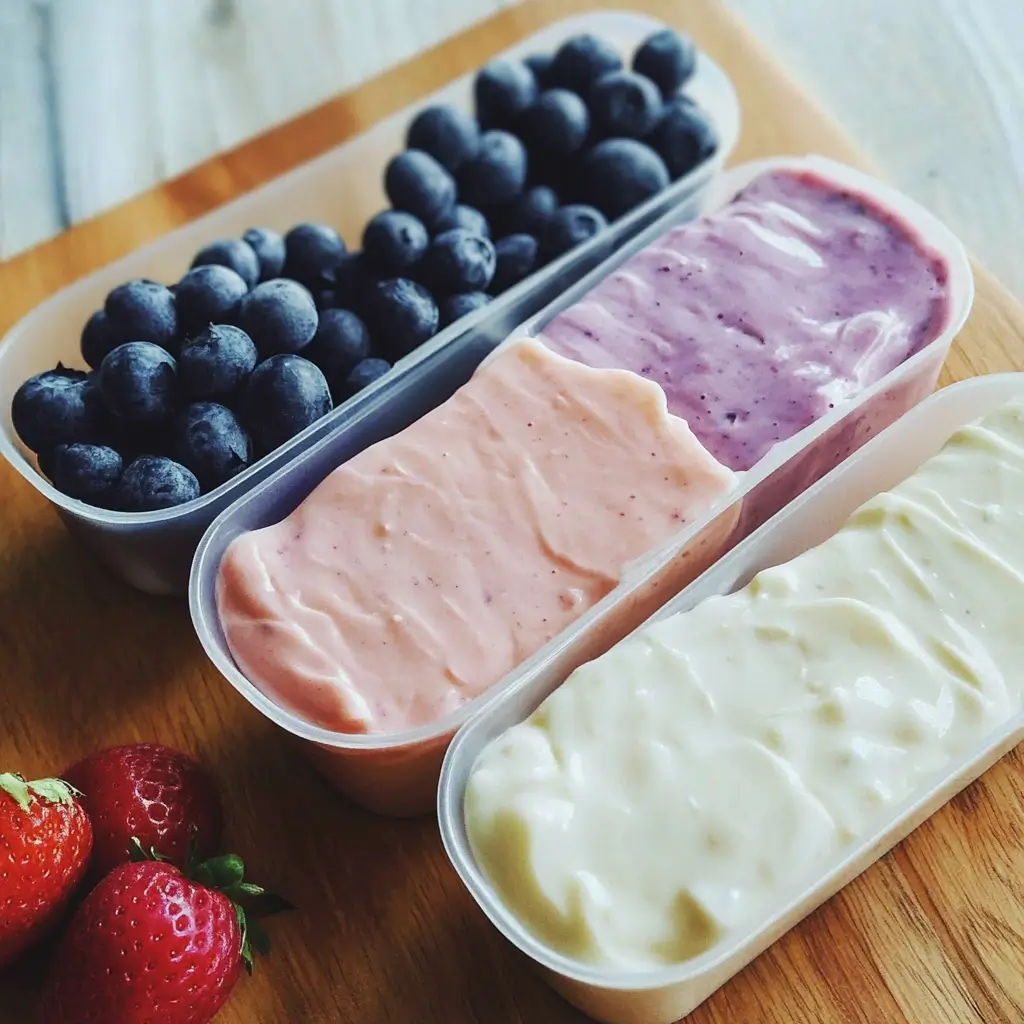
- Fruit: The fruit component is where you can truly let your creativity shine and tailor the yogurt tubes to your family’s preferences and seasonal availability. Fresh or frozen fruit both work wonderfully.
- Berry Bliss: Berries are a classic and nutritious choice.
- Strawberries: Sweet, juicy, and packed with vitamin C, strawberries add a vibrant color and delightful flavor.
- Blueberries: Bursting with antioxidants and a slightly tart flavor, blueberries are a superfood powerhouse.
- Raspberries: Tangy and slightly floral, raspberries bring a sophisticated flavor and beautiful color.
- Blackberries: Rich and slightly sweet with a hint of earthiness, blackberries offer a unique and delicious flavor.
- Mixed Berries: A combination of berries provides a complex flavor profile and a variety of nutrients.
- Tropical Temptation: For a taste of the tropics, consider these fruits:
- Mango: Sweet, creamy, and exotic, mango adds a luscious tropical flavor.
- Pineapple: Tangy and sweet, pineapple provides a refreshing tropical twist.
- Banana: Creamy and naturally sweet, bananas add a smooth texture and potassium boost. (Bananas can make the yogurt tubes slightly thicker).
- Stone Fruit Sensations: When in season, stone fruits are a fantastic option.
- Peaches: Sweet and juicy, peaches offer a classic summer flavor.
- Nectarines: Similar to peaches but with smoother skin, nectarines are equally delicious.
- Plums: Slightly tart and sweet, plums add a unique flavor and vibrant color.
- Cherries: Sweet and slightly tart, cherries bring a rich flavor and beautiful color. (Pit them before blending!)
- Other Fruit Options: Don’t limit yourself to just these!
- Applesauce (Unsweetened): For a smooth and naturally sweet option, unsweetened applesauce can be blended with yogurt.
- Pears: Sweet and mild, pears offer a delicate flavor and smooth texture.
- Citrus (Use Sparingly): A little bit of orange or mandarin orange can add a bright flavor, but be mindful of acidity, especially with dairy yogurt.
- Frozen vs. Fresh Fruit:
- Frozen Fruit: Frozen fruit is incredibly convenient and often more affordable than fresh fruit, especially out of season. It also helps to thicken the yogurt tubes and creates a colder, more refreshing treat. No need to thaw frozen fruit before blending – just toss it in!
- Fresh Fruit: Fresh fruit brings vibrant flavors and textures. Ensure your fresh fruit is ripe for the best sweetness and flavor.
- Fruit Preparation: Wash fresh fruit thoroughly. Remove stems, pits, and peels as needed. For larger fruits like mangoes or peaches, chop them into smaller pieces before blending.
- Berry Bliss: Berries are a classic and nutritious choice.
With just these two simple ingredient categories, the possibilities for flavor combinations are virtually endless! Experiment with different yogurt types and fruits to discover your family’s favorite homemade yogurt tube creations.
Instructions: Making Your Homemade Yogurt Tubes
Creating these wholesome yogurt tubes is incredibly simple and quick, perfect for busy weeknights or involving little helpers in the kitchen. Follow these step-by-step instructions for delicious homemade frozen snacks:
Step 1: Blend the Yogurt and Fruit
- Gather Your Ingredients: Measure out 2 cups of your chosen plain yogurt and 1 cup of your selected fruit. Have your blender ready and clean.
- Combine in the Blender: Place the yogurt into the blender first. This helps to create a base and prevents the fruit from getting stuck at the bottom. Add the 1 cup of fruit on top of the yogurt.
- Blend Until Smooth: Secure the lid on your blender and blend the yogurt and fruit together until you achieve a completely smooth and uniform consistency. This usually takes about 30-60 seconds, depending on your blender and the type of fruit you’re using. Pause and scrape down the sides of the blender jar with a spatula if needed to ensure all the fruit is fully incorporated. You want to eliminate any chunks of fruit for the smoothest texture in your yogurt tubes.
- Taste and Adjust (Optional): At this stage, take a small taste of the blended mixture. If you prefer a sweeter yogurt tube, you can add a touch of natural sweetener like honey, maple syrup, or a few drops of stevia. Start with a small amount and blend again to incorporate. Remember that fruit naturally adds sweetness, so you may not need any additional sweetener, especially with ripe or sweeter fruits. For a tangier flavor, you could add a squeeze of lemon juice or a pinch of citric acid, particularly if using very sweet fruits.
Step 2: Fill the Yogurt Tubes
- Prepare Your Yogurt Tubes or Pouches: You’ll need yogurt tubes or reusable pouches to fill with your blended mixture.
- Yogurt Tubes: You can purchase empty, disposable yogurt tubes online or at some kitchen supply stores. These are designed specifically for making homemade yogurt tubes and usually come with sealing mechanisms.
- Reusable Pouches: Reusable food pouches designed for baby food or snacks are an excellent eco-friendly option. They are durable, washable, and often come with convenient zipper closures. Look for pouches that are freezer-safe and easy to clean.
- DIY Parchment Paper Cones (Less Ideal, but Possible): In a pinch, you could create cones out of parchment paper and seal the bottom, but this method is less secure and more prone to leaks. Yogurt tubes or reusable pouches are highly recommended for ease and mess-free results.
- Use a Funnel (Recommended): A small funnel is your best friend for filling yogurt tubes neatly and efficiently. A funnel with a narrow spout is ideal for fitting into the opening of yogurt tubes or pouches. If you don’t have a funnel, you can improvise by using a piping bag or even carefully spooning the mixture into the tubes, but a funnel greatly reduces mess and spillage.
- Fill Carefully: Place the funnel into the opening of a yogurt tube or pouch. Slowly pour or spoon the blended yogurt mixture into the funnel, allowing it to flow into the tube. Fill each tube or pouch, leaving at least ½ inch of headspace at the top. This headspace is crucial for expansion when the yogurt tubes freeze. Overfilling can cause the tubes to burst in the freezer.
- Seal Tightly: Once filled, securely seal each yogurt tube or pouch according to the manufacturer’s instructions.
- Yogurt Tubes: Most disposable yogurt tubes come with a heat-sealing mechanism. Follow the instructions provided with your tubes for proper sealing. Ensure a complete and airtight seal to prevent leaks and freezer burn.
- Reusable Pouches: Close the zipper closure on reusable pouches tightly, ensuring it is fully sealed to prevent leaks. Double-check the seal by gently squeezing the pouch to make sure no air or yogurt mixture escapes.
Step 3: Freeze or Refrigerate
- Freezing for Frozen Yogurt Tubes: For frozen yogurt tubes, lay the filled and sealed tubes flat in a single layer on a baking sheet or tray. This helps them freeze evenly and prevents them from sticking together. Place the baking sheet in the freezer for at least 4-6 hours, or preferably overnight, until the yogurt tubes are completely frozen solid.
- Refrigerating for Chilled Yogurt Tubes: If you prefer chilled yogurt tubes for immediate consumption or for packing in lunches within a few days, you can store them in the refrigerator instead of the freezer. Place the filled and sealed tubes in an airtight container or zippered bag in the refrigerator. They will stay fresh for up to 5 days.
Step 4: Storage
- Freezer Storage: Once frozen solid, you can transfer the yogurt tubes from the baking sheet to a freezer-safe bag or container. Store them in the freezer for up to 3 months for optimal quality. Label the bag or container with the date and flavor for easy identification.
- Refrigerator Storage: Refrigerated yogurt tubes should be stored in an airtight container or zippered bag and consumed within 5 days.
Step 5: Enjoy!
Your homemade yogurt tubes are now ready to be enjoyed! For frozen yogurt tubes, you can eat them straight from the freezer for a refreshing frozen treat, or allow them to thaw slightly for a softer, more slushy consistency. For chilled yogurt tubes, they are ready to eat right from the refrigerator.
That’s all there is to it! Making homemade yogurt tubes is a simple, fun, and rewarding way to provide your family with healthy and delicious snacks.
Nutrition Facts (Estimated)
Please note that the nutrition facts for homemade yogurt tubes will vary depending on the type of yogurt and fruit you use. The following is an approximate estimate per serving (1 yogurt tube, assuming 12 servings from the recipe):
- Servings: 12 tubes
- Calories per Serving (Estimated): 50-100 calories (This range depends heavily on the type of yogurt and fruit used. Plain non-fat yogurt with berries will be on the lower end, while whole milk Greek yogurt with banana and honey will be on the higher end).
General Nutritional Benefits (per serving, approximate, based on using plain yogurt and berries):
- Protein: 3-7 grams (depending on yogurt type – Greek yogurt will be higher)
- Fat: 0-5 grams (depending on yogurt type – non-fat to whole milk)
- Carbohydrates: 8-15 grams (primarily from fruit and yogurt’s natural sugars)
- Sugar: 6-12 grams (natural sugars from fruit and yogurt – significantly lower than most store-bought tubes)
- Calcium: Good source (from yogurt)
- Vitamins and Antioxidants: Varies depending on the fruit used, but generally a good source of vitamins (like Vitamin C from berries) and antioxidants.
- Probiotics: (From yogurt) Beneficial for gut health.
Important Note: These are estimates. For more precise nutritional information, you can use online nutrition calculators and input the specific brands and types of yogurt and fruit you use. Homemade yogurt tubes are generally a much healthier option than store-bought versions because you control the ingredients and avoid added sugars, artificial flavors, and preservatives.
Preparation Time
This recipe is incredibly quick to prepare!
- Prep Time: 5 minutes
- Total Time: 5 minutes (plus freezing time if making frozen yogurt tubes)
The actual hands-on time to blend the ingredients and fill the tubes is minimal, making it a perfect snack to whip up even on the busiest days. Freezing time is passive, and you can easily prepare a batch in advance for grab-and-go convenience.
How to Serve Homemade Yogurt Tubes
Homemade yogurt tubes are incredibly versatile and can be enjoyed in various ways. Here are some serving suggestions:
- Frozen Treat: Enjoy straight from the freezer for a refreshing and healthy alternative to ice pops or ice cream. Perfect for hot days or as a cool-down after outdoor activities.
- Lunchbox Addition: Pack a frozen yogurt tube in a lunchbox with an ice pack in the morning. By lunchtime, it will be perfectly thawed and ready to eat as a nutritious and enjoyable snack or dessert.
- After-School Snack: A quick and healthy after-school snack that kids will love. It’s a much better option than processed snacks loaded with sugar and artificial ingredients.
- Breakfast on the Go: For busy mornings, a thawed yogurt tube can be a convenient and nutritious breakfast option, especially when paired with a piece of fruit or whole-grain toast.
- Pre- or Post-Workout Snack: Yogurt provides protein and carbohydrates, making yogurt tubes a good option for a light snack before or after exercise.
- Dessert Alternative: Serve as a lighter and healthier dessert option after dinner.
- Party Treat: Homemade yogurt tubes can be a fun and healthy party treat for kids’ birthdays or gatherings. You can even get creative with flavors and colors to match the party theme.
- For Picky Eaters: The familiar tube format can make yogurt more appealing to picky eaters who might be hesitant to eat yogurt from a cup. The customizable flavors also increase the chances of finding a fruit combination they enjoy.
Serving Tips:
- Thawing Time: If serving frozen yogurt tubes, let them thaw for a few minutes at room temperature or briefly run them under warm water for easier squeezing and a slightly softer texture.
- Presentation: For a fun presentation, you can cut the top off the yogurt tube and serve it in a small bowl like a mini yogurt parfait. You can add toppings like granola, chopped nuts (for older children), or a drizzle of honey or maple syrup.
- Pairing: Serve yogurt tubes alongside other healthy snacks like fresh fruit slices, vegetable sticks, or whole-grain crackers for a balanced snack plate.
Additional Tips for Perfect Homemade Yogurt Tubes
Here are five helpful tips to ensure your homemade yogurt tubes are a success every time:
- Choose High-Quality Yogurt: Starting with a good quality yogurt is key to the flavor and texture of your yogurt tubes. Opt for plain, unsweetened yogurt and choose a type you enjoy the taste of. Experiment with Greek yogurt for extra creaminess and protein or explore dairy-free alternatives for dietary needs.
- Don’t Overfill the Tubes: Always leave at least ½ inch of headspace at the top of each yogurt tube or pouch before sealing. Yogurt expands when it freezes, and overfilling can cause the tubes to burst in the freezer, leading to a messy cleanup and wasted snack.
- Freeze in a Single Layer: Lay the filled yogurt tubes flat on a baking sheet or tray in a single layer when freezing. This ensures they freeze evenly and prevents them from sticking together in a clump. Once frozen solid, you can transfer them to a freezer bag or container for long-term storage.
- Experiment with Flavor Combinations: Get creative with your fruit choices! Don’t be afraid to experiment with different fruit combinations to find your family’s favorites. Try berry medleys, tropical blends, stone fruit combinations, or even add a touch of vanilla extract or cinnamon for extra flavor complexity. Consider adding a tablespoon of nut butter (for older children and those without allergies) for added protein and flavor.
- Sweeten Naturally (If Needed): If your fruit isn’t sweet enough or you prefer a sweeter yogurt tube, opt for natural sweeteners like honey, maple syrup, or a few drops of stevia. Add sweetener sparingly and taste as you go to avoid making them overly sweet. Remember that the goal is to create a healthy snack, so minimizing added sugar is always a good idea.
Frequently Asked Questions (FAQ) About Homemade Yogurt Tubes
Q1: Can I use flavored yogurt instead of plain yogurt?
A: While you can use flavored yogurt, it’s generally recommended to start with plain yogurt to control the sugar content and artificial ingredients. Flavored yogurts are often high in added sugars. By using plain yogurt and adding your own fruit, you create a much healthier snack with natural sweetness. If you do use flavored yogurt, be mindful of the sugar content and consider reducing or omitting any additional sweeteners.
Q2: How long do homemade yogurt tubes last in the freezer?
A: Homemade yogurt tubes will last for up to 3 months in the freezer if stored properly in a freezer-safe bag or container. After 3 months, the quality may start to decline slightly in terms of texture and flavor, but they will still be safe to eat for longer if continuously frozen. For the best taste and texture, aim to consume them within 3 months.
Q3: Can I make these yogurt tubes dairy-free?
A: Absolutely! You can easily make dairy-free yogurt tubes by using plant-based yogurt alternatives such as coconut yogurt, almond yogurt, soy yogurt, or oat yogurt. Choose a plain, unsweetened variety of your preferred dairy-free yogurt and follow the recipe as directed. Dairy-free yogurt tubes are a fantastic option for those with dairy allergies, lactose intolerance, or vegan diets.
Q4: My yogurt tubes are bursting in the freezer, what am I doing wrong?
A: Bursting yogurt tubes are usually caused by overfilling. Make sure you leave at least ½ inch of headspace at the top of each tube or pouch before sealing. This space allows for expansion as the yogurt freezes. Also, ensure your tubes or pouches are properly sealed to prevent leaks and bursting. Laying them flat to freeze initially can also help prevent uneven freezing and pressure buildup.
Q5: Can I refreeze thawed yogurt tubes?
A: It’s generally not recommended to refreeze thawed yogurt tubes. Refreezing can negatively impact the texture, making them icy and less appealing. It can also increase the risk of bacterial growth. It’s best to only thaw what you plan to consume immediately. If a yogurt tube has partially thawed but is still mostly frozen, you can refreeze it, but the quality may be slightly compromised. For optimal quality and safety, avoid refreezing completely thawed yogurt tubes.
This comprehensive guide to homemade yogurt tubes provides everything you need to create this healthy and delicious snack at home. Enjoy experimenting with flavors and making this recipe your own!
Print
Homemade Yogurt Tubes Recipe
Ingredients
- Plain Yogurt: The foundation of our yogurt tubes is, of course, yogurt! Plain yogurt is the star here because it offers a blank canvas for flavor customization and allows you to control the sweetness level. Opting for plain yogurt over flavored varieties significantly reduces added sugars and artificial flavors that are commonly found in store-bought yogurt tubes.
- Yogurt Types: You have a wonderful array of yogurt options to choose from.
- Greek Yogurt: For a thicker, creamier texture and an extra boost of protein, Greek yogurt is an excellent choice. Its strained nature removes whey, resulting in a richer consistency and higher protein content, which helps keep you feeling fuller for longer. Greek yogurt also tends to be tangier, which can balance the sweetness of the fruit beautifully.
- Regular Yogurt (American-style): This yogurt is lighter in texture compared to Greek yogurt. It’s still a fantastic base for yogurt tubes and provides a classic yogurt flavor. If you prefer a slightly thinner consistency in your tubes, regular yogurt is a great choice.
- Whole Milk Yogurt: Using whole milk yogurt will result in the richest and creamiest yogurt tubes. The higher fat content contributes to a luxurious texture and can be particularly satisfying. This is a great option for younger children or anyone who enjoys a richer treat.
- Low-Fat or Non-Fat Yogurt: If you’re watching your fat intake, low-fat or non-fat yogurt will work perfectly well. Keep in mind that these options might be slightly less creamy than whole milk or Greek yogurt, but they still provide the nutritional benefits and delicious flavor.
- Dairy-Free Yogurt Alternatives: For those with dairy sensitivities or following a vegan diet, there are fantastic plant-based yogurt alternatives available.
- Coconut Yogurt: Coconut yogurt is naturally creamy and adds a subtle coconut flavor, which pairs wonderfully with tropical fruits like mango and pineapple, as well as berries.
- Almond Yogurt: Almond yogurt is a lighter option with a slightly nutty flavor. It’s a good source of vitamin E and is lower in calories than coconut yogurt.
- Soy Yogurt: Soy yogurt has a smooth texture and a neutral flavor, making it a versatile base for any fruit combination. It’s also a good source of protein.
- Oat Yogurt: Oat yogurt is known for its creamy texture and slightly sweet, oaty flavor. It’s often well-tolerated and a good source of fiber.
- Choosing the Right Yogurt: When selecting your yogurt, read the ingredient list to ensure there are minimal additives, thickeners, or added sugars. Plain, unsweetened yogurt is always the best starting point. You can then control the sweetness and flavor profile yourself.
- Yogurt Types: You have a wonderful array of yogurt options to choose from.
- Fruit: The fruit component is where you can truly let your creativity shine and tailor the yogurt tubes to your family’s preferences and seasonal availability. Fresh or frozen fruit both work wonderfully.
- Berry Bliss: Berries are a classic and nutritious choice.
- Strawberries: Sweet, juicy, and packed with vitamin C, strawberries add a vibrant color and delightful flavor.
- Blueberries: Bursting with antioxidants and a slightly tart flavor, blueberries are a superfood powerhouse.
- Raspberries: Tangy and slightly floral, raspberries bring a sophisticated flavor and beautiful color.
- Blackberries: Rich and slightly sweet with a hint of earthiness, blackberries offer a unique and delicious flavor.
- Mixed Berries: A combination of berries provides a complex flavor profile and a variety of nutrients.
- Tropical Temptation: For a taste of the tropics, consider these fruits:
- Mango: Sweet, creamy, and exotic, mango adds a luscious tropical flavor.
- Pineapple: Tangy and sweet, pineapple provides a refreshing tropical twist.
- Banana: Creamy and naturally sweet, bananas add a smooth texture and potassium boost. (Bananas can make the yogurt tubes slightly thicker).
- Stone Fruit Sensations: When in season, stone fruits are a fantastic option.
- Peaches: Sweet and juicy, peaches offer a classic summer flavor.
- Nectarines: Similar to peaches but with smoother skin, nectarines are equally delicious.
- Plums: Slightly tart and sweet, plums add a unique flavor and vibrant color.
- Cherries: Sweet and slightly tart, cherries bring a rich flavor and beautiful color. (Pit them before blending!)
- Other Fruit Options: Don’t limit yourself to just these!
- Applesauce (Unsweetened): For a smooth and naturally sweet option, unsweetened applesauce can be blended with yogurt.
- Pears: Sweet and mild, pears offer a delicate flavor and smooth texture.
- Citrus (Use Sparingly): A little bit of orange or mandarin orange can add a bright flavor, but be mindful of acidity, especially with dairy yogurt.
- Frozen vs. Fresh Fruit:
- Frozen Fruit: Frozen fruit is incredibly convenient and often more affordable than fresh fruit, especially out of season. It also helps to thicken the yogurt tubes and creates a colder, more refreshing treat. No need to thaw frozen fruit before blending – just toss it in!
- Fresh Fruit: Fresh fruit brings vibrant flavors and textures. Ensure your fresh fruit is ripe for the best sweetness and flavor.
- Fruit Preparation: Wash fresh fruit thoroughly. Remove stems, pits, and peels as needed. For larger fruits like mangoes or peaches, chop them into smaller pieces before blending.
- Berry Bliss: Berries are a classic and nutritious choice.
Instructions
- Plain Yogurt: The foundation of our yogurt tubes is, of course, yogurt! Plain yogurt is the star here because it offers a blank canvas for flavor customization and allows you to control the sweetness level. Opting for plain yogurt over flavored varieties significantly reduces added sugars and artificial flavors that are commonly found in store-bought yogurt tubes.
- Yogurt Types: You have a wonderful array of yogurt options to choose from.
- Greek Yogurt: For a thicker, creamier texture and an extra boost of protein, Greek yogurt is an excellent choice. Its strained nature removes whey, resulting in a richer consistency and higher protein content, which helps keep you feeling fuller for longer. Greek yogurt also tends to be tangier, which can balance the sweetness of the fruit beautifully.
- Regular Yogurt (American-style): This yogurt is lighter in texture compared to Greek yogurt. It’s still a fantastic base for yogurt tubes and provides a classic yogurt flavor. If you prefer a slightly thinner consistency in your tubes, regular yogurt is a great choice.
- Whole Milk Yogurt: Using whole milk yogurt will result in the richest and creamiest yogurt tubes. The higher fat content contributes to a luxurious texture and can be particularly satisfying. This is a great option for younger children or anyone who enjoys a richer treat.
- Low-Fat or Non-Fat Yogurt: If you’re watching your fat intake, low-fat or non-fat yogurt will work perfectly well. Keep in mind that these options might be slightly less creamy than whole milk or Greek yogurt, but they still provide the nutritional benefits and delicious flavor.
- Dairy-Free Yogurt Alternatives: For those with dairy sensitivities or following a vegan diet, there are fantastic plant-based yogurt alternatives available.
- Coconut Yogurt: Coconut yogurt is naturally creamy and adds a subtle coconut flavor, which pairs wonderfully with tropical fruits like mango and pineapple, as well as berries.
- Almond Yogurt: Almond yogurt is a lighter option with a slightly nutty flavor. It’s a good source of vitamin E and is lower in calories than coconut yogurt.
- Soy Yogurt: Soy yogurt has a smooth texture and a neutral flavor, making it a versatile base for any fruit combination. It’s also a good source of protein.
- Oat Yogurt: Oat yogurt is known for its creamy texture and slightly sweet, oaty flavor. It’s often well-tolerated and a good source of fiber.
- Choosing the Right Yogurt: When selecting your yogurt, read the ingredient list to ensure there are minimal additives, thickeners, or added sugars. Plain, unsweetened yogurt is always the best starting point. You can then control the sweetness and flavor profile yourself.
- Yogurt Types: You have a wonderful array of yogurt options to choose from.
- Fruit: The fruit component is where you can truly let your creativity shine and tailor the yogurt tubes to your family’s preferences and seasonal availability. Fresh or frozen fruit both work wonderfully.
- Berry Bliss: Berries are a classic and nutritious choice.
- Strawberries: Sweet, juicy, and packed with vitamin C, strawberries add a vibrant color and delightful flavor.
- Blueberries: Bursting with antioxidants and a slightly tart flavor, blueberries are a superfood powerhouse.
- Raspberries: Tangy and slightly floral, raspberries bring a sophisticated flavor and beautiful color.
- Blackberries: Rich and slightly sweet with a hint of earthiness, blackberries offer a unique and delicious flavor.
- Mixed Berries: A combination of berries provides a complex flavor profile and a variety of nutrients.
- Tropical Temptation: For a taste of the tropics, consider these fruits:
- Mango: Sweet, creamy, and exotic, mango adds a luscious tropical flavor.
- Pineapple: Tangy and sweet, pineapple provides a refreshing tropical twist.
- Banana: Creamy and naturally sweet, bananas add a smooth texture and potassium boost. (Bananas can make the yogurt tubes slightly thicker).
- Stone Fruit Sensations: When in season, stone fruits are a fantastic option.
- Peaches: Sweet and juicy, peaches offer a classic summer flavor.
- Nectarines: Similar to peaches but with smoother skin, nectarines are equally delicious.
- Plums: Slightly tart and sweet, plums add a unique flavor and vibrant color.
- Cherries: Sweet and slightly tart, cherries bring a rich flavor and beautiful color. (Pit them before blending!)
- Other Fruit Options: Don’t limit yourself to just these!
- Applesauce (Unsweetened): For a smooth and naturally sweet option, unsweetened applesauce can be blended with yogurt.
- Pears: Sweet and mild, pears offer a delicate flavor and smooth texture.
- Citrus (Use Sparingly): A little bit of orange or mandarin orange can add a bright flavor, but be mindful of acidity, especially with dairy yogurt.
- Frozen vs. Fresh Fruit:
- Frozen Fruit: Frozen fruit is incredibly convenient and often more affordable than fresh fruit, especially out of season. It also helps to thicken the yogurt tubes and creates a colder, more refreshing treat. No need to thaw frozen fruit before blending – just toss it in!
- Fresh Fruit: Fresh fruit brings vibrant flavors and textures. Ensure your fresh fruit is ripe for the best sweetness and flavor.
- Fruit Preparation: Wash fresh fruit thoroughly. Remove stems, pits, and peels as needed. For larger fruits like mangoes or peaches, chop them into smaller pieces before blending.
- Berry Bliss: Berries are a classic and nutritious choice.
Nutrition
- Serving Size: One Normal Portion
- Calories: 50-100
- Sugar: 6-12 grams
- Fat: 0-5 grams
- Carbohydrates: 8-15 grams
- Protein: 3-7 grams