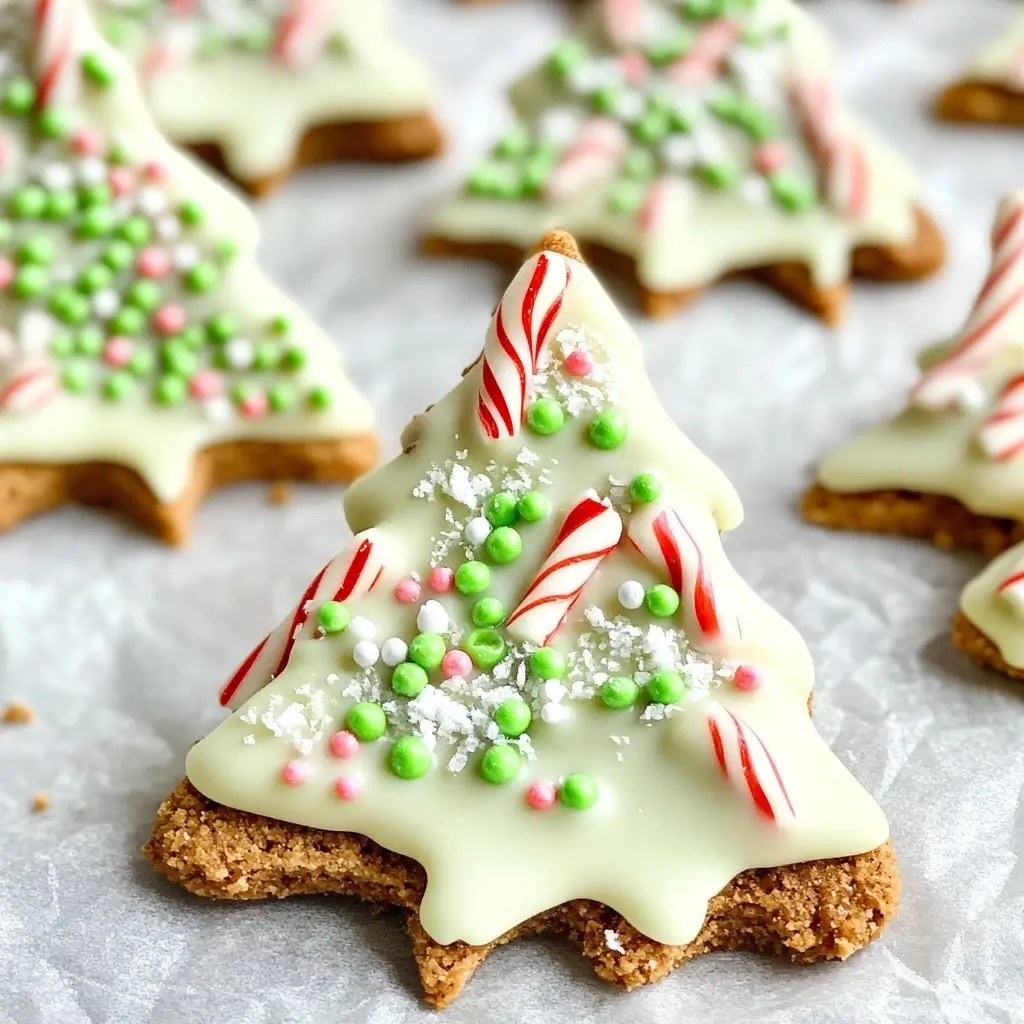
As the holiday season approaches, the aroma of freshly baked cookies fills the air, bringing warmth and joy to homes everywhere. Among the plethora of festive treats, Easy White Chocolate Biscoff Christmas Tree Cookies stand out as a delightful addition to any Christmas celebration. Combining the rich, spiced flavor of Biscoff cookie butter with the creamy sweetness of white chocolate, these cookies are sure to become a family favorite. Whether you’re a seasoned baker or a novice in the kitchen, this easy-to-follow recipe will guide you through creating these charming and delicious holiday cookies.
These cookies offer a perfect balance of texture and flavor, with a soft, chewy base and a smooth, melt-in-your-mouth white chocolate coating. The Biscoff cookie butter adds a unique depth of flavor, making them far more than your typical Christmas cookie. Plus, their festive tree shape makes them a fun and whimsical treat to share with family and friends. Ideal for decorating with colorful sprinkles or edible glitter, these cookies will brighten up any holiday cookie platter. Get ready to impress your loved ones with this simple yet stunning treat!
Ingredients
To start your baking journey with these festive cookies, gather the following ingredients:
- 1 cup Biscoff cookie butter
- 1/2 cup softened butter
- 1 cup brown sugar
- 1 egg
- 2 1/2 cups all-purpose flour
- 1 tsp baking soda
- 1/2 tsp vanilla extract
- 1 cup white chocolate chips
- Green food coloring (optional)
- Sprinkles for decoration
These ingredients come together to create a cookie that is not only visually appealing but also tantalizing to the taste buds.
Instructions
Creating these Easy White Chocolate Biscoff Christmas Tree Cookies is a simple process that even beginners can master. Follow these step-by-step instructions to bring your holiday treats to life:
- Preheat the Oven
Begin by preheating your oven to 350°F (175°C). This ensures that your cookies bake evenly and achieve a perfect golden hue. - Mix the Main Ingredients
In a large mixing bowl, combine the Biscoff cookie butter, softened butter, and brown sugar. Use a hand or stand mixer to blend these ingredients until smooth and creamy. - Add Egg and Vanilla
Crack the egg into the mixture and add the vanilla extract. Stir until these ingredients are fully incorporated, creating a cohesive batter. - Incorporate Dry Ingredients
Gradually add the all-purpose flour and baking soda to the wet mixture. Mix until a dough forms. The dough should be pliable and easy to handle. - Shape the Cookies
Roll the dough into small balls and shape them into Christmas trees on a baking sheet lined with parchment paper. This step is where your creativity can shine, so have fun with the shapes! - Bake
Place the shaped cookies into the preheated oven and bake for 10-12 minutes or until they turn a light golden color. Be careful not to overbake, as this can dry out the cookies. - Cool the Cookies
Remove the cookies from the oven and allow them to cool on a wire rack. This step is crucial for the next part of the decoration process. - Prepare the White Chocolate Drizzle
Melt the white chocolate chips in a microwave-safe bowl or using a double boiler. If desired, mix in a few drops of green food coloring to create a festive hue. - Decorate
Drizzle the melted white chocolate over the cooled cookies and add sprinkles for decoration. This final touch not only enhances the appearance but also adds a delightful crunch.
Nutrition Facts
Understanding the nutritional content of your holiday treats can help you enjoy them responsibly. Here is an approximate nutritional breakdown per cookie:
- Calories: 180
- Total Fat: 9g
- Saturated Fat: 5g
- Cholesterol: 20mg
- Sodium: 95mg
- Total Carbohydrates: 23g
- Dietary Fiber: 1g
- Sugars: 15g
- Protein: 2g
Please note that these values are estimates and may vary based on the exact size of your cookies and any variations in ingredient brands.
How to Serve
Serving these cookies can be as creative as making them. Here are several inspiring ideas to elevate your cookie presentation and make any occasion extra special:
1. Holiday Platter
Create a stunning holiday platter that showcases your cookies alongside other festive treats. Start by selecting a large, decorative platter or a wooden board for a rustic touch. Arrange your cookies in a visually appealing way, perhaps by grouping similar flavors or colors together. To enhance the festive spirit, incorporate seasonal items such as candy canes, chocolate truffles, gingerbread men, or even small meringues. Consider adding some greenery, like sprigs of holly or rosemary, to fill in empty spaces and add a pop of color. For a final touch, sprinkle a bit of powdered sugar over the cookies for a snowy effect, or use edible glitter to bring a sparkle to the arrangement.
2. Gift Boxes
Transform your cookies into thoughtful homemade gifts by packaging them in decorative gift boxes. Choose boxes that reflect the season or the recipient’s personal style. Line the boxes with parchment paper or festive tissue paper to cushion the cookies and add an elegant flair. You can also include a personalized note or a recipe card to share the love behind your baking. For an extra touch, tie the boxes with a beautiful ribbon or twine and attach a small ornament or a sprig of pine to make them even more special. These homemade gifts are perfect for friends, family, or neighbors, and they convey a heartfelt sentiment that store-bought treats simply can’t match.
3. Dessert Table
Elevate your holiday gatherings by incorporating these cookies into a lavish dessert table. Start with a themed tablecloth or runner that matches the occasion, and use tiered stands to create height and visual interest. Arrange the cookies on different levels, mixing them with other seasonal favorites like pies, cakes, and pastries. Consider serving a hot cocoa bar alongside the dessert table, complete with toppings like whipped cream, marshmallows, and peppermint sticks. This interactive element allows guests to customize their drinks while enjoying the cookies. You might also include a selection of seasonal fruits, nuts, and chocolates for a well-rounded dessert experience that caters to varying tastes.
4. Cookie Exchange
Take advantage of the festive spirit by hosting or participating in a cookie exchange party. These gatherings are a wonderful way to share your cookie creations while sampling others’ delightful treats. To organize a successful cookie exchange, invite friends and family to bring a batch of their favorite cookies, along with copies of the recipe to share. Set a date and location that works for everyone, and consider themes such as “classic holiday flavors” or “international cookies” for added fun. Provide festive packaging materials so guests can easily transport their cookies home. This not only fosters a sense of community but also allows everyone to leave with a diverse assortment of cookies to enjoy throughout the holiday season.
By incorporating these serving ideas, you can enhance the experience of sharing your delicious cookies, making them not just a treat, but a centerpiece of celebration and joy. Whether you’re hosting a gathering or gifting to loved ones, the presentation and thoughtfulness behind serving these cookies will leave a lasting impression.
Additional Tips for Perfect Cookies
When it comes to baking cookies, attention to detail can make all the difference in achieving that perfect texture and flavor. Here are some essential tips to enhance your cookie-making experience and ensure the best possible results.
Chill the Dough
One of the most crucial steps in cookie preparation is chilling the dough. If you find that your cookie dough is too sticky to handle, a simple solution is to place it in the refrigerator for about 30 minutes. Chilling the dough not only makes it easier to shape but also helps to prevent the cookies from spreading too much during baking. The cold temperature solidifies the fats in the dough, leading to a firmer consistency. Moreover, allowing the dough to rest in the fridge also enhances the flavors as the ingredients have time to meld together. For best results, wrap the dough tightly in plastic wrap or place it in an airtight container to prevent it from drying out or absorbing other odors in the refrigerator.
Uniform Size
Achieving uniform cookie size is essential for even baking. When cookies are of similar size and thickness, they will cook at the same rate, ensuring that none are overbaked or underbaked. To achieve uniformity, consider using a cookie scoop or a kitchen scale to measure out the dough. A standard cookie scoop typically holds about 1.5 tablespoons of dough, which is perfect for most cookie recipes. If you prefer a more rustic look, you can roll the dough into balls by hand, but aim for consistency in size. Additionally, when placing the dough on the baking sheet, make sure to leave enough space between each cookie to allow for spreading without merging into each other.
Alternative Shapes
While the traditional Christmas tree shape is undeniably festive and charming, don’t hesitate to unleash your creativity by experimenting with various shapes. Consider using cookie cutters in the form of stars, snowflakes, gingerbread men, or even holiday-themed items like ornaments or candy canes. You can also try freehand shaping for a more personalized touch. For added flair, decorate cookies with icing, sprinkles, or colored sugar to create unique designs that reflect your style. This is especially fun for baking with children, as they can take part in designing their own cookies. Don’t forget to adjust baking times slightly if you’re using larger or smaller shapes, as this can affect how quickly they cook through.
Storage
Proper storage is key to maintaining the freshness and flavor of your cookies. Once your cookies have cooled completely, store them in an airtight container at room temperature. This will keep them soft and chewy for up to a week, depending on the recipe and ingredients used. Place a piece of parchment paper or wax paper between layers of cookies to prevent them from sticking together. If you want to prolong their shelf life, consider freezing them. To freeze cookies, place them in a single layer on a baking sheet and freeze until solid. Then, transfer the cookies to a freezer-safe bag or container, separating layers with parchment paper to avoid sticking. Most cookies can be frozen for up to three months. When you’re ready to enjoy them, simply let them thaw at room temperature or warm them briefly in the oven for a fresh-baked taste.
By following these additional tips, you can elevate your cookie-baking game, ensuring delicious, beautifully shaped treats that will delight family and friends during the holiday season or any special occasion. Happy baking!
FAQs
1. Can I substitute Biscoff cookie butter with another type of spread?
Yes, you can substitute Biscoff cookie butter with peanut butter or almond butter, but note that the flavor profile will change.
2. What if I don’t have green food coloring?
The green food coloring is optional and only for visual appeal. The cookies will taste just as delicious without it.
3. How can I ensure the cookies don’t spread too much during baking?
Make sure your dough is firm by chilling it if necessary, and avoid over-creaming the butter and sugar.
4. Can I add nuts or dried fruits to the recipe?
Absolutely! Chopped nuts or dried cranberries can add texture and flavor to the cookies.
5. Is it possible to make these cookies gluten-free?
Yes, by using a gluten-free all-purpose flour blend, you can adapt this recipe to be gluten-free.
Conclusion
Easy White Chocolate Biscoff Christmas Tree Cookies are a festive and fun way to celebrate the holiday season. With their delightful shape, rich flavor, and eye-catching decoration, they are a treat for both the palate and the eyes. Whether you’re baking for family, friends, or a holiday gathering, these cookies will surely spread cheer and warmth. The combination of white chocolate and Biscoff cookie butter creates an irresistible flavor that everyone will love. Embrace the joy of baking and add a touch of homemade magic to your holiday festivities with these delightful cookies. Happy baking and happy holidays! 🎄