

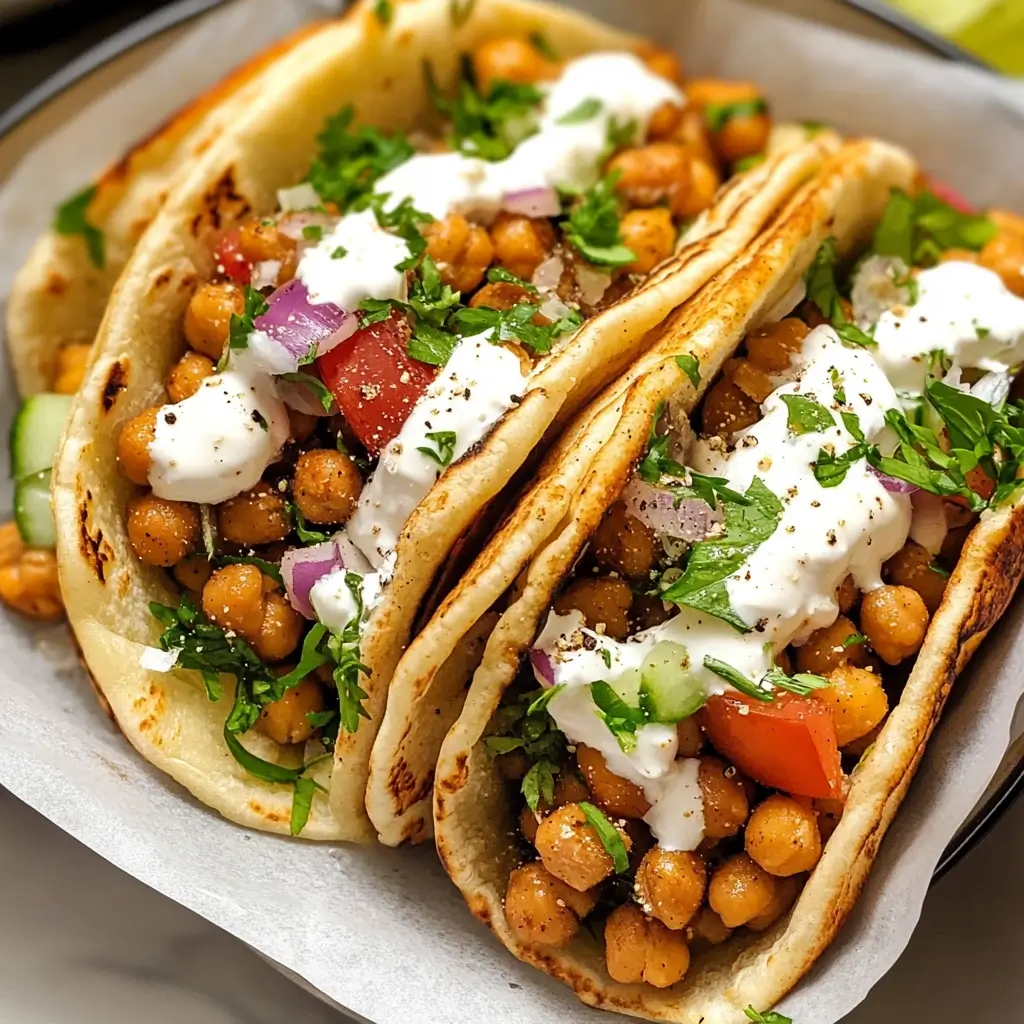

Let me tell you, weeknight dinners in our house can sometimes feel like a culinary tightrope walk. Balancing healthy, delicious, and, most importantly, quick, often feels like an impossible feat. That’s where these Easy Vegetarian Chickpea Gyros swooped in and saved the day, or rather, many days! From the first bite, my family was hooked. Even my notoriously picky eater, who usually eyes anything green with suspicion, devoured these gyros with gusto. The smoky, spiced chickpeas nestled in warm pita bread, bursting with fresh, crunchy vegetables and a creamy, tangy sauce – it’s a flavor explosion that’s both satisfying and surprisingly light. What I love most about this recipe, besides the sheer deliciousness, is its simplicity. It’s truly “easy” as advertised, making it perfect for busy weeknights or a relaxed weekend lunch. If you’re looking for a vibrant, flavorful vegetarian meal that’s guaranteed to be a crowd-pleaser, look no further. These chickpea gyros are about to become your new go-to!
Ingredients: The Building Blocks of Flavorful Chickpea Gyros
The beauty of these vegetarian chickpea gyros lies in the harmonious blend of simple, fresh ingredients. Each component plays a crucial role in creating the final symphony of flavors and textures. Let’s break down each ingredient and understand its contribution to this delicious dish.
For the Spiced Chickpeas:
- 2 cans (15 ounces each) chickpeas, drained and rinsed: Chickpeas are the star of our vegetarian gyros, providing a hearty, protein-rich base. Rinsing them removes excess sodium and any starchy liquid, ensuring a cleaner flavor. You can also cook your own chickpeas from dried, which will offer an even fresher taste and texture. If using dried chickpeas, you’ll need about ¾ cup of dried chickpeas, soaked overnight and then cooked until tender.
- 2 tablespoons olive oil: Olive oil is essential for both flavor and texture. It helps to sauté the chickpeas and spices beautifully, creating a slightly crispy exterior while keeping the inside tender. Extra virgin olive oil is recommended for its richer flavor and health benefits. You could also use avocado oil or another neutral oil if preferred, but olive oil adds a distinct Mediterranean touch that complements the gyro flavors perfectly.
- 1 large onion, finely chopped: Onion forms the aromatic base of our chickpea mixture. As it cooks, it releases its sweetness and savory notes, building a foundation of flavor. Yellow or white onions are ideal for this recipe due to their balanced flavor profile. Finely chopping ensures even cooking and blends seamlessly into the chickpea mixture.
- 2 cloves garlic, minced: Garlic is a flavor powerhouse, adding pungent and savory notes that enhance the overall taste of the gyros. Freshly minced garlic is always best for maximum flavor. If you don’t have fresh garlic, you can substitute with ½ teaspoon of garlic powder, but fresh garlic will provide a more vibrant and authentic taste.
- 1 tablespoon smoked paprika: Smoked paprika is the secret ingredient that elevates these gyros to the next level. It imparts a deep, smoky flavor that mimics the characteristic taste of traditional gyro meat. It adds warmth and complexity that regular paprika simply cannot replicate. If you can’t find smoked paprika, you can use regular paprika, but the smoky element will be missed. Consider adding a tiny touch of liquid smoke (use sparingly, as it’s potent) if you want to try and recreate that smoky note without smoked paprika.
- 1 teaspoon ground cumin: Cumin brings an earthy, warm, and slightly citrusy flavor that is quintessential in Mediterranean and Middle Eastern cuisine. It complements the smoked paprika beautifully and adds depth to the spice blend. Freshly ground cumin seeds, toasted lightly before grinding, will offer the most intense flavor, but pre-ground cumin works just as well for convenience.
- 1 teaspoon dried oregano: Oregano is a classic Mediterranean herb that provides a slightly peppery and aromatic flavor. It adds a touch of herbaceousness that balances the smoky and earthy spices. Dried oregano is readily available and works perfectly in this recipe. If you have fresh oregano, you can use about 1 tablespoon of chopped fresh oregano, added towards the end of cooking to preserve its fresh flavor.
- ½ teaspoon salt: Salt is crucial for seasoning and enhancing the flavors of all the other ingredients. It balances the sweetness of the onion and the spiciness of the paprika, bringing all the flavors together. Adjust the amount of salt to your preference. Sea salt or kosher salt are excellent choices.
- ¼ teaspoon black pepper: Black pepper adds a touch of subtle heat and complexity. Freshly ground black pepper is always preferred for its brighter and more nuanced flavor.
For the Creamy Yogurt Sauce:
- 1 cup plain Greek yogurt: Greek yogurt forms the creamy base of our delicious sauce. It provides a tangy and refreshing counterpoint to the spiced chickpeas. Full-fat Greek yogurt will offer the richest flavor and creamiest texture, but you can use low-fat or non-fat Greek yogurt for a lighter option. Make sure to use plain, unsweetened Greek yogurt.
- 1 tablespoon lemon juice, freshly squeezed: Fresh lemon juice adds brightness and acidity to the yogurt sauce, cutting through the richness and enhancing the overall flavor profile. Freshly squeezed lemon juice is essential for the best flavor. Bottled lemon juice can be used in a pinch, but fresh juice will always be superior.
- 1 clove garlic, minced: Just like in the chickpea mixture, garlic adds a pungent and savory note to the yogurt sauce, complementing the other flavors and adding depth. Freshly minced garlic is recommended for the best flavor.
- ¼ cup chopped fresh dill: Fresh dill brings a bright, herbaceous, and slightly citrusy flavor to the yogurt sauce. It adds a refreshing element that pairs perfectly with the creamy yogurt and spiced chickpeas. Fresh dill is crucial for this sauce. Dried dill will not provide the same fresh and vibrant flavor. If you absolutely cannot find fresh dill, you might consider substituting with fresh mint or parsley for a different, but still fresh, herbaceous note.
- Salt and pepper to taste: Salt and pepper are used to season the yogurt sauce and balance the flavors. Adjust the amounts to your preference.
For Assembly:
- 4 pita breads: Pita breads are the perfect vessel for our chickpea gyros. They are soft, pliable, and slightly chewy, providing a wonderful texture and flavor. Look for whole wheat pita breads for added fiber and nutritional value. You can also use regular white pita breads. Make sure to warm the pita breads before assembling the gyros for a softer and more enjoyable experience.
- Toppings of your choice: This is where you can get creative and customize your gyros to your liking! Here are some popular and delicious topping suggestions:
- Sliced cucumber: Cucumber adds a refreshing crunch and coolness that complements the warm chickpeas and creamy sauce. English cucumbers or Persian cucumbers are great choices.
- Diced tomatoes: Tomatoes provide sweetness, acidity, and juiciness. Roma tomatoes, cherry tomatoes, or grape tomatoes all work well.
- Red onion slices (thinly sliced): Red onion adds a pungent and slightly spicy bite. Thinly slicing the red onion softens its intensity and makes it more palatable in the gyros. You can also soak the red onion slices in cold water for a few minutes to further reduce their sharpness.
- Feta cheese, crumbled (optional): Feta cheese adds a salty and tangy flavor that complements the Mediterranean flavors of the gyros. If you are vegan or dairy-free, you can omit the feta or use a vegan feta alternative.
- Kalamata olives, halved (optional): Kalamata olives add a briny and salty flavor that enhances the Mediterranean vibe. Pitted Kalamata olives are the easiest to use.
- Fresh parsley, chopped (optional): Fresh parsley adds a fresh, herbaceous touch and a pop of color.
- Hot sauce or chili flakes (optional): For those who like a little heat, a drizzle of hot sauce or a sprinkle of chili flakes can add an extra kick.
These ingredients, when combined, create a symphony of flavors and textures that make these vegetarian chickpea gyros an absolute delight. The smoky and spiced chickpeas, the creamy and tangy yogurt sauce, and the fresh, crunchy toppings all work together in perfect harmony.
Instructions: Crafting Your Perfect Chickpea Gyros Step-by-Step
Making these Easy Vegetarian Chickpea Gyros is surprisingly straightforward. With a few simple steps, you’ll be enjoying a flavorful and satisfying meal in no time. Let’s break down the process into easy-to-follow instructions.
Step 1: Prepare the Spiced Chickpeas
- Sauté Aromatics: Heat the olive oil in a large skillet over medium heat. Add the finely chopped onion and cook for about 5-7 minutes, or until softened and translucent. Stir occasionally to prevent burning. Softening the onions is crucial as it releases their sweetness and creates a flavorful base for the chickpeas. Don’t rush this step; properly sautéed onions will significantly enhance the overall taste.
- Add Garlic and Spices: Add the minced garlic, smoked paprika, cumin, and dried oregano to the skillet. Cook for another minute, stirring constantly, until fragrant. This step is important because heating the spices releases their aromatic oils, intensifying their flavor and infusing the onions and oil with deliciousness. Be careful not to burn the garlic and spices; they should be fragrant, not scorched.
- Incorporate Chickpeas: Add the drained and rinsed chickpeas, salt, and black pepper to the skillet. Stir well to coat the chickpeas evenly with the spice mixture. Make sure all the chickpeas are nicely coated in the flavorful spice blend.
- Sauté Chickpeas: Cook for 8-10 minutes, stirring occasionally, until the chickpeas are heated through and slightly softened. As the chickpeas sauté, they will absorb the flavors of the spices and become slightly crispy on the outside while remaining tender on the inside. You can gently mash some of the chickpeas with the back of a spoon or spatula during cooking if you prefer a slightly creamier texture. This is optional but can enhance the overall texture of the filling.
- Taste and Adjust Seasoning: Taste the chickpea mixture and adjust seasoning as needed. You might want to add a little more salt, pepper, or smoked paprika to your liking. This is a crucial step in any recipe. Taste and adjust seasoning to ensure the flavors are perfectly balanced to your preference.
Step 2: Prepare the Creamy Yogurt Sauce
- Combine Ingredients: In a medium bowl, combine the plain Greek yogurt, fresh lemon juice, minced garlic, and chopped fresh dill.
- Season and Mix: Season with salt and pepper to taste. Stir well to combine all ingredients thoroughly.
- Chill (Optional): For best results, cover the yogurt sauce and refrigerate for at least 15-20 minutes, or up to a few hours, to allow the flavors to meld together. Chilling the sauce not only enhances the flavor but also helps to thicken it slightly. However, if you’re short on time, you can use the sauce immediately.
Step 3: Warm the Pita Breads
- Choose Warming Method: You can warm the pita breads in a few different ways:
- Oven: Preheat oven to 350°F (175°C). Wrap pita breads in foil and bake for 5-7 minutes, or until warmed through.
- Skillet: Heat a dry skillet over medium heat. Warm pita breads one at a time for about 30-60 seconds per side, or until softened and heated through. Be careful not to burn them.
- Microwave: Wrap pita breads in a damp paper towel and microwave for 10-20 seconds, or until softened. Microwaving can sometimes make pita breads a little chewy if overheated, so be mindful of the time.
- Keep Warm: Keep the warmed pita breads wrapped in a clean kitchen towel to keep them soft and warm until ready to assemble the gyros.
Step 4: Assemble the Gyros
- Lay out Pita Breads: Place warmed pita breads on a clean surface.
- Fill with Chickpeas: Spoon a generous amount of the spiced chickpea mixture into the center of each pita bread.
- Add Toppings: Top with your desired toppings, such as sliced cucumber, diced tomatoes, red onion slices, crumbled feta cheese (if using), and Kalamata olives (if using).
- Drizzle with Sauce: Drizzle generously with the creamy yogurt sauce over the toppings.
- Fold and Serve: Fold the pita breads in half or roll them up to create gyros. Serve immediately and enjoy your delicious homemade Easy Vegetarian Chickpea Gyros!
Following these step-by-step instructions will guide you to create flavorful and satisfying vegetarian chickpea gyros that are perfect for a quick and healthy meal. The key is to take your time with each step, especially sautéing the onions and spices, to build layers of flavor.
Nutrition Facts: A Wholesome and Satisfying Meal
These Easy Vegetarian Chickpea Gyros are not only delicious but also packed with nutritional goodness. They offer a balanced combination of protein, fiber, and healthy fats, making them a wholesome and satisfying meal option.
Servings: 4
Estimated Calories per Serving: Approximately 450-550 calories (This is an estimate and can vary depending on the specific ingredients used, portion sizes, and toppings.)
Approximate Nutritional Breakdown per Serving (Estimates):
- Calories: 450-550 kcal
- Protein: 18-22 grams
- Fat: 20-25 grams (primarily healthy fats from olive oil and yogurt)
- Saturated Fat: 4-6 grams (depending on the type of yogurt and feta cheese used)
- Cholesterol: 10-20 mg (depending on the type of yogurt used)
- Sodium: 600-800 mg (can vary depending on canned chickpeas and added salt)
- Carbohydrates: 50-60 grams
- Fiber: 12-15 grams
- Sugar: 8-12 grams (naturally occurring sugars from vegetables and yogurt)
Key Nutritional Highlights:
- High in Protein: Chickpeas are an excellent source of plant-based protein, crucial for muscle building, repair, and overall satiety.
- Rich in Fiber: Chickpeas and whole wheat pita bread (if used) are high in dietary fiber, promoting digestive health, regulating blood sugar levels, and contributing to feelings of fullness.
- Good Source of Healthy Fats: Olive oil and Greek yogurt provide healthy monounsaturated and polyunsaturated fats, beneficial for heart health and overall well-being.
- Vitamins and Minerals: Chickpeas are a good source of various vitamins and minerals, including iron, folate, phosphorus, and manganese. Vegetables like tomatoes, cucumbers, and onions contribute vitamins A, C, and K, as well as antioxidants.
- Vegetarian and Customizable: This recipe is naturally vegetarian and can easily be made vegan by omitting the Greek yogurt sauce and feta cheese and using plant-based alternatives. You can also customize the toppings to increase the nutritional value further by adding more vegetables.
Important Note: These nutrition facts are estimates and can vary. For a more precise nutritional analysis, you can use online nutrition calculators and input the specific brands and quantities of ingredients you are using. Pay attention to portion sizes to manage calorie intake. Choosing whole wheat pita bread and low-fat Greek yogurt can further enhance the nutritional profile of these gyros.
Preparation Time: Quick and Convenient
One of the best things about these Easy Vegetarian Chickpea Gyros is their relatively quick preparation time. They are perfect for busy weeknights when you need a delicious and healthy meal on the table without spending hours in the kitchen.
Total Preparation Time: Approximately 30-40 minutes
Breakdown of Time:
- Prep Time (Chopping vegetables, measuring ingredients): 15-20 minutes
- Cook Time (Sautéing onions, spices, and chickpeas): 15-20 minutes
- Yogurt Sauce Preparation: 5 minutes (can be done while chickpeas are cooking)
- Pita Bread Warming: 5-10 minutes (can be done while chickpeas are cooking or sauce is chilling)
- Assembly Time: 5 minutes
Make-Ahead Tips to Shorten Preparation Time:
- Prepare Yogurt Sauce in Advance: The yogurt sauce can be made up to 2-3 days ahead of time and stored in the refrigerator. In fact, allowing the sauce to sit in the refrigerator for a while can actually enhance the flavors.
- Chop Vegetables Ahead: You can chop the onions, cucumbers, and tomatoes ahead of time and store them in airtight containers in the refrigerator for up to a day.
- Cook Chickpeas in Advance (Optional): While the chickpea mixture is best when freshly cooked, you can technically cook the chickpea mixture a few hours ahead of time and gently reheat it before assembling the gyros. However, for optimal texture and flavor, cooking the chickpeas right before serving is recommended.
Tips for Efficiency:
- Multitask: While the onions are sautéing, you can prepare the yogurt sauce. While the chickpeas are cooking, you can chop the toppings and warm the pita breads. Efficient multitasking will significantly reduce the overall preparation time.
- Use Pre-chopped Vegetables (Optional): To save even more time, you can use pre-chopped onions, garlic, and other vegetables available in most grocery stores. However, freshly chopped vegetables generally offer better flavor and texture.
- Organize Your Ingredients: Before you start cooking, gather all your ingredients and have them measured and ready to go. This “mise en place” approach streamlines the cooking process and makes it much more efficient.
With a little planning and efficient multitasking, you can have these Easy Vegetarian Chickpea Gyros ready and on the table in under 40 minutes, making them a perfect choice for a quick and healthy weeknight dinner.
How to Serve: Elevating Your Gyro Experience
Serving these Easy Vegetarian Chickpea Gyros is just as important as the recipe itself! The right accompaniments and presentation can elevate your gyro experience from a simple meal to a delightful culinary adventure. Here are some ideas on how to serve and enhance your chickpea gyros:
Serving Suggestions:
- Classic Gyro Style:
- Warm Pita Pockets: Serve the chickpea filling, yogurt sauce, and toppings nestled inside warm pita pockets for the traditional gyro experience.
- Individual Plates: Arrange warmed pita breads on individual plates. Allow everyone to assemble their own gyros with the chickpea filling, yogurt sauce, and a variety of toppings served in separate bowls. This is a fun and interactive way to serve gyros, especially for families or gatherings.
- Deconstructed Gyro Bowl:
- Gyro Salad Bowl: For a lighter and more refreshing option, create a deconstructed gyro bowl. Layer a bed of mixed greens or chopped romaine lettuce in a bowl. Top with the spiced chickpea mixture, yogurt sauce, and your choice of gyro toppings. This is a great way to enjoy all the flavors of the gyros in a salad format, perfect for a healthier and lower-carb meal.
- Grain Bowl Variation: Add a base of cooked grains like quinoa, couscous, or brown rice to the bowl for added substance and fiber. Top with the chickpea mixture, yogurt sauce, and gyro toppings. This creates a heartier and more filling gyro bowl.
- Side Dishes to Complement Your Gyros:
- Greek Salad (Horiatiki Salad): A classic Greek salad with tomatoes, cucumbers, onions, olives, and feta cheese is the perfect refreshing side dish. The acidity of the salad vinaigrette complements the richness of the gyros.
- Tzatziki Sauce: While the recipe includes a delicious yogurt sauce, serving extra tzatziki sauce on the side is always a welcome addition for dipping or extra drizzling.
- Roasted Lemon Potatoes: Roasted potatoes with lemon and herbs are a flavorful and satisfying side that pairs beautifully with gyros.
- Hummus and Pita Chips: Serve a side of creamy hummus with extra pita chips or crudités (vegetable sticks) for dipping.
- Marinated Olives and Feta: A simple platter of marinated olives and feta cheese makes a great appetizer or side dish to start your gyro meal.
- Watermelon and Feta Salad: In the summer months, a refreshing watermelon and feta salad with mint is a light and flavorful side dish.
Presentation Tips:
- Garnish with Fresh Herbs: Garnish the assembled gyros or gyro bowls with a sprinkle of fresh chopped parsley, dill, or mint for a pop of color and freshness.
- Drizzle with Olive Oil: A light drizzle of extra virgin olive oil over the assembled gyros can add richness and visual appeal.
- Serve with Lemon Wedges: Offer lemon wedges on the side for those who like to add an extra squeeze of lemon juice for brightness.
- Colorful Toppings: Arrange the toppings in separate bowls in an organized and visually appealing manner. The vibrant colors of the vegetables will enhance the overall presentation.
- Warm Pita Breads: Ensure the pita breads are served warm for the best texture and enjoyment.
By considering these serving suggestions and presentation tips, you can create a complete and delightful meal experience around your Easy Vegetarian Chickpea Gyros, impressing your family and guests with both flavor and presentation.
Additional Tips: Elevating Your Chickpea Gyro Game
While this recipe is already wonderfully easy and delicious, there are always ways to tweak and enhance it to suit your preferences and elevate your chickpea gyro game even further. Here are five additional tips to take your gyros to the next level:
1. Marinate the Chickpeas for Deeper Flavor:
For an even more intense and flavorful chickpea experience, consider marinating the chickpeas before sautéing them. After draining and rinsing the chickpeas, toss them in a bowl with the olive oil, smoked paprika, cumin, oregano, salt, and pepper. Let them marinate for at least 30 minutes at room temperature, or up to a few hours in the refrigerator. Marinating allows the chickpeas to absorb the spices more deeply, resulting in a richer and more complex flavor when cooked. This is particularly beneficial if you want a more pronounced smoky flavor from the paprika.
2. Add a Touch of Heat:
If you enjoy a little spice, consider adding a pinch of red pepper flakes or a dash of cayenne pepper to the spice mixture when sautéing the onions and garlic. You can also drizzle your gyros with a touch of hot sauce, such as sriracha or your favorite chili garlic sauce, before serving. Alternatively, finely chopped fresh chili peppers like jalapeños or serranos can be added to the toppings for a fresh kick of heat. Start with a small amount and adjust to your spice tolerance.
3. Customize the Yogurt Sauce:
The creamy yogurt sauce is a key element of the gyros, and you can easily customize it to your liking. Experiment with different herbs. Instead of dill, try using fresh mint, parsley, or a combination of herbs. For a tangier sauce, add a bit more lemon juice or a tablespoon of white wine vinegar. For a richer sauce, add a tablespoon of tahini (sesame seed paste) or a dollop of mayonnaise to the yogurt. Taste and adjust the seasonings to create your perfect yogurt sauce flavor profile.
4. Grill or Roast the Chickpeas for Added Texture:
For a different texture and slightly charred flavor, you can grill or roast the chickpeas instead of sautéing them. Toss the marinated chickpeas with olive oil and spices and spread them in a single layer on a baking sheet or grill pan. Roast in a preheated oven at 400°F (200°C) for 20-25 minutes, or grill over medium heat for 15-20 minutes, flipping occasionally, until slightly crispy and lightly charred. Grilling or roasting will impart a smoky char and a firmer texture to the chickpeas, adding another dimension to the gyros.
5. Explore Different Pita Bread Variations:
While classic pita bread is traditional, feel free to experiment with different types of flatbreads. Whole wheat pita breads offer a nuttier flavor and added fiber. Greek pita breads, which are thicker and fluffier, are also a great option. You can even use naan bread for a slightly different texture and flavor. If you’re feeling adventurous, try making your own homemade pita bread for the ultimate fresh and authentic gyro experience. Experiment with different pita bread variations to find your favorite.
By incorporating these additional tips, you can personalize your Easy Vegetarian Chickpea Gyros and take them from delicious to extraordinary. Don’t be afraid to experiment and find your own perfect combination of flavors and textures!
FAQ: Your Chickpea Gyro Questions Answered
We’ve covered the recipe, serving suggestions, and extra tips, but you might still have some questions. Here are answers to five frequently asked questions about making Easy Vegetarian Chickpea Gyros:
Q1: Can I make these gyros vegan?
A: Yes, absolutely! These chickpea gyros are easily adaptable to be fully vegan. To make them vegan, simply substitute the Greek yogurt sauce with a plant-based yogurt sauce. You can use vegan Greek yogurt alternatives (made from soy, almond, or coconut) or create a sauce using tahini, lemon juice, garlic, dill, and water to thin it to desired consistency. Omit the feta cheese topping or use a vegan feta cheese alternative. All other ingredients in the recipe are naturally vegan-friendly.
Q2: Can I prepare the chickpea filling ahead of time?
A: Yes, you can prepare the chickpea filling ahead of time, which makes these gyros even more convenient for meal prepping or busy schedules. The cooked chickpea mixture can be stored in an airtight container in the refrigerator for up to 3 days. When ready to serve, simply reheat the chickpea mixture in a skillet over medium heat until warmed through. You might need to add a splash of water if it seems a bit dry during reheating. Preparing the chickpea filling in advance can save you significant time on the day you plan to serve the gyros.
Q3: Can I freeze the chickpea filling?
A: While you can technically freeze the chickpea filling, it’s generally not recommended as the texture of chickpeas can change slightly after freezing and thawing, becoming a bit softer. However, if you have leftover chickpea filling and want to freeze it to avoid waste, you can do so. Allow the chickpea filling to cool completely, then transfer it to a freezer-safe container and freeze for up to 2-3 months. Thaw overnight in the refrigerator and reheat thoroughly before serving. Keep in mind that the texture might be slightly less ideal than freshly cooked chickpeas.
Q4: Can I use dried chickpeas instead of canned?
A: Yes, you can definitely use dried chickpeas instead of canned chickpeas for this recipe. Using dried chickpeas will result in a fresher and potentially more flavorful outcome. To use dried chickpeas, you will need to soak ¾ cup of dried chickpeas overnight in water. The next day, drain and rinse the soaked chickpeas. Cook them in a pot of water or in a pressure cooker until tender, which usually takes about 1-2 hours on the stovetop or significantly less in a pressure cooker. Once cooked, you’ll have approximately the equivalent of 2 cans of chickpeas. Proceed with the recipe as instructed, using your cooked chickpeas.
Q5: How can I adjust the spice level of these gyros?
A: Adjusting the spice level of these gyros is easy to customize to your preference. If you prefer a milder flavor, reduce the amount of smoked paprika and cumin. You can also omit the red pepper flakes or cayenne pepper completely if you are sensitive to heat. For a spicier gyro, add more smoked paprika, cumin, and red pepper flakes or cayenne pepper. You can also incorporate other spices like chili powder or a pinch of chipotle powder for a different type of heat. Taste the spice mixture as you are cooking and adjust the seasonings to achieve your desired spice level. Remember that you can always add more spice, but you can’t easily take it away, so start with less and add more as needed.
These FAQs should address common questions and concerns about making Easy Vegetarian Chickpea Gyros. Don’t hesitate to experiment and adapt the recipe to your liking, and enjoy the deliciousness of these flavorful and healthy vegetarian gyros!
Print
Easy Vegetarian Chickpea Gyros Recipe
Ingredients
For the Spiced Chickpeas:
- 2 cans (15 ounces each) chickpeas, drained and rinsed: Chickpeas are the star of our vegetarian gyros, providing a hearty, protein-rich base. Rinsing them removes excess sodium and any starchy liquid, ensuring a cleaner flavor. You can also cook your own chickpeas from dried, which will offer an even fresher taste and texture. If using dried chickpeas, you’ll need about ¾ cup of dried chickpeas, soaked overnight and then cooked until tender.
- 2 tablespoons olive oil: Olive oil is essential for both flavor and texture. It helps to sauté the chickpeas and spices beautifully, creating a slightly crispy exterior while keeping the inside tender. Extra virgin olive oil is recommended for its richer flavor and health benefits. You could also use avocado oil or another neutral oil if preferred, but olive oil adds a distinct Mediterranean touch that complements the gyro flavors perfectly.
- 1 large onion, finely chopped: Onion forms the aromatic base of our chickpea mixture. As it cooks, it releases its sweetness and savory notes, building a foundation of flavor. Yellow or white onions are ideal for this recipe due to their balanced flavor profile. Finely chopping ensures even cooking and blends seamlessly into the chickpea mixture.
- 2 cloves garlic, minced: Garlic is a flavor powerhouse, adding pungent and savory notes that enhance the overall taste of the gyros. Freshly minced garlic is always best for maximum flavor. If you don’t have fresh garlic, you can substitute with ½ teaspoon of garlic powder, but fresh garlic will provide a more vibrant and authentic taste.
- 1 tablespoon smoked paprika: Smoked paprika is the secret ingredient that elevates these gyros to the next level. It imparts a deep, smoky flavor that mimics the characteristic taste of traditional gyro meat. It adds warmth and complexity that regular paprika simply cannot replicate. If you can’t find smoked paprika, you can use regular paprika, but the smoky element will be missed. Consider adding a tiny touch of liquid smoke (use sparingly, as it’s potent) if you want to try and recreate that smoky note without smoked paprika.
- 1 teaspoon ground cumin: Cumin brings an earthy, warm, and slightly citrusy flavor that is quintessential in Mediterranean and Middle Eastern cuisine. It complements the smoked paprika beautifully and adds depth to the spice blend. Freshly ground cumin seeds, toasted lightly before grinding, will offer the most intense flavor, but pre-ground cumin works just as well for convenience.
- 1 teaspoon dried oregano: Oregano is a classic Mediterranean herb that provides a slightly peppery and aromatic flavor. It adds a touch of herbaceousness that balances the smoky and earthy spices. Dried oregano is readily available and works perfectly in this recipe. If you have fresh oregano, you can use about 1 tablespoon of chopped fresh oregano, added towards the end of cooking to preserve its fresh flavor.
- ½ teaspoon salt: Salt is crucial for seasoning and enhancing the flavors of all the other ingredients. It balances the sweetness of the onion and the spiciness of the paprika, bringing all the flavors together. Adjust the amount of salt to your preference. Sea salt or kosher salt are excellent choices.
- ¼ teaspoon black pepper: Black pepper adds a touch of subtle heat and complexity. Freshly ground black pepper is always preferred for its brighter and more nuanced flavor.
For the Creamy Yogurt Sauce:
- 1 cup plain Greek yogurt: Greek yogurt forms the creamy base of our delicious sauce. It provides a tangy and refreshing counterpoint to the spiced chickpeas. Full-fat Greek yogurt will offer the richest flavor and creamiest texture, but you can use low-fat or non-fat Greek yogurt for a lighter option. Make sure to use plain, unsweetened Greek yogurt.
- 1 tablespoon lemon juice, freshly squeezed: Fresh lemon juice adds brightness and acidity to the yogurt sauce, cutting through the richness and enhancing the overall flavor profile. Freshly squeezed lemon juice is essential for the best flavor. Bottled lemon juice can be used in a pinch, but fresh juice will always be superior.
- 1 clove garlic, minced: Just like in the chickpea mixture, garlic adds a pungent and savory note to the yogurt sauce, complementing the other flavors and adding depth. Freshly minced garlic is recommended for the best flavor.
- ¼ cup chopped fresh dill: Fresh dill brings a bright, herbaceous, and slightly citrusy flavor to the yogurt sauce. It adds a refreshing element that pairs perfectly with the creamy yogurt and spiced chickpeas. Fresh dill is crucial for this sauce. Dried dill will not provide the same fresh and vibrant flavor. If you absolutely cannot find fresh dill, you might consider substituting with fresh mint or parsley for a different, but still fresh, herbaceous note.
- Salt and pepper to taste: Salt and pepper are used to season the yogurt sauce and balance the flavors. Adjust the amounts to your preference.
Instructions
Step 1: Prepare the Spiced Chickpeas
- Sauté Aromatics: Heat the olive oil in a large skillet over medium heat. Add the finely chopped onion and cook for about 5-7 minutes, or until softened and translucent. Stir occasionally to prevent burning. Softening the onions is crucial as it releases their sweetness and creates a flavorful base for the chickpeas. Don’t rush this step; properly sautéed onions will significantly enhance the overall taste.
- Add Garlic and Spices: Add the minced garlic, smoked paprika, cumin, and dried oregano to the skillet. Cook for another minute, stirring constantly, until fragrant. This step is important because heating the spices releases their aromatic oils, intensifying their flavor and infusing the onions and oil with deliciousness. Be careful not to burn the garlic and spices; they should be fragrant, not scorched.
- Incorporate Chickpeas: Add the drained and rinsed chickpeas, salt, and black pepper to the skillet. Stir well to coat the chickpeas evenly with the spice mixture. Make sure all the chickpeas are nicely coated in the flavorful spice blend.
- Sauté Chickpeas: Cook for 8-10 minutes, stirring occasionally, until the chickpeas are heated through and slightly softened. As the chickpeas sauté, they will absorb the flavors of the spices and become slightly crispy on the outside while remaining tender on the inside. You can gently mash some of the chickpeas with the back of a spoon or spatula during cooking if you prefer a slightly creamier texture. This is optional but can enhance the overall texture of the filling.
- Taste and Adjust Seasoning: Taste the chickpea mixture and adjust seasoning as needed. You might want to add a little more salt, pepper, or smoked paprika to your liking. This is a crucial step in any recipe. Taste and adjust seasoning to ensure the flavors are perfectly balanced to your preference.
Step 2: Prepare the Creamy Yogurt Sauce
- Combine Ingredients: In a medium bowl, combine the plain Greek yogurt, fresh lemon juice, minced garlic, and chopped fresh dill.
- Season and Mix: Season with salt and pepper to taste. Stir well to combine all ingredients thoroughly.
- Chill (Optional): For best results, cover the yogurt sauce and refrigerate for at least 15-20 minutes, or up to a few hours, to allow the flavors to meld together. Chilling the sauce not only enhances the flavor but also helps to thicken it slightly. However, if you’re short on time, you can use the sauce immediately.
Step 3: Warm the Pita Breads
- Choose Warming Method: You can warm the pita breads in a few different ways:
- Oven: Preheat oven to 350°F (175°C). Wrap pita breads in foil and bake for 5-7 minutes, or until warmed through.
- Skillet: Heat a dry skillet over medium heat. Warm pita breads one at a time for about 30-60 seconds per side, or until softened and heated through. Be careful not to burn them.
- Microwave: Wrap pita breads in a damp paper towel and microwave for 10-20 seconds, or until softened. Microwaving can sometimes make pita breads a little chewy if overheated, so be mindful of the time.
- Keep Warm: Keep the warmed pita breads wrapped in a clean kitchen towel to keep them soft and warm until ready to assemble the gyros.
Step 4: Assemble the Gyros
- Lay out Pita Breads: Place warmed pita breads on a clean surface.
- Fill with Chickpeas: Spoon a generous amount of the spiced chickpea mixture into the center of each pita bread.
- Add Toppings: Top with your desired toppings, such as sliced cucumber, diced tomatoes, red onion slices, crumbled feta cheese (if using), and Kalamata olives (if using).
- Drizzle with Sauce: Drizzle generously with the creamy yogurt sauce over the toppings.
- Fold and Serve: Fold the pita breads in half or roll them up to create gyros. Serve immediately and enjoy your delicious homemade Easy Vegetarian Chickpea Gyros!
Nutrition
- Serving Size: one normal portion
- Calories: 450-550 kcal
- Sugar: 8-12 grams
- Sodium: 600-800 mg
- Fat: 20-25 grams
- Saturated Fat: 4-6 grams
- Carbohydrates: 50-60 grams
- Fiber: 12-15 grams
- Protein: 18-22 grams
- Cholesterol: 10-20 mg


