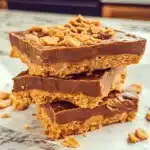
There’s something truly comforting about the rich, creamy blend of peanut butter and sweet chocolate—especially when it comes together in a dessert that requires zero oven time. I first discovered this easy no bake peanut butter bars recipe on a hectic afternoon when I needed a quick treat that wouldn’t keep me tethered to the kitchen. It’s become my go-to snack for everything from afternoon pick-me-ups to last-minute guests. With just a handful of simple ingredients, these bars offer that perfect balance of chewy, nutty goodness and melt-in-your-mouth sweetness. Whether you’re a seasoned home cook or just tired of the usual fast-food slump, this recipe brings homemade charm without the fuss. Trust me, once you try these bars, they’ll become a permanent fixture in your dessert rotation—no baking required!
Why choose Easy No Bake Peanut Butter Bars?
Simplicity at its finest: This recipe requires no oven, making it perfect for busy days or hot weather. Rich, creamy flavor: The luscious peanut butter and chocolate combo satisfies your sweet tooth with every bite. Quick prep time: Ready in under 15 minutes, ideal for spontaneous cravings or unexpected guests. Versatile snack: Enjoy them as dessert, an energy boost, or a lunchbox treat. Crowd-pleaser guarantee: Loved by kids and adults alike, these bars always disappear fast!
Easy No Bake Peanut Butter Bars Ingredients
For the Peanut Butter Base
- Creamy peanut butter – Use smooth peanut butter for the perfect melt-in-your-mouth texture.
- Powdered sugar – Adds sweetness and helps firm up the bars without grit.
- Unsalted butter – Softens the mixture and adds richness for a decadent bite.
For the Chocolate Topping
- Semi-sweet chocolate chips – Choose good-quality chips for that luscious chocolate layer.
- Light corn syrup – Helps the chocolate topping stay glossy and smooth on these easy no bake peanut butter bars.
Optional Mix-Ins and Garnishes
- Chopped peanuts – For a delightful crunch that complements the creamy base.
- Sea salt flakes – Sprinkle on top to enhance the chocolate-peanut flavor contrast.
How to Make Easy No Bake Peanut Butter Bars
- Line the Pan: Line an 8×8-inch pan with parchment paper, allowing overhang on two sides. Press it into corners for easy removal and a no-stick guarantee—perfect for neat, easy slices.
- Mix the Base: In a large bowl, combine 1 cup creamy peanut butter, ½ cup softened unsalted butter, and 2 cups powdered sugar. Stir vigorously for 2–3 minutes until thick, smooth, and lump-free.
- Press the Base: Transfer the mixture to your prepared pan. Use the back of a spatula to press it firmly into an even, compact layer—about ½-inch thick—for consistent, chewy bars.
For the Chocolate Topping:
- Melt the Chocolate: In a microwave-safe bowl or double boiler, combine 1½ cups semi-sweet chocolate chips with 2 tablespoons light corn syrup. Heat in 30-second intervals, stirring until glossy and pourable.
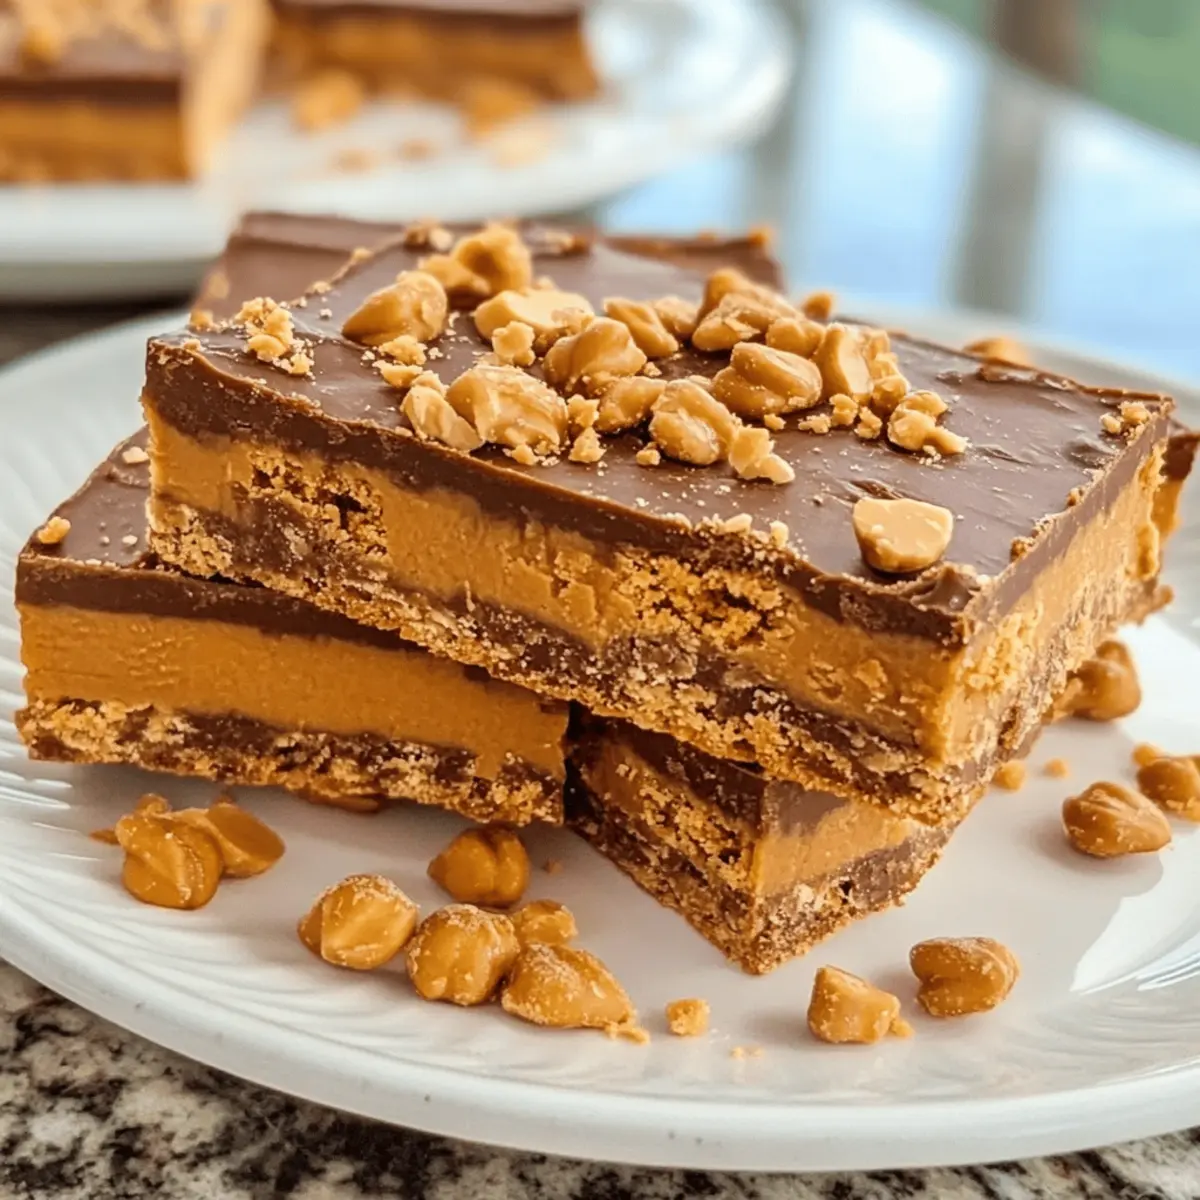
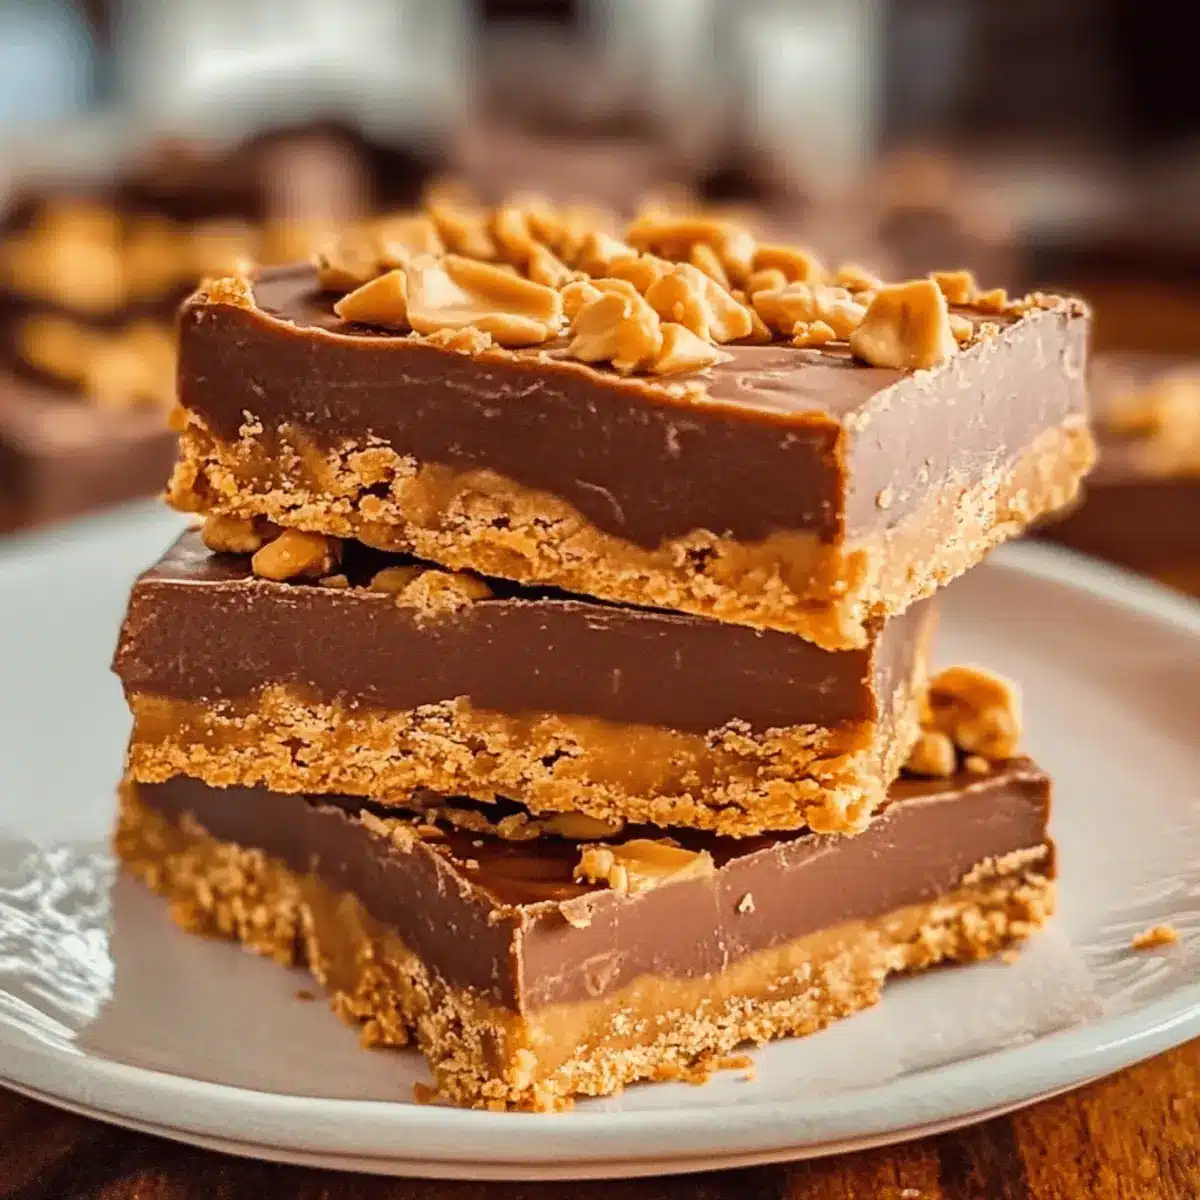
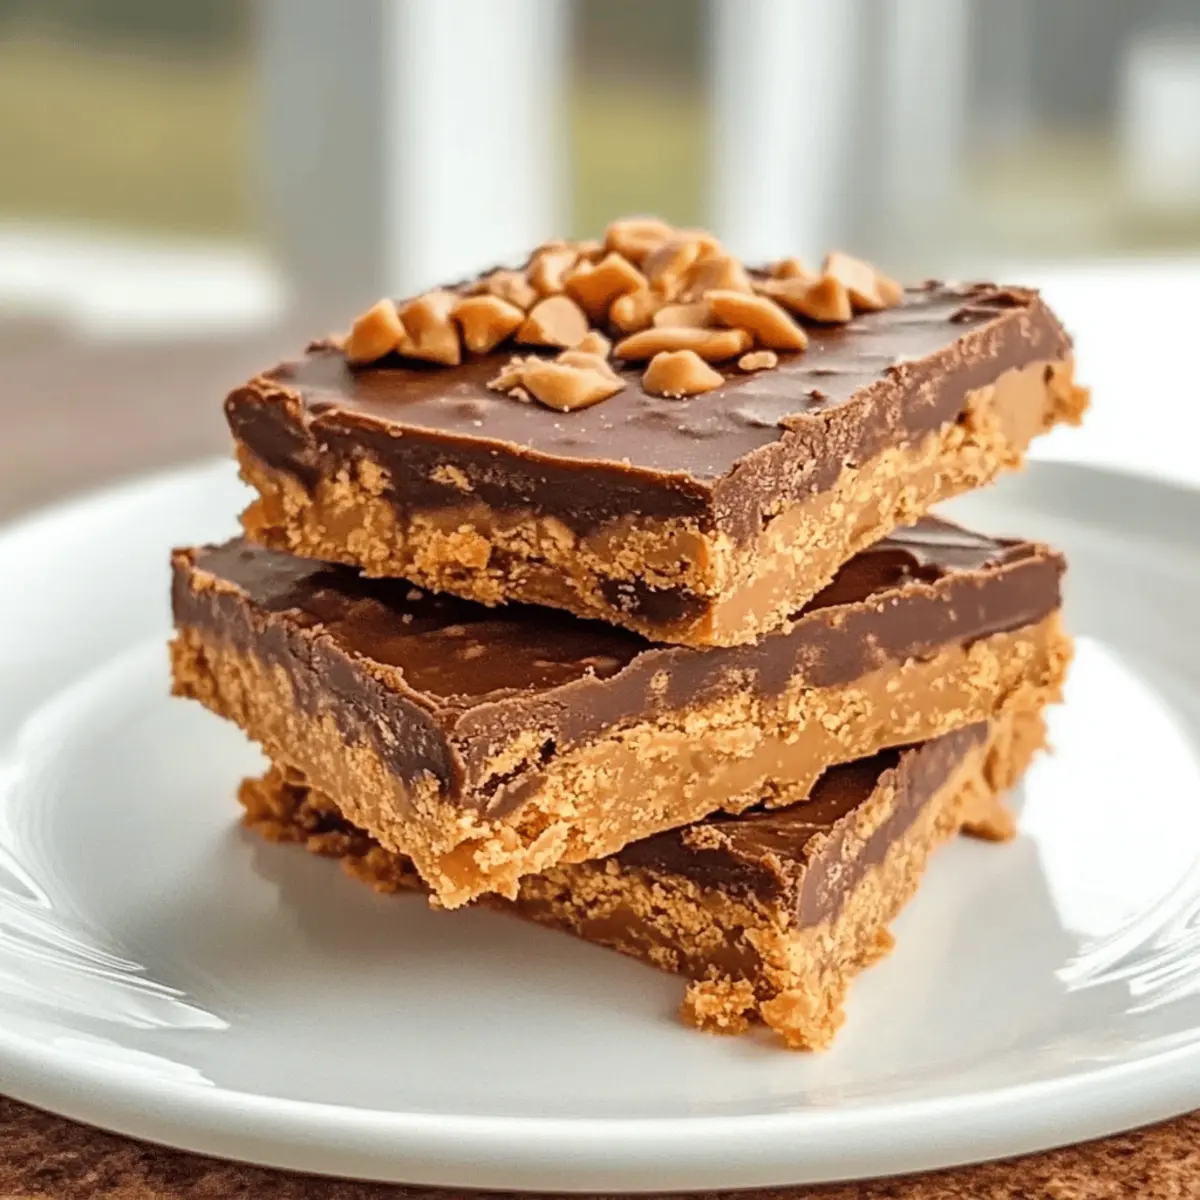
- Spread and Smooth: Pour the melted chocolate evenly over the peanut butter layer. Gently tilt the pan or use a small offset spatula to create a smooth, shiny top—about 5 minutes.
- Chill to Set: Refrigerate the bars for at least 2 hours, or freeze for 30 minutes. The chocolate will firm up and the base will set into perfectly sliceable bars.
- Slice and Enjoy: Lift bars out using parchment handles. Use a sharp knife, wiping clean between cuts for neat edges. Cut into 16 equal squares and serve chilled or at room temperature.
Optional: Sprinkle chopped peanuts and a pinch of sea salt for extra crunch.
Exact quantities are listed in the recipe card below.
Expert Tips for Easy No Bake Peanut Butter Bars
- Use Room Temperature Ingredients: Softened butter and peanut butter blend smoothly, creating that perfect creamy base without lumps.
- Press Base Firmly: Compact the peanut butter mixture tightly in the pan to ensure bars hold their shape and have a satisfying chew.
- Melt Chocolate Gently: Warm chocolate in short bursts to avoid burning; stirring often keeps it glossy for a smooth topping on your bars.
- Chill Thoroughly: Refrigerate long enough so the layers set well—this prevents melting and makes slicing easier.
- Sharp Knife is Key: Wipe the knife clean between cuts for neat, professional-looking bars every time.
- Add Texture Thoughtfully: Sprinkle chopped peanuts or sea salt just before chilling to keep the toppings fresh and crunchy on these easy no bake peanut butter bars.
How to Store and Freeze Easy No Bake Peanut Butter Bars
Room Temperature: Store in an airtight container at room temperature for up to 3 days for a soft, chewy texture that’s ready to enjoy anytime.
Fridge: Keep bars in the fridge for up to 2 weeks to maintain freshness and firmness; this is especially helpful in warm weather.
Freezer: For longer storage, freeze bars in a single layer, separated by parchment paper, for up to 3 months—perfect for grabbing a quick treat!
Reheating: Enjoy these easy no bake peanut butter bars chilled or at room temperature. If desired, let them sit out for about 10 minutes before serving for a softer texture.
Make Ahead Options
These Easy No Bake Peanut Butter Bars are a fantastic choice for meal prep, saving you time on those busy weeknights! You can prepare the peanut butter base up to 24 hours in advance; simply mix the ingredients and press the mixture into the lined pan, then cover tightly with plastic wrap and refrigerate. The chocolate topping can be melted and prepared just before serving to ensure it remains glossy. Alternatively, if you want to keep the bars for longer, they can be stored in the fridge for up to 3 days or even frozen for up to a month. Just remember to slice them after chilling and serve them at room temperature for that perfect melt-in-your-mouth experience!
Variations & Substitutions for Easy No Bake Peanut Butter Bars
Feel free to make these bars your own—and let your creativity shine through with these delightful twists!
-
Nut Butter Swap: Use almond or cashew butter for a unique flavor that still maintains that creamy texture. Each nut butter has its own lovely nuances, making your bars stand out.
-
Sugar Alternatives: Swap powdered sugar with coconut sugar or a sugar-free substitute to cut calories while keeping sweetness intact. You’ll still get that gratifying taste without the guilt!
-
Dairy-Free Delight: Try using coconut oil instead of butter and dairy-free chocolate chips for a fantastic vegan variation. This way, everyone can indulge in the deliciousness!
-
Add Some Crunch: Incorporate crispy rice cereal or granola into the peanut butter base for an exciting, playful texture. The added crunch provides a satisfying contrast to the gooey goodness.
-
Spice Things Up: Add a pinch of cinnamon or a dash of vanilla extract to the peanut butter mixture for an aromatic flavor boost. Just a hint can elevate your bars to a whole new level!
-
Fruit Flavors: Fold in some mini chocolate chips or chopped dried fruits like cranberries or apricots for a fruity twist. These additions can bring a fresh burst of flavor to every bite.
-
Chili Chocolate: For a surprising heat element, add a sprinkle of cayenne pepper to the chocolate topping. The spice pairs surprisingly well with the sweetness, creating a delightful contrast.
-
Layer It Up: Create a layered treat by spreading a thin layer of jam or jelly before adding the chocolate topping. This adds a tangy sweetness that will have everyone coming back for more.
What to Serve with Easy No Bake Peanut Butter Bars?
There’s nothing quite like the happiness that comes from a delicious dessert paired perfectly with wholesome sides or beverages.
- Fresh Fruit Salad: A colorful medley of seasonal fruits balances the richness of the bars and adds a refreshing, juicy crunch to each bite.
- Milk or Nut Milk: A classic companion, a tall glass of cold milk beautifully complements the creamy peanut butter flavor. For a twist, try almond or coconut milk for a nutty notes.
- Creamy Yogurt Dip: Whip up a light yogurt dip with honey and vanilla for a luscious, tangy contrast that enhances the sweet and salty notes of the bars.
- Chocolate Chip Cookies: For the ultimate treat platter, serve these bars alongside soft chocolate chip cookies. The familiar flavor pairing is sure to please everyone!
- Espresso or Coffee: A warm cup of brewed coffee or espresso deepens the rich flavors of the dessert, creating a perfect afternoon delight.
- Chocolate Drizzle: A simple drizzle of melted chocolate over the finished bars adds a touch of elegance and extra sweetness when serving for guests.
These pairings create a delightful gathering at your table, ensuring your easy no bake peanut butter bars shine amid a spread of enjoyable flavors and textures.
Easy No Bake Peanut Butter Bars Recipe FAQs
What kind of peanut butter should I use for the best bars?
I recommend using creamy, smooth peanut butter. It blends beautifully to create that melt-in-your-mouth texture these bars are famous for. Chunky peanut butter can add texture, but for the classic silky feel, creamy is the way to go!
How long can I store these bars at room temperature?
You can keep these bars in an airtight container at room temperature for up to 3 days. This keeps them soft and chewy without risking spoilage. If your kitchen is warm, it’s better to refrigerate them to avoid melting.
Can I freeze Easy No Bake Peanut Butter Bars?
Absolutely! Freeze bars in a single layer with parchment paper between each piece to prevent sticking. Place them in an airtight container or freezer bag, and they’ll stay delicious for up to 3 months. When ready to eat, thaw in the fridge overnight or sit them out 10-15 minutes at room temp.
My chocolate topping isn’t setting properly—what went wrong?
This often happens if the bars aren’t chilled long enough. Make sure you refrigerate for at least 2 hours or freeze for 30 minutes to fully set the chocolate. Also, avoid stirring warm bars too soon after spreading the melted chocolate; let it settle undisturbed for a glossy finish.
Are these bars safe for pets if I accidentally share?
While peanut butter itself is safe for dogs in small amounts, the chocolate topping is toxic to pets. Always keep these bars out of reach from your furry friends to avoid any health issues. For a pet-friendly treat, make a batch without the chocolate and avoid xylitol or sweeteners toxic to animals.

Easy No Bake Peanut Butter Bars That Melt in Your Mouth
Ingredients
Equipment
Method
- Line an 8×8-inch pan with parchment paper, allowing overhang on two sides.
- In a large bowl, mix the peanut butter, unsalted butter, and powdered sugar for 2–3 minutes.
- Transfer the mixture to the pan and press it evenly.
- In a bowl, melt the chocolate chips with corn syrup in short intervals until glossy.
- Pour the melted chocolate over the peanut butter layer and smooth it out.
- Chill in the refrigerator for at least 2 hours.
- Slice into 16 squares and serve.