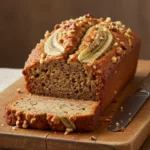
It’s Easter time again, and our family tradition of baking up a storm is in full swing! This year, we decided to try something a little different from the usual Easter cookies and carrot cake – Easter Cake Pops! Honestly, I was a bit hesitant at first. Cake pops always seemed like they’d be fiddly and complicated, but let me tell you, these were surprisingly fun and easy to make, even with the kids “helping” (mostly making a glorious mess!). The best part? They were an absolute hit! The vibrant colors, the adorable shapes, and the delicious taste made them disappear in minutes. Even my usually picky teenager devoured them, declaring them “way better than store-bought.” If you’re looking for a delightful, festive, and crowd-pleasing Easter treat, look no further. These Easter Cake Pops are guaranteed to be the star of your holiday dessert table and bring smiles to everyone’s faces. Get ready to roll up your sleeves, embrace the sprinkles, and create some Easter magic!
Ingredients
To create these delightful Easter Cake Pops, you’ll need a combination of cake base, frosting binder, coating, and decorative elements. Here’s a comprehensive list of ingredients to ensure you have everything on hand:
For the Cake Base:
- 1 Box (15.25 oz) Cake Mix: Choose your favorite flavor! Vanilla, chocolate, lemon, or even funfetti work wonderfully. White or yellow cake mix is ideal if you want vibrant pastel colors for your cake pops.
- Eggs, Oil, and Water: As called for on the cake mix box instructions. These are essential for baking a moist and tender cake.
- Optional Flavor Enhancements:
- 1 teaspoon Vanilla Extract or Almond Extract: Enhances the flavor of vanilla or white cake mixes.
- 1/4 cup Lemon Juice or Zest: Adds a bright citrusy note to vanilla or lemon cake mixes.
- 2 tablespoons Cocoa Powder: If starting with a white or yellow cake mix and wanting a lighter chocolate flavor.
For the Frosting Binder:
- 1/2 cup to 3/4 cup Frosting: Canned frosting works perfectly for convenience, but you can also use homemade buttercream. Vanilla or cream cheese frosting are classic choices, but you can experiment with flavors that complement your cake base.
- Vanilla Frosting: Versatile and pairs well with most cake flavors.
- Cream Cheese Frosting: Adds a tangy sweetness that complements vanilla, lemon, or spice cakes.
- Chocolate Frosting: A rich option for chocolate cake pops.
For the Coating:
- 16 oz Candy Melts or Chocolate: Candy melts are specifically designed for dipping and come in a wide array of colors. White chocolate, milk chocolate, or dark chocolate can also be used.
- Candy Melts (Various Colors): Essential for achieving vibrant Easter colors like pastel pink, blue, yellow, green, and purple.
- White Chocolate Chips or Bar: Can be melted and colored with food coloring for custom pastel shades.
- Milk Chocolate Chips or Bar: Provides a classic chocolate coating.
- Dark Chocolate Chips or Bar: Offers a richer, less sweet coating.
- 1 tablespoon Shortening or Coconut Oil (Optional): Adding a small amount of shortening or coconut oil to the melted candy melts or chocolate helps create a smoother, more fluid consistency for easier dipping and a glossy finish.
For Decoration:
- Sprinkles: Easter-themed sprinkles, pastel sprinkles, jimmies, nonpareils, sanding sugar – get creative!
- Edible Glitter: Adds a touch of sparkle and elegance.
- Mini Chocolate Chips or Candy Pieces: For adding details or accents.
- Decorating Icing or Gel: In various colors for drawing on details like bunny faces, chicks, or floral patterns.
- Lollipop Sticks or Cake Pop Sticks: Essential for creating the “pop” effect. Choose 4-inch or 6-inch sticks depending on your preference.
- Optional Decorations:
- Miniature Edible Flowers: For a spring-inspired touch.
- Shredded Coconut (Colored): Tint shredded coconut with food coloring for a textured, nest-like appearance.
- Miniature Candy Eggs or Chocolate Bunnies: For adding extra Easter flair.
Equipment:
- 9×13 inch Baking Pan: For baking the cake.
- Mixing Bowls: For mixing cake batter and frosting.
- Electric Mixer (Handheld or Stand Mixer): For mixing cake batter and frosting.
- Spatulas or Wooden Spoons: For mixing and scraping bowls.
- Measuring Cups and Spoons: For accurate ingredient measurements.
- Cookie Scoop or Spoon: For portioning cake pop dough.
- Baking Sheets: Lined with parchment paper or silicone mats for chilling and setting cake pops.
- Double Boiler or Microwave-Safe Bowls: For melting candy melts or chocolate.
- Cake Pop Stand or Styrofoam Block: For holding cake pops upright while drying. (Alternatively, you can use a tall glass or mug filled with rice or sugar).
- Toothpicks or Skewers: For dipping and decorating.
Instructions
Follow these step-by-step instructions to create perfect Easter Cake Pops:
Step 1: Bake the Cake
- Preheat Oven and Prepare Pan: Preheat your oven to 350°F (175°C). Grease and flour a 9×13 inch baking pan or spray with baking spray. This prevents the cake from sticking and ensures easy removal.
- Prepare Cake Batter: In a large mixing bowl, combine the cake mix, eggs, oil, and water according to the box instructions. Add any optional flavorings like vanilla extract or lemon zest at this stage.
- Mix Cake Batter: Using an electric mixer, beat the batter on low speed until just combined, then increase to medium speed and beat for 2 minutes, or as directed on the cake mix box. Be careful not to overmix, as this can result in a tough cake.
- Bake the Cake: Pour the batter into the prepared baking pan and spread evenly. Bake for 25-30 minutes, or until a toothpick inserted into the center comes out clean. The edges should be lightly golden brown.
- Cool Completely: Let the cake cool in the pan for 10-15 minutes before inverting it onto a wire rack to cool completely. It’s crucial that the cake is completely cool before crumbling; otherwise, it will be too soft and difficult to work with.
Step 2: Crumble and Frost the Cake
- Crumble the Cake: Once the cake is completely cooled, break it into chunks and place it in a large mixing bowl. Using your hands or a fork, crumble the cake into fine, even crumbs. Ensure there are no large lumps remaining.
- Add Frosting: Add the frosting to the crumbled cake, starting with 1/2 cup. Mix the frosting into the cake crumbs using your hands or a spatula. Start mixing gently and gradually increase pressure as the frosting incorporates.
- Achieve Cake Pop Dough Consistency: Continue mixing until the frosting is evenly distributed throughout the cake crumbs and the mixture comes together to form a moist, moldable dough. You should be able to easily roll a small ball of the mixture and it should hold its shape without being sticky or crumbly. If the mixture is too dry, add a tablespoon of frosting at a time until you reach the desired consistency. If it’s too wet, add a bit more crumbled cake (if you have any extra) or a tablespoon of powdered sugar.
Step 3: Shape the Cake Pops
- Portion Cake Pop Dough: Using a cookie scoop or spoon, scoop out even portions of the cake pop dough. This ensures uniform size and baking. A standard cookie scoop (about 1.5 tablespoons) is a good size for cake pops.
- Roll into Balls: Roll each portion of dough between your palms to create smooth, round balls. If you desire other shapes for Easter, like eggs or bunny heads, gently shape the dough accordingly. For egg shapes, slightly elongate the balls and taper one end. For bunny heads, you might need to use a cookie cutter or mold for more intricate shapes, or simply shape by hand for a more rustic look.
- Chill Cake Pop Balls: Place the rolled cake pop balls on a baking sheet lined with parchment paper or a silicone mat. Cover them loosely with plastic wrap and refrigerate for at least 30 minutes, or up to an hour. Chilling firms up the dough, making it easier to dip and prevents the cake pops from falling off the sticks.
Step 4: Melt the Coating
- Prepare Melting Station: Set up your melting station. You can use a double boiler or microwave-safe bowls. If using a double boiler, fill the bottom pot with water and bring it to a simmer. Place the candy melts or chocolate in the top pot, ensuring the bottom of the pot doesn’t touch the water. If using a microwave, place the candy melts or chocolate in a microwave-safe bowl.
- Melt Candy Melts or Chocolate:
- Double Boiler Method: Gently melt the candy melts or chocolate over simmering water, stirring frequently until smooth and completely melted. Be careful not to overheat, as this can cause the chocolate to seize or become grainy.
- Microwave Method: Microwave in 30-second intervals, stirring well after each interval. Continue microwaving and stirring until the candy melts or chocolate are smooth and melted. Microwaving in short bursts prevents overheating.
- Add Shortening or Coconut Oil (Optional): If desired, stir in a tablespoon of shortening or coconut oil to the melted coating to make it smoother and more fluid. This is especially helpful when using thicker candy melts or chocolate.
- Keep Coating Warm: If not using immediately, keep the melted coating warm by placing the bowl over a pot of warm water or in a very low oven (warm setting). Ensure the coating remains fluid for dipping.
Step 5: Dip and Decorate the Cake Pops
- Prepare Lollipop Sticks: Dip the tip of a lollipop stick into the melted coating and immediately insert it about halfway into a chilled cake pop ball. This “glue” helps secure the stick and prevents the cake pop from falling off. Repeat for all cake pops.
- Chill Again (Briefly): Return the cake pops on sticks to the refrigerator for another 5-10 minutes to allow the coating on the sticks to set, further securing them.
- Dip Cake Pops: Remove a chilled cake pop from the refrigerator. Hold it by the stick and dip it completely into the melted coating, rotating gently to ensure even coverage. Tap off any excess coating by gently tapping the stick against the edge of the bowl or rotating the cake pop upside down.
- Decorate Immediately: While the coating is still wet, immediately decorate the cake pops with sprinkles, edible glitter, mini chocolate chips, or other decorations. The sprinkles will adhere best to wet coating.
- Set Cake Pops: Place the decorated cake pops stick-down in a cake pop stand, styrofoam block, or a tall glass filled with rice or sugar to allow the coating to set completely. Ensure the cake pops don’t touch each other to prevent sticking.
- Add Icing Details (After Setting): Once the coating is completely set and firm, you can add further decorations with decorating icing or gel. Draw on bunny faces, chick features, floral patterns, or any other Easter-themed designs.
Step 6: Store and Serve
- Allow to Set Completely: Ensure the cake pops are completely set and firm before handling or storing. This usually takes about 30-60 minutes at room temperature, or faster in the refrigerator.
- Store Properly: Once set, store the Easter Cake Pops in an airtight container at room temperature for up to 2-3 days, or in the refrigerator for up to a week. If storing in the refrigerator, bring them to room temperature for about 15-20 minutes before serving to prevent the coating from sweating.
- Avoid Overcrowding: When storing, avoid overcrowding the container to prevent the decorations from getting smudged or damaged. You can layer them between sheets of parchment paper if needed.
Nutrition Facts
(Please note: Nutritional information is an estimate and can vary based on specific ingredients and brands used.)
Servings: Approximately 24-30 cake pops (depending on size)
Serving Size: 1 cake pop
Approximate Nutritional Information per Serving (1 Cake Pop):
- Calories: 150-200 kcal
- Fat: 8-12g
- Saturated Fat: 5-8g
- Trans Fat: 0g
- Cholesterol: 20-30mg
- Sodium: 80-120mg
- Carbohydrates: 20-25g
- Sugar: 15-20g
- Fiber: <1g
- Protein: 1-2g
Important Considerations:
- These values are estimates and will vary based on the specific cake mix, frosting, candy melts/chocolate, and decorations used.
- Cake pops are a treat and are higher in sugar and fat. Enjoy in moderation as part of a balanced diet.
- To reduce calories and sugar, consider using sugar-free cake mix and frosting options, and dark chocolate coating. However, this will alter the taste and texture.
Preparation Time
- Prep Time: 45 minutes (includes baking, cooling, crumbling, and mixing dough)
- Chill Time: 1 hour (for cake pop dough balls and dipped pops)
- Decorating Time: 30-45 minutes (depending on complexity of decorations)
- Total Time: Approximately 2 hours 15 minutes – 2 hours 45 minutes (excluding setting time)
Breakdown:
- Baking & Cooling Cake: 1 hour (includes baking and cooling time)
- Making Cake Pop Dough: 20 minutes
- Rolling & Chilling Dough Balls: 40 minutes (includes rolling and chilling time)
- Melting Coating & Dipping: 30 minutes
- Decorating: 30-45 minutes
- Setting Time: 1-2 hours (inactive time, cake pops setting)
Note: These times are estimates and may vary based on your baking experience and the complexity of your decorations.
How to Serve
Easter Cake Pops are incredibly versatile and can be served in a variety of fun and festive ways:
- Cake Pop Bouquet:
- Arrange the finished cake pops in a decorative vase or pot filled with floral foam or rice.
- This creates a beautiful and eye-catching centerpiece for your Easter table.
- Consider using pastel-colored tissue paper or ribbons to enhance the Easter theme.
- Individual Cake Pop Favors:
- Wrap each cake pop individually in clear cellophane bags and tie with a ribbon.
- These make adorable and personalized Easter favors for guests or for gifting to friends and family.
- Add a small tag with a Easter greeting or personalized message.
- Cake Pop Platter:
- Arrange the cake pops on a decorative platter or serving tray.
- Mix and match different colors and decorations for a visually appealing display.
- Incorporate other Easter treats like mini cupcakes, cookies, or candies on the platter for variety.
- Easter Basket Addition:
- Include cake pops in Easter baskets as a special homemade treat.
- They are a fun and festive alternative to traditional Easter candies.
- Place them amongst other Easter goodies like chocolate eggs, jelly beans, and plush toys.
- Dessert Table Highlight:
- Feature cake pops prominently on your Easter dessert table.
- Use cake pop stands at varying heights to create a dynamic and visually interesting display.
- Label the cake pops with cute Easter-themed names (e.g., “Bunny Bites,” “Chick Pops,” “Spring Blooms”).
- Kid-Friendly Serving:
- Serve cake pops directly on plates or napkins for easy handling by children.
- They are mess-free and perfect for little hands to enjoy at Easter egg hunts or parties.
- Consider using shorter lollipop sticks for younger children’s safety.
Additional Tips for Perfect Easter Cake Pops
- Don’t Overmix the Cake Dough: When mixing the frosting into the crumbled cake, mix just until combined. Overmixing can make the dough tough and dense, resulting in less tender cake pops. Gently combine the frosting and cake crumbs until a moldable dough forms.
- Chill Cake Pops Thoroughly: Chilling the cake pop dough balls before dipping is crucial. It firms them up, making them easier to handle and dip without falling apart or sliding off the sticks. Similarly, briefly chilling the cake pops after inserting the sticks further secures them before dipping.
- Melt Coating Smoothly and Properly: Ensure your candy melts or chocolate are melted smoothly and evenly. Avoid overheating, which can cause them to seize or become grainy. Melt in a double boiler or microwave in short intervals, stirring frequently. Adding a touch of shortening or coconut oil can help create a smoother, more fluid coating.
- Tap Off Excess Coating: After dipping, gently tap off any excess coating. Too much coating can make the cake pops heavy and prone to cracking. Rotating the cake pop upside down and gently tapping the stick against the bowl’s edge helps remove excess coating while maintaining a smooth finish.
- Decorate Quickly After Dipping: Decorate your cake pops immediately after dipping while the coating is still wet. Sprinkles, edible glitter, and other decorations adhere best to a wet surface. If you wait too long, the coating will set, and decorations may not stick properly. Prepare your decorations in advance so you can decorate swiftly.
FAQ Section
Q1: Can I use a different type of cake besides cake mix?
A: Yes, absolutely! You can use any type of cake you like. Leftover homemade cake, pound cake, or even brownies can be used as the base for cake pops. Just ensure the cake is fully cooled before crumbling. Using a denser cake like pound cake can sometimes result in a less crumbly cake pop, which some people prefer for easier handling.
Q2: My candy melts are too thick and hard to dip, what can I do?
A: If your candy melts are too thick, you can thin them out by adding a small amount of shortening or coconut oil (about 1 teaspoon at a time), stirring well after each addition. This will make the coating more fluid and easier to dip. Be careful not to add too much liquid, as this can make the coating too thin and less opaque. You can also try warming the candy melts slightly more, but be cautious not to overheat them.
Q3: How do I prevent my cake pops from cracking after dipping?
A: Cracking can occur if the cake pops are too cold compared to the coating. Make sure the cake pops are chilled but not frozen solid. Also, avoid dipping them in extremely hot coating. Ensure the coating is warm and fluid but not scalding. Tapping off excess coating gently and allowing the cake pops to set gradually at room temperature can also help prevent cracking. If cracks do appear, you can often camouflage them with sprinkles or decorations.
Q4: Can I make cake pops ahead of time?
A: Yes, cake pops are great for making ahead! You can prepare the cake pop dough balls and store them, covered, in the refrigerator for up to 2 days before dipping and decorating. Once dipped and decorated, they can be stored at room temperature in an airtight container for 2-3 days or refrigerated for up to a week. For best texture and taste, it’s recommended to consume them within a few days of making.
Q5: What are some alternative decorations besides sprinkles?
A: There are endless possibilities for decorating cake pops! Besides sprinkles, you can use:
- Edible Glitter: For a sparkly, elegant touch.
- Mini Chocolate Chips or Candy Pieces: To create patterns or add accents.
- Chopped Nuts or Coconut: For texture and flavor.
- Decorating Icing or Gel: To draw on faces, patterns, or write messages.
- Melted White or Dark Chocolate (Drizzled): For a contrasting and decorative drizzle.
- Edible Markers: To draw directly on the set coating.
- Fondant or Marzipan Decorations: For more elaborate and sculpted designs (like bunny ears or flowers).
Get creative and have fun experimenting with different decorations to make your Easter Cake Pops truly unique and festive!
Print
Easter Cake Pops Recipe
Ingredients
For the Cake Base:
- 1 Box (15.25 oz) Cake Mix: Choose your favorite flavor! Vanilla, chocolate, lemon, or even funfetti work wonderfully. White or yellow cake mix is ideal if you want vibrant pastel colors for your cake pops.
- Eggs, Oil, and Water: As called for on the cake mix box instructions. These are essential for baking a moist and tender cake.
- Optional Flavor Enhancements:
- 1 teaspoon Vanilla Extract or Almond Extract: Enhances the flavor of vanilla or white cake mixes.
- 1/4 cup Lemon Juice or Zest: Adds a bright citrusy note to vanilla or lemon cake mixes.
- 2 tablespoons Cocoa Powder: If starting with a white or yellow cake mix and wanting a lighter chocolate flavor.
For the Frosting Binder:
- 1/2 cup to 3/4 cup Frosting: Canned frosting works perfectly for convenience, but you can also use homemade buttercream. Vanilla or cream cheese frosting are classic choices, but you can experiment with flavors that complement your cake base.
- Vanilla Frosting: Versatile and pairs well with most cake flavors.
- Cream Cheese Frosting: Adds a tangy sweetness that complements vanilla, lemon, or spice cakes.
- Chocolate Frosting: A rich option for chocolate cake pops.
For the Coating:
- 16 oz Candy Melts or Chocolate: Candy melts are specifically designed for dipping and come in a wide array of colors. White chocolate, milk chocolate, or dark chocolate can also be used.
- Candy Melts (Various Colors): Essential for achieving vibrant Easter colors like pastel pink, blue, yellow, green, and purple.
- White Chocolate Chips or Bar: Can be melted and colored with food coloring for custom pastel shades.
- Milk Chocolate Chips or Bar: Provides a classic chocolate coating.
- Dark Chocolate Chips or Bar: Offers a richer, less sweet coating.
- 1 tablespoon Shortening or Coconut Oil (Optional): Adding a small amount of shortening or coconut oil to the melted candy melts or chocolate helps create a smoother, more fluid consistency for easier dipping and a glossy finish.
For Decoration:
- Sprinkles: Easter-themed sprinkles, pastel sprinkles, jimmies, nonpareils, sanding sugar – get creative!
- Edible Glitter: Adds a touch of sparkle and elegance.
- Mini Chocolate Chips or Candy Pieces: For adding details or accents.
- Decorating Icing or Gel: In various colors for drawing on details like bunny faces, chicks, or floral patterns.
- Lollipop Sticks or Cake Pop Sticks: Essential for creating the “pop” effect. Choose 4-inch or 6-inch sticks depending on your preference.
- Optional Decorations:
- Miniature Edible Flowers: For a spring-inspired touch.
- Shredded Coconut (Colored): Tint shredded coconut with food coloring for a textured, nest-like appearance.
- Miniature Candy Eggs or Chocolate Bunnies: For adding extra Easter flair.
Instructions
Step 1: Bake the Cake
- Preheat Oven and Prepare Pan: Preheat your oven to 350°F (175°C). Grease and flour a 9×13 inch baking pan or spray with baking spray. This prevents the cake from sticking and ensures easy removal.
- Prepare Cake Batter: In a large mixing bowl, combine the cake mix, eggs, oil, and water according to the box instructions. Add any optional flavorings like vanilla extract or lemon zest at this stage.
- Mix Cake Batter: Using an electric mixer, beat the batter on low speed until just combined, then increase to medium speed and beat for 2 minutes, or as directed on the cake mix box. Be careful not to overmix, as this can result in a tough cake.
- Bake the Cake: Pour the batter into the prepared baking pan and spread evenly. Bake for 25-30 minutes, or until a toothpick inserted into the center comes out clean. The edges should be lightly golden brown.
- Cool Completely: Let the cake cool in the pan for 10-15 minutes before inverting it onto a wire rack to cool completely. It’s crucial that the cake is completely cool before crumbling; otherwise, it will be too soft and difficult to work with.
Step 2: Crumble and Frost the Cake
- Crumble the Cake: Once the cake is completely cooled, break it into chunks and place it in a large mixing bowl. Using your hands or a fork, crumble the cake into fine, even crumbs. Ensure there are no large lumps remaining.
- Add Frosting: Add the frosting to the crumbled cake, starting with 1/2 cup. Mix the frosting into the cake crumbs using your hands or a spatula. Start mixing gently and gradually increase pressure as the frosting incorporates.
- Achieve Cake Pop Dough Consistency: Continue mixing until the frosting is evenly distributed throughout the cake crumbs and the mixture comes together to form a moist, moldable dough. You should be able to easily roll a small ball of the mixture and it should hold its shape without being sticky or crumbly. If the mixture is too dry, add a tablespoon of frosting at a time until you reach the desired consistency. If it’s too wet, add a bit more crumbled cake (if you have any extra) or a tablespoon of powdered sugar.
Step 3: Shape the Cake Pops
- Portion Cake Pop Dough: Using a cookie scoop or spoon, scoop out even portions of the cake pop dough. This ensures uniform size and baking. A standard cookie scoop (about 1.5 tablespoons) is a good size for cake pops.
- Roll into Balls: Roll each portion of dough between your palms to create smooth, round balls. If you desire other shapes for Easter, like eggs or bunny heads, gently shape the dough accordingly. For egg shapes, slightly elongate the balls and taper one end. For bunny heads, you might need to use a cookie cutter or mold for more intricate shapes, or simply shape by hand for a more rustic look.
- Chill Cake Pop Balls: Place the rolled cake pop balls on a baking sheet lined with parchment paper or a silicone mat. Cover them loosely with plastic wrap and refrigerate for at least 30 minutes, or up to an hour. Chilling firms up the dough, making it easier to dip and prevents the cake pops from falling off the sticks.
Step 4: Melt the Coating
- Prepare Melting Station: Set up your melting station. You can use a double boiler or microwave-safe bowls. If using a double boiler, fill the bottom pot with water and bring it to a simmer. Place the candy melts or chocolate in the top pot, ensuring the bottom of the pot doesn’t touch the water. If using a microwave, place the candy melts or chocolate in a microwave-safe bowl.
- Melt Candy Melts or Chocolate:
- Double Boiler Method: Gently melt the candy melts or chocolate over simmering water, stirring frequently until smooth and completely melted. Be careful not to overheat, as this can cause the chocolate to seize or become grainy.
- Microwave Method: Microwave in 30-second intervals, stirring well after each interval. Continue microwaving and stirring until the candy melts or chocolate are smooth and melted. Microwaving in short bursts prevents overheating.
- Add Shortening or Coconut Oil (Optional): If desired, stir in a tablespoon of shortening or coconut oil to the melted coating to make it smoother and more fluid. This is especially helpful when using thicker candy melts or chocolate.
- Keep Coating Warm: If not using immediately, keep the melted coating warm by placing the bowl over a pot of warm water or in a very low oven (warm setting). Ensure the coating remains fluid for dipping.
Step 5: Dip and Decorate the Cake Pops
- Prepare Lollipop Sticks: Dip the tip of a lollipop stick into the melted coating and immediately insert it about halfway into a chilled cake pop ball. This “glue” helps secure the stick and prevents the cake pop from falling off. Repeat for all cake pops.
- Chill Again (Briefly): Return the cake pops on sticks to the refrigerator for another 5-10 minutes to allow the coating on the sticks to set, further securing them.
- Dip Cake Pops: Remove a chilled cake pop from the refrigerator. Hold it by the stick and dip it completely into the melted coating, rotating gently to ensure even coverage. Tap off any excess coating by gently tapping the stick against the edge of the bowl or rotating the cake pop upside down.
- Decorate Immediately: While the coating is still wet, immediately decorate the cake pops with sprinkles, edible glitter, mini chocolate chips, or other decorations. The sprinkles will adhere best to wet coating.
- Set Cake Pops: Place the decorated cake pops stick-down in a cake pop stand, styrofoam block, or a tall glass filled with rice or sugar to allow the coating to set completely. Ensure the cake pops don’t touch each other to prevent sticking.
- Add Icing Details (After Setting): Once the coating is completely set and firm, you can add further decorations with decorating icing or gel. Draw on bunny faces, chick features, floral patterns, or any other Easter-themed designs.
Step 6: Store and Serve
- Allow to Set Completely: Ensure the cake pops are completely set and firm before handling or storing. This usually takes about 30-60 minutes at room temperature, or faster in the refrigerator.
- Store Properly: Once set, store the Easter Cake Pops in an airtight container at room temperature for up to 2-3 days, or in the refrigerator for up to a week. If storing in the refrigerator, bring them to room temperature for about 15-20 minutes before serving to prevent the coating from sweating.
- Avoid Overcrowding: When storing, avoid overcrowding the container to prevent the decorations from getting smudged or damaged. You can layer them between sheets of parchment paper if needed.
Nutrition
- Serving Size: One Normal Portion
- Calories: 150-200 kcal
- Sugar: 15-20g
- Sodium: 80-120mg
- Fat: 8-12g
- Saturated Fat: 5-8g
- Trans Fat: 0g
- Carbohydrates: 20-25g
- Fiber: <1g
- Protein: 1-2g
- Cholesterol: 20-30mg