


There are desserts, and then there are dessert experiences. This recipe for Crème Brûlée Cheesecake Cupcakes falls firmly into the latter category. I still remember the first time I decided to tackle this ambitious-sounding mashup. I adore classic crème brûlée – that satisfying crack of caramelized sugar giving way to cool, smooth custard is pure bliss. Cheesecake, with its tangy, dense creaminess and buttery crust, is another family favorite, often requested for birthdays and special occasions. The thought of combining them into individual, elegant cupcakes felt like a stroke of genius, but also slightly intimidating. Would the textures work? Could I achieve that perfect brûléed top without melting the delicate cheesecake underneath? The anticipation built as I gathered the ingredients. The process itself was surprisingly methodical, almost therapeutic – crushing the graham crackers, whipping the cream cheese until perfectly smooth, carefully filling the liners. The aroma wafting from the oven as the cheesecakes baked was incredible. But the real magic happened right before serving. Torching the sugar, watching it bubble and transform into a glassy amber crust over each little cheesecake… it was captivating. When I finally presented them to my family, the reaction was immediate – wide eyes, appreciative murmurs, and then that collective, satisfying crack as spoons broke through the caramelized tops. The verdict? An absolute triumph. The creamy, slightly tangy cheesecake filling was the perfect counterpoint to the sweet, brittle topping, all grounded by the familiar comfort of the graham cracker crust. These Crème Brûlée Cheesecake Cupcakes have since become my go-to dessert for impressing guests or simply treating ourselves to something truly special. They offer the best of both worlds in a perfectly portioned, undeniably elegant package.
The Ultimate Dessert Mashup: Crème Brûlée Cheesecake Cupcakes
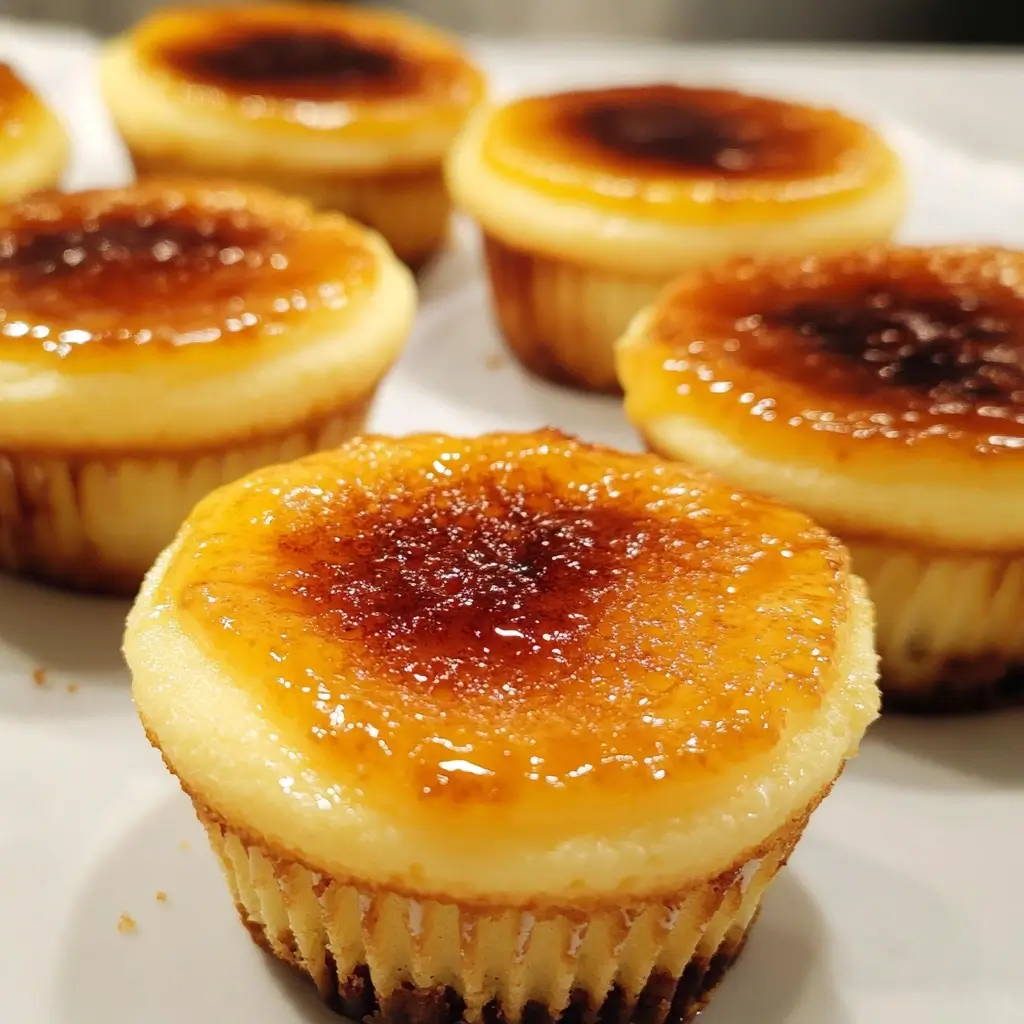
Prepare yourself for a dessert revelation. This recipe marries the sophisticated charm of French Crème Brûlée with the comforting indulgence of classic American cheesecake, all presented in an adorable, individual cupcake form. It’s a multi-textural delight: a crunchy, caramelized sugar topping that shatters under your spoon, revealing a rich, smooth, and tangy cream cheese filling, all built upon a buttery, crumbly graham cracker base. While it sounds complex, each component is straightforward to prepare, and the result is a showstopper dessert perfect for dinner parties, holidays, or any occasion demanding a touch of elegance and indulgence. Don’t be intimidated; follow these steps carefully, and you’ll be rewarded with bakery-worthy treats that taste even better than they look.
Ingredients You’ll Need
Gathering the right ingredients is the first step towards dessert perfection. Using high-quality, full-fat ingredients is recommended for the richest flavor and creamiest texture. Ensure your cream cheese and eggs are at room temperature before you begin – this is crucial for a smooth, lump-free cheesecake filling.
For the Graham Cracker Crust (Makes 12 Cupcakes):
- 1 ½ cups (about 150g) Graham Cracker Crumbs: Approximately 10-12 full graham cracker sheets. You can buy pre-made crumbs or make your own using a food processor or by placing crackers in a zip-top bag and crushing them with a rolling pin. Fine crumbs create a more cohesive crust.
- ¼ cup (50g) Granulated Sugar: Adds a touch of sweetness and helps bind the crust.
- 6 tablespoons (85g) Unsalted Butter, Melted: The binding agent that holds the crust together. Unsalted butter allows you to control the saltiness.
For the Cheesecake Filling:
- 16 ounces (452g) Full-Fat Block Cream Cheese, Softened: This is the star! Use two standard blocks, and ensure they are fully softened to room temperature to prevent lumps. Avoid using whipped cream cheese or low-fat versions, as they can affect the texture.
- ¾ cup (150g) Granulated Sugar: Provides the primary sweetness for the cheesecake filling.
- 2 Large Eggs, Room Temperature: Eggs provide structure and richness. Having them at room temperature helps them incorporate smoothly into the batter without chilling the cream cheese.
- 1 teaspoon Pure Vanilla Extract: Enhances the other flavors and adds a classic cheesecake aroma. Use pure extract for the best taste.
- ¼ cup (60ml) Heavy Cream or Full-Fat Sour Cream, Room Temperature: Adds extra richness, creaminess, and a slight tang (especially if using sour cream). Room temperature ensures smooth incorporation.
For the Crème Brûlée Topping:
- ½ cup (100g) Granulated Sugar (or Turbinado Sugar): This is specifically for torching. Granulated sugar works perfectly, but turbinado (raw) sugar can provide a slightly deeper color and flavor. You’ll likely use about 1-2 teaspoons per cupcake.
Equipment Needed:
- Standard 12-cup Muffin Tin
- Paper or Foil Cupcake Liners
- Food Processor (optional, for crushing graham crackers)
- Mixing Bowls (various sizes)
- Electric Mixer (Handheld or Stand Mixer with paddle attachment)
- Rubber Spatula
- Measuring Cups and Spoons
- Kitchen Torch (Highly Recommended)
Step-by-Step Instructions: Crafting Your Masterpieces
Follow these detailed instructions carefully for the best results. Patience during the cooling and chilling phases is key to achieving the perfect cheesecake texture.
1. Preparation is Key:
- Preheat Oven: Adjust your oven rack to the middle position and preheat your oven to 325°F (160°C). A moderate temperature helps the cheesecakes bake evenly without cracking.
- Prepare Muffin Tin: Line a standard 12-cup muffin tin with paper or foil liners. Foil liners provide slightly better support, but paper liners work perfectly well. Set aside.
2. Make the Graham Cracker Crust:
- Combine Dry Ingredients: In a medium bowl, combine the graham cracker crumbs and ¼ cup granulated sugar. Whisk them together to ensure the sugar is evenly distributed.
- Add Melted Butter: Pour the melted unsalted butter over the crumb mixture. Stir with a fork or spatula until all the crumbs are moistened and the mixture resembles wet sand.
- Press Crust into Liners: Distribute the crumb mixture evenly among the 12 cupcake liners (about 1.5 to 2 tablespoons per liner). Use the bottom of a small glass, a spice jar, or your fingers to press the crumbs down firmly and evenly into the base of each liner. A firm press creates a solid base that won’t crumble excessively.
- Optional Pre-Bake: For an extra-crisp crust, bake the crusts in the preheated oven for 5-7 minutes. This step helps set the crust before adding the filling. Let the tin cool slightly on a wire rack while you prepare the filling. If skipping this step, proceed directly to making the filling.
3. Prepare the Creamy Cheesecake Filling:
- Beat the Cream Cheese: Place the room temperature block cream cheese in the bowl of your stand mixer fitted with the paddle attachment, or in a large bowl if using a handheld electric mixer. Beat the cream cheese on medium-low speed until it’s completely smooth and creamy, with no lumps remaining. Scrape down the sides and bottom of the bowl frequently with a rubber spatula. This initial step is crucial for a silky texture. Do not overbeat at high speed, as this incorporates too much air, which can lead to cracks.
- Add Sugar: With the mixer on low speed, gradually add the ¾ cup granulated sugar. Continue beating until the sugar is fully incorporated and the mixture is smooth. Scrape the bowl again.
- Incorporate Eggs: Add the room temperature eggs one at a time, beating on low speed just until the yolk disappears after each addition. Overmixing at this stage is a common cause of cracked cheesecakes. Mix until just combined.
- Mix in Flavor and Creaminess: Add the pure vanilla extract and the room temperature heavy cream (or sour cream). Mix on low speed until just combined and the batter is smooth and uniform. Give the bowl one final scrape down with the spatula, ensuring everything is incorporated from the bottom. The final batter should be thick, smooth, and luscious.
4. Fill the Cupcake Liners:
- Distribute Batter: Carefully divide the cheesecake batter evenly among the 12 prepared cupcake liners, filling each one about three-quarters full. The batter will puff slightly during baking but shouldn’t overflow if not overfilled. You can use a large cookie scoop or an ice cream scoop for consistent portions.
- Smooth the Tops: Gently smooth the tops of the batter with the back of a small spoon or an offset spatula if desired, though it’s not strictly necessary as they will be covered by the brûlée topping.
5. Bake the Cheesecakes:
- Baking Time: Carefully place the muffin tin in the preheated 325°F (160°C) oven. Bake for approximately 18-22 minutes.
- Check for Doneness: The cheesecakes are done when the edges appear set and slightly puffed, and the centers still have a slight jiggle (not liquid, but not completely firm). They will continue to cook and set as they cool. Avoid overbaking, which can lead to a dry texture and cracks. You can lightly touch the edge; it should feel set.
- No Water Bath Needed (Usually): While large cheesecakes benefit immensely from a water bath, individual cupcakes often bake evenly enough without one due to their small size and the protection of the liners. However, if you consistently have issues with cracking, you can place a pan of hot water on the lower rack of your oven while the cupcakes bake on the middle rack to create steam.
6. Cool Down Slowly and Chill Thoroughly:
- Initial Cooling: Turn off the oven, crack the oven door open slightly, and let the cheesecakes cool inside the oven for about 30 minutes to 1 hour. This gradual cooling process is crucial for preventing cracks caused by sudden temperature changes.
- Room Temperature Cooling: Carefully remove the muffin tin from the oven and place it on a wire rack. Let the cheesecakes cool completely in the tin at room temperature (this may take another 1-2 hours).
- Refrigeration: Once completely cool, cover the muffin tin loosely with plastic wrap (don’t let it touch the cheesecake tops) and transfer it to the refrigerator. Chill for at least 4 hours, but preferably overnight. Chilling is essential for the cheesecake to fully set, develop its flavor, and achieve the correct dense, creamy texture. Do not attempt to brûlée until they are thoroughly chilled.
7. The Grand Finale: Brûlée the Tops:
- Prepare for Torching: This step should be done just before serving for the best crunchy texture. Remove the chilled cheesecakes from the refrigerator. If desired, carefully remove them from the muffin tin and arrange them on a heatproof surface or serving platter (ensure the platter is torch-safe!).
- Apply Sugar: Sprinkle about 1-2 teaspoons of granulated (or turbinado) sugar evenly over the top surface of one cheesecake. Ensure a thin, even layer covers the entire top; avoid clumps or bare spots.
- Torch the Sugar: Ignite your kitchen torch according to its instructions. Hold the flame a few inches above the sugar layer, keeping the torch constantly moving in small circles. Watch carefully as the sugar begins to melt, bubble, and caramelize into a beautiful amber-brown crust. Aim for an even color. Be cautious not to burn the sugar (it will taste bitter) or heat the cheesecake underneath excessively.
- Repeat: Repeat the sugar sprinkling and torching process for each remaining cheesecake, one at a time.
- Let Set: Allow the caramelized sugar topping to cool and harden for a minute or two before serving. It will become brittle and glassy.
8. Serve and Enjoy:
- Serve the Crème Brûlée Cheesecake Cupcakes immediately after torching to enjoy the delightful contrast between the warm, crackly topping and the cool, creamy cheesecake filling.
Nutritional Information (Approximate)
Please note that these values are estimates and can vary based on specific ingredients used (e.g., brand of cream cheese, fat content of cream/sour cream) and precise serving size.
- Servings: This recipe makes 12 standard-sized cupcakes.
- Calories Per Serving (1 Cupcake): Approximately 350-450 calories.
Factors Influencing Nutrition:
- Cream Cheese: Full-fat cream cheese contributes significantly to calories and fat.
- Sugar: Both the filling and the topping contribute sugar content.
- Butter: Used in the crust, adds fat and calories.
- Heavy Cream/Sour Cream: Adds fat and richness.
- Eggs: Contribute protein and fat.
These cupcakes are an indulgent treat, best enjoyed in moderation as part of a balanced diet.
Time Commitment: Planning Your Bake
Understanding the time involved helps you plan when to make these delicious treats. Note that most of the time is inactive chilling time.
- Preparation Time: Approximately 30-40 minutes (includes making crust, mixing filling, filling liners).
- Cook Time: 18-22 minutes.
- Oven Cooling Time: 30-60 minutes.
- Room Temperature Cooling Time: 1-2 hours.
- Chilling Time (Crucial): Minimum 4 hours, preferably 8 hours or overnight.
- Torching Time: Approximately 5-10 minutes (just before serving).
- Total Active Time: Approximately 45-60 minutes.
- Total Time (Including Minimum Chilling): Approximately 7-9 hours.
- Total Time (Including Overnight Chilling): Approximately 11-14 hours (mostly hands-off).
Due to the long chilling requirement, these are an excellent make-ahead dessert. Prepare them the day before you plan to serve them, and simply brûlée the tops just before presenting.
How to Serve Your Crème Brûlée Cheesecake Cupcakes
Presentation enhances the enjoyment of these already spectacular cupcakes. Serve them chilled, with the topping freshly torched for that signature crackle.
- Plating:
- Individual Plates: Serve each cupcake on a small dessert plate for an elegant presentation.
- Platter: Arrange the torched cupcakes on a beautiful platter for parties or gatherings. Ensure the platter is stable and allows guests easy access.
- Keep Liners On: Serve them directly in their cupcake liners for easy handling.
- Temperature: The contrast between the cool, creamy cheesecake and the slightly warm, brittle topping is key. Always serve immediately after torching.
- Garnishes (Optional – Add After Torching):
- Fresh Berries: A few raspberries, blueberries, or a sliced strawberry add a pop of color and tartness that complements the richness.
- Mint Sprig: A small sprig of fresh mint adds visual appeal and a hint of freshness.
- Chocolate Shavings or Drizzle: A light drizzle of melted dark chocolate or some delicate chocolate shavings can add another layer of decadence (apply carefully after the brûlée has set).
- Whipped Cream: While already rich, a tiny dollop of freshly whipped cream on the side is never unwelcome.
- Occasions:
- Dinner Parties: An impressive yet manageable dessert finale.
- Holidays: Perfect for Thanksgiving, Christmas, Easter, or New Year’s Eve celebrations.
- Birthdays: A sophisticated alternative to a traditional cake.
- Potlucks: Easy to transport (before torching) and serve.
- Special Treat: Simply because you deserve something wonderful!
- Pairings:
- Coffee or Espresso: The bitterness cuts through the richness beautifully.
- Dessert Wine: A Late Harvest Riesling or a Sauternes can pair nicely.
- Tea: A simple black tea or Earl Grey complements the flavors well.
Pro Tips for Perfect Crème Brûlée Cheesecake Cupcakes
Elevate your cupcakes from great to unforgettable with these expert tips:
- Room Temperature is Non-Negotiable (for Filling): Seriously, don’t skip this. Softened cream cheese (let it sit out for 1-2 hours) and room temperature eggs and heavy cream/sour cream are essential for a smooth, homogenous, lump-free cheesecake batter. Cold ingredients don’t emulsify properly and can lead to a chunky texture and potentially cracks during baking.
- Mix Master: Avoid Overmixing! Once you add the eggs, mix on low speed only until just combined. Overmixing incorporates too much air into the batter. This air expands during baking and then collapses upon cooling, leading to the dreaded cracks on the surface of your cheesecake. Gentle handling at this stage is key. Scrape the bowl often, but mix minimally.
- Master the Brûlée Technique: For that perfect glassy top, ensure an even, thin layer of sugar. Too thick, and it might not caramelize fully or might taste too sweet. Too thin, and it might burn too quickly. Keep the torch moving constantly, holding it a few inches away. Watch the color transformation closely – aim for a deep amber. Practice on one cupcake first if you’re new to using a torch. Always torch on a heatproof surface and away from flammable materials.
- Patience in Cooling = Perfect Texture: The slow cooling process (in the turned-off oven, then at room temperature) followed by thorough chilling is vital. Rushing the cooling can cause cracks due to thermal shock. Chilling allows the cheesecake structure to set fully, developing that dense, creamy texture that defines great cheesecake. Don’t try to speed it up in the freezer (unless you plan to freeze for long-term storage, see FAQ).
- Make-Ahead Strategy: Embrace the make-ahead nature of this dessert! Bake the cheesecakes, cool them completely, and store them covered in the refrigerator for up to 2-3 days. This actually allows the flavors to meld and deepen. Do the brûlée topping only right before serving. The caramelized sugar will absorb moisture and soften if done too far in advance, losing its signature crunch.
Frequently Asked Questions (FAQ)
Here are answers to common questions about making Crème Brûlée Cheesecake Cupcakes:
- Q: Can I make these without a kitchen torch? What are the alternatives?
- A: A kitchen torch provides the best, most controlled results for caramelizing the sugar evenly without excessively heating the cheesecake below. However, you can use your oven’s broiler. Place the chilled, sugar-topped cheesecakes on a baking sheet. Position the oven rack so the tops are 3-5 inches from the broiler element. Turn the broiler on high and watch constantly – it will only take 30-90 seconds. Rotate the pan or individual cupcakes as needed for even browning. Be extremely vigilant, as the sugar can go from caramelized to burnt in seconds. The broiler method heats the cheesecake more than a torch, so the temperature contrast won’t be as pronounced. It’s less ideal but feasible if you don’t own a torch.
- Q: My cheesecakes cracked! What did I do wrong?
- A: Cracking is usually due to one or more factors:
- Overmixing: Incorporating too much air, especially after adding eggs. Mix on low speed and only until combined.
- Ingredients Too Cold: Cream cheese, eggs, or cream/sour cream were not fully at room temperature, leading to lumps and uneven mixing/baking.
- Overbaking: Baking them until completely firm. Remember, the center should still have a slight jiggle when you remove them from the oven.
- Cooling Too Quickly: Subjecting the cheesecakes to drastic temperature changes. Utilize the slow cooling process (in-oven, then room temp) before refrigerating.
- The good news for this recipe is that the brûléed topping hides minor surface imperfections beautifully!
- A: Cracking is usually due to one or more factors:
- Q: How far in advance can I make these, and how should I store them?
- A: You can bake and chill the cheesecake cupcakes (without the topping) up to 3 days in advance. Once completely cooled, cover them loosely with plastic wrap (or store them in an airtight container) in the refrigerator. Do not add the sugar topping until just before you plan to serve them. The caramelized sugar will liquefy and become soggy if stored in the fridge.
- Q: Can I freeze Crème Brûlée Cheesecake Cupcakes?
- A: Yes, you can freeze the baked and chilled cheesecake cupcakes before adding the brûlée topping. Once completely chilled, place the cupcakes (still in their liners) on a baking sheet and freeze until solid. Then, transfer them to an airtight freezer container or freezer bag, separating layers with parchment paper if needed. They can be frozen for up to 1-2 months. To serve, thaw them overnight in the refrigerator. Let them sit at room temperature for about 20-30 minutes before torching the tops. Do not freeze them after the topping has been brûléed, as the topping will become sticky and unpleasant upon thawing.
- Q: Can I use a different type of crust?
- A: Absolutely! While graham cracker crust is classic, feel free to experiment.
- Oreo Crust: Substitute crushed Oreo cookies (filling included) for the graham crackers. You might want to reduce or omit the added sugar in the crust, as Oreos are already sweet.
- Shortbread Crust: Use crushed shortbread cookies for a buttery alternative.
- Gingersnap Crust: Crushed gingersnaps provide a warm, spicy contrast to the cool cheesecake.
- Adjust the amount of melted butter slightly depending on the cookie’s fat content. The process remains the same: combine crumbs, sugar (if using), and melted butter, then press into liners.
- A: Absolutely! While graham cracker crust is classic, feel free to experiment.

Crème Brûlée Cheesecake Cupcakes Recipe
Ingredients
For the Graham Cracker Crust (Makes 12 Cupcakes):
- 1 ½ cups (about 150g) Graham Cracker Crumbs: Approximately 10-12 full graham cracker sheets. You can buy pre-made crumbs or make your own using a food processor or by placing crackers in a zip-top bag and crushing them with a rolling pin. Fine crumbs create a more cohesive crust.
- ¼ cup (50g) Granulated Sugar: Adds a touch of sweetness and helps bind the crust.
- 6 tablespoons (85g) Unsalted Butter, Melted: The binding agent that holds the crust together. Unsalted butter allows you to control the saltiness.
For the Cheesecake Filling:
- 16 ounces (452g) Full-Fat Block Cream Cheese, Softened: This is the star! Use two standard blocks, and ensure they are fully softened to room temperature to prevent lumps. Avoid using whipped cream cheese or low-fat versions, as they can affect the texture.
- ¾ cup (150g) Granulated Sugar: Provides the primary sweetness for the cheesecake filling.
- 2 Large Eggs, Room Temperature: Eggs provide structure and richness. Having them at room temperature helps them incorporate smoothly into the batter without chilling the cream cheese.
- 1 teaspoon Pure Vanilla Extract: Enhances the other flavors and adds a classic cheesecake aroma. Use pure extract for the best taste.
- ¼ cup (60ml) Heavy Cream or Full-Fat Sour Cream, Room Temperature: Adds extra richness, creaminess, and a slight tang (especially if using sour cream). Room temperature ensures smooth incorporation.
For the Crème Brûlée Topping:
- ½ cup (100g) Granulated Sugar (or Turbinado Sugar): This is specifically for torching. Granulated sugar works perfectly, but turbinado (raw) sugar can provide a slightly deeper color and flavor. You’ll likely use about 1-2 teaspoons per cupcake.
Instructions
1. Preparation is Key:
- Preheat Oven: Adjust your oven rack to the middle position and preheat your oven to 325°F (160°C). A moderate temperature helps the cheesecakes bake evenly without cracking.
- Prepare Muffin Tin: Line a standard 12-cup muffin tin with paper or foil liners. Foil liners provide slightly better support, but paper liners work perfectly well. Set aside.
2. Make the Graham Cracker Crust:
- Combine Dry Ingredients: In a medium bowl, combine the graham cracker crumbs and ¼ cup granulated sugar. Whisk them together to ensure the sugar is evenly distributed.
- Add Melted Butter: Pour the melted unsalted butter over the crumb mixture. Stir with a fork or spatula until all the crumbs are moistened and the mixture resembles wet sand.
- Press Crust into Liners: Distribute the crumb mixture evenly among the 12 cupcake liners (about 1.5 to 2 tablespoons per liner). Use the bottom of a small glass, a spice jar, or your fingers to press the crumbs down firmly and evenly into the base of each liner. A firm press creates a solid base that won’t crumble excessively.
- Optional Pre-Bake: For an extra-crisp crust, bake the crusts in the preheated oven for 5-7 minutes. This step helps set the crust before adding the filling. Let the tin cool slightly on a wire rack while you prepare the filling. If skipping this step, proceed directly to making the filling.
3. Prepare the Creamy Cheesecake Filling:
- Beat the Cream Cheese: Place the room temperature block cream cheese in the bowl of your stand mixer fitted with the paddle attachment, or in a large bowl if using a handheld electric mixer. Beat the cream cheese on medium-low speed until it’s completely smooth and creamy, with no lumps remaining. Scrape down the sides and bottom of the bowl frequently with a rubber spatula. This initial step is crucial for a silky texture. Do not overbeat at high speed, as this incorporates too much air, which can lead to cracks.
- Add Sugar: With the mixer on low speed, gradually add the ¾ cup granulated sugar. Continue beating until the sugar is fully incorporated and the mixture is smooth. Scrape the bowl again.
- Incorporate Eggs: Add the room temperature eggs one at a time, beating on low speed just until the yolk disappears after each addition. Overmixing at this stage is a common cause of cracked cheesecakes. Mix until just combined.
- Mix in Flavor and Creaminess: Add the pure vanilla extract and the room temperature heavy cream (or sour cream). Mix on low speed until just combined and the batter is smooth and uniform. Give the bowl one final scrape down with the spatula, ensuring everything is incorporated from the bottom. The final batter should be thick, smooth, and luscious.
4. Fill the Cupcake Liners:
- Distribute Batter: Carefully divide the cheesecake batter evenly among the 12 prepared cupcake liners, filling each one about three-quarters full. The batter will puff slightly during baking but shouldn’t overflow if not overfilled. You can use a large cookie scoop or an ice cream scoop for consistent portions.
- Smooth the Tops: Gently smooth the tops of the batter with the back of a small spoon or an offset spatula if desired, though it’s not strictly necessary as they will be covered by the brûlée topping.
5. Bake the Cheesecakes:
- Baking Time: Carefully place the muffin tin in the preheated 325°F (160°C) oven. Bake for approximately 18-22 minutes.
- Check for Doneness: The cheesecakes are done when the edges appear set and slightly puffed, and the centers still have a slight jiggle (not liquid, but not completely firm). They will continue to cook and set as they cool. Avoid overbaking, which can lead to a dry texture and cracks. You can lightly touch the edge; it should feel set.
- No Water Bath Needed (Usually): While large cheesecakes benefit immensely from a water bath, individual cupcakes often bake evenly enough without one due to their small size and the protection of the liners. However, if you consistently have issues with cracking, you can place a pan of hot water on the lower rack of your oven while the cupcakes bake on the middle rack to create steam.
6. Cool Down Slowly and Chill Thoroughly:
- Initial Cooling: Turn off the oven, crack the oven door open slightly, and let the cheesecakes cool inside the oven for about 30 minutes to 1 hour. This gradual cooling process is crucial for preventing cracks caused by sudden temperature changes.
- Room Temperature Cooling: Carefully remove the muffin tin from the oven and place it on a wire rack. Let the cheesecakes cool completely in the tin at room temperature (this may take another 1-2 hours).
- Refrigeration: Once completely cool, cover the muffin tin loosely with plastic wrap (don’t let it touch the cheesecake tops) and transfer it to the refrigerator. Chill for at least 4 hours, but preferably overnight. Chilling is essential for the cheesecake to fully set, develop its flavor, and achieve the correct dense, creamy texture. Do not attempt to brûlée until they are thoroughly chilled.
7. The Grand Finale: Brûlée the Tops:
- Prepare for Torching: This step should be done just before serving for the best crunchy texture. Remove the chilled cheesecakes from the refrigerator. If desired, carefully remove them from the muffin tin and arrange them on a heatproof surface or serving platter (ensure the platter is torch-safe!).
- Apply Sugar: Sprinkle about 1-2 teaspoons of granulated (or turbinado) sugar evenly over the top surface of one cheesecake. Ensure a thin, even layer covers the entire top; avoid clumps or bare spots.
- Torch the Sugar: Ignite your kitchen torch according to its instructions. Hold the flame a few inches above the sugar layer, keeping the torch constantly moving in small circles. Watch carefully as the sugar begins to melt, bubble, and caramelize into a beautiful amber-brown crust. Aim for an even color. Be cautious not to burn the sugar (it will taste bitter) or heat the cheesecake underneath excessively.
- Repeat: Repeat the sugar sprinkling and torching process for each remaining cheesecake, one at a time.
- Let Set: Allow the caramelized sugar topping to cool and harden for a minute or two before serving. It will become brittle and glassy.
8. Serve and Enjoy:
- Serve the Crème Brûlée Cheesecake Cupcakes immediately after torching to enjoy the delightful contrast between the warm, crackly topping and the cool, creamy cheesecake filling.
Nutrition
- Serving Size: one normal portion
- Calories: 350-450


