There are few desserts that evoke such pure, unadulterated joy in my household as these Coconut Tartlets. The first time I baked a batch, the aroma alone was enough to draw everyone into the kitchen, eyes wide with anticipation. The moment of truth – that first bite into the crisp, buttery pastry giving way to a sweet, chewy, and intensely coconutty filling – was met with a chorus of “Mmmms” and “This is the best thing ever!” Since then, they’ve become a staple for special occasions, afternoon tea, or simply when we crave a bite of sunshine. The golden-brown tops, the tender crumb of the pastry, and the rich, moist coconut interior create a symphony of textures and flavors that is both comforting and sophisticated. They look incredibly inviting on a dessert platter, and I’ve found they disappear remarkably quickly, a testament to their universal appeal. Preparing them is a joy in itself; the process of making the pastry from scratch, whisking together the fragrant filling, and watching them bake to perfection is a wonderfully satisfying culinary experience. I’ve tweaked and perfected this recipe over time, and I’m thrilled to share what I believe is the ultimate guide to creating these delectable little treats that are sure to win hearts and tantalize taste buds.
The Ultimate Coconut Tartlets: A Step-by-Step Guide to Tropical Bliss
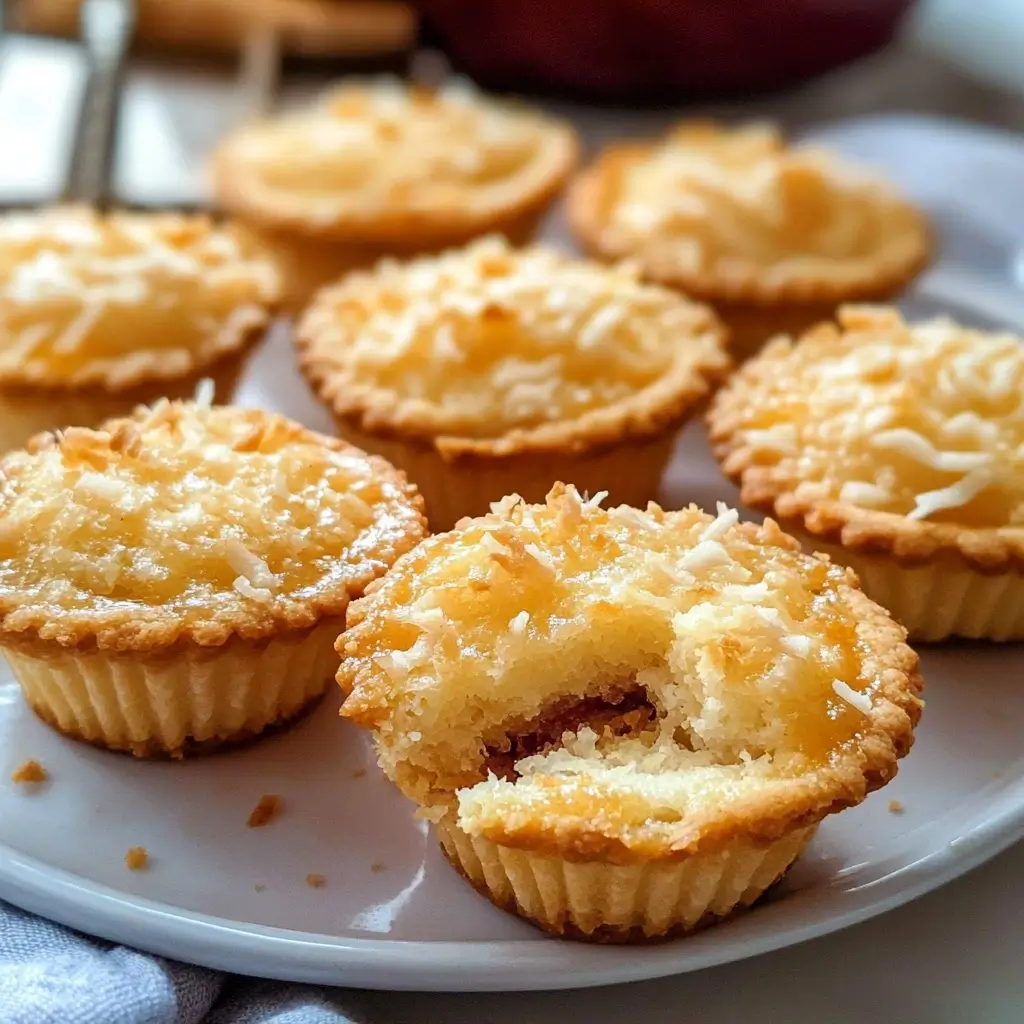
Coconut tartlets are a delightful confection, balancing a rich, buttery shortcrust pastry with a sweet, moist, and intensely aromatic coconut filling. These individual-sized treats are perfect for any occasion, from elegant afternoon teas to casual family gatherings. Their golden, slightly caramelized tops and tender interiors make them utterly irresistible. This comprehensive guide will walk you through creating perfect coconut tartlets every single time, ensuring a bakery-quality result from your own kitchen. We’ll delve into the nuances of creating the perfect pastry, the secrets to a luscious filling, and tips for making these tarts truly shine.
Ingredients: Crafting Your Coconut Masterpieces
Crafting the perfect coconut tartlet begins with quality ingredients. Each component plays a crucial role in the final texture and flavor. Below is a detailed list of what you’ll need, with specific amounts to ensure success.
For the Sweet Shortcrust Pastry (Yields enough for 12-14 standard tartlet shells):
- All-Purpose Flour: 1 ¾ cups (210g) – Provides the structure for our pastry.
- Unsalted Butter: ½ cup + 2 tablespoons (140g), cold and cubed – Cold butter is essential for a flaky crust. The small cubes incorporate more easily.
- Powdered Sugar (Icing Sugar): ¼ cup (30g), sifted – Dissolves easily and creates a tender, melt-in-the-mouth texture.
- Large Egg Yolk: 1 – Adds richness, color, and helps bind the dough.
- Ice Water: 2-3 tablespoons – Use sparingly, just enough to bring the dough together. The cold temperature keeps the butter from melting.
- Salt: ¼ teaspoon – Enhances the flavors of the pastry.
For the Luscious Coconut Filling (Fills 12-14 tartlet shells):
- Unsweetened Desiccated Coconut: 2 ½ cups (225g) – The star of the show! Unsweetened allows you to control the overall sweetness. If using sweetened, you may need to reduce the sugar.
- Granulated Sugar: ¾ cup (150g) – Provides sweetness and contributes to the texture. Adjust to your preference if using sweetened coconut.
- Large Eggs: 2 – Bind the filling and provide richness and structure.
- Unsalted Butter: ¼ cup (57g), melted – Adds moisture, richness, and helps with browning.
- Heavy Cream (or Full-Fat Coconut Milk for extra coconut flavor): ½ cup (120ml) – Contributes to a creamy, moist texture.
- Vanilla Extract: 1 teaspoon – Enhances the sweetness and complements the coconut flavor.
- Almond Extract (Optional but Recommended): ¼ teaspoon – A small amount beautifully elevates the coconut flavor.
- Salt: ⅛ teaspoon – Balances the sweetness.
Optional Garnish:
- Toasted Coconut Flakes: For sprinkling on top after baking.
- Glace Cherries: A classic, nostalgic topping, halved or quartered.
- Powdered Sugar: For a light dusting before serving.
Instructions: Your Journey to Coconut Tartlet Perfection
Follow these detailed steps meticulously for the best results. We’ll first prepare the pastry, then the filling, and finally assemble and bake our tartlets.
Part 1: Preparing the Sweet Shortcrust Pastry
- Combine Dry Ingredients: In a large mixing bowl, whisk together the all-purpose flour, sifted powdered sugar, and salt. This ensures even distribution.
- Cut in the Butter: Add the cold, cubed unsalted butter to the flour mixture. Using a pastry blender, your fingertips, or a food processor (on pulse mode), cut the butter into the flour until the mixture resembles coarse breadcrumbs with some pea-sized pieces of butter remaining. Working quickly is key to keep the butter cold. These small pieces of butter will melt during baking, creating steam and those desirable flaky layers.
- Add Egg Yolk and Water: In a small bowl, lightly whisk the egg yolk with 2 tablespoons of ice water. Make a well in the center of the flour-butter mixture and pour in the egg yolk mixture. Gently combine with a fork or your hands until the dough just starts to come together. If it seems too dry and crumbly, add the remaining tablespoon of ice water, one teaspoon at a time, until it forms a cohesive (but not sticky) dough. Be careful not to overmix, as this will develop the gluten and make the pastry tough.
- Chill the Dough: Turn the dough out onto a lightly floured surface and gently pat it into a flat disc. Wrap it tightly in plastic wrap and refrigerate for at least 1 hour (or up to 2 days). Chilling allows the gluten to relax (preventing shrinkage) and the fat to solidify, making it easier to roll and contributing to flakiness.
Part 2: Shaping and Blind Baking the Tartlet Shells
You’ll need a 12-cup standard muffin tin or individual tartlet tins (approximately 3 inches/7.5 cm in diameter).
- Preheat Oven and Prepare Tins: Preheat your oven to 375°F (190°C). Lightly grease your muffin tin cups or individual tartlet tins if they are not non-stick.
- Roll the Dough: On a lightly floured surface, unwrap the chilled dough. If it’s very firm, let it sit at room temperature for 5-10 minutes to become more pliable. Roll the dough out to about ⅛ inch (3mm) thickness. Work quickly to keep the dough cool.
- Cut and Line Tins: Using a round cookie cutter (approximately 4 inches/10 cm in diameter, or sized appropriately to line your tins with a slight overhang), cut out circles of dough. Gently press each circle into a muffin cup or tartlet tin, ensuring it fits snugly against the bottom and sides. Prick the bottom of each pastry case a few times with a fork. This allows steam to escape and prevents the base from puffing up during baking.
- Chill Again (Crucial Step): Place the lined tins in the refrigerator or freezer for another 15-20 minutes. This further helps prevent shrinkage during baking.
- Blind Bake: Line each pastry case with a small square of parchment paper or a cupcake liner, and fill with pie weights, dried beans, or uncooked rice. This process, known as blind baking, pre-bakes the crust and prevents a “soggy bottom” when the wet filling is added.
- First Bake: Bake for 15 minutes. Carefully remove the parchment paper and weights.
- Second Bake (Sealing the Crust): Return the tartlet shells to the oven and bake for another 5-7 minutes, or until the pastry is lightly golden and looks dry. This step ensures the inside of the crust is cooked through. If you have any cracks, you can optionally brush the hot pastry shells with a little beaten egg white immediately after removing them from the oven to seal them.
- Cool Slightly: Remove the pastry shells from the oven and let them cool in the tins for a few minutes before carefully transferring them to a wire rack to cool further while you prepare the filling. If using a muffin tin, they might be easier to fill while still in the tin. Reduce oven temperature to 350°F (175°C).
Part 3: Preparing the Luscious Coconut Filling
- Combine Wet Ingredients: In a medium mixing bowl, whisk together the granulated sugar and the large eggs until well combined and slightly pale.
- Add Butter, Cream, and Flavorings: Whisk in the melted unsalted butter, heavy cream (or coconut milk), vanilla extract, optional almond extract, and salt until the mixture is smooth and homogenous.
- Fold in Coconut: Add the unsweetened desiccated coconut to the wet mixture. Use a spatula to fold it in gently until all the coconut is evenly moistened. Do not overmix. The mixture will be thick.
Part 4: Assembling and Baking the Coconut Tartlets
- Fill the Tartlet Shells: Spoon the coconut filling evenly into the pre-baked pastry shells. Fill them almost to the top, but be mindful that they might puff slightly during baking. Avoid overfilling to prevent spillage.
- Bake: Place the filled tartlets (either on a baking sheet if using individual tins, or in the muffin tin) into the preheated oven at 350°F (175°C). Bake for 20-25 minutes, or until the filling is set and the tops are beautifully golden brown. The edges of the coconut should look nicely toasted.
- Cool Completely: Once baked, remove the tartlets from the oven. Let them cool in their tins for 10-15 minutes before carefully transferring them to a wire rack to cool completely. They are delicate when hot, so handle with care. Cooling completely allows the filling to set fully and the flavors to meld.
Part 5: Garnishing (Optional)
- Toast Coconut Flakes (if using): Spread a thin layer of coconut flakes on a baking sheet and toast in the oven at 325°F (160°C) for 3-5 minutes, watching carefully as they can burn quickly.
- Decorate: Once the tartlets are completely cool, you can sprinkle them with toasted coconut flakes, place a half or quarter glacé cherry in the center, or give them a light dusting of powdered sugar just before serving.
Why This Recipe Works: The Science and Art of Perfect Tartlets
Understanding the “why” behind certain steps can elevate your baking:
- Cold Ingredients for Pastry: Keeping butter cold and using ice water limits gluten development, resulting in a tender, flaky crust rather than a tough one. The cold butter melts during baking, creating steam pockets that separate layers of dough.
- Resting the Dough: Chilling the dough allows the flour to hydrate fully and the gluten to relax. This makes the dough easier to roll and significantly reduces shrinkage during baking.
- Blind Baking: This is non-negotiable for filled tarts. It partially cooks the pastry shell, creating a barrier against the wet filling and preventing the dreaded “soggy bottom.” The second, shorter bake without weights dries out the interior of the shell.
- Not Overmixing Filling: Gentle folding incorporates the coconut without developing too much structure in the eggs, keeping the filling tender and moist rather than rubbery.
- Cooling Completely: This allows the filling to set properly. Warm tartlets can be crumbly and the filling might not hold its shape. The flavors also meld and intensify as they cool.
- Balancing Sweetness: Using unsweetened desiccated coconut and controlling the sugar in the filling gives you command over the final taste profile, preventing it from becoming cloyingly sweet.
Nutrition Facts
- Servings: This recipe makes approximately 12-14 standard-sized tartlets.
- Calories per serving (approximate): Around 300-350 calories per tartlet. This can vary based on the exact size of your tartlets and specific ingredients used (e.g., full-fat coconut milk vs. heavy cream).
Disclaimer: Nutritional information is an estimate and can vary based on specific ingredients, brands, and portion sizes.
Preparation and Cook Time
- Pastry Preparation Time: 20 minutes active, plus 1 hour 15 minutes chilling time (minimum).
- Filling Preparation Time: 10 minutes active.
- Assembly Time: 10 minutes.
- Baking Time:
- Blind Baking: 20-22 minutes total.
- Final Bake with Filling: 20-25 minutes.
- Total Active Time: Approximately 40 minutes.
- Total Time (including chilling and cooling): Approximately 3.5 – 4 hours (much of this is inactive time).
How to Serve Your Delicious Coconut Tartlets
These versatile tartlets can be served in numerous delightful ways:
- Classic Afternoon Tea:
- Arrange them on a tiered stand alongside scones, finger sandwiches, and other petit fours.
- Serve with a pot of Earl Grey, English Breakfast, or a fragrant herbal tea.
- Dessert Centerpiece:
- Serve slightly warm or at room temperature.
- Accompany with a dollop of freshly whipped cream or a scoop of vanilla bean ice cream.
- A drizzle of raspberry coulis or passion fruit pulp can add a lovely tart contrast.
- Coffee Break Treat:
- Perfect alongside a freshly brewed coffee or latte for a mid-morning or afternoon pick-me-up.
- Potlucks and Parties:
- Their individual size makes them easy to serve and transport.
- They are always a crowd-pleaser and tend to disappear quickly!
- Brunch Addition:
- Offer them as a sweet counterpoint to savory brunch dishes.
- Tropical Theme:
- Enhance the tropical vibe by serving with fresh pineapple slices, mango, or a passion fruit curd.
- A small edible flower can add a beautiful visual touch.
- Gift Giving:
- Package them in a pretty box tied with a ribbon for a delightful homemade gift.
Additional Tips for Coconut Tartlet Success
- Don’t Overwork the Pastry: Mix the pastry dough only until it just comes together. Overworking develops gluten, leading to a tough crust instead of a tender, flaky one. Handle it gently at all stages.
- Embrace the Chill: Do not skip or shorten the chilling times for the pastry. Chilling the dough after mixing and again after lining the tins is paramount for preventing shrinkage and ensuring a flaky texture. Cold dough is also much easier to work with.
- Uniformity is Key: When rolling out the dough and lining the tins, aim for consistent thickness. This ensures even baking. Similarly, try to distribute the filling evenly among the tartlet shells for consistent results.
- Watch for Doneness: Ovens vary. Keep an eye on the tartlets during the final bake. They are done when the filling is set (a skewer inserted near the center should come out mostly clean or with moist crumbs, not wet batter) and the tops are a beautiful golden brown. The edges of the coconut should look nicely toasted.
- Storage Savvy: Store leftover coconut tartlets in an airtight container at room temperature for up to 2 days, or in the refrigerator for up to 4-5 days. They are best enjoyed within the first couple of days. If refrigerated, allow them to come to room temperature or warm slightly in a low oven (300°F/150°C for 5-7 minutes) before serving to refresh the pastry.
Frequently Asked Questions (FAQ)
Q1: Can I use pre-made shortcrust pastry shells?
A1: Absolutely! If you’re short on time or prefer not to make pastry from scratch, good quality store-bought sweet shortcrust pastry (either in a block to roll out or pre-formed shells) can be a great shortcut. Simply follow the package instructions for blind baking before adding the coconut filling. The homemade touch is special, but convenience is sometimes key!
Q2: What’s the difference between sweetened and unsweetened desiccated coconut, and can I use either?
A2: Unsweetened desiccated coconut contains only coconut, allowing you to control the sugar level in your recipe. Sweetened desiccated coconut has sugar added. This recipe calls for unsweetened. If you only have sweetened desiccated coconut, you can use it, but you should reduce the amount of granulated sugar in the filling by about ¼ cup (50g) to avoid the tartlets being overly sweet. Taste the filling mixture (before adding raw eggs, if you prefer, or make a tiny test batch) and adjust if necessary.
Q3: How do I prevent my pastry from shrinking in the tins during blind baking?
A3: Shrinkage is a common pastry problem. The keys to preventing it are:
* Minimal liquid: Don’t add too much water to your dough.
* Don’t overwork: Mix gently and minimally.
* Resting/Chilling: Chill the dough thoroughly after making it AND after lining the tins. This relaxes the gluten.
* Leave an overhang: When lining the tins, leave a slight overhang of pastry above the rim. This can be trimmed neatly after blind baking.
* Use pie weights: Proper weighting during blind baking helps hold the sides in place.
Q4: Can I make these coconut tartlets ahead of time?
A4: Yes, you can!
* Pastry Dough: Can be made up to 2 days in advance and stored tightly wrapped in the refrigerator, or frozen for up to 3 months (thaw overnight in the fridge).
* Blind-Baked Shells: Can be baked a day in advance, cooled completely, and stored in an airtight container at room temperature.
* Filled Tartlets: Can be baked a day ahead, cooled, and stored in an airtight container at room temperature or in the fridge. If refrigerated, allow them to come to room temperature or warm slightly before serving.
Q5: My coconut filling seems a bit dry/too wet. What went wrong?
A5:
* Too Dry: This could be due to using very dry desiccated coconut, slightly too much coconut, or not enough liquid (cream/eggs). Ensure accurate measurements. If your coconut seems exceptionally dry, you could try adding an extra tablespoon of cream.
* Too Wet: This might happen if you used extra-large eggs or too much liquid. Ensure accurate measurements. The filling should be thick and pasty, not runny, before baking. If it seems very loose, you could add an extra tablespoon or two of desiccated coconut to help absorb excess moisture. Also, ensure the tartlets are baked until the filling is fully set.
Enjoy the delightful process of baking and, more importantly, savoring these exquisite Coconut Tartlets. They are a true testament to how simple ingredients can combine to create something truly magical.
Print
Coconut Tartlets Recipe
Ingredients
For the Sweet Shortcrust Pastry (Yields enough for 12-14 standard tartlet shells):
- All-Purpose Flour: 1 ¾ cups (210g) – Provides the structure for our pastry.
- Unsalted Butter: ½ cup + 2 tablespoons (140g), cold and cubed – Cold butter is essential for a flaky crust. The small cubes incorporate more easily.
- Powdered Sugar (Icing Sugar): ¼ cup (30g), sifted – Dissolves easily and creates a tender, melt-in-the-mouth texture.
- Large Egg Yolk: 1 – Adds richness, color, and helps bind the dough.
- Ice Water: 2-3 tablespoons – Use sparingly, just enough to bring the dough together. The cold temperature keeps the butter from melting.
- Salt: ¼ teaspoon – Enhances the flavors of the pastry.
For the Luscious Coconut Filling (Fills 12-14 tartlet shells):
- Unsweetened Desiccated Coconut: 2 ½ cups (225g) – The star of the show! Unsweetened allows you to control the overall sweetness. If using sweetened, you may need to reduce the sugar.
- Granulated Sugar: ¾ cup (150g) – Provides sweetness and contributes to the texture. Adjust to your preference if using sweetened coconut.
- Large Eggs: 2 – Bind the filling and provide richness and structure.
- Unsalted Butter: ¼ cup (57g), melted – Adds moisture, richness, and helps with browning.
- Heavy Cream (or Full-Fat Coconut Milk for extra coconut flavor): ½ cup (120ml) – Contributes to a creamy, moist texture.
- Vanilla Extract: 1 teaspoon – Enhances the sweetness and complements the coconut flavor.
- Almond Extract (Optional but Recommended): ¼ teaspoon – A small amount beautifully elevates the coconut flavor.
- Salt: ⅛ teaspoon – Balances the sweetness.
Instructions
Part 1: Preparing the Sweet Shortcrust Pastry
- Combine Dry Ingredients: In a large mixing bowl, whisk together the all-purpose flour, sifted powdered sugar, and salt. This ensures even distribution.
- Cut in the Butter: Add the cold, cubed unsalted butter to the flour mixture. Using a pastry blender, your fingertips, or a food processor (on pulse mode), cut the butter into the flour until the mixture resembles coarse breadcrumbs with some pea-sized pieces of butter remaining. Working quickly is key to keep the butter cold. These small pieces of butter will melt during baking, creating steam and those desirable flaky layers.
- Add Egg Yolk and Water: In a small bowl, lightly whisk the egg yolk with 2 tablespoons of ice water. Make a well in the center of the flour-butter mixture and pour in the egg yolk mixture. Gently combine with a fork or your hands until the dough just starts to come together. If it seems too dry and crumbly, add the remaining tablespoon of ice water, one teaspoon at a time, until it forms a cohesive (but not sticky) dough. Be careful not to overmix, as this will develop the gluten and make the pastry tough.
- Chill the Dough: Turn the dough out onto a lightly floured surface and gently pat it into a flat disc. Wrap it tightly in plastic wrap and refrigerate for at least 1 hour (or up to 2 days). Chilling allows the gluten to relax (preventing shrinkage) and the fat to solidify, making it easier to roll and contributing to flakiness.
Part 2: Shaping and Blind Baking the Tartlet Shells
You’ll need a 12-cup standard muffin tin or individual tartlet tins (approximately 3 inches/7.5 cm in diameter).
- Preheat Oven and Prepare Tins: Preheat your oven to 375°F (190°C). Lightly grease your muffin tin cups or individual tartlet tins if they are not non-stick.
- Roll the Dough: On a lightly floured surface, unwrap the chilled dough. If it’s very firm, let it sit at room temperature for 5-10 minutes to become more pliable. Roll the dough out to about ⅛ inch (3mm) thickness. Work quickly to keep the dough cool.
- Cut and Line Tins: Using a round cookie cutter (approximately 4 inches/10 cm in diameter, or sized appropriately to line your tins with a slight overhang), cut out circles of dough. Gently press each circle into a muffin cup or tartlet tin, ensuring it fits snugly against the bottom and sides. Prick the bottom of each pastry case a few times with a fork. This allows steam to escape and prevents the base from puffing up during baking.
- Chill Again (Crucial Step): Place the lined tins in the refrigerator or freezer for another 15-20 minutes. This further helps prevent shrinkage during baking.
- Blind Bake: Line each pastry case with a small square of parchment paper or a cupcake liner, and fill with pie weights, dried beans, or uncooked rice. This process, known as blind baking, pre-bakes the crust and prevents a “soggy bottom” when the wet filling is added.
- First Bake: Bake for 15 minutes. Carefully remove the parchment paper and weights.
- Second Bake (Sealing the Crust): Return the tartlet shells to the oven and bake for another 5-7 minutes, or until the pastry is lightly golden and looks dry. This step ensures the inside of the crust is cooked through. If you have any cracks, you can optionally brush the hot pastry shells with a little beaten egg white immediately after removing them from the oven to seal them.
- Cool Slightly: Remove the pastry shells from the oven and let them cool in the tins for a few minutes before carefully transferring them to a wire rack to cool further while you prepare the filling. If using a muffin tin, they might be easier to fill while still in the tin. Reduce oven temperature to 350°F (175°C).
Part 3: Preparing the Luscious Coconut Filling
- Combine Wet Ingredients: In a medium mixing bowl, whisk together the granulated sugar and the large eggs until well combined and slightly pale.
- Add Butter, Cream, and Flavorings: Whisk in the melted unsalted butter, heavy cream (or coconut milk), vanilla extract, optional almond extract, and salt until the mixture is smooth and homogenous.
- Fold in Coconut: Add the unsweetened desiccated coconut to the wet mixture. Use a spatula to fold it in gently until all the coconut is evenly moistened. Do not overmix. The mixture will be thick.
Part 4: Assembling and Baking the Coconut Tartlets
- Fill the Tartlet Shells: Spoon the coconut filling evenly into the pre-baked pastry shells. Fill them almost to the top, but be mindful that they might puff slightly during baking. Avoid overfilling to prevent spillage.
- Bake: Place the filled tartlets (either on a baking sheet if using individual tins, or in the muffin tin) into the preheated oven at 350°F (175°C). Bake for 20-25 minutes, or until the filling is set and the tops are beautifully golden brown. The edges of the coconut should look nicely toasted.
- Cool Completely: Once baked, remove the tartlets from the oven. Let them cool in their tins for 10-15 minutes before carefully transferring them to a wire rack to cool completely. They are delicate when hot, so handle with care. Cooling completely allows the filling to set fully and the flavors to meld.
Part 5: Garnishing (Optional)
- Toast Coconut Flakes (if using): Spread a thin layer of coconut flakes on a baking sheet and toast in the oven at 325°F (160°C) for 3-5 minutes, watching carefully as they can burn quickly.
- Decorate: Once the tartlets are completely cool, you can sprinkle them with toasted coconut flakes, place a half or quarter glacé cherry in the center, or give them a light dusting of powdered sugar just before serving.
Nutrition
- Serving Size: One Normal Portion
- Calories: 300-350