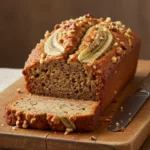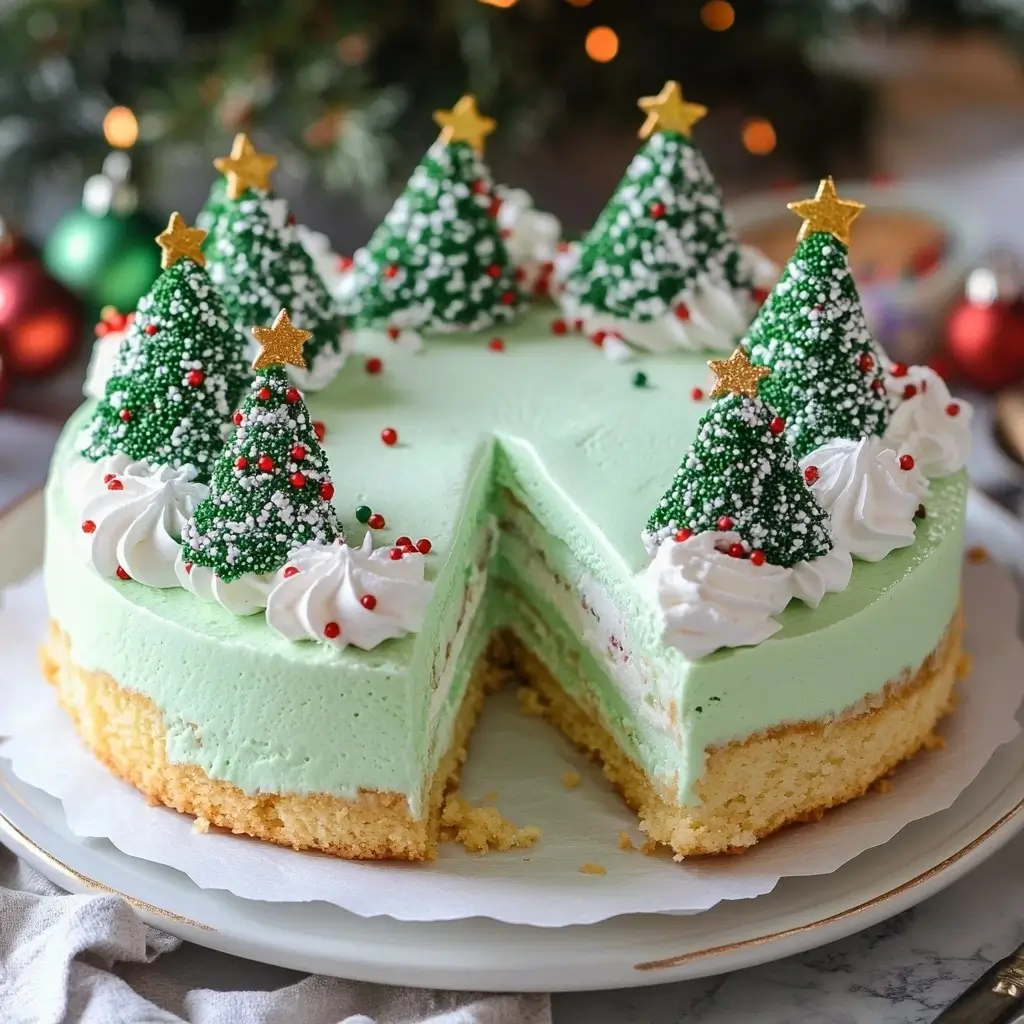
As the holiday season approaches, many of us begin to search for the perfect dessert that will wow our guests and leave a lasting impression. Introducing the Christmas Tree Cakes Ice Cream Cake—a delightful combination of classic vanilla cake, creamy ice cream, and whimsical Christmas tree-shaped snack cakes. This dessert not only tastes heavenly but also adds a festive touch to your holiday table. Let’s dive into this delightful recipe, which is sure to become a Christmas tradition in your home.
Ingredients
Before you begin, gather the following ingredients to ensure a smooth baking process:
- 1 box of vanilla cake mix
- 2 cups vanilla ice cream
- 1 cup whipped cream
- 1 pack of Christmas tree-shaped snack cakes
- Green food coloring
- Decorative sprinkles
These ingredients are easy to find and may already be in your pantry, making this cake both convenient and delicious.
Instructions
Follow these simple steps to create your Christmas Tree Cakes Ice Cream Cake:
- Bake the Cake:
Begin by preparing the vanilla cake mix as per the package directions. Once baked, allow the cake to cool completely. This step is crucial as it ensures the ice cream layer will hold its texture and not melt. - Layer Ice Cream:
Once your cake has cooled, spread a generous layer of softened vanilla ice cream on top. Smooth it out using a spatula for an even layer. Place the cake in the freezer for 1 hour to allow the ice cream to firm up. - Add Whipped Cream:
After the ice cream has set, spread a layer of whipped cream over the ice cream. This adds an extra creamy texture to your cake. Return the cake to the freezer for another hour to let the whipped cream solidify. - Decorate:
Arrange the Christmas tree-shaped snack cakes on top of the whipped cream layer. In a separate bowl, mix a few drops of green food coloring with some whipped cream. Using a piping bag, pipe the green whipped cream around the snack cakes to create a festive display. - Sprinkle:
Finish by adding decorative sprinkles to enhance the festive look of your cake. Feel free to add as many or as few as you like to achieve your desired level of festivity.
Nutrition Facts
Understanding the nutritional content of your dessert is important, especially during the holiday season when indulgence is at its peak. Here’s a general breakdown of the nutrition per serving of this cake:
- Calories: Approximately 300-350 per slice
- Total Fat: 15g
- Saturated Fat: 9g
- Cholesterol: 45mg
- Sodium: 280mg
- Total Carbohydrates: 40g
- Dietary Fiber: 1g
- Sugars: 25g
- Protein: 4g
Please note that these values can vary based on the specific brands of ingredients used.
How to Serve Your Christmas Tree Cakes Ice Cream Cake
Serving your Christmas Tree Cakes Ice Cream Cake is an art form that combines visual appeal with the delightful experience of taste. The way you present this festive dessert can elevate it from merely being a sweet treat to a centerpiece of your holiday gathering. Here are some detailed tips to ensure that your dessert not only tastes fantastic but also looks stunning on the table.
1. Use a Sharp Knife
When it comes time to serve your cake, the tool you use can make all the difference. Opt for a sharp, serrated knife specifically designed for cutting through frozen desserts. A sharp knife will glide through the layers, allowing you to create clean, even slices that showcase the beautiful layers of cake and ice cream. To further enhance the presentation:
- Warm the Knife: Before cutting, dip the knife in warm water and wipe it dry. This technique helps the blade glide through the frozen layers more easily, reducing the risk of squishing the cake or creating jagged edges.
- Cut with Precision: Start by slicing through the cake at the center and then work your way out to the edges. This method helps maintain the structure of the cake and makes it easier to serve neat, attractive portions.
2. Plate with Care
Presentation is key when serving dessert, especially during the festive season. Here are some ideas to elevate your plating:
- Choose Festive Plates: Use plates that complement the holiday theme—think red, green, or gold. The right plate can enhance the visual appeal of your dessert.
- Layering Elements: When placing the cake slice on the plate, consider adding an element of height. For instance, you can place the slice slightly off-center, or stack it with a scoop of ice cream for a more dynamic presentation.
- Accompaniments: A dollop of freshly whipped cream can add a touch of elegance. You can even flavor the whipped cream with a hint of vanilla or peppermint extract for an extra festive touch. Alternatively, a scoop of creamy vanilla ice cream can complement the cake’s flavors beautifully.
3. Add a Touch of Color
Garnishing your dessert not only enhances flavor but also contributes to a visually stunning presentation. Here are some creative ideas for garnishing your Christmas Tree Cakes Ice Cream Cake:
- Fresh Herbs: A sprig of mint can add a pop of vibrant green, providing a refreshing contrast to the cake’s rich flavors. Mint also offers a delightful aroma that can enhance the overall experience.
- Berries: Raspberries, strawberries, or even pomegranate seeds can bring a burst of color and a tangy flavor that balances the sweetness of the cake. Arrange a few berries around the slice for a beautiful display.
- Edible Glitter or Gold Dust: For an extra touch of festivity, consider sprinkling edible glitter or gold dust over the top of the cake slice or the plate. This subtle shimmer can create a magical effect, perfect for the holiday season.
- Chocolate Shavings or Drizzle: A drizzle of chocolate sauce or a scattering of chocolate shavings can add richness and visual appeal. Dark chocolate pairs beautifully with the sweetness of the cake, providing a decadent finishing touch.
4. Create a Holiday-Inspired Setting
Beyond the cake itself, consider the environment in which you’re serving your dessert. A well-decorated table can enhance the entire dining experience:
- Table Linens: Use festive tablecloths and napkins that match your holiday theme. Seasonal patterns or colors can set a joyful mood.
- Centerpiece: Consider a holiday-themed centerpiece, such as a small evergreen arrangement or a bowl of ornaments, to draw attention to your dessert.
- Lighting: Soft, warm lighting can create an inviting atmosphere. If you have candles, light them for a cozy glow that adds to the ambiance during your festive gathering.
By paying attention to these details in serving your Christmas Tree Cakes Ice Cream Cake, you’ll create a memorable experience for your guests. The combination of a well-cut slice, beautiful plating, vibrant garnishes, and a festive setting will surely delight both the eyes and the palate, making your dessert the star of the holiday celebration.
Additional Tips for an Enhanced Baking and Serving Experience
Elevate your baking and serving experience with these comprehensive tips that ensure your creation is not only delicious but also visually appealing and enjoyable for everyone.
Soften Ice Cream Properly
When it comes to decorating cakes with ice cream, achieving the right consistency is key. Allow the ice cream to soften at room temperature for about 10 minutes. This brief period helps the ice cream become more pliable, making it easier to spread evenly over the cake layers without tearing the cake or creating an unsightly mess. If you’re in a hurry, you can microwave the ice cream for about 15 seconds, but be cautious not to melt it—aim for a soft, spreadable texture instead.
For those who love a layered cake, consider using a serrated knife to slice your cake layers evenly before applying the ice cream. This ensures that each layer can hold its shape and gives you a beautiful, even surface for spreading. Additionally, using a spatula or a bench scraper can help achieve an even finish, creating a more polished look for your dessert.
Customize Your Colors
Baking is as much about creativity as it is about flavor. Don’t hesitate to customize the colors of your whipped cream to match the theme of your gathering or the season. Use gel food coloring for richer, more vibrant hues, as they won’t alter the texture of your cream like liquid dyes might. Start with a small amount, and gradually add more until you achieve the desired shade.
For a festive touch, consider using multiple colors to create a marbled effect or a gradient. You can achieve this by dividing your whipped cream into separate bowls, tinting each with a different color, and then gently swirling them together before spreading. This not only adds visual appeal but also invites guests to enjoy a delightful surprise with each slice.
Add a Crunch
Textural contrast can elevate your cake from ordinary to extraordinary. Consider adding a layer of crunch by sprinkling crushed candy canes, chopped nuts, or even toasted coconut between the layers of cake and ice cream. This not only enhances the flavor profile but also provides an interesting mouthfeel that can make each bite more enjoyable.
If you choose candy canes, crush them into small pieces to avoid overwhelming the other flavors, and be mindful of the sharp edges that may remain. For nuts, ensure they are finely chopped to prevent any large chunks that could disrupt the cake’s overall texture. Alternatively, you can also incorporate granola or cookie crumbs for a delightful crunch that complements the sweetness of the cake and ice cream.
Storage
Proper storage is essential to maintain the freshness of your delectable creation. If you have any leftovers, store them in the freezer to preserve their taste and texture. To prevent freezer burn, wrap the cake tightly in plastic wrap or aluminum foil, or place it in an airtight container. This will help seal in moisture and protect the cake from absorbing any unwanted odors from the freezer.
When you’re ready to enjoy your leftovers, remove the cake from the freezer and let it sit at room temperature for about 15–20 minutes before serving. This will allow the ice cream to soften slightly, ensuring the cake remains easy to slice and serve. If you anticipate having leftovers, consider portioning out individual slices before storing them; this way, you can easily grab a piece whenever the craving strikes without needing to thaw the entire cake.
By incorporating these thoughtful tips into your baking and serving process, you can create a dessert that is not only visually stunning and delicious but also a joy for your guests to enjoy. Happy baking!
FAQs
Here are some frequently asked questions that might help you during the preparation:
1. Can I use a different cake mix flavor?
Absolutely! While vanilla is classic, feel free to experiment with other flavors like chocolate or red velvet for a unique twist.
2. What if I don’t have a piping bag?
No piping bag? No problem! You can use a plastic sandwich bag with a small corner cut off as a makeshift piping bag.
3. How far in advance can I make this cake?
You can prepare this cake up to two days in advance. Just make sure to store it in the freezer until you’re ready to serve.
4. Can I use homemade whipped cream?
Yes, homemade whipped cream works wonderfully and can give you more control over the sweetness and texture.
5. Is there a non-dairy option for this recipe?
Certainly! Substitute the ice cream and whipped cream with non-dairy alternatives available in most grocery stores.
Conclusion
Creating a Christmas Tree Cakes Ice Cream Cake is a festive and delightful way to celebrate the holiday season. With its layers of soft vanilla cake, creamy ice cream, and decorative toppings, this cake is sure to be a hit at any holiday gathering. Whether you’re a seasoned baker or a novice in the kitchen, this recipe is straightforward and rewarding. The vibrant green icing and colorful decorations make it a visual centerpiece, while the combination of flavors pleases all palates. Feel free to personalize it with your favorite flavors or additional treats like sprinkles, edible glitter, or mini candy canes. Enjoy the process, and most importantly, enjoy the smiles it brings to your loved ones. Happy Holidays!