


Of all the recipes that have become staples in my kitchen, this Vegetarian Bean Chili holds a special place. It’s more than just a meal; it’s an event. I first developed this recipe on a crisp autumn afternoon when the craving for something hearty, warming, and profoundly satisfying struck. I wanted to create a chili that wasn’t just a meatless version of a classic, but a dish that stood proudly on its own, celebrating the rich, earthy flavors of beans and spices. The real game-changer, the element that took it from “great” to “unforgettable” for my family, was the addition of the Smoky Pickled Onions. The first time I served it, my husband, a self-proclaimed chili connoisseur, was skeptical. “Vegetarian chili?” he’d asked, raising an eyebrow. But after his first bite, a spoonful of the rich, thick chili topped with those tangy, smoky onions, his skepticism melted away faster than the cheddar cheese on top. He declared it the best chili he’d had in years. Now, it’s our go-to for game days, cozy nights in, and even for serving guests, who are always shocked to learn it’s entirely plant-based. The deep, complex flavor from the bloomed spices, the satisfying texture of the three different beans, and the bright, acidic, smoky crunch from the onions create a symphony of flavors and textures that dance on the palate. It’s a pot of comfort that proves vegetarian cooking is anything but boring.
The Ultimate Vegetarian Bean Chili with Smoky Pickled Onions
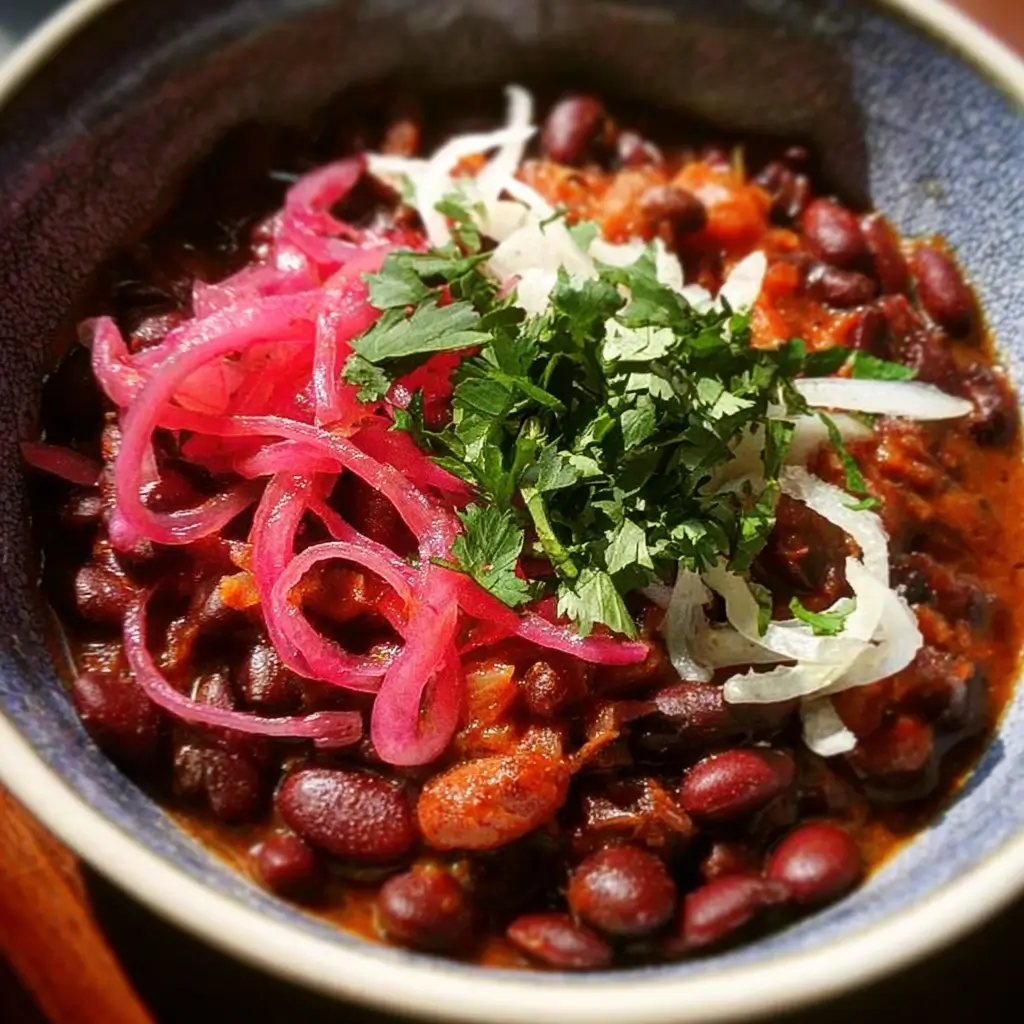
This recipe is designed to be a showstopper. It’s a hearty, three-bean chili that develops a surprisingly deep and complex flavor profile without any meat. The secret lies in a well-balanced spice blend, a touch of smoked paprika, and the crowning glory: quick-pickled red onions infused with a smoky essence. Don’t be intimidated by the ingredient list; each component plays a crucial role in building layers of flavor that will make this your new favorite chili recipe.
Ingredients You’ll Need
A great dish starts with great ingredients. We’ve broken down the list into three parts for clarity: the chili itself, the game-changing pickled onions, and the essential toppings for serving.
For the Smoky Pickled Onions:
- Red Onion: 1 large, thinly sliced into half-moons
- Apple Cider Vinegar: 1 cup (240ml)
- Water: 1 cup (240ml)
- Granulated Sugar: 2 tablespoons
- Kosher Salt: 1 ½ teaspoons
- Liquid Smoke: 1 teaspoon (use hickory or mesquite flavor)
- Black Peppercorns: 1 teaspoon
- Garlic: 2 cloves, smashed
For the Hearty Vegetarian Bean Chili:
- Olive Oil or Avocado Oil: 2 tablespoons
- Yellow Onion: 1 large, diced
- Bell Peppers: 2 medium (a mix of red and green is great for color and flavor), diced
- Jalapeño: 1, finely minced (seeds removed for less heat, or kept for more)
- Garlic: 6 cloves, minced
- Chili Powder: ¼ cup (60g) – use a high-quality blend
- Smoked Paprika: 1 tablespoon
- Ground Cumin: 1 tablespoon
- Dried Oregano: 2 teaspoons
- Cocoa Powder: 1 teaspoon, unsweetened (optional, for depth)
- Cayenne Pepper: ¼ to ½ teaspoon, or to taste
- Crushed Tomatoes: 1 can (28 ounces / 794g), preferably fire-roasted for extra flavor
- Diced Tomatoes with Green Chilies: 1 can (10 ounces / 283g), undrained
- Vegetable Broth: 2 cups (480ml), low-sodium
- Kidney Beans: 1 can (15 ounces / 425g), rinsed and drained
- Black Beans: 1 can (15 ounces / 425g), rinsed and drained
- Pinto Beans: 1 can (15 ounces / 425g), rinsed and drained
- Corn: 1 cup (150g), frozen or fresh
- Kosher Salt: To taste (start with 1 teaspoon)
- Black Pepper: To taste (start with ½ teaspoon)
Suggested Toppings for Serving:
- Shredded Sharp Cheddar or Monterey Jack Cheese (or vegan alternative)
- Sour Cream or Plain Greek Yogurt (or vegan cashew cream)
- Fresh Cilantro, chopped
- Avocado, diced
- Tortilla Strips or Crushed Tortilla Chips
- Lime Wedges
Step-by-Step Instructions
Follow these detailed instructions for a chili that tastes like it has been simmering for days. We’ll start by preparing the pickled onions so they can infuse while the chili cooks.
Part 1: Preparing the Smoky Pickled Onions
This step should be done first to allow the onions maximum time to pickle and develop their flavor. They can be made up to a week in advance.
- Prepare the Onions: Thinly slice the red onion and place the slices into a medium-sized heatproof jar (like a Mason jar). Add the smashed garlic cloves and black peppercorns to the jar with the onions.
- Create the Brine: In a small saucepan, combine the apple cider vinegar, water, granulated sugar, and kosher salt. Bring the mixture to a gentle boil over medium-high heat, stirring until the sugar and salt have completely dissolved.
- Infuse with Smoke: Once the brine is boiling, remove it from the heat. Immediately stir in the teaspoon of liquid smoke. This is the key to that unique smoky flavor.
- Pickle the Onions: Carefully pour the hot brine over the onions in the jar, ensuring they are fully submerged. Use a spoon to gently press them down if needed.
- Cool and Infuse: Let the jar cool on the counter for about 30-45 minutes before sealing it with a lid. For the best flavor, let the onions sit for at least one hour before serving. They will become even more flavorful if refrigerated for a few hours or overnight.
Part 2: Cooking the Vegetarian Bean Chili
Now for the main event. The key here is patience—letting the chili simmer allows the flavors to meld and deepen into something truly special.
- Sauté the Aromatics: Heat the 2 tablespoons of olive oil in a large Dutch oven or heavy-bottomed pot over medium heat. Add the diced yellow onion, bell peppers, and minced jalapeño. Sauté for 7-8 minutes, stirring occasionally, until the vegetables have softened and the onion is translucent.
- Bloom the Spices: Add the minced garlic and cook for another minute until fragrant. Now, add all the dry spices: the chili powder, smoked paprika, ground cumin, dried oregano, cocoa powder (if using), and cayenne pepper. Stir constantly for 60-90 seconds. This step, known as “blooming,” toasts the spices in the oil, which unlocks their essential oils and deepens their flavor significantly. The mixture will become very fragrant and paste-like.
- Deglaze and Build the Base: Pour in about a half-cup of the vegetable broth to deglaze the pot, scraping up any browned bits (fond) from the bottom with a wooden spoon. This fond is packed with flavor.
- Add Liquid and Tomatoes: Stir in the remaining vegetable broth, the can of crushed tomatoes, and the can of diced tomatoes with green chilies (with their juice). Stir everything together until well combined.
- Simmer for Flavor: Bring the mixture to a boil, then reduce the heat to low, cover the pot, and let it simmer for at least 45 minutes. An hour is even better. This long, slow simmer is crucial for the flavors to meld and develop complexity. The chili will begin to thicken and darken in color.
- Add Beans and Corn: After the initial simmer, stir in the rinsed and drained kidney beans, black beans, and pinto beans, along with the corn.
- Final Simmer: Increase the heat to bring the chili back to a gentle simmer. Once simmering, reduce the heat to low again, cover, and cook for another 20-30 minutes. This allows the beans to absorb the flavors of the chili base. During this time, you can give the chili an occasional stir to prevent sticking.
- Season to Perfection: Uncover the chili. Taste it and season generously with kosher salt and black pepper. The amount of salt needed will depend on the saltiness of your broth and canned tomatoes. Start with a teaspoon and add more as needed until the flavors pop.
Nutrition Facts
- Servings: 8-10
- Calories per serving: Approximately 350-400 kcal (this is an estimate and does not include toppings, which will vary).
This chili is a powerhouse of nutrition. It’s packed with plant-based protein and fiber from the beans, which aids in digestion and promotes a feeling of fullness. The tomatoes provide lycopene, a powerful antioxidant, and the various vegetables contribute essential vitamins and minerals.
Preparation Time
Proper time management makes this recipe a breeze.
- Pickled Onions Prep & Infusion: 15 minutes prep, 1 hour infusion
- Chili Prep Time (Chopping): 15-20 minutes
- Cook Time: 1 hour 15 minutes to 1 hour 30 minutes
- Total Time: Approximately 1 hour 45 minutes (can be done concurrently)
How to Serve Your Vegetarian Chili
Serving chili is all about the accompaniments. Setting up a “chili bar” with various toppings allows everyone to customize their bowl to perfection.
The Ultimate Toppings Bar
Arrange these in small bowls for an interactive and fun meal experience.
- Creamy Elements:
- Full-fat sour cream or a lighter plain Greek yogurt.
- For a vegan option, use a dollop of cashew cream or a store-bought vegan sour cream.
- Diced or sliced fresh avocado provides a wonderful creamy texture and healthy fats.
- Fresh & Zesty Elements:
- A generous sprinkle of freshly chopped cilantro.
- Extra sliced jalapeños (fresh or pickled) for those who love heat.
- A squeeze of fresh lime juice right before eating brightens all the flavors.
- Of course, the Smoky Pickled Onions are the star topping!
- Crunchy & Cheesy Elements:
- Crushed tortilla chips or Fritos corn chips for that classic salty crunch.
- Crispy fried tortilla strips.
- A handful of shredded sharp cheddar, Monterey Jack, or a Mexican blend cheese. For a vegan version, use your favorite dairy-free shreds.
Perfect Side Dish Pairings
While the chili is a complete meal on its own, a great side dish can elevate it even further.
- Skillet Cornbread: A thick wedge of warm, buttery cornbread is the quintessential chili partner, perfect for sopping up every last drop.
- Steamed Rice or Quinoa: Serve the chili over a bed of fluffy white or brown rice, or protein-packed quinoa to make it even more substantial.
- Simple Green Salad: A crisp green salad with a simple vinaigrette provides a light and refreshing contrast to the rich, hearty chili.
Additional Tips for Chili Perfection
Take your chili from great to gourmet with these five professional tips.
- Embrace the Bloom: Do not skip the step of blooming your spices. Frying the dry spices in oil for a minute before adding liquids awakens their dormant flavors. It’s the difference between a chili that tastes like chili powder and a chili that tastes like a complex, harmonious blend of individual spices.
- The Secret Ingredient for Depth: The optional teaspoon of unsweetened cocoa powder might sound strange, but it’s a secret weapon in many award-winning chili recipes. It doesn’t make the chili taste like chocolate; instead, it adds an incredible, underlying depth and richness, similar to how it’s used in Mexican mole sauces.
- Control the Consistency: If you prefer a thicker chili, you have a few options. You can let it simmer uncovered for the last 15-20 minutes to allow more liquid to evaporate. Alternatively, you can mash about a cup of the beans with a fork or potato masher and stir them back into the pot; the starches will naturally thicken the chili.
- Make It Ahead for Better Flavor: Like many stews and braises, this vegetarian chili is even better the next day. The flavors continue to meld and deepen as it sits in the refrigerator. This makes it a perfect dish for meal prepping or for entertaining, as you can make it a day in advance and simply reheat it before your guests arrive.
- Master the Art of Freezing: This chili freezes beautifully. Let it cool completely, then transfer it to freezer-safe containers or bags. It can be frozen for up to 3 months. To serve, thaw it overnight in the refrigerator and then gently reheat it on the stovetop, adding a splash of vegetable broth if it has become too thick.
Frequently Asked Questions (FAQ)
Here are answers to some common questions you might have about this recipe.
1. Can I make this vegetarian chili vegan?
Absolutely! This recipe is easily made vegan. The chili base itself is already vegan. The only substitutions you need to make are in the toppings. Simply swap the dairy-based cheese and sour cream for your favorite vegan alternatives. There are excellent vegan shredded cheeses and sour creams available in most grocery stores today.
2. How can I make this chili in a slow cooker or Crock-Pot?
This recipe adapts wonderfully to the slow cooker. Simply complete steps 1 and 2 (sautéing the vegetables and blooming the spices) in a skillet on the stovetop. This step is crucial for flavor and shouldn’t be skipped. Then, transfer the sautéed vegetable and spice mixture to your slow cooker. Add all the remaining chili ingredients (except for the corn and beans), stir, and cook on low for 6-8 hours or on high for 3-4 hours. Stir in the beans and corn during the last 30 minutes of cooking.
3. What’s the best way to adjust the spiciness?
You have full control over the heat level. For a milder chili, make sure to remove all the seeds and white membranes from the jalapeño. You can also omit the cayenne pepper entirely. For a medium heat, leave some of the jalapeño seeds in. For a truly spicy chili, use two jalapeños, keep all the seeds, and increase the cayenne pepper. You could even add a minced chipotle pepper in adobo sauce along with the garlic for a smoky heat.
4. Can I use dried beans instead of canned beans?
Yes, you can use dried beans, but it requires extra planning. You will need to soak the beans overnight and then cook them separately until they are tender before adding them to the chili. As a general rule, 1 cup of dried beans will yield about 3 cups of cooked beans, which is equivalent to about two 15-ounce cans. Using dried beans can offer a superior texture and is more economical.
5. How long do the Smoky Pickled Onions last, and what else can I use them on?
Stored in a sealed jar in the refrigerator, the Smoky Pickled Onions will last for up to 2 weeks, though their flavor and vibrant color are best within the first week. They are incredibly versatile! Use them on tacos, sandwiches, burgers (veggie or otherwise), grain bowls, salads, and avocado toast. They add a fantastic pop of tangy, smoky flavor to almost any savory dish.

Vegetarian Bean Chili with Smoky Pickled Onions Recipe
Ingredients
For the Smoky Pickled Onions:
- Red Onion: 1 large, thinly sliced into half-moons
- Apple Cider Vinegar: 1 cup (240ml)
- Water: 1 cup (240ml)
- Granulated Sugar: 2 tablespoons
- Kosher Salt: 1 ½ teaspoons
- Liquid Smoke: 1 teaspoon (use hickory or mesquite flavor)
- Black Peppercorns: 1 teaspoon
- Garlic: 2 cloves, smashed
For the Hearty Vegetarian Bean Chili:
- Olive Oil or Avocado Oil: 2 tablespoons
- Yellow Onion: 1 large, diced
- Bell Peppers: 2 medium (a mix of red and green is great for color and flavor), diced
- Jalapeño: 1, finely minced (seeds removed for less heat, or kept for more)
- Garlic: 6 cloves, minced
- Chili Powder: ¼ cup (60g) – use a high-quality blend
- Smoked Paprika: 1 tablespoon
- Ground Cumin: 1 tablespoon
- Dried Oregano: 2 teaspoons
- Cocoa Powder: 1 teaspoon, unsweetened (optional, for depth)
- Cayenne Pepper: ¼ to ½ teaspoon, or to taste
- Crushed Tomatoes: 1 can (28 ounces / 794g), preferably fire-roasted for extra flavor
- Diced Tomatoes with Green Chilies: 1 can (10 ounces / 283g), undrained
- Vegetable Broth: 2 cups (480ml), low-sodium
- Kidney Beans: 1 can (15 ounces / 425g), rinsed and drained
- Black Beans: 1 can (15 ounces / 425g), rinsed and drained
- Pinto Beans: 1 can (15 ounces / 425g), rinsed and drained
- Corn: 1 cup (150g), frozen or fresh
- Kosher Salt: To taste (start with 1 teaspoon)
- Black Pepper: To taste (start with ½ teaspoon)
Suggested Toppings for Serving:
- Shredded Sharp Cheddar or Monterey Jack Cheese (or vegan alternative)
- Sour Cream or Plain Greek Yogurt (or vegan cashew cream)
- Fresh Cilantro, chopped
- Avocado, diced
- Tortilla Strips or Crushed Tortilla Chips
- Lime Wedges
Instructions
Part 1: Preparing the Smoky Pickled Onions
This step should be done first to allow the onions maximum time to pickle and develop their flavor. They can be made up to a week in advance.
- Prepare the Onions: Thinly slice the red onion and place the slices into a medium-sized heatproof jar (like a Mason jar). Add the smashed garlic cloves and black peppercorns to the jar with the onions.
- Create the Brine: In a small saucepan, combine the apple cider vinegar, water, granulated sugar, and kosher salt. Bring the mixture to a gentle boil over medium-high heat, stirring until the sugar and salt have completely dissolved.
- Infuse with Smoke: Once the brine is boiling, remove it from the heat. Immediately stir in the teaspoon of liquid smoke. This is the key to that unique smoky flavor.
- Pickle the Onions: Carefully pour the hot brine over the onions in the jar, ensuring they are fully submerged. Use a spoon to gently press them down if needed.
- Cool and Infuse: Let the jar cool on the counter for about 30-45 minutes before sealing it with a lid. For the best flavor, let the onions sit for at least one hour before serving. They will become even more flavorful if refrigerated for a few hours or overnight.
Part 2: Cooking the Vegetarian Bean Chili
Now for the main event. The key here is patience—letting the chili simmer allows the flavors to meld and deepen into something truly special.
- Sauté the Aromatics: Heat the 2 tablespoons of olive oil in a large Dutch oven or heavy-bottomed pot over medium heat. Add the diced yellow onion, bell peppers, and minced jalapeño. Sauté for 7-8 minutes, stirring occasionally, until the vegetables have softened and the onion is translucent.
- Bloom the Spices: Add the minced garlic and cook for another minute until fragrant. Now, add all the dry spices: the chili powder, smoked paprika, ground cumin, dried oregano, cocoa powder (if using), and cayenne pepper. Stir constantly for 60-90 seconds. This step, known as “blooming,” toasts the spices in the oil, which unlocks their essential oils and deepens their flavor significantly. The mixture will become very fragrant and paste-like.
- Deglaze and Build the Base: Pour in about a half-cup of the vegetable broth to deglaze the pot, scraping up any browned bits (fond) from the bottom with a wooden spoon. This fond is packed with flavor.
- Add Liquid and Tomatoes: Stir in the remaining vegetable broth, the can of crushed tomatoes, and the can of diced tomatoes with green chilies (with their juice). Stir everything together until well combined.
- Simmer for Flavor: Bring the mixture to a boil, then reduce the heat to low, cover the pot, and let it simmer for at least 45 minutes. An hour is even better. This long, slow simmer is crucial for the flavors to meld and develop complexity. The chili will begin to thicken and darken in color.
- Add Beans and Corn: After the initial simmer, stir in the rinsed and drained kidney beans, black beans, and pinto beans, along with the corn.
- Final Simmer: Increase the heat to bring the chili back to a gentle simmer. Once simmering, reduce the heat to low again, cover, and cook for another 20-30 minutes. This allows the beans to absorb the flavors of the chili base. During this time, you can give the chili an occasional stir to prevent sticking.
- Season to Perfection: Uncover the chili. Taste it and season generously with kosher salt and black pepper. The amount of salt needed will depend on the saltiness of your broth and canned tomatoes. Start with a teaspoon and add more as needed until the flavors pop.
Nutrition
- Serving Size: One Normal Portion
- Calories: 350-400 kcal


