


I still remember the first time I truly nailed a batch of homemade vegan granola bars. For years, I’d been buying the store-bought kind, often wincing at the price tag and the sometimes questionable ingredient lists. My kids loved them for school snacks, and my husband would grab one on his way to work, but I always felt there had to be a better, healthier, and more cost-effective way. After a few crumbly disasters and some overly sticky experiments, this recipe emerged as the champion. The beauty of these bars is their incredible versatility and the sheer satisfaction of knowing exactly what goes into them. My family adores them – the kids get excited to pick their favorite mix-ins, and my husband claims they’re the best “grab-and-go” breakfast he’s ever had. They’ve become a weekly staple in our household, perfect for tucking into lunchboxes, fueling afternoon slumps, or even crumbling over a bowl of vegan yogurt for a decadent yet wholesome treat. These bars aren’t just food; they’re a little slice of homemade goodness that brings a smile to everyone’s face. They are chewy, packed with flavor, and incredibly easy to adapt to whatever you have in your pantry.
The Ultimate Chewy Vegan Granola Bars: Your Go-To Healthy Snack
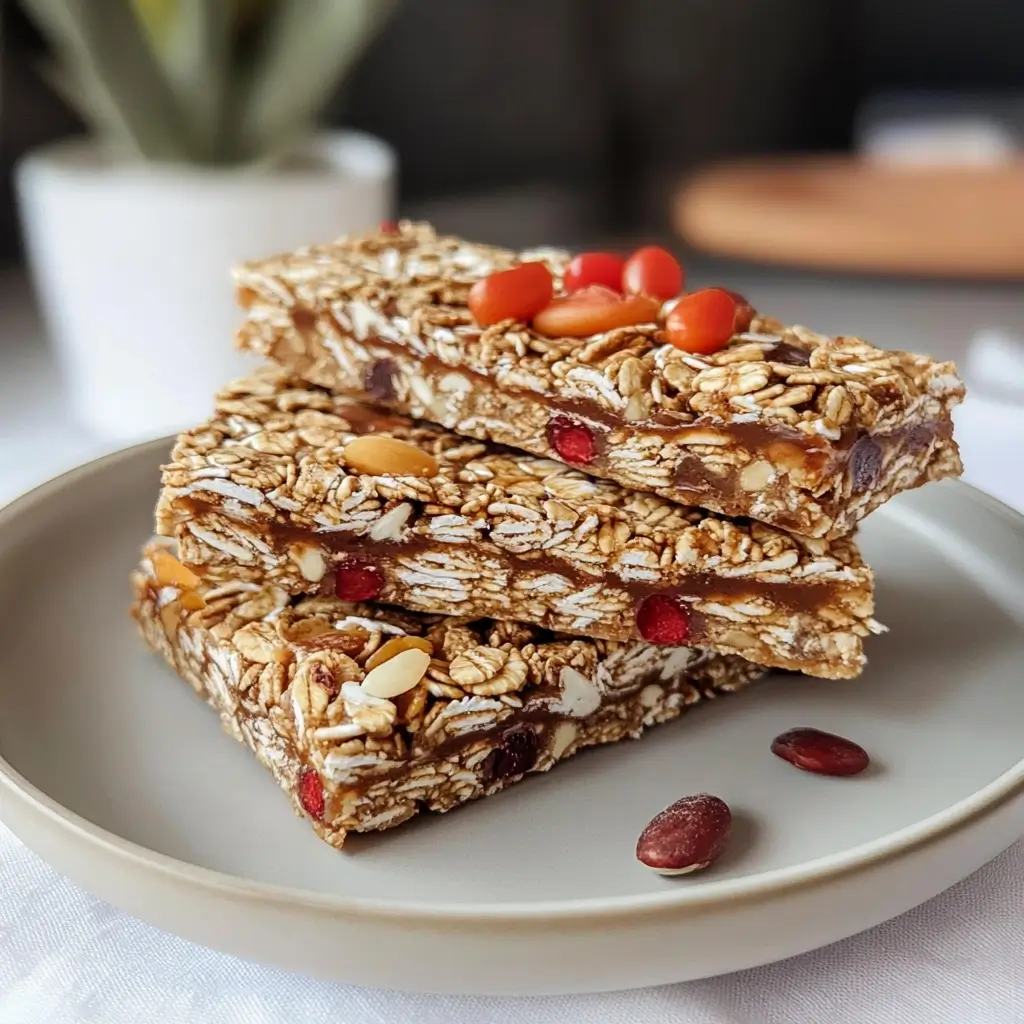
Welcome to the recipe that will change your snacking game forever! These homemade vegan granola bars are not only incredibly delicious but also surprisingly simple to make. Forget those expensive, often sugar-laden store-bought bars. With this guide, you’ll be whipping up batches of wholesome, customizable granola bars that are perfect for breakfast on the go, a mid-day energy boost, or a healthy treat for the kids’ lunchboxes. We’re talking perfectly chewy texture, a delightful balance of sweetness and nutty flavors, and the freedom to add all your favorite goodies. Get ready to become a granola bar guru!
Ingredients: Crafting Your Perfect Vegan Granola Bar
The magic of these bars lies in the synergy of simple, wholesome ingredients. We’ll break them down into categories to make it easy to understand their roles.
Dry Ingredients:
- 2 ½ cups (225g) Rolled Oats: Use old-fashioned rolled oats, not instant or steel-cut. For a gluten-free version, ensure you use certified gluten-free rolled oats. They provide the essential structure and chewiness.
- ½ cup (60g) All-Purpose Flour (or Oat Flour for GF): This helps bind the bars. You can make oat flour by simply blending rolled oats until fine.
- ½ cup (50g) Chopped Nuts: Almonds, walnuts, pecans, or cashews work wonderfully. Roughly chop them for a nice texture. For a nut-free version, substitute with more seeds or puffed rice cereal.
- ¼ cup (35g) Seeds: A mix of pumpkin seeds, sunflower seeds, and/or sesame seeds adds crunch and nutritional value.
- ¼ cup (15g) Unsweetened Shredded Coconut (optional): Adds a lovely subtle sweetness and texture.
- 2 tablespoons Ground Flaxseed or Chia Seeds: These act as an additional binder and boost the omega-3 content.
- ½ teaspoon Ground Cinnamon: For a warm, comforting flavor.
- ¼ teaspoon Fine Sea Salt: Balances the sweetness and enhances all the other flavors.
Wet Ingredients (The Binder):
- ½ cup (120ml) Liquid Sweetener: Maple syrup is classic, but agave nectar or brown rice syrup also work well. Date syrup can be used for a richer, more caramel-like flavor.
- ½ cup (125g) Nut or Seed Butter: Creamy peanut butter, almond butter, cashew butter, or sunflower seed butter (for nut-free) are all excellent choices. Ensure it’s the smooth, runny kind.
- ¼ cup (60ml) Melted Coconut Oil (or other neutral oil): This helps create a chewy texture and binds the ingredients. Refined coconut oil will have less coconut flavor. Light olive oil or avocado oil can also work.
- 1 teaspoon Vanilla Extract: Enhances the overall flavor profile.
Mix-Ins (Customize Your Creation!):
- ¾ – 1 cup (120-160g) Total of Your Favorite Add-Ins: This is where you can get creative!
- Dried Fruit: Raisins, cranberries, chopped apricots, dates, figs (ensure they are chopped into small, even pieces).
- Vegan Chocolate Chips: Mini or regular-sized dark chocolate chips or chunks.
- Puffed Cereal: Puffed rice or quinoa can add a lighter, crispier texture.
- Mini Pretzels (chopped): For a sweet and salty twist.
Instructions: Step-by-Step to Granola Bar Perfection
Follow these simple steps, and you’ll have delicious homemade granola bars in no time. The key is patience during chilling!
- Prepare the Pan:
- Lightly grease a 9×9 inch (23×23 cm) square baking pan or a similar-sized rectangular pan (e.g., 8×11 inch).
- Line the pan with parchment paper, leaving an overhang on two opposite sides. This “sling” will make it much easier to remove the bars later. Lightly grease the parchment paper as well if you want extra non-stick assurance, though it’s often not necessary.
- Combine Dry Ingredients:
- In a large mixing bowl, add the rolled oats, flour (or oat flour), chopped nuts, seeds, shredded coconut (if using), ground flaxseed/chia seeds, cinnamon, and salt.
- Whisk everything together thoroughly to ensure all the dry components are evenly distributed. This prevents pockets of salt or cinnamon and ensures consistent flavor and texture throughout your bars.
- Prepare Wet Ingredients:
- In a separate medium-sized saucepan, combine the liquid sweetener (maple syrup/agave), nut/seed butter, and melted coconut oil.
- Place the saucepan over low to medium-low heat. Stir continuously until the mixture is smooth, well-combined, and just beginning to warm through. You don’t want it to boil or simmer, just get warm enough to be easily pourable and to help melt the nut butter fully.
- Remove from heat and stir in the vanilla extract.
- Combine Wet and Dry Ingredients:
- Pour the warm wet mixture over the dry ingredients in the large bowl.
- Using a sturdy spatula or wooden spoon, mix everything together until all the dry ingredients are thoroughly moistened and coated. Scrape the bottom and sides of the bowl to ensure no dry patches remain. The mixture will be thick and sticky.
- Incorporate Mix-Ins:
- Once the base mixture is well combined, add your chosen mix-ins (dried fruit, chocolate chips, etc.).
- Gently fold them into the mixture until they are evenly distributed. If using chocolate chips, you might want to let the mixture cool for a minute or two before adding them to prevent excessive melting, unless you prefer a more marbled chocolate effect.
- Press into Pan:
- Transfer the granola bar mixture to your prepared baking pan.
- This is a crucial step for well-formed bars: Press the mixture down very firmly and evenly into the pan. You can use the back of your spatula, but for best results, place another piece of parchment paper on top of the mixture and use the bottom of a flat glass or measuring cup to press down with significant pressure. The more compressed the mixture, the less likely your bars are to crumble. Aim for a compact, level surface.
- Chill for Firmness:
- Cover the pan with plastic wrap or foil (or the top piece of parchment).
- Place the pan in the refrigerator for at least 2-3 hours, or preferably overnight. For a quicker set, you can place it in the freezer for 30-60 minutes, but refrigeration yields a chewier bar. The chilling process is essential for the bars to firm up properly and hold their shape when cut.
- Cut and Store:
- Once thoroughly chilled and firm, use the parchment paper overhangs to lift the entire slab of granola out of the pan and onto a cutting board.
- Using a large, sharp knife, cut the slab into bars of your desired size. You can make 12 larger bars or 16 smaller ones. Wiping the knife with a damp cloth between cuts can help if it gets sticky.
- The bars are ready to enjoy immediately!
Nutrition Facts
- Servings: This recipe makes approximately 12-16 bars, depending on how you cut them.
- Calories per serving (approximate for 1 of 16 bars): 180-250 calories.
Disclaimer: The exact nutritional information will vary based on the specific brands of ingredients used, the precise types and amounts of nuts, seeds, and mix-ins chosen, and the final serving size. The values provided are an estimate.
These bars are a good source of fiber, healthy fats, and plant-based protein, making them a satisfying and energizing snack.
Preparation Time
- Active Preparation Time: 15-20 minutes (This includes measuring ingredients, mixing, and pressing into the pan).
- Chilling Time: Minimum 2-3 hours in the refrigerator (overnight is best), or 30-60 minutes in the freezer for a quicker set.
- Total Time (excluding chilling): Approximately 20 minutes.
- Total Time (including minimum chilling): Approximately 2 hours 20 minutes to 3 hours 20 minutes.
How to Serve Your Delicious Vegan Granola Bars
These versatile bars can be enjoyed in numerous ways. Here are some ideas:
- The Classic Snack:
- Enjoy a bar straight up as a quick and satisfying snack between meals.
- Perfect for combating the mid-afternoon energy slump.
- On-the-Go Breakfast:
- Grab a bar when you’re rushing out the door for a convenient and nutritious breakfast.
- Pair with a piece of fruit or a vegan smoothie for a more complete meal.
- Lunchbox Hero:
- Pack them in kids’ (or adult) lunchboxes for a healthy, homemade treat.
- They’re a great alternative to processed snack foods.
- Pre- or Post-Workout Fuel:
- The combination of carbohydrates for energy and protein for muscle repair makes them ideal for fitness enthusiasts.
- Consume one about 30-60 minutes before a workout or shortly after.
- With Yogurt or Smoothie Bowls:
- Crumble a bar over your favorite vegan yogurt or a smoothie bowl for added texture, flavor, and nutrients, effectively turning it into homemade granola.
- Dessert with a Twist:
- Serve a small piece alongside a scoop of vegan ice cream.
- Drizzle with a little extra melted vegan chocolate for an indulgent treat.
- Hiking and Travel Companion:
- Their portable nature makes them perfect for taking on hikes, road trips, or flights. They pack well and don’t require refrigeration for short periods once set.
Additional Tips for Granola Bar Success
Mastering homemade granola bars is easy with these extra pointers:
- Press, Press, Press!: This cannot be overstated. The most common reason for crumbly granola bars is not pressing the mixture firmly enough into the pan. Use significant, even pressure. A flat-bottomed glass or a potato masher (covered with parchment to prevent sticking) can be your best friend here. The more compact the mixture, the better the bars will hold together.
- Parchment Paper is Key: Using a parchment paper sling not only prevents sticking but makes removing the entire block of granola from the pan incredibly easy and neat. Don’t skip this step; it saves a lot of hassle.
- Chill Thoroughly: Patience during the chilling phase is crucial. The binders (nut butter, syrup, oil) need time to solidify and hold everything together. Cutting them too soon will result in crumbly bars. If you’re in a hurry, the freezer is an option, but a longer chill in the fridge often yields a chewier, more cohesive bar.
- Customize Smartly: While it’s fun to experiment with mix-ins, be mindful of the overall wet-to-dry ingredient ratio. Adding too many dry mix-ins without adjusting the binder can lead to crumbly bars. If you’re adding a lot of extra nuts or dried fruit, you might need a touch more nut butter or syrup. Start with the recommended amount and adjust slightly if needed.
- Storage Savvy:
- Room Temperature: Store the cut bars in an airtight container at room temperature for up to 5-7 days. Place parchment paper between layers to prevent sticking.
- Refrigerator: For longer storage or a firmer, chewier texture, keep them in an airtight container in the refrigerator for up to 2 weeks.
- Freezer: For long-term storage, wrap individual bars tightly in plastic wrap, then place them in a freezer-safe bag or container. They can be frozen for up to 3 months. Thaw at room temperature or in the fridge.
FAQ: Your Vegan Granola Bar Questions Answered
- Q: Why are my granola bars crumbly?
- A: There are a few common culprits:
- Not enough binder: The ratio of wet to dry ingredients might be off. You might need a little more nut butter, liquid sweetener, or oil.
- Not pressed firmly enough: This is the most frequent reason. You really need to compact the mixture tightly into the pan.
- Not chilled long enough: The bars need adequate time in the fridge or freezer to set properly.
- Over-baking (if using a baked recipe): This recipe is no-bake, but for baked versions, over-baking can dry them out.
- Cutting while warm: Always ensure the bars are thoroughly chilled before attempting to cut them.
- A: There are a few common culprits:
- Q: Can I make these granola bars nut-free?
- A: Absolutely! To make them nut-free, substitute the chopped nuts with an equivalent amount of seeds (like more pumpkin or sunflower seeds), puffed rice cereal, or extra rolled oats. For the nut butter, use sunflower seed butter (SunButter) or tahini. Ensure any chocolate chips or other mix-ins are also nut-free.
- Q: How can I make these granola bars gluten-free?
- A: It’s very simple! Ensure you use certified gluten-free rolled oats. Oats are naturally gluten-free but can be contaminated during processing. Also, instead of all-purpose flour, use oat flour (which you can make by blending gluten-free rolled oats until fine) or a gluten-free all-purpose flour blend. Double-check that all your other mix-ins are also certified gluten-free.
- Q: Can I reduce the sugar content?
- A: You can slightly reduce the liquid sweetener, but be cautious. The sweetener not only adds sweetness but also acts as a crucial binder. Reducing it too much can result in crumbly bars. If you do reduce it, you might need to slightly increase the nut butter or add a little more ground flaxseed mixed with water (a “flax egg”) to help with binding. Using naturally sweet dried fruits like dates can also help you reduce added liquid sweeteners while maintaining sweetness and binding.
- Q: What are some exciting flavor variations I can try?
- A: The possibilities are endless! Here are a few ideas:
- Chocolate Peanut Butter: Use peanut butter, add extra vegan chocolate chips, and maybe a tablespoon of cocoa powder to the dry ingredients.
- Tropical Delight: Use coconut oil, shredded coconut, dried pineapple, and macadamia nuts (or sunflower seeds for nut-free).
- Berry Bliss: Use a mix of dried cranberries, blueberries, and raspberries, with almond butter and perhaps a hint of lemon zest.
- Mocha Chip: Add 1-2 teaspoons of instant espresso powder to the wet ingredients along with chocolate chips.
- Spiced Apple Pie: Use chopped dried apples, walnuts or pecans, and increase the cinnamon, adding a pinch of nutmeg and allspice.
- A: The possibilities are endless! Here are a few ideas:
Enjoy crafting and devouring these fantastic vegan granola bars! They’re a testament to how simple, healthy, and delicious homemade snacking can be.
Print
Vegan Granola Bars Recipe
Ingredients
Dry Ingredients:
- 2 ½ cups (225g) Rolled Oats: Use old-fashioned rolled oats, not instant or steel-cut. For a gluten-free version, ensure you use certified gluten-free rolled oats. They provide the essential structure and chewiness.
- ½ cup (60g) All-Purpose Flour (or Oat Flour for GF): This helps bind the bars. You can make oat flour by simply blending rolled oats until fine.
- ½ cup (50g) Chopped Nuts: Almonds, walnuts, pecans, or cashews work wonderfully. Roughly chop them for a nice texture. For a nut-free version, substitute with more seeds or puffed rice cereal.
- ¼ cup (35g) Seeds: A mix of pumpkin seeds, sunflower seeds, and/or sesame seeds adds crunch and nutritional value.
- ¼ cup (15g) Unsweetened Shredded Coconut (optional): Adds a lovely subtle sweetness and texture.
- 2 tablespoons Ground Flaxseed or Chia Seeds: These act as an additional binder and boost the omega-3 content.
- ½ teaspoon Ground Cinnamon: For a warm, comforting flavor.
- ¼ teaspoon Fine Sea Salt: Balances the sweetness and enhances all the other flavors.
Wet Ingredients (The Binder):
- ½ cup (120ml) Liquid Sweetener: Maple syrup is classic, but agave nectar or brown rice syrup also work well. Date syrup can be used for a richer, more caramel-like flavor.
- ½ cup (125g) Nut or Seed Butter: Creamy peanut butter, almond butter, cashew butter, or sunflower seed butter (for nut-free) are all excellent choices. Ensure it’s the smooth, runny kind.
- ¼ cup (60ml) Melted Coconut Oil (or other neutral oil): This helps create a chewy texture and binds the ingredients. Refined coconut oil will have less coconut flavor. Light olive oil or avocado oil can also work.
- 1 teaspoon Vanilla Extract: Enhances the overall flavor profile.
Mix-Ins (Customize Your Creation!):
- ¾ – 1 cup (120-160g) Total of Your Favorite Add-Ins: This is where you can get creative!
- Dried Fruit: Raisins, cranberries, chopped apricots, dates, figs (ensure they are chopped into small, even pieces).
- Vegan Chocolate Chips: Mini or regular-sized dark chocolate chips or chunks.
- Puffed Cereal: Puffed rice or quinoa can add a lighter, crispier texture.
- Mini Pretzels (chopped): For a sweet and salty twist.
Instructions
- Prepare the Pan:
- Lightly grease a 9×9 inch (23×23 cm) square baking pan or a similar-sized rectangular pan (e.g., 8×11 inch).
- Line the pan with parchment paper, leaving an overhang on two opposite sides. This “sling” will make it much easier to remove the bars later. Lightly grease the parchment paper as well if you want extra non-stick assurance, though it’s often not necessary.
- Combine Dry Ingredients:
- In a large mixing bowl, add the rolled oats, flour (or oat flour), chopped nuts, seeds, shredded coconut (if using), ground flaxseed/chia seeds, cinnamon, and salt.
- Whisk everything together thoroughly to ensure all the dry components are evenly distributed. This prevents pockets of salt or cinnamon and ensures consistent flavor and texture throughout your bars.
- Prepare Wet Ingredients:
- In a separate medium-sized saucepan, combine the liquid sweetener (maple syrup/agave), nut/seed butter, and melted coconut oil.
- Place the saucepan over low to medium-low heat. Stir continuously until the mixture is smooth, well-combined, and just beginning to warm through. You don’t want it to boil or simmer, just get warm enough to be easily pourable and to help melt the nut butter fully.
- Remove from heat and stir in the vanilla extract.
- Combine Wet and Dry Ingredients:
- Pour the warm wet mixture over the dry ingredients in the large bowl.
- Using a sturdy spatula or wooden spoon, mix everything together until all the dry ingredients are thoroughly moistened and coated. Scrape the bottom and sides of the bowl to ensure no dry patches remain. The mixture will be thick and sticky.
- Incorporate Mix-Ins:
- Once the base mixture is well combined, add your chosen mix-ins (dried fruit, chocolate chips, etc.).
- Gently fold them into the mixture until they are evenly distributed. If using chocolate chips, you might want to let the mixture cool for a minute or two before adding them to prevent excessive melting, unless you prefer a more marbled chocolate effect.
- Press into Pan:
- Transfer the granola bar mixture to your prepared baking pan.
- This is a crucial step for well-formed bars: Press the mixture down very firmly and evenly into the pan. You can use the back of your spatula, but for best results, place another piece of parchment paper on top of the mixture and use the bottom of a flat glass or measuring cup to press down with significant pressure. The more compressed the mixture, the less likely your bars are to crumble. Aim for a compact, level surface.
- Chill for Firmness:
- Cover the pan with plastic wrap or foil (or the top piece of parchment).
- Place the pan in the refrigerator for at least 2-3 hours, or preferably overnight. For a quicker set, you can place it in the freezer for 30-60 minutes, but refrigeration yields a chewier bar. The chilling process is essential for the bars to firm up properly and hold their shape when cut.
- Cut and Store:
- Once thoroughly chilled and firm, use the parchment paper overhangs to lift the entire slab of granola out of the pan and onto a cutting board.
- Using a large, sharp knife, cut the slab into bars of your desired size. You can make 12 larger bars or 16 smaller ones. Wiping the knife with a damp cloth between cuts can help if it gets sticky.
- The bars are ready to enjoy immediately!
Nutrition
- Serving Size: One Normal Portion
- Calories: 180-250


