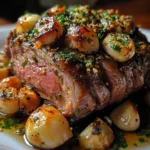
Roasted chickpeas have become a staple snack in our household, and for good reason! There’s something incredibly satisfying about the crunchy exterior giving way to a slightly softer, nutty interior. I first stumbled upon this recipe on a busy weeknight when I was craving something flavorful and healthy, but didn’t have a lot of time to spend in the kitchen. The simplicity of this recipe immediately appealed to me – just a handful of ingredients and minimal effort for maximum taste. My family, especially my kids, absolutely love them. They’ve replaced chips and crackers as our go-to snack, and I often find myself making a double batch just to keep up with the demand. Whether we’re enjoying them straight out of the oven, sprinkled over salads, or tucked into wraps, these roasted chickpeas are a winner every time. This recipe is not just easy, it’s incredibly versatile and customizable, allowing you to experiment with different spices to suit your mood and taste preferences. Trust me, once you try this simple recipe, roasted chickpeas will become a regular part of your snacking routine too!
Ingredients
This recipe for roasted chickpeas is beautifully simple, requiring just three core ingredients plus your choice of spice to elevate the flavor. Let’s break down each component to understand why they are essential and how to choose the best options for your culinary creation.
- 400g (1 can) cooked chickpeas, washed and drained: Chickpeas, also known as garbanzo beans, are the star of this recipe. Using canned chickpeas makes this recipe incredibly quick and convenient. When selecting your canned chickpeas, opt for those with no added salt or low sodium options if you are watching your salt intake. The washing and draining process is crucial. Washing removes any excess starch and canning liquid which can hinder crispiness. Draining ensures that excess moisture is removed, allowing the olive oil and spices to coat the chickpeas effectively and promote optimal roasting. You can also cook your own chickpeas from dried, which will require soaking and boiling beforehand, but canned chickpeas are a fantastic time-saver for this recipe.
- 15ml (1 tbsp) olive oil: Olive oil is the fat component in this recipe, playing a vital role in achieving that desirable crispy texture. It also adds a subtle richness and healthy fats to the snack. Extra virgin olive oil is recommended for its superior flavor and health benefits, but regular olive oil will also work perfectly fine. The oil coats the chickpeas, preventing them from drying out completely in the oven and allowing them to roast rather than just bake. This even coating of oil is key to achieving uniform crispness across all the chickpeas. Don’t be tempted to skimp on the oil, as it is essential for both texture and flavor development.
- 15ml (1 tbsp) spice: This is where you get to unleash your creativity and customize the roasted chickpeas to your liking! The spice component is incredibly versatile, allowing you to create a wide range of flavor profiles. You can use a single spice or a blend to achieve your desired taste. Some popular and delicious options include:
- Smoked Paprika: For a smoky and slightly sweet flavor. It adds a beautiful reddish hue and a depth of flavor that is incredibly addictive.
- Garlic Powder: A classic choice that adds a savory and aromatic element. Garlic powder enhances the natural nuttiness of the chickpeas.
- Onion Powder: Similar to garlic powder, onion powder provides a savory base note and complements other spices beautifully.
- Chili Powder: For a touch of heat and warmth. Chili powder can range from mild to hot, so choose one that suits your spice preference.
- Cumin: Earthy and warm, cumin adds a distinct Middle Eastern or Mexican flavor profile.
- Curry Powder: A blend of spices that offers a complex and aromatic flavor. Curry powder can bring a vibrant and exotic touch to your roasted chickpeas.
- Italian Herbs: A mix of dried herbs like oregano, basil, rosemary, and thyme for a Mediterranean twist. These herbs provide a fragrant and savory flavor.
- Cajun Seasoning: For a spicy and savory kick with notes of paprika, cayenne, and garlic. Cajun seasoning delivers a bold and flavorful punch.
- Everything Bagel Seasoning: A trendy and flavorful blend of sesame seeds, poppy seeds, dried garlic, dried onion, and salt. This seasoning adds a delightful crunch and savory flavor.
- Cinnamon Sugar: For a sweet and savory snack. A combination of cinnamon and sugar creates a delightful sweet treat with a hint of warmth.
- Plain Salt and Pepper: For a simple yet satisfying snack that highlights the natural flavor of the chickpeas. Sometimes, simplicity is key, and salt and pepper are all you need.
Feel free to experiment with different spice combinations to discover your favorite flavor profiles. You can also adjust the amount of spice to your preference. For a more intense flavor, you can increase the spice quantity slightly.
Instructions
Roasting chickpeas to crispy perfection is a straightforward process, but following these detailed instructions will ensure you achieve the best results every time. Let’s walk through each step to create perfectly roasted and flavorful chickpeas.
- Heat oven to 200°C/180°C fan/gas 6. Preheating your oven to the correct temperature is crucial for even roasting and crispiness. The high heat is essential for quickly drying out the chickpeas and creating that desirable crunchy texture. If your oven tends to run hot or cold, you may need to adjust the temperature slightly. Using a fan-assisted oven (convection oven) will help to circulate the hot air more evenly, resulting in more uniformly roasted chickpeas. If you don’t have a fan oven, the standard temperature of 200°C (gas mark 6) will work well. Allow your oven to fully preheat before placing the chickpeas inside to ensure they start roasting immediately.
- Arrange the chickpeas in an even layer in a large baking pan. Using a large baking pan is important to avoid overcrowding the chickpeas. Overcrowding will steam the chickpeas instead of roasting them, leading to a softer, less crispy result. Spread the chickpeas in a single, even layer across the baking pan. This allows hot air to circulate around each chickpea, promoting even cooking and crisping. If you are making a larger batch, you may need to use two baking pans or roast the chickpeas in batches to ensure they are not overcrowded. A rimmed baking sheet is ideal to prevent any chickpeas from rolling off during shaking.
- Drizzle with oil and give pan a vigorous shake to ensure the chickpeas are thoroughly covered. Drizzling the olive oil evenly over the chickpeas is the next crucial step. Aim for a light but thorough coating. The tablespoon of olive oil should be sufficient for a 400g can of chickpeas. After drizzling, the “vigorous shake” is key to distributing the oil evenly and ensuring that every chickpea is coated. You can also use your hands or a spatula to toss the chickpeas and ensure they are well coated with the oil. This even coating of oil is what helps to achieve uniform crispness and prevents some chickpeas from becoming dry while others remain soft.
- Roast the chickpeas for 30-40 minutes or until they are golden and crisp. Roasting time is a guideline, and the exact time may vary depending on your oven and the desired level of crispiness. Start checking the chickpeas around 30 minutes. They are ready when they are golden brown and feel crispy to the touch. You can test crispiness by removing a chickpea and letting it cool slightly. If it’s crispy when cooled, the rest are likely ready. During the roasting process, you can shake the pan or stir the chickpeas halfway through to ensure even browning and prevent sticking. Keep a close eye on them towards the end of the roasting time to prevent them from burning, especially if your oven runs hot. The goal is to achieve a balance between crispiness and avoiding them becoming overly hard or burnt.
- Remove from the oven and place them in a mixing bowl. Once the chickpeas are roasted to your desired crispiness, remove them from the oven promptly. Transferring them to a mixing bowl immediately helps to stop the cooking process and allows them to cool slightly before adding the spices. Using a mixing bowl provides ample space for tossing the chickpeas with the spices and ensures even distribution.
- Add the spice of your choice to them. Mix well and serve. Now comes the exciting part – adding your chosen spice! While the chickpeas are still warm, sprinkle your desired spice or spice blend over them in the mixing bowl. Toss the chickpeas thoroughly to ensure they are evenly coated with the spice. The warmth of the chickpeas helps the spices to adhere better and release their aromas. Taste a chickpea and adjust the seasoning if needed. You can add more spice or a pinch of salt if desired. Serve the roasted chickpeas immediately while they are at their crispiest and most flavorful. They are best enjoyed warm but are also delicious at room temperature.
Nutrition Facts
Roasted chickpeas are not only delicious but also a surprisingly nutritious snack! Let’s take a look at the approximate nutritional information per serving, based on this recipe. Please note that these are estimates and can vary depending on the specific brands and ingredients used.
Servings: 8
Approximate Nutrition per Serving:
- Calories: 75-90 kcal
- This is a relatively low-calorie snack, making it a great option for those watching their calorie intake.
- Protein: 3-4g
- Chickpeas are a good source of plant-based protein, contributing to satiety and muscle maintenance.
- Fat: 4-5g
- Primarily from the olive oil, these are healthy monounsaturated fats, beneficial for heart health.
- Saturated Fat: <1g
- Low in saturated fat, making it a healthier fat option compared to many processed snacks.
- Cholesterol: 0mg
- Cholesterol-free, as it is a plant-based food.
- Sodium: 100-150mg (can vary depending on canned chickpeas and added salt)
- Choose low-sodium canned chickpeas and control added salt to manage sodium intake.
- Carbohydrates: 10-12g
- Provides energy and includes complex carbohydrates from the chickpeas.
- Fiber: 2-3g
- Chickpeas are an excellent source of dietary fiber, promoting digestive health, satiety, and blood sugar control.
- Sugar: <1g (naturally occurring)
- Low in sugar, making it a better choice than many sugary snacks.
- Iron: Approximately 5-7% of Daily Value
- Chickpeas contribute to your daily iron intake, important for energy and oxygen transport.
- Folate: Approximately 8-10% of Daily Value
- A good source of folate, a B vitamin essential for cell growth and development.
- Manganese: Approximately 10-12% of Daily Value
- Provides manganese, an important mineral for bone health and metabolism.
Nutritional Highlights:
- High in Fiber: The significant fiber content helps keep you feeling full and satisfied, aiding in weight management and promoting healthy digestion.
- Good Source of Plant-Based Protein: Protein is essential for building and repairing tissues, and roasted chickpeas offer a plant-based source, making them suitable for vegetarians and vegans.
- Healthy Fats: The olive oil provides monounsaturated fats, which are considered heart-healthy and beneficial for overall well-being.
- Rich in Vitamins and Minerals: Chickpeas are packed with essential vitamins and minerals like iron, folate, and manganese, contributing to your daily nutrient intake.
- Low in Sugar and Saturated Fat: Compared to many processed snacks, roasted chickpeas are naturally low in sugar and saturated fat, making them a healthier option.
Incorporating roasted chickpeas into your diet is a great way to boost your intake of fiber, protein, and essential nutrients while enjoying a delicious and satisfying snack. They are a much healthier alternative to chips, crackers, and other processed snacks, offering both flavor and nutritional benefits.
Preparation Time
The total preparation time for this roasted chickpeas recipe is approximately 45 minutes. This timeframe includes both the active preparation and the roasting time in the oven. Let’s break down the time allocation:
- Preparation Time (Hands-on): 5-10 minutes
- This includes the time it takes to gather your ingredients, wash and drain the chickpeas, and toss them with olive oil and spices. The active preparation is minimal and very quick, making this a great recipe for busy individuals.
- Cooking Time (Roasting in Oven): 30-40 minutes
- The majority of the time is spent roasting the chickpeas in the oven. While they are roasting, you are free to do other things, making this a relatively hands-off cooking process. You may need to check on them and shake the pan once or twice during roasting, but otherwise, they require minimal attention.
Therefore, from start to finish, you can have a batch of delicious and crispy roasted chickpeas ready in under 45 minutes. This quick preparation time, combined with the ease of the recipe and the healthy nature of the snack, makes roasted chickpeas a perfect choice for a last-minute snack craving, a healthy addition to meal prep, or a quick and easy appetizer for gatherings. The relatively short cooking time also means you can quickly satisfy your hunger without spending hours in the kitchen.
How to Serve Roasted Chickpeas
Roasted chickpeas are incredibly versatile and can be enjoyed in numerous ways beyond just a simple snack. Their crunchy texture and flavorful profile make them a fantastic addition to various dishes. Here are some delicious ways to serve roasted chickpeas:
- As a Snack:
- Straight out of the oven: Enjoy them warm and crispy as a satisfying snack on their own. This is the simplest and most direct way to enjoy their flavor and texture.
- Party Snack: Serve them in bowls at parties or gatherings as a healthy and flavorful alternative to chips and pretzels. They are always a crowd-pleaser and a welcome change from typical party fare.
- On-the-Go Snack: Pack them in containers for a healthy and portable snack to take to work, school, or on hikes. They are a much better option than processed snacks when you are out and about.
- As a Salad Topping:
- Crunchy Salad Element: Sprinkle them over your favorite salads to add a delightful crunch and protein boost. They work especially well with Mediterranean salads, grain bowls, and leafy green salads.
- Caesar Salad Alternative: Use them instead of croutons in a Caesar salad for a gluten-free and healthier crunch.
- Warm Salad Addition: Toss them into warm salads with roasted vegetables or grains for added texture and flavor.
- In Bowls and Grain Bowls:
- Buddha Bowls: Incorporate them into Buddha bowls or nourish bowls with grains like quinoa or brown rice, roasted vegetables, and a flavorful sauce. They add protein, fiber, and crunch to these wholesome bowls.
- Mediterranean Bowls: Add them to Mediterranean-inspired bowls with hummus, falafel, cucumber, tomatoes, and feta cheese.
- Taco Bowls: Use spiced roasted chickpeas as a plant-based protein in taco bowls instead of meat.
- As a Soup or Stew Garnish:
- Crunchy Topping: Sprinkle them over creamy soups or hearty stews for a textural contrast and added flavor. They prevent soups from being one-dimensional and add a pleasant bite.
- Chili Topping: Top chili with roasted chickpeas for extra protein and crunch.
- In Wraps and Sandwiches:
- Vegetarian Wraps: Add them to vegetarian wraps with hummus, vegetables, and feta cheese for a satisfying and protein-rich filling.
- Sandwich Filler: Include them in sandwiches for added texture and flavor, especially in vegetarian or vegan sandwiches.
- As a Side Dish:
- Vegetable Side: Serve them as a simple side dish alongside grilled meats, fish, or other main courses.
- Roasted Vegetable Platter: Include them on a roasted vegetable platter for added variety and texture.
- Creative Culinary Uses:
- Chickpea “Croutons” for Soup: Blend roasted chickpeas into a coarse crumb in a food processor and use as croutons for creamy soups.
- Thickener for Soups and Stews: Puree some roasted chickpeas and add them to soups or stews to thicken them naturally and add a nutty flavor.
- Pasta Topping: Sprinkle them over pasta dishes, especially vegetarian pasta dishes, for added texture and protein.
The possibilities are truly endless! Experiment with different serving ideas to discover your favorite ways to enjoy these crispy and flavorful roasted chickpeas. Their versatility makes them a fantastic ingredient to keep on hand for adding a healthy and delicious touch to a wide range of meals and snacks.
Additional Tips for Perfect Roasted Chickpeas
To consistently achieve perfectly crispy and flavorful roasted chickpeas, here are five additional tips to elevate your recipe and ensure success every time:
- Dry the Chickpeas Thoroughly: Moisture is the enemy of crispiness when it comes to roasting chickpeas. After washing and draining your canned chickpeas, take the extra step of drying them thoroughly. Spread the drained chickpeas on a clean kitchen towel or paper towels and gently pat them dry. You can even roll them gently within the towel to remove excess moisture. The drier the chickpeas are before roasting, the crispier they will become. Excess water will steam them in the oven rather than roasting them to a crisp.
- Remove Loose Skins (Optional but Recommended): While not strictly necessary, removing the loose skins from the chickpeas can contribute to a crispier texture. After drying the chickpeas, you might notice some loose skins. You can gently rub the chickpeas between your fingers to loosen and remove these skins. This step is a bit time-consuming but can result in a slightly smoother and crispier final product. It also helps the spices adhere better to the chickpea surface.
- Don’t Overcrowd the Baking Pan: As mentioned earlier, overcrowding the baking pan is a common mistake that leads to soggy chickpeas. Ensure that the chickpeas are arranged in a single, even layer with space between them. If you need to roast a larger batch, use two baking pans or roast in batches. Proper spacing allows for hot air to circulate around each chickpea, promoting even roasting and crisping. If they are too close together, they will steam instead of roast.
- Roast at the Right Temperature and Time, and Listen to Your Oven: The recommended oven temperature of 200°C/180°C fan/gas 6 is a good starting point, but ovens can vary. Pay attention to how your chickpeas are roasting. If they are browning too quickly, you can lower the oven temperature slightly. If they are not crisping up after 30-40 minutes, you might need to increase the roasting time slightly. Listen to your oven – the chickpeas are ready when they are golden brown, sound slightly hollow when tapped, and feel crispy when you bite into one after it has cooled slightly. Roasting time is a guideline, not a strict rule.
- Spice After Roasting for Maximum Flavor and Aroma: While you can toss the spices with the chickpeas before roasting, adding the spices after roasting, as indicated in the recipe, can enhance the flavor and aroma. The heat from the freshly roasted chickpeas helps to bloom the spices, releasing their full flavor potential. Tossing the warm chickpeas with spices in a bowl ensures even coating and maximum flavor impact. This method also prevents spices from burning in the oven, which can sometimes happen if they are roasted for the entire duration.
By following these additional tips, you can consistently achieve perfectly roasted chickpeas that are crispy on the outside, tender on the inside, and bursting with flavor. These simple adjustments can make a significant difference in the final result, transforming this simple recipe into a truly exceptional snack or ingredient.
Frequently Asked Questions (FAQ) about Roasted Chickpeas
Here are some frequently asked questions about roasted chickpeas to help you troubleshoot and further customize this delicious and healthy snack:
Q1: My roasted chickpeas are not crispy, what did I do wrong?
A: There are several reasons why your roasted chickpeas might not be crispy:
- Not dried thoroughly: The most common reason is that the chickpeas were not dried sufficiently before roasting. Ensure you pat them thoroughly dry with a kitchen towel or paper towels before tossing them with oil and spices.
- Overcrowding the pan: Overcrowding leads to steaming instead of roasting. Make sure the chickpeas are in a single, even layer with space between them. Use a larger baking pan or roast in batches if needed.
- Insufficient roasting time: They might need to roast longer. Keep roasting for an additional 5-10 minutes, checking for crispiness.
- Oven temperature too low: Ensure your oven is preheated to the correct temperature (200°C/180°C fan/gas 6). Oven temperatures can vary, so you might need to slightly adjust the temperature or roasting time.
- Not enough oil: Olive oil helps with crisping. Ensure the chickpeas are evenly coated with oil.
Q2: Can I use dried chickpeas instead of canned chickpeas?
A: Yes, you can use dried chickpeas, but it requires more preparation time. You will need to:
- Soak: Soak 1 cup of dried chickpeas in water overnight (at least 8 hours).
- Cook: Drain and rinse the soaked chickpeas. Boil them in fresh water for about 45-60 minutes, or until tender but not mushy. Drain well.
- Proceed with the recipe: Once cooked and drained, you can follow the recipe instructions starting from step 2 (arranging in a baking pan).
Using canned chickpeas is a much faster and more convenient option, especially for a quick snack.
Q3: How long do roasted chickpeas last and how should I store them?
A: Roasted chickpeas are best enjoyed fresh and crispy, ideally within a few hours of roasting. However, you can store leftover roasted chickpeas in an airtight container at room temperature for up to 2-3 days. Keep in mind that they will lose some of their crispness over time, especially if stored in a humid environment. To help maintain crispness, you can add a piece of paper towel to the container to absorb moisture. Reheating them in a dry pan or a low oven for a few minutes can help to revive some of the crispness, but they won’t be quite as crispy as freshly roasted.
Q4: What are some other spice variations I can try?
A: The spice possibilities are endless! Here are some more spice variation ideas beyond those already mentioned:
- Za’atar: A Middle Eastern spice blend with thyme, sesame seeds, and sumac.
- Ras el Hanout: A complex and aromatic Moroccan spice blend.
- Lemon Pepper: For a zesty and peppery flavor.
- Turmeric and Ginger: For a warm and anti-inflammatory spice combination.
- Maple Cinnamon: For a sweeter, dessert-like roasted chickpea snack. Use maple syrup instead of olive oil and sprinkle with cinnamon after roasting.
- Italian Herb and Parmesan: Toss with Italian herbs and grated Parmesan cheese after roasting for a savory and cheesy flavor. (Add Parmesan after roasting so it doesn’t burn).
- Peri-Peri: For a fiery and spicy kick, use peri-peri seasoning.
Experiment and find your favorite spice combinations! You can also create your own custom spice blends to suit your taste.
Q5: Are roasted chickpeas a healthy snack?
A: Yes, roasted chickpeas are a very healthy snack option! They are:
- High in Fiber: Promote digestive health and satiety.
- Good Source of Plant-Based Protein: Help with muscle maintenance and feeling full.
- Rich in Nutrients: Packed with vitamins and minerals like iron, folate, and manganese.
- Lower in Calories than Many Processed Snacks: A healthier alternative to chips, crackers, and other processed snacks.
- Provide Healthy Fats: From the olive oil, contributing to heart health.
- Naturally Gluten-Free and Vegan: Suitable for various dietary needs.
Roasted chickpeas are a nutritious and delicious way to satisfy snack cravings and incorporate more plant-based protein and fiber into your diet. They are a much better choice than many commercially available snacks that are often high in unhealthy fats, sodium, and processed ingredients.
Print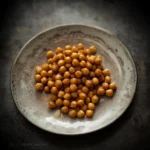
Roasted chickpeas Recipe
Ingredients
- 400g (1 can) cooked chickpeas, washed and drained: Chickpeas, also known as garbanzo beans, are the star of this recipe. Using canned chickpeas makes this recipe incredibly quick and convenient. When selecting your canned chickpeas, opt for those with no added salt or low sodium options if you are watching your salt intake. The washing and draining process is crucial. Washing removes any excess starch and canning liquid which can hinder crispiness. Draining ensures that excess moisture is removed, allowing the olive oil and spices to coat the chickpeas effectively and promote optimal roasting. You can also cook your own chickpeas from dried, which will require soaking and boiling beforehand, but canned chickpeas are a fantastic time-saver for this recipe.
- 15ml (1 tbsp) olive oil: Olive oil is the fat component in this recipe, playing a vital role in achieving that desirable crispy texture. It also adds a subtle richness and healthy fats to the snack. Extra virgin olive oil is recommended for its superior flavor and health benefits, but regular olive oil will also work perfectly fine. The oil coats the chickpeas, preventing them from drying out completely in the oven and allowing them to roast rather than just bake. This even coating of oil is key to achieving uniform crispness across all the chickpeas. Don’t be tempted to skimp on the oil, as it is essential for both texture and flavor development.
- 15ml (1 tbsp) spice: This is where you get to unleash your creativity and customize the roasted chickpeas to your liking! The spice component is incredibly versatile, allowing you to create a wide range of flavor profiles. You can use a single spice or a blend to achieve your desired taste. Some popular and delicious options include:
- Smoked Paprika: For a smoky and slightly sweet flavor. It adds a beautiful reddish hue and a depth of flavor that is incredibly addictive.
- Garlic Powder: A classic choice that adds a savory and aromatic element. Garlic powder enhances the natural nuttiness of the chickpeas.
- Onion Powder: Similar to garlic powder, onion powder provides a savory base note and complements other spices beautifully.
- Chili Powder: For a touch of heat and warmth. Chili powder can range from mild to hot, so choose one that suits your spice preference.
- Cumin: Earthy and warm, cumin adds a distinct Middle Eastern or Mexican flavor profile.
- Curry Powder: A blend of spices that offers a complex and aromatic flavor. Curry powder can bring a vibrant and exotic touch to your roasted chickpeas.
- Italian Herbs: A mix of dried herbs like oregano, basil, rosemary, and thyme for a Mediterranean twist. These herbs provide a fragrant and savory flavor.
- Cajun Seasoning: For a spicy and savory kick with notes of paprika, cayenne, and garlic. Cajun seasoning delivers a bold and flavorful punch.
- Everything Bagel Seasoning: A trendy and flavorful blend of sesame seeds, poppy seeds, dried garlic, dried onion, and salt. This seasoning adds a delightful crunch and savory flavor.
- Cinnamon Sugar: For a sweet and savory snack. A combination of cinnamon and sugar creates a delightful sweet treat with a hint of warmth.
- Plain Salt and Pepper: For a simple yet satisfying snack that highlights the natural flavor of the chickpeas. Sometimes, simplicity is key, and salt and pepper are all you need.
Instructions
- Heat oven to 200°C/180°C fan/gas 6. Preheating your oven to the correct temperature is crucial for even roasting and crispiness. The high heat is essential for quickly drying out the chickpeas and creating that desirable crunchy texture. If your oven tends to run hot or cold, you may need to adjust the temperature slightly. Using a fan-assisted oven (convection oven) will help to circulate the hot air more evenly, resulting in more uniformly roasted chickpeas. If you don’t have a fan oven, the standard temperature of 200°C (gas mark 6) will work well. Allow your oven to fully preheat before placing the chickpeas inside to ensure they start roasting immediately.
- Arrange the chickpeas in an even layer in a large baking pan. Using a large baking pan is important to avoid overcrowding the chickpeas. Overcrowding will steam the chickpeas instead of roasting them, leading to a softer, less crispy result. Spread the chickpeas in a single, even layer across the baking pan. This allows hot air to circulate around each chickpea, promoting even cooking and crisping. If you are making a larger batch, you may need to use two baking pans or roast the chickpeas in batches to ensure they are not overcrowded. A rimmed baking sheet is ideal to prevent any chickpeas from rolling off during shaking.
- Drizzle with oil and give pan a vigorous shake to ensure the chickpeas are thoroughly covered. Drizzling the olive oil evenly over the chickpeas is the next crucial step. Aim for a light but thorough coating. The tablespoon of olive oil should be sufficient for a 400g can of chickpeas. After drizzling, the “vigorous shake” is key to distributing the oil evenly and ensuring that every chickpea is coated. You can also use your hands or a spatula to toss the chickpeas and ensure they are well coated with the oil. This even coating of oil is what helps to achieve uniform crispness and prevents some chickpeas from becoming dry while others remain soft.
- Roast the chickpeas for 30-40 minutes or until they are golden and crisp. Roasting time is a guideline, and the exact time may vary depending on your oven and the desired level of crispiness. Start checking the chickpeas around 30 minutes. They are ready when they are golden brown and feel crispy to the touch. You can test crispiness by removing a chickpea and letting it cool slightly. If it’s crispy when cooled, the rest are likely ready. During the roasting process, you can shake the pan or stir the chickpeas halfway through to ensure even browning and prevent sticking. Keep a close eye on them towards the end of the roasting time to prevent them from burning, especially if your oven runs hot. The goal is to achieve a balance between crispiness and avoiding them becoming overly hard or burnt.
- Remove from the oven and place them in a mixing bowl. Once the chickpeas are roasted to your desired crispiness, remove them from the oven promptly. Transferring them to a mixing bowl immediately helps to stop the cooking process and allows them to cool slightly before adding the spices. Using a mixing bowl provides ample space for tossing the chickpeas with the spices and ensures even distribution.
- Add the spice of your choice to them. Mix well and serve. Now comes the exciting part – adding your chosen spice! While the chickpeas are still warm, sprinkle your desired spice or spice blend over them in the mixing bowl. Toss the chickpeas thoroughly to ensure they are evenly coated with the spice. The warmth of the chickpeas helps the spices to adhere better and release their aromas. Taste a chickpea and adjust the seasoning if needed. You can add more spice or a pinch of salt if desired. Serve the roasted chickpeas immediately while they are at their crispiest and most flavorful. They are best enjoyed warm but are also delicious at room temperature.
Nutrition
- Serving Size: One Normal Portion
- Calories: 75-90 kcal
- Sugar: <1g
- Sodium: 100-150mg
- Fat: 4-5g
- Saturated Fat: <1g
- Carbohydrates: 10-12g
- Fiber: 2-3g
- Protein: 3-4g
- Cholesterol: 0mg