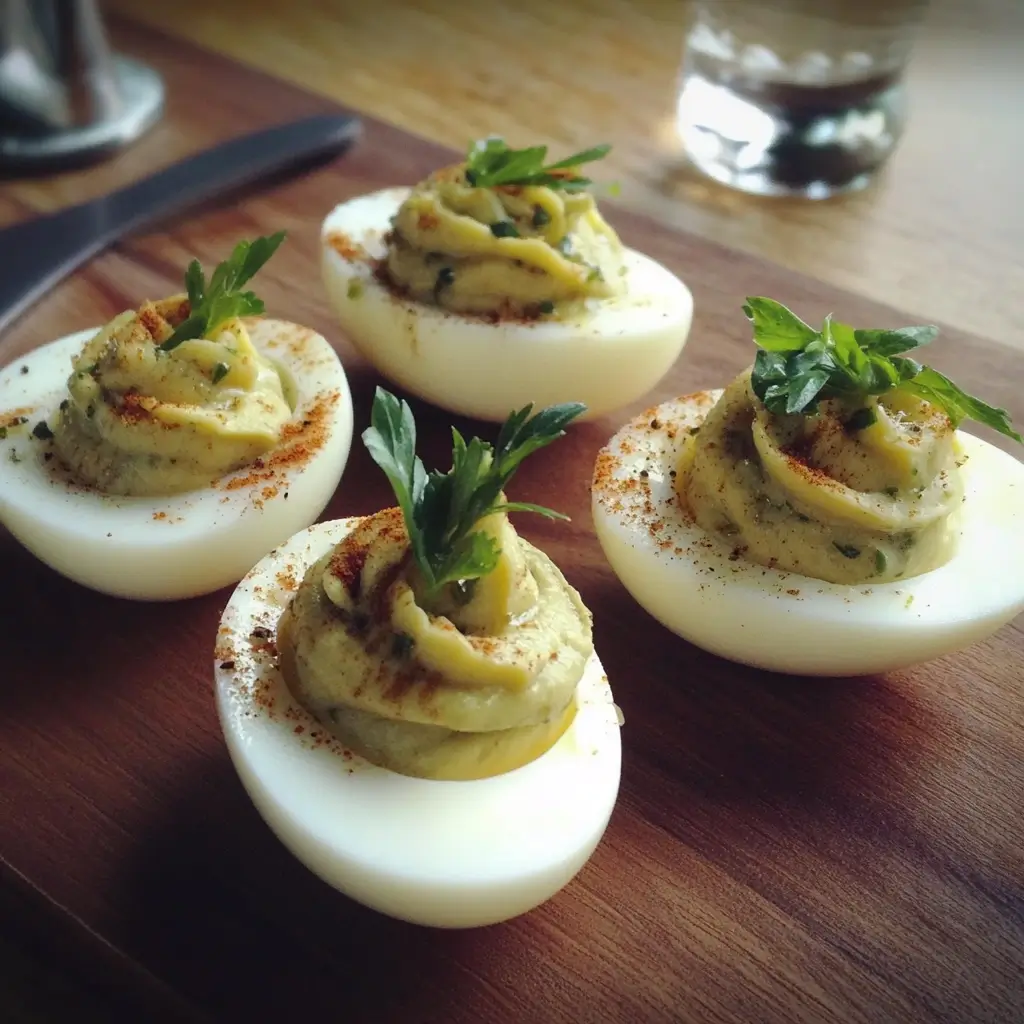
Deviled eggs. Just the name conjures up images of sunny picnics, festive holiday gatherings, and potlucks brimming with deliciousness. They are a timeless classic, a crowd-pleaser that somehow manages to be both elegant and comforting. But let’s be honest, sometimes even the most beloved classics can benefit from a little reinvention. That’s where these Pickled Onion Deviled Eggs come in. I stumbled upon this recipe quite by accident while trying to figure out what to do with a jar of homemade pickled red onions that were sitting in my fridge, practically begging for a purpose beyond burger topping. The idea of combining the creamy richness of deviled eggs with the tangy, sweet-and-sour punch of pickled onions seemed intriguing, and let me tell you, it was a stroke of culinary genius! From the very first bite, my family was hooked. The vibrant pink hue from the pickled onions speckled throughout the creamy yellow filling was visually stunning, and the flavor? Oh, the flavor! The familiar creamy, savory base of the deviled egg was elevated by the bright acidity and subtle sweetness of the pickled onions, creating a perfect harmony of flavors and textures. These are not your grandma’s deviled eggs – unless your grandma was incredibly adventurous and had a penchant for bold, delicious twists. They are sophisticated enough for a fancy appetizer spread, yet simple enough to whip up for a casual weekend brunch. Trust me, once you try these Pickled Onion Deviled Eggs, you’ll never look at regular deviled eggs the same way again. Get ready to experience a deviled egg revolution!
Ingredients
To create these delightful Pickled Onion Deviled Eggs, you’ll need a handful of readily available ingredients. The magic truly lies in the balance of flavors, so using quality ingredients will make all the difference. Here’s what you’ll need:
For the Pickled Red Onions:
- 1 medium red onion, thinly sliced: Red onions are ideal for pickling due to their beautiful color and slightly milder flavor compared to yellow or white onions. Thinly slicing ensures quick pickling and a delicate texture in the final deviled eggs.
- 1 cup apple cider vinegar: Apple cider vinegar lends a slightly fruity and mellow acidity that complements the sweetness of the onions and the richness of the eggs. You can substitute with white wine vinegar or distilled white vinegar if needed, but apple cider vinegar provides a unique depth of flavor.
- 1/2 cup water: Water dilutes the vinegar slightly, creating a more balanced pickling brine and preventing the onions from becoming overly acidic.
- 1/4 cup granulated sugar: Sugar balances the acidity of the vinegar and adds a touch of sweetness that enhances the overall flavor profile of the pickled onions. You can adjust the amount of sugar to your preference, depending on how sweet you like your pickles.
- 1 teaspoon salt: Salt is crucial for pickling as it helps to draw out moisture from the onions, tenderize them, and enhance their flavor. Use kosher salt or sea salt for best results.
- 1/2 teaspoon black peppercorns: Black peppercorns add a subtle warmth and spice to the pickling brine, adding another layer of complexity to the pickled onions. You can also use other spices like mustard seeds or bay leaves for variation.
For the Deviled Eggs:
- 12 large eggs: Large eggs are the standard size for deviled eggs, providing a good balance of yolk and white. Ensure your eggs are fresh for optimal flavor and easier peeling after boiling.
- 1/2 cup mayonnaise: Mayonnaise is the creamy base of deviled egg filling. Use a good quality, full-fat mayonnaise for the best flavor and texture. You can experiment with different types of mayonnaise, such as avocado oil mayonnaise, for a slightly different flavor profile.
- 2 tablespoons Dijon mustard: Dijon mustard adds a tangy and slightly spicy kick to the deviled egg filling, balancing the richness of the mayonnaise and eggs. You can adjust the amount to your taste or substitute with yellow mustard for a milder flavor.
- 2 tablespoons finely chopped fresh chives: Fresh chives add a delicate oniony flavor and a vibrant green color to the filling and garnish. They complement the pickled onions beautifully and add a touch of freshness. Parsley or dill can be used as alternatives.
- 2 tablespoons pickled red onions, drained and finely chopped: These are the star of the show! Finely chopping the pickled onions ensures they distribute evenly throughout the filling and provide bursts of flavor in every bite. Reserve some whole or larger pieces for garnish.
- 1 tablespoon pickle juice (from the pickled red onions jar): Adding a tablespoon of the pickling juice to the deviled egg filling intensifies the pickled onion flavor and adds a touch of acidity that brightens the overall taste.
- Salt and freshly ground black pepper, to taste: Seasoning is essential! Taste the filling and adjust the salt and pepper to your preference. Remember that the pickled onions will also contribute saltiness and acidity.
- Paprika, for garnish (optional): Paprika is a classic deviled egg garnish, adding a touch of color and subtle smoky flavor. Smoked paprika is particularly delicious.
Instructions
Creating these Pickled Onion Deviled Eggs is a straightforward process, broken down into manageable steps. The pickling of the onions can be done ahead of time, making assembly even quicker when you’re ready to serve.
Step 1: Pickle the Red Onions (at least 30 minutes ahead, or up to a week in advance)
- Prepare the Pickling Brine: In a small saucepan, combine the apple cider vinegar, water, sugar, salt, and black peppercorns. Bring the mixture to a simmer over medium heat, stirring until the sugar and salt are dissolved. Remove from heat and let it cool slightly.
- Why this step is important: Heating the brine helps dissolve the sugar and salt more readily and infuses the vinegar with the flavor of the peppercorns. Cooling it slightly before adding the onions prevents them from cooking and ensures they retain a crisp texture.
- Prepare the Onions: Place the thinly sliced red onion in a clean glass jar or heat-proof container.
- Tip for even pickling: Pack the onions relatively tightly in the jar, but not so much that you crush them. This ensures they are mostly submerged in the brine.
- Pour Brine over Onions: Pour the warm pickling brine over the red onions, ensuring they are completely submerged. If needed, use a weight (like a small clean jar or a fermentation weight) to keep the onions submerged.
- Submersion is key: Exposed onions can spoil or become discolored. Make sure the brine completely covers them.
- Let Pickle: Allow the pickled onions to sit at room temperature for at least 30 minutes, or ideally for 1-2 hours, for the flavors to develop. For a more intense pickled flavor, refrigerate for several hours or overnight. The pickled onions can be stored in the refrigerator in the pickling brine for up to a week.
- Time is flavor: The longer the onions pickle, the more pronounced the flavor will become. Even 30 minutes will make a noticeable difference, but longer pickling yields deeper flavor.
Step 2: Hard Boil the Eggs
- Place Eggs in a Pot: Gently place the eggs in a single layer in a large saucepan. Cover the eggs with cold water by about an inch.
- Cold water start: Starting with cold water helps prevent the eggs from cracking due to sudden temperature changes.
- Bring to a Boil: Bring the water to a rolling boil over high heat. Once boiling, immediately remove the pot from the heat, cover it tightly with a lid, and let it stand for 10-12 minutes for large eggs.
- Perfectly cooked yolks: This “stand and steam” method cooks the yolks perfectly, preventing them from turning dry or green around the edges. The timing is crucial for ideal texture.
- Ice Bath: While the eggs are standing, prepare an ice bath by filling a bowl with ice and cold water. After 10-12 minutes, carefully transfer the hot eggs to the ice bath using a slotted spoon. Let them cool completely in the ice bath for at least 15-20 minutes.
- Easy peeling secret: The ice bath stops the cooking process and makes the eggs much easier to peel. The cold water shrinks the egg whites slightly, separating them from the shell membrane.
- Peel the Eggs: Gently tap each egg all over to crack the shell. Starting under cold running water, peel the eggs, starting from the larger end where the air pocket is. The shells should slip off easily.
- Freshness matters for peeling: Older eggs are generally easier to peel than very fresh eggs.
Step 3: Prepare the Deviled Egg Filling
- Halve the Eggs: Slice the peeled eggs lengthwise. Gently remove the yolks and place them in a medium bowl. Arrange the egg whites on a serving platter or a plate.
- Handle gently: Be careful not to tear the egg whites while removing the yolks.
- Mash the Yolks: Using a fork, mash the egg yolks until they are smooth and crumb-free.
- Smooth filling is key: Thoroughly mashing the yolks ensures a creamy and lump-free deviled egg filling.
- Add Mayonnaise and Mustard: Add the mayonnaise and Dijon mustard to the mashed yolks. Stir until well combined and creamy.
- Creamy base: Mayonnaise and mustard are the foundation of the classic deviled egg flavor and texture.
- Incorporate Pickled Onions and Chives: Drain the pickled red onions and finely chop about 2 tablespoons. Add the chopped pickled onions, finely chopped fresh chives, and pickle juice to the yolk mixture. Stir to combine everything evenly.
- Flavor infusion: The pickled onions, chives, and pickle juice are what give these deviled eggs their signature tangy and fresh flavor.
- Season to Taste: Season the deviled egg filling with salt and freshly ground black pepper to taste. Start with a pinch of each and adjust as needed. Remember to taste and adjust seasoning as you go.
- Balance is crucial: The pickled onions contribute acidity and salt, so taste before adding more salt.
- Fill the Egg Whites: You can use a spoon or a piping bag to fill the egg whites with the deviled egg filling. For a neater presentation, use a piping bag fitted with a star tip to pipe the filling into the egg whites.
- Presentation options: Spooning is quick and easy. Piping adds a touch of elegance.
Step 4: Garnish and Serve
- Garnish: Garnish the filled deviled eggs with a sprinkle of paprika (if using) and a few small pieces or thinly sliced pickled red onions on top of each egg. Fresh chives can also be used for additional garnish.
- Visual appeal: Garnishes enhance the visual appeal and hint at the flavors within.
- Chill (Optional): If not serving immediately, cover the deviled eggs loosely with plastic wrap and refrigerate for up to 2-3 hours. For the best texture, it’s ideal to serve them within a couple of hours of assembly.
- Chill for best texture: Chilling helps the flavors meld further and keeps the deviled eggs cool and refreshing.
- Serve: Arrange the Pickled Onion Deviled Eggs on a serving platter and serve chilled as an appetizer, side dish, or snack.
Nutrition Facts
- Servings: 12 deviled eggs (6 servings of 2 eggs each)
- Calories per Serving (2 deviled eggs): Approximately 200-250 calories (This is an estimate and can vary based on ingredient brands and specific mayonnaise used).
Approximate Nutrition Information per serving (2 deviled eggs):
- Calories: 200-250
- Protein: 8-10g
- Fat: 16-20g (primarily from mayonnaise and egg yolks)
- Saturated Fat: 4-6g
- Cholesterol: 350-400mg
- Sodium: 200-300mg (can vary depending on salt added and mayonnaise used)
- Carbohydrates: 3-5g
- Fiber: <1g
- Sugar: 2-3g
Please note: These are estimated values and can vary depending on the specific ingredients used and portion sizes. For more precise nutritional information, use a nutrition calculator with the specific brands and quantities of ingredients you use.
Preparation Time
- Pickling Onions: 15 minutes prep + 30 minutes to 2 hours pickling time (or longer for stronger flavor)
- Hard Boiling Eggs: 20 minutes (including boiling and cooling time)
- Deviled Egg Preparation: 20 minutes
- Total Preparation Time (excluding pickling time beyond 30 minutes): Approximately 55 minutes
- Active Prep Time: 35 minutes (Pickling prep, egg boiling, peeling, filling prep)
- Inactive Time: 20 minutes (Egg cooling in ice bath)
Make-Ahead Tips: The pickled onions can be made up to a week in advance and stored in the refrigerator. Hard-boiled eggs can be prepared 1-2 days in advance and stored unpeeled in the refrigerator. The deviled egg filling can be made a few hours ahead of time, but it’s best to fill the egg whites closer to serving time to prevent them from becoming watery.
How to Serve
Pickled Onion Deviled Eggs are incredibly versatile and can be served in a variety of ways. Their vibrant flavor and attractive presentation make them a welcome addition to any occasion.
Serving Suggestions:
- As an Appetizer:
- Party Platters: Arrange them beautifully on a platter as part of a larger appetizer spread. They pair wonderfully with crackers, crudités, cheeses, and charcuterie.
- Holiday Gatherings: Perfect for Easter, Thanksgiving, Christmas, and other holiday celebrations. Their festive colors and delicious taste make them a crowd-pleasing starter.
- Cocktail Parties: Serve them as elegant finger food at cocktail parties. Their tangy flavor complements drinks beautifully.
- Game Day: A sophisticated yet satisfying snack for game day gatherings.
- As a Side Dish:
- BBQs and Cookouts: A refreshing and flavorful side dish to complement grilled meats, burgers, and hot dogs. Their tanginess cuts through the richness of grilled foods.
- Picnics: Pack them for picnics! They are portable and delicious cold. Use a deviled egg carrier for easy transport.
- Brunch: A delightful addition to brunch spreads, alongside quiches, frittatas, and breakfast meats.
- Light Lunches: Pair them with a light salad for a satisfying and protein-rich lunch.
- Garnishing Ideas (Beyond the Recipe):
- Fresh Dill or Parsley: Adds a fresh, herbaceous note and extra green color.
- Smoked Paprika: Enhances the smoky flavor and adds a deeper color contrast.
- Crispy Bacon Bits: Adds a salty, crunchy texture and smoky bacon flavor.
- Hot Sauce Drizzle: For those who like a bit of heat, a drizzle of your favorite hot sauce (like sriracha or Tabasco) adds a spicy kick.
- Everything Bagel Seasoning: Adds a savory, crunchy topping with onion, garlic, and sesame seeds.
- Finely Chopped Celery: Adds a refreshing crunch and subtle celery flavor to the filling itself or as a garnish.
Additional Tips for Perfect Pickled Onion Deviled Eggs
- Achieve Perfectly Hard-Boiled Eggs for Easy Peeling: The key to easy-peel hard-boiled eggs is the ice bath. Immediately transferring the hot eggs to an ice bath after boiling stops the cooking process and causes the egg white to contract slightly, making it separate more easily from the shell membrane. Also, starting with older eggs (a few days to a week old) often results in easier peeling due to the egg white becoming slightly less tightly bound to the shell over time.
- Make Ahead Components for Convenience: Pickling the onions in advance is a great time-saver. They can be made up to a week ahead and stored in the refrigerator. You can also hard-boil the eggs a day or two in advance. However, for the best texture, assemble the deviled eggs (fill the whites) closer to serving time, ideally within a few hours.
- Customize the Flavor Profile: Don’t be afraid to experiment with the flavor of the deviled egg filling! For a spicier kick, add a dash of hot sauce or a pinch of cayenne pepper. For a richer flavor, try adding a teaspoon of sour cream or cream cheese to the filling. You can also incorporate other herbs and spices like dill, tarragon, or garlic powder to create different flavor variations. Consider adding a tiny bit of smoked paprika directly into the yolk mixture for a deeper smoky note throughout.
- Presentation Matters – Elevate Your Deviled Eggs: Presentation can make a big difference! Use a piping bag fitted with a decorative tip to pipe the filling into the egg whites for a more elegant look. Garnish thoughtfully with paprika, pickled onions, fresh herbs, or other toppings to enhance visual appeal. Arrange the deviled eggs on a beautiful platter or deviled egg tray for a polished presentation.
- Proper Storage for Leftovers: Store leftover Pickled Onion Deviled Eggs in an airtight container in the refrigerator for up to 2-3 days. It’s best to consume them sooner rather than later for optimal texture and flavor. Deviled eggs do not freeze well, as the mayonnaise and egg whites can become watery and the texture can change significantly upon thawing.
FAQ: Your Pickled Onion Deviled Egg Questions Answered
Q1: Can I use white or yellow onion instead of red onion for pickling?
A: Yes, you can use white or yellow onions if you don’t have red onions on hand. However, red onions are preferred for pickling in this recipe for a few reasons. Firstly, they have a milder flavor compared to white or yellow onions, which allows the tangy-sweet pickling brine to shine without being overpowered by onion pungency. Secondly, red onions offer a beautiful vibrant pink color when pickled, which adds to the visual appeal of the deviled eggs. White or yellow onions will still taste delicious pickled, but they will lack the same visual vibrancy and subtle flavor profile.
Q2: How long do pickled red onions last in the refrigerator?
A: Pickled red onions, when stored properly in an airtight container and submerged in their pickling brine, can last for up to 2-3 weeks in the refrigerator, and sometimes even longer. The vinegar acts as a natural preservative. However, for the best flavor and texture, it’s generally recommended to use them within 1-2 weeks. Always check for any signs of spoilage (off smell, mold) before consuming. The pickling brine itself also lasts for a considerable time and can be reused for pickling another batch of onions if desired, though the flavor may become slightly diluted with each use.
Q3: Can I make deviled eggs the day before serving?
A: While you can prepare components of deviled eggs ahead of time (like pickling onions and hard-boiling eggs), it’s generally best to assemble the deviled eggs (fill the egg whites) closer to serving time, ideally within a few hours. You can prepare the deviled egg filling up to a day in advance and store it in an airtight container in the refrigerator. However, filled deviled eggs can sometimes become slightly watery if stored for extended periods as the salt in the filling can draw out moisture from the egg whites. If you must make them the day before, make sure to store them in an airtight container and consider placing a paper towel in the container to absorb any excess moisture.
Q4: What can I do if my deviled egg filling is too thick or too thin?
A: If your deviled egg filling is too thick, you can easily thin it out by adding a small amount of mayonnaise, pickle juice (from the pickled onions or regular pickle juice), or even a teaspoon of cream or milk. Add liquid gradually, a teaspoon at a time, and stir until you reach your desired consistency. If your filling is too thin, you can thicken it by adding more mashed egg yolk or a little extra mayonnaise. You can also refrigerate the filling for about 30 minutes, as chilling can help firm it up slightly.
Q5: Can I freeze Pickled Onion Deviled Eggs?
A: Freezing deviled eggs is generally not recommended. The texture of both the egg whites and the mayonnaise-based filling can change significantly upon thawing. The egg whites can become rubbery and watery, and the mayonnaise may separate, resulting in a less appealing texture and flavor. While technically safe to freeze, the quality and texture will be significantly compromised. It is always best to enjoy deviled eggs fresh or within a few days of preparation when refrigerated. If you need to prepare components ahead of time, focus on making the pickled onions and hard-boiling the eggs in advance, and then assemble the deviled eggs closer to serving.
Print
Pickled Onion Deviled Eggs Recipe
Ingredients
For the Pickled Red Onions:
- 1 medium red onion, thinly sliced: Red onions are ideal for pickling due to their beautiful color and slightly milder flavor compared to yellow or white onions. Thinly slicing ensures quick pickling and a delicate texture in the final deviled eggs.
- 1 cup apple cider vinegar: Apple cider vinegar lends a slightly fruity and mellow acidity that complements the sweetness of the onions and the richness of the eggs. You can substitute with white wine vinegar or distilled white vinegar if needed, but apple cider vinegar provides a unique depth of flavor.
- 1/2 cup water: Water dilutes the vinegar slightly, creating a more balanced pickling brine and preventing the onions from becoming overly acidic.
- 1/4 cup granulated sugar: Sugar balances the acidity of the vinegar and adds a touch of sweetness that enhances the overall flavor profile of the pickled onions. You can adjust the amount of sugar to your preference, depending on how sweet you like your pickles.
- 1 teaspoon salt: Salt is crucial for pickling as it helps to draw out moisture from the onions, tenderize them, and enhance their flavor. Use kosher salt or sea salt for best results.
- 1/2 teaspoon black peppercorns: Black peppercorns add a subtle warmth and spice to the pickling brine, adding another layer of complexity to the pickled onions. You can also use other spices like mustard seeds or bay leaves for variation.
For the Deviled Eggs:
- 12 large eggs: Large eggs are the standard size for deviled eggs, providing a good balance of yolk and white. Ensure your eggs are fresh for optimal flavor and easier peeling after boiling.
- 1/2 cup mayonnaise: Mayonnaise is the creamy base of deviled egg filling. Use a good quality, full-fat mayonnaise for the best flavor and texture. You can experiment with different types of mayonnaise, such as avocado oil mayonnaise, for a slightly different flavor profile.
- 2 tablespoons Dijon mustard: Dijon mustard adds a tangy and slightly spicy kick to the deviled egg filling, balancing the richness of the mayonnaise and eggs. You can adjust the amount to your taste or substitute with yellow mustard for a milder flavor.
- 2 tablespoons finely chopped fresh chives: Fresh chives add a delicate oniony flavor and a vibrant green color to the filling and garnish. They complement the pickled onions beautifully and add a touch of freshness. Parsley or dill can be used as alternatives.
- 2 tablespoons pickled red onions, drained and finely chopped: These are the star of the show! Finely chopping the pickled onions ensures they distribute evenly throughout the filling and provide bursts of flavor in every bite. Reserve some whole or larger pieces for garnish.
- 1 tablespoon pickle juice (from the pickled red onions jar): Adding a tablespoon of the pickling juice to the deviled egg filling intensifies the pickled onion flavor and adds a touch of acidity that brightens the overall taste.
- Salt and freshly ground black pepper, to taste: Seasoning is essential! Taste the filling and adjust the salt and pepper to your preference. Remember that the pickled onions will also contribute saltiness and acidity.
- Paprika, for garnish (optional): Paprika is a classic deviled egg garnish, adding a touch of color and subtle smoky flavor. Smoked paprika is particularly delicious.
Instructions
Step 1: Pickle the Red Onions (at least 30 minutes ahead, or up to a week in advance)
- Prepare the Pickling Brine: In a small saucepan, combine the apple cider vinegar, water, sugar, salt, and black peppercorns. Bring the mixture to a simmer over medium heat, stirring until the sugar and salt are dissolved. Remove from heat and let it cool slightly.
- Why this step is important: Heating the brine helps dissolve the sugar and salt more readily and infuses the vinegar with the flavor of the peppercorns. Cooling it slightly before adding the onions prevents them from cooking and ensures they retain a crisp texture.
- Prepare the Onions: Place the thinly sliced red onion in a clean glass jar or heat-proof container.
- Tip for even pickling: Pack the onions relatively tightly in the jar, but not so much that you crush them. This ensures they are mostly submerged in the brine.
- Pour Brine over Onions: Pour the warm pickling brine over the red onions, ensuring they are completely submerged. If needed, use a weight (like a small clean jar or a fermentation weight) to keep the onions submerged.
- Submersion is key: Exposed onions can spoil or become discolored. Make sure the brine completely covers them.
- Let Pickle: Allow the pickled onions to sit at room temperature for at least 30 minutes, or ideally for 1-2 hours, for the flavors to develop. For a more intense pickled flavor, refrigerate for several hours or overnight. The pickled onions can be stored in the refrigerator in the pickling brine for up to a week.
- Time is flavor: The longer the onions pickle, the more pronounced the flavor will become. Even 30 minutes will make a noticeable difference, but longer pickling yields deeper flavor.
Step 2: Hard Boil the Eggs
- Place Eggs in a Pot: Gently place the eggs in a single layer in a large saucepan. Cover the eggs with cold water by about an inch.
- Cold water start: Starting with cold water helps prevent the eggs from cracking due to sudden temperature changes.
- Bring to a Boil: Bring the water to a rolling boil over high heat. Once boiling, immediately remove the pot from the heat, cover it tightly with a lid, and let it stand for 10-12 minutes for large eggs.
- Perfectly cooked yolks: This “stand and steam” method cooks the yolks perfectly, preventing them from turning dry or green around the edges. The timing is crucial for ideal texture.
- Ice Bath: While the eggs are standing, prepare an ice bath by filling a bowl with ice and cold water. After 10-12 minutes, carefully transfer the hot eggs to the ice bath using a slotted spoon. Let them cool completely in the ice bath for at least 15-20 minutes.
- Easy peeling secret: The ice bath stops the cooking process and makes the eggs much easier to peel. The cold water shrinks the egg whites slightly, separating them from the shell membrane.
- Peel the Eggs: Gently tap each egg all over to crack the shell. Starting under cold running water, peel the eggs, starting from the larger end where the air pocket is. The shells should slip off easily.
- Freshness matters for peeling: Older eggs are generally easier to peel than very fresh eggs.
Step 3: Prepare the Deviled Egg Filling
- Halve the Eggs: Slice the peeled eggs lengthwise. Gently remove the yolks and place them in a medium bowl. Arrange the egg whites on a serving platter or a plate.
- Handle gently: Be careful not to tear the egg whites while removing the yolks.
- Mash the Yolks: Using a fork, mash the egg yolks until they are smooth and crumb-free.
- Smooth filling is key: Thoroughly mashing the yolks ensures a creamy and lump-free deviled egg filling.
- Add Mayonnaise and Mustard: Add the mayonnaise and Dijon mustard to the mashed yolks. Stir until well combined and creamy.
- Creamy base: Mayonnaise and mustard are the foundation of the classic deviled egg flavor and texture.
- Incorporate Pickled Onions and Chives: Drain the pickled red onions and finely chop about 2 tablespoons. Add the chopped pickled onions, finely chopped fresh chives, and pickle juice to the yolk mixture. Stir to combine everything evenly.
- Flavor infusion: The pickled onions, chives, and pickle juice are what give these deviled eggs their signature tangy and fresh flavor.
- Season to Taste: Season the deviled egg filling with salt and freshly ground black pepper to taste. Start with a pinch of each and adjust as needed. Remember to taste and adjust seasoning as you go.
- Balance is crucial: The pickled onions contribute acidity and salt, so taste before adding more salt.
- Fill the Egg Whites: You can use a spoon or a piping bag to fill the egg whites with the deviled egg filling. For a neater presentation, use a piping bag fitted with a star tip to pipe the filling into the egg whites.
- Presentation options: Spooning is quick and easy. Piping adds a touch of elegance.
Step 4: Garnish and Serve
- Garnish: Garnish the filled deviled eggs with a sprinkle of paprika (if using) and a few small pieces or thinly sliced pickled red onions on top of each egg. Fresh chives can also be used for additional garnish.
- Visual appeal: Garnishes enhance the visual appeal and hint at the flavors within.
- Chill (Optional): If not serving immediately, cover the deviled eggs loosely with plastic wrap and refrigerate for up to 2-3 hours. For the best texture, it’s ideal to serve them within a couple of hours of assembly.
- Chill for best texture: Chilling helps the flavors meld further and keeps the deviled eggs cool and refreshing.
- Serve: Arrange the Pickled Onion Deviled Eggs on a serving platter and serve chilled as an appetizer, side dish, or snack.
Nutrition
- Serving Size: one normal portion
- Calories: 200-250
- Sugar: 2-3g
- Sodium: 200-300mg
- Fat: 16-20g
- Saturated Fat: 4-6g
- Carbohydrates: 3-5g
- Fiber: <1g
- Protein: 8-10g
- Cholesterol: 350-400mg