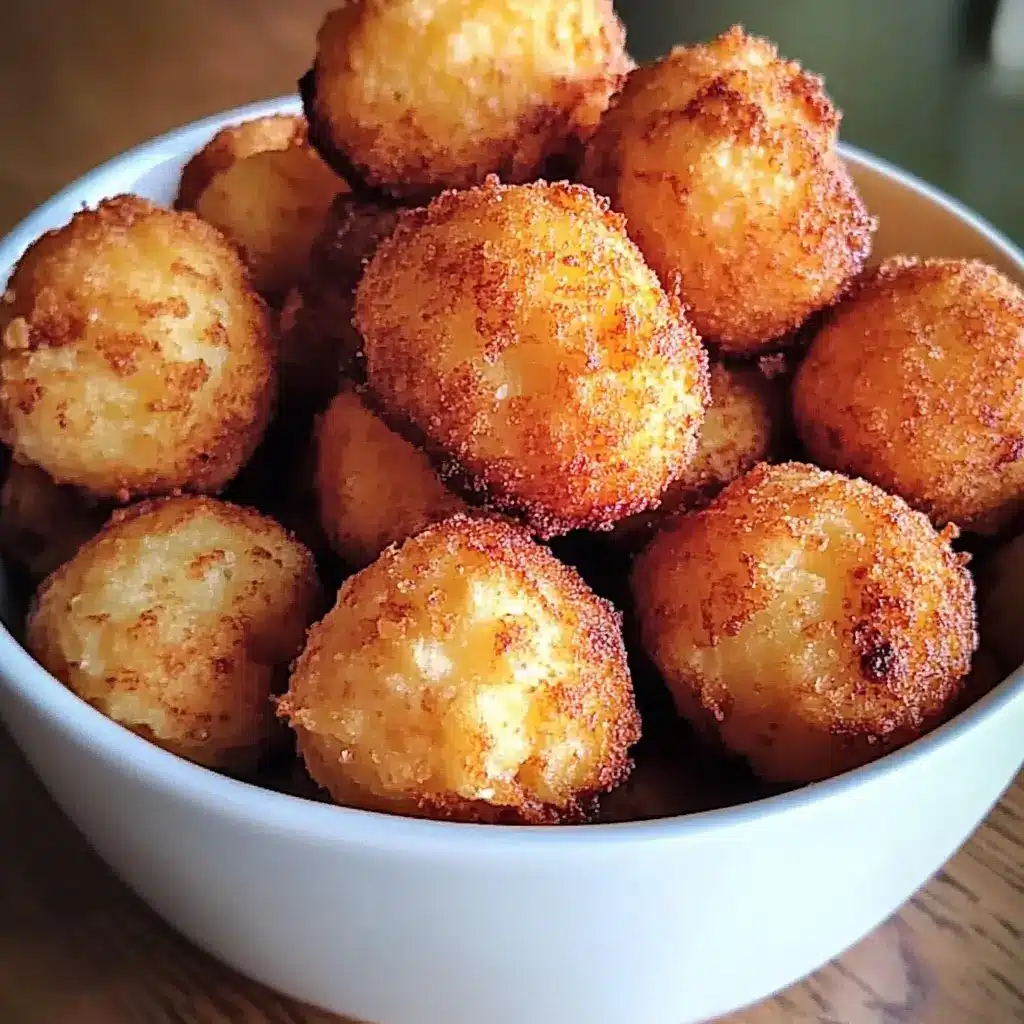

It’s funny how some of the simplest recipes become the most cherished in our families. These gluten-free hushpuppies are a perfect example. I remember the first time I whipped up a batch, my family was a bit skeptical. Hushpuppies without cornmeal? Would they even taste right? But one bite was all it took to convert them into die-hard fans. The crispy exterior, the soft, slightly sweet interior, and that hint of onion – they were devoured within minutes! Since then, these little golden nuggets have become a regular request at our dinner table, especially when we’re grilling or having a casual get-together. They’re surprisingly easy to make, even for a novice cook, and the gluten-free twist means everyone can enjoy them. Honestly, there’s something truly magical about seeing a plate of these disappear so quickly, knowing you created a moment of pure culinary joy. Give this recipe a try, and I bet you’ll find yourself making them again and again too!
Ingredients
To embark on your gluten-free hushpuppy adventure, gather these simple yet essential ingredients. Each component plays a vital role in creating the perfect balance of flavor and texture. Remember, using high-quality ingredients will always elevate the final dish.
- 2 Large Eggs: Eggs are the binding agent in our hushpuppies, lending moisture and richness to the batter. They contribute to the tender interior texture and help the hushpuppies achieve that beautiful golden-brown crust. For the best results, use large eggs at room temperature. This helps them incorporate more smoothly into the batter.
- ½ Cup Granulated Sugar: Sugar might seem unexpected in a savory side dish, but it’s crucial for balancing the flavors and contributing to the browning process during frying. It adds a subtle sweetness that complements the onion and savory notes, creating a well-rounded taste profile. Don’t worry, the hushpuppies won’t be overly sweet – the sugar simply enhances the overall deliciousness.
- 1 Medium Onion, Finely Chopped: Onion is the heart and soul of a hushpuppy, providing that signature savory flavor and aromatic depth. Finely chopping the onion is key to ensuring it cooks through evenly and distributes its flavor throughout each hushpuppy without being overpowering. Yellow or white onions work best for their mild yet distinct flavor. For an even finer texture, you can grate the onion instead of chopping it, but be sure to squeeze out any excess moisture.
- ½ Cup Gluten-Free Cornmeal (or Corn Flour Alternative): This is where the gluten-free magic happens! Traditionally, hushpuppies are made with cornmeal, but for our gluten-free version, we’re using gluten-free cornmeal or a suitable alternative. If you can find gluten-free cornmeal, that’s ideal as it provides the closest texture and flavor to traditional hushpuppies. However, if gluten-free cornmeal is unavailable, you can use corn flour (masa harina) or a blend of corn flour and rice flour. The key is to use a flour that provides a slightly coarser texture than all-purpose gluten-free flour, mimicking the texture of cornmeal. Ensure your cornmeal or corn flour is certified gluten-free to avoid cross-contamination if you are strictly gluten-free.
- ½ Cup Gluten-Free All-Purpose Flour Blend: A good quality gluten-free all-purpose flour blend is essential for creating the structure of our hushpuppies. Look for a blend that contains a mix of starches and gums (like xanthan gum or guar gum) as these help to mimic the properties of gluten, resulting in a batter that holds together well and produces tender, not crumbly, hushpuppies. Different gluten-free flour blends can vary in texture and absorbency, so you might need to adjust the liquid slightly depending on the blend you use. A blend that is specifically designed for baking is generally a good choice.
- Salt and Pepper to Taste: Seasoning is crucial! Salt enhances all the flavors in the hushpuppies, while pepper adds a subtle warmth and depth. Start with a generous pinch of salt and a few grinds of black pepper, and then adjust to your preference. Remember, you can always add more seasoning later, but you can’t take it away. Taste the batter before frying to ensure it is properly seasoned.
- Vegetable Oil or Canola Oil, for Deep Frying: For that perfect crispy exterior, we need oil for deep frying. Vegetable oil or canola oil are excellent choices as they have a neutral flavor and a high smoke point, making them ideal for deep frying. You’ll need enough oil to fill your deep fryer or kettle to a depth of at least two inches. Using enough oil ensures the hushpuppies cook evenly and don’t stick to the bottom of the pan.
- Optional: Hushpuppy Dipping Sauce (for Serving): While hushpuppies are delicious on their own, a dipping sauce elevates them to another level. Consider making a classic creamy dipping sauce like remoulade, tartar sauce, or a simple honey mustard. Alternatively, a spicy aioli or a tangy BBQ sauce would also complement the savory hushpuppies beautifully. The choice of dipping sauce is entirely up to your personal preference and can be tailored to suit your meal.
Instructions
Now that you have all your ingredients ready, let’s dive into the step-by-step instructions for creating these delightful gluten-free hushpuppies. Follow these directions carefully for foolproof results every time.
Step 1: Combine Wet Ingredients
- In a large mixing bowl, crack the 2 large eggs. Ensure they are at room temperature for better incorporation.
- Add the ½ cup granulated sugar to the bowl with the eggs.
- Using a whisk or a hand mixer, beat the eggs and sugar together until they are well combined and slightly frothy. This step incorporates air into the mixture, which contributes to the light and airy texture of the hushpuppies. You don’t need to whip them to stiff peaks, just until they are pale yellow and slightly thickened.
Step 2: Incorporate Onions
- Add the 1 medium onion, finely chopped, to the egg and sugar mixture.
- Stir the chopped onion into the wet ingredients until it is evenly distributed. The onion will release some of its moisture, which is perfectly fine and will contribute to the overall moisture content of the batter.
Step 3: Combine Dry Ingredients
- In a separate, smaller mixing bowl, measure out the ½ cup gluten-free cornmeal (or corn flour alternative) and the ½ cup gluten-free all-purpose flour blend.
- Add salt and pepper to taste to the dry ingredients. Start with about ½ teaspoon of salt and ¼ teaspoon of black pepper, and adjust to your liking.
- Whisk the dry ingredients together thoroughly to ensure they are well combined and evenly distributed. This step is important to prevent clumps of flour in the batter and to ensure the seasoning is consistent throughout.
Step 4: Combine Wet and Dry Ingredients
- Gradually add the dry ingredients to the large bowl containing the wet ingredients.
- Using a spatula or wooden spoon, gently fold the dry ingredients into the wet ingredients. Mix until just combined. Be careful not to overmix the batter, as this can develop the gluten in gluten-free flours and result in tougher hushpuppies. A few streaks of flour are okay at this stage, as they will disappear as you continue to mix.
- Once the batter is mostly combined, stop mixing and let it rest for about 5-10 minutes. This resting period allows the gluten-free flours to fully hydrate and the batter to thicken slightly.
Step 5: Heat Oil for Deep Frying
- Pour vegetable oil or canola oil into a deep fryer or a large, heavy-bottomed pot or kettle. You need enough oil to reach a depth of at least two inches.
- Heat the oil over medium-high heat until it reaches a temperature of 350-375°F (175-190°C). Use a deep-fry thermometer to accurately measure the oil temperature. Maintaining the correct oil temperature is crucial for ensuring the hushpuppies cook properly and don’t become greasy or undercooked. If you don’t have a thermometer, you can test the oil by dropping a tiny bit of batter into it. If it sizzles and browns in about 45-60 seconds, the oil is ready.
Step 6: Fry the Hushpuppies
- Once the oil is hot and at the correct temperature, carefully drop spoonfuls of the hushpuppy dough into the hot oil. Use a heaping teaspoon to scoop the batter and gently drop it into the oil. Do not overcrowd the pot; fry in batches to maintain the oil temperature and prevent the hushpuppies from sticking together. Fry about 6-8 hushpuppies at a time, depending on the size of your pot.
- As the hushpuppies fry, they will initially sink to the bottom and then rise to the surface. Allow them to cook for about 2-3 minutes on the first side, until the bottom becomes golden brown.
- If necessary, gently turn the hushpuppies using a slotted spoon or tongs to ensure they cook evenly on all sides. Sometimes they will roll themselves as they cook, but if not, a gentle nudge will help.
- Continue to fry the hushpuppies until they are golden brown all over and cooked through. This should take about 4-6 minutes total per batch, depending on the size and oil temperature.
Step 7: Drain Excess Oil
- Remove the cooked hushpuppies from the hot oil using a slotted spoon or tongs.
- Place them on a plate lined with paper towels to drain any excess grease. The paper towels will absorb the oil and help keep the hushpuppies crispy.
Step 8: Serve and Enjoy
- Serve the gluten-free hushpuppies immediately while they are hot and crispy.
- Serve with your favorite hushpuppy dipping sauce (optional, but highly recommended!). Classic options include remoulade, tartar sauce, honey mustard, or a spicy aioli.
- Enjoy these delicious, crispy, and gluten-free treats as an appetizer, snack, or side dish!
Nutrition Facts
Understanding the nutritional content of your food is important, especially when considering dietary needs. Here’s a breakdown of the estimated nutrition facts for these gluten-free hushpuppies. Please note that these are estimations and can vary based on specific ingredients and portion sizes.
- Servings: Approximately 20-24 hushpuppies (depending on size)
- Serving Size: 2-3 hushpuppies
Approximate Nutrition Facts per Serving (2-3 hushpuppies):
- Calories: 200-250 kcal
- Fat: 12-15g
- Saturated Fat: 2-3g
- Unsaturated Fat: 9-12g
- Cholesterol: 40-50mg
- Sodium: 150-200mg
- Carbohydrates: 20-25g
- Fiber: 1-2g
- Sugar: 8-10g
- Protein: 3-4g
Important Notes:
- These values are estimates and can vary based on the specific ingredients used, the size of the hushpuppies, and the amount of oil absorbed during frying.
- Deep-fried foods are generally higher in fat and calories. Enjoy these hushpuppies in moderation as part of a balanced diet.
- Using gluten-free flour blends may slightly alter the nutritional profile compared to traditional wheat-based hushpuppies.
- Serving sizes and the number of hushpuppies per serving are approximate and can be adjusted to your preference.
For more precise nutritional information, you can use online nutrition calculators and input the specific brands and quantities of ingredients you use.
Preparation Time
Time is precious, and knowing how long a recipe will take is essential for meal planning. Here’s a breakdown of the estimated preparation and cooking times for these gluten-free hushpuppies:
- Prep Time: 15-20 minutes
- This includes the time to gather ingredients, chop the onion, measure out the flours and sugar, and mix the batter. The chopping of the onion is the most time-consuming part of the prep.
- If you are efficient in the kitchen, you might be able to complete the prep work in closer to 15 minutes. If you are a more leisurely cook or new to the recipe, allow for up to 20 minutes.
- Cook Time: 20-25 minutes
- This is the time spent frying the hushpuppies in batches. Each batch takes approximately 4-6 minutes to fry until golden brown and cooked through.
- The cook time will vary slightly depending on the size of your batches and the oil temperature. It’s important to maintain a consistent oil temperature for even cooking.
- Frying in smaller batches will take longer overall but ensures better quality hushpuppies. Overcrowding the pot will lower the oil temperature and lead to greasy hushpuppies.
- Total Time: 35-45 minutes
- This is the combined prep time and cook time. From start to finish, you can expect to have a batch of delicious gluten-free hushpuppies ready in under 45 minutes. This makes them a great option for a relatively quick appetizer or side dish.
Time-Saving Tips:
- Chop the onion in advance: If you are short on time, you can chop the onion ahead of time and store it in an airtight container in the refrigerator for up to a day.
- Measure ingredients beforehand: Having all your ingredients measured out before you start mixing will streamline the process and save you time during preparation.
- Use a deep fryer: If you have a deep fryer, it can help maintain a consistent oil temperature and make the frying process more efficient. However, a pot on the stovetop works just as well.
How to Serve
Hushpuppies are incredibly versatile and can be served in various ways, making them a fantastic addition to many meals and occasions. Here are some delightful serving suggestions:
- As an Appetizer:
- Classic Appetizer Platter: Arrange the hot, crispy hushpuppies on a platter alongside a selection of dipping sauces. Offer options like remoulade, tartar sauce, honey mustard, spicy aioli, or even a creamy ranch dressing.
- Southern-Style Appetizer: Pair them with other Southern appetizers like fried green tomatoes, pimento cheese dip, or deviled eggs for a truly Southern spread.
- Seafood Appetizer Combo: Serve them with shrimp cocktail, crab cakes, or smoked salmon for a delicious seafood-themed appetizer platter.
- As a Side Dish:
- BBQ and Grilling Companion: Hushpuppies are a classic side dish for BBQ and grilled meats. They complement ribs, pulled pork, brisket, grilled chicken, and burgers perfectly.
- Seafood Feast Side: Serve them alongside fried fish, shrimp, or oysters for a traditional seafood dinner. They are especially popular with catfish and shrimp boils.
- Comfort Food Side: Pair them with comfort food classics like mac and cheese, collard greens, or creamy coleslaw for a satisfying and hearty meal.
- Soup and Stew Accompaniment: Hushpuppies can be a delightful side to hearty soups and stews, offering a crispy and flavorful contrast to the rich and savory broth.
- For Gatherings and Parties:
- Casual Get-Togethers: Hushpuppies are perfect for casual gatherings, potlucks, and backyard barbecues. They are easy to eat with your hands and always a crowd-pleaser.
- Game Day Snack: Serve them as a game day snack along with other finger foods like chicken wings, nachos, and sliders.
- Holiday Appetizer: While traditionally Southern, hushpuppies can be a unique and delicious appetizer for holiday gatherings, offering something different from the usual fare.
- Dipping Sauce Ideas:
- Classic Remoulade: A creamy, tangy, and slightly spicy remoulade sauce is a traditional pairing for hushpuppies.
- Tartar Sauce: Another classic seafood sauce, tartar sauce offers a creamy and tangy flavor that complements the savory hushpuppies.
- Honey Mustard: The sweet and tangy combination of honey mustard is a universally loved dipping sauce.
- Spicy Aioli: Add a kick with a spicy aioli made with mayonnaise, garlic, and chili flakes or sriracha.
- BBQ Sauce: A smoky and sweet BBQ sauce is a great option, especially when serving hushpuppies with BBQ dishes.
- Sweet Options: For a sweeter twist, try dipping them in maple syrup or a cinnamon-sugar mixture for a dessert-like treat (though less traditional).
Serving Tips:
- Serve Hot: Hushpuppies are best served hot and fresh from the fryer when they are at their crispiest.
- Keep Warm (if necessary): If you need to keep them warm for a short period, place them on a wire rack in a warm oven (around 200°F or 95°C) to maintain their crispiness. Avoid stacking them directly on top of each other, as this can make them soggy.
- Garnish (optional): Garnish the platter with fresh herbs like parsley or chives for a pop of color and freshness.
Additional Tips for Perfect Gluten-Free Hushpuppies
Creating perfect gluten-free hushpuppies is easy with a few helpful tips and tricks. These insights will help you achieve crispy, flavorful, and consistently delicious results every time.
- Batter Consistency is Key: The batter should be thick enough to hold its shape when dropped into the hot oil but still loose enough to be easily spoonable. If the batter seems too thick, you can add a tablespoon of milk or water at a time to thin it slightly. If it’s too thin, add a tablespoon of gluten-free flour blend to thicken it. Remember that gluten-free flours absorb liquid differently, so the consistency might vary slightly depending on the blend you use. Letting the batter rest for 5-10 minutes after mixing will also help it thicken as the flours hydrate.
- Oil Temperature is Crucial: Maintaining the correct oil temperature (350-375°F or 175-190°C) is vital for achieving crispy hushpuppies that are cooked through without being greasy. If the oil is too cold, the hushpuppies will absorb too much oil and become soggy. If the oil is too hot, they will brown too quickly on the outside and may be raw in the center. Use a deep-fry thermometer to monitor the oil temperature accurately. If you don’t have a thermometer, test the oil by dropping a small amount of batter in. It should sizzle immediately and brown nicely in about a minute.
- Don’t Overcrowd the Pot: Fry the hushpuppies in batches, ensuring you don’t overcrowd the pot. Overcrowding will lower the oil temperature, causing the hushpuppies to cook unevenly and absorb more oil. Fry about 6-8 hushpuppies at a time, depending on the size of your pot. Give them enough space in the oil so they can cook evenly and turn golden brown on all sides.
- Drain Excess Oil Properly: After frying, immediately remove the hushpuppies from the hot oil and place them on a plate lined with paper towels. The paper towels will absorb any excess oil, helping to keep the hushpuppies crispy and less greasy. You can also use a wire rack placed over a baking sheet to allow for even better drainage and airflow, which further enhances crispiness.
- Serve Immediately for Best Crispiness: Hushpuppies are at their absolute best when served hot and fresh from the fryer. They are crispiest right after cooking and tend to lose some crispness as they cool down. Plan to fry them just before you are ready to serve them. If you need to hold them for a short time, keep them warm in a low oven (around 200°F or 95°C) on a wire rack, but ideally, serve them as soon as possible for the most enjoyable texture and flavor.
Frequently Asked Questions (FAQ)
Got questions about making gluten-free hushpuppies? Here are answers to some common queries to help you succeed in your hushpuppy-making endeavors.
Q1: Can I use a different gluten-free flour blend?
A: Yes, you can use different gluten-free all-purpose flour blends, but results may vary slightly. Look for a blend that is designed for baking and contains a mix of starches and gums (like xanthan gum or guar gum). Some blends may absorb more liquid than others, so you might need to adjust the liquid in the batter slightly to achieve the desired consistency. Start with the recommended amount of liquid and add more if the batter seems too thick.
Q2: Can I make these hushpuppies ahead of time?
A: While hushpuppies are best served fresh and hot, you can prepare the batter ahead of time. The batter can be made up to a few hours in advance and stored in the refrigerator. However, it’s best to fry them just before serving for optimal crispness. If you need to reheat cooked hushpuppies, you can bake them in a preheated oven at 350°F (175°C) for a few minutes to crisp them up slightly, but they won’t be quite as crispy as freshly fried ones.
Q3: Can I add other ingredients to the hushpuppy batter?
A: Absolutely! Feel free to customize your hushpuppies by adding other ingredients to the batter. Some popular additions include:
- Jalapeños: Finely diced jalapeños (seeds removed for less heat) add a spicy kick.
- Corn Kernels: Adding cooked corn kernels (fresh or frozen and thawed) enhances the corn flavor and texture.
- Herbs: Fresh herbs like chopped chives, parsley, or thyme can add extra flavor and freshness.
- Cheese: Shredded cheddar cheese or Monterey Jack cheese can be incorporated for cheesy hushpuppies.
- Spices: A pinch of paprika, cayenne pepper, or garlic powder can add extra depth of flavor.
Q4: What if I don’t have gluten-free cornmeal? What can I substitute?
A: If you don’t have gluten-free cornmeal, you can use corn flour (masa harina) as a substitute. Corn flour is finer than cornmeal but will still provide a similar corn flavor. You can also use a combination of corn flour and rice flour to mimic the texture of cornmeal more closely. Ensure that whatever corn product you use is certified gluten-free if you are strictly gluten-free.
Q5: Can I bake these hushpuppies instead of frying them?
A: While traditionally hushpuppies are deep-fried for their signature crispy texture, you can try baking them for a healthier option. However, baked hushpuppies will not be as crispy as fried ones. To bake them, preheat your oven to 400°F (200°C). Grease a baking sheet and drop spoonfuls of batter onto the sheet. Bake for 15-20 minutes, or until golden brown, flipping halfway through. Keep in mind that the texture will be different – more cake-like than crispy. For a slightly crispier baked version, you can brush them lightly with oil before baking.
Print
Perfect Gluten-Free Hushpuppies Recipe
Ingredients
- 2 Large Eggs: Eggs are the binding agent in our hushpuppies, lending moisture and richness to the batter. They contribute to the tender interior texture and help the hushpuppies achieve that beautiful golden-brown crust. For the best results, use large eggs at room temperature. This helps them incorporate more smoothly into the batter.
- ½ Cup Granulated Sugar: Sugar might seem unexpected in a savory side dish, but it’s crucial for balancing the flavors and contributing to the browning process during frying. It adds a subtle sweetness that complements the onion and savory notes, creating a well-rounded taste profile. Don’t worry, the hushpuppies won’t be overly sweet – the sugar simply enhances the overall deliciousness.
- 1 Medium Onion, Finely Chopped: Onion is the heart and soul of a hushpuppy, providing that signature savory flavor and aromatic depth. Finely chopping the onion is key to ensuring it cooks through evenly and distributes its flavor throughout each hushpuppy without being overpowering. Yellow or white onions work best for their mild yet distinct flavor. For an even finer texture, you can grate the onion instead of chopping it, but be sure to squeeze out any excess moisture.
- ½ Cup Gluten-Free Cornmeal (or Corn Flour Alternative): This is where the gluten-free magic happens! Traditionally, hushpuppies are made with cornmeal, but for our gluten-free version, we’re using gluten-free cornmeal or a suitable alternative. If you can find gluten-free cornmeal, that’s ideal as it provides the closest texture and flavor to traditional hushpuppies. However, if gluten-free cornmeal is unavailable, you can use corn flour (masa harina) or a blend of corn flour and rice flour. The key is to use a flour that provides a slightly coarser texture than all-purpose gluten-free flour, mimicking the texture of cornmeal. Ensure your cornmeal or corn flour is certified gluten-free to avoid cross-contamination if you are strictly gluten-free.
- ½ Cup Gluten-Free All-Purpose Flour Blend: A good quality gluten-free all-purpose flour blend is essential for creating the structure of our hushpuppies. Look for a blend that contains a mix of starches and gums (like xanthan gum or guar gum) as these help to mimic the properties of gluten, resulting in a batter that holds together well and produces tender, not crumbly, hushpuppies. Different gluten-free flour blends can vary in texture and absorbency, so you might need to adjust the liquid slightly depending on the blend you use. A blend that is specifically designed for baking is generally a good choice.
- Salt and Pepper to Taste: Seasoning is crucial! Salt enhances all the flavors in the hushpuppies, while pepper adds a subtle warmth and depth. Start with a generous pinch of salt and a few grinds of black pepper, and then adjust to your preference. Remember, you can always add more seasoning later, but you can’t take it away. Taste the batter before frying to ensure it is properly seasoned.
- Vegetable Oil or Canola Oil, for Deep Frying: For that perfect crispy exterior, we need oil for deep frying. Vegetable oil or canola oil are excellent choices as they have a neutral flavor and a high smoke point, making them ideal for deep frying. You’ll need enough oil to fill your deep fryer or kettle to a depth of at least two inches. Using enough oil ensures the hushpuppies cook evenly and don’t stick to the bottom of the pan.
- Optional: Hushpuppy Dipping Sauce (for Serving): While hushpuppies are delicious on their own, a dipping sauce elevates them to another level. Consider making a classic creamy dipping sauce like remoulade, tartar sauce, or a simple honey mustard. Alternatively, a spicy aioli or a tangy BBQ sauce would also complement the savory hushpuppies beautifully. The choice of dipping sauce is entirely up to your personal preference and can be tailored to suit your meal.
Instructions
Step 1: Combine Wet Ingredients
- In a large mixing bowl, crack the 2 large eggs. Ensure they are at room temperature for better incorporation.
- Add the ½ cup granulated sugar to the bowl with the eggs.
- Using a whisk or a hand mixer, beat the eggs and sugar together until they are well combined and slightly frothy. This step incorporates air into the mixture, which contributes to the light and airy texture of the hushpuppies. You don’t need to whip them to stiff peaks, just until they are pale yellow and slightly thickened.
Step 2: Incorporate Onions
- Add the 1 medium onion, finely chopped, to the egg and sugar mixture.
- Stir the chopped onion into the wet ingredients until it is evenly distributed. The onion will release some of its moisture, which is perfectly fine and will contribute to the overall moisture content of the batter.
Step 3: Combine Dry Ingredients
- In a separate, smaller mixing bowl, measure out the ½ cup gluten-free cornmeal (or corn flour alternative) and the ½ cup gluten-free all-purpose flour blend.
- Add salt and pepper to taste to the dry ingredients. Start with about ½ teaspoon of salt and ¼ teaspoon of black pepper, and adjust to your liking.
- Whisk the dry ingredients together thoroughly to ensure they are well combined and evenly distributed. This step is important to prevent clumps of flour in the batter and to ensure the seasoning is consistent throughout.
Step 4: Combine Wet and Dry Ingredients
- Gradually add the dry ingredients to the large bowl containing the wet ingredients.
- Using a spatula or wooden spoon, gently fold the dry ingredients into the wet ingredients. Mix until just combined. Be careful not to overmix the batter, as this can develop the gluten in gluten-free flours and result in tougher hushpuppies. A few streaks of flour are okay at this stage, as they will disappear as you continue to mix.
- Once the batter is mostly combined, stop mixing and let it rest for about 5-10 minutes. This resting period allows the gluten-free flours to fully hydrate and the batter to thicken slightly.
Step 5: Heat Oil for Deep Frying
- Pour vegetable oil or canola oil into a deep fryer or a large, heavy-bottomed pot or kettle. You need enough oil to reach a depth of at least two inches.
- Heat the oil over medium-high heat until it reaches a temperature of 350-375°F (175-190°C). Use a deep-fry thermometer to accurately measure the oil temperature. Maintaining the correct oil temperature is crucial for ensuring the hushpuppies cook properly and don’t become greasy or undercooked. If you don’t have a thermometer, you can test the oil by dropping a tiny bit of batter into it. If it sizzles and browns in about 45-60 seconds, the oil is ready.
Step 6: Fry the Hushpuppies
- Once the oil is hot and at the correct temperature, carefully drop spoonfuls of the hushpuppy dough into the hot oil. Use a heaping teaspoon to scoop the batter and gently drop it into the oil. Do not overcrowd the pot; fry in batches to maintain the oil temperature and prevent the hushpuppies from sticking together. Fry about 6-8 hushpuppies at a time, depending on the size of your pot.
- As the hushpuppies fry, they will initially sink to the bottom and then rise to the surface. Allow them to cook for about 2-3 minutes on the first side, until the bottom becomes golden brown.
- If necessary, gently turn the hushpuppies using a slotted spoon or tongs to ensure they cook evenly on all sides. Sometimes they will roll themselves as they cook, but if not, a gentle nudge will help.
- Continue to fry the hushpuppies until they are golden brown all over and cooked through. This should take about 4-6 minutes total per batch, depending on the size and oil temperature.
Step 7: Drain Excess Oil
- Remove the cooked hushpuppies from the hot oil using a slotted spoon or tongs.
- Place them on a plate lined with paper towels to drain any excess grease. The paper towels will absorb the oil and help keep the hushpuppies crispy.
Step 8: Serve and Enjoy
- Serve the gluten-free hushpuppies immediately while they are hot and crispy.
- Serve with your favorite hushpuppy dipping sauce (optional, but highly recommended!). Classic options include remoulade, tartar sauce, honey mustard, or a spicy aioli.
- Enjoy these delicious, crispy, and gluten-free treats as an appetizer, snack, or side dish!
Nutrition
- Serving Size: one normal portion
- Calories: 200-250 kcal
- Sugar: 8-10g
- Sodium: 150-200mg
- Fat: 12-15g
- Saturated Fat: 2-3g
- Unsaturated Fat: 9-12g
- Carbohydrates: 20-25g
- Fiber: 1-2g
- Protein: 3-4g
- Cholesterol: 40-50mg