


Of all the flavor combinations that transport me straight back to childhood, none is more powerful than peanut butter and jelly. It’s the taste of after-school snacks, packed lunches made with love, and simple, uncomplicated joy. For years, I’ve been on a mission to capture that exact feeling, not in a sandwich, but in a cookie. After countless batches—some too crumbly, some too flat, some where the jelly just vanished—I finally landed on this recipe. This isn’t just a cookie; it’s a masterpiece of nostalgia. The first time I pulled a tray of these Peanut Butter and Jelly Cookies from the oven, the aroma alone was a triumph. The rich, nutty scent of baking peanut butter mingled with the sweet, fruity perfume of warm jam. My kids, drawn by the smell like a cartoon character to a pie on a windowsill, were my first taste testers. Their eyes widened at the first bite, a perfect symphony of a soft, chewy, intensely peanut-buttery cookie giving way to a sweet, gooey jewel of jelly in the center. They were an instant hit, disappearing from the cooling rack in record time. This recipe has since become a staple in our home, the go-to for bake sales, potlucks, and those days that just need a little extra comfort. It’s the ultimate tribute to the classic PB&J, reimagined in the best way possible.
The Ultimate Peanut Butter and Jelly Cookies
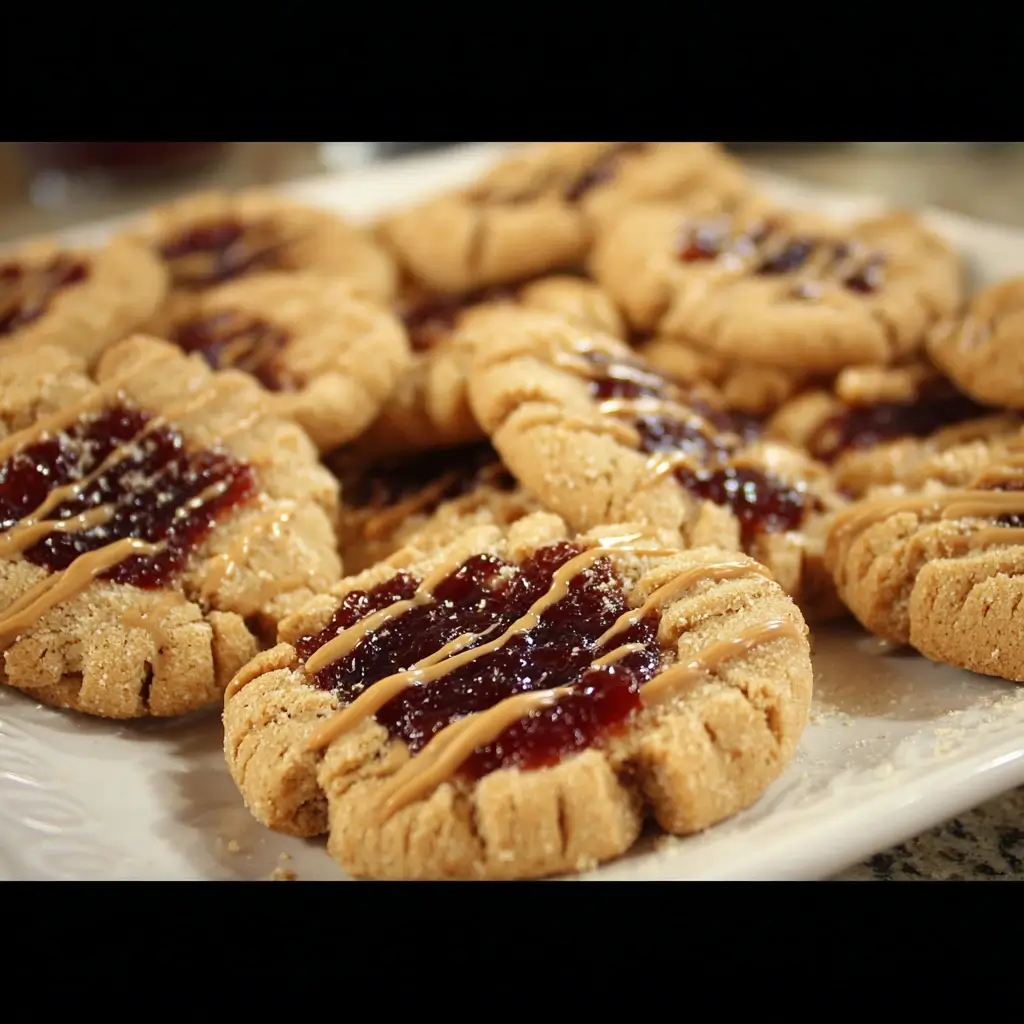
This recipe is designed for a perfect texture: a soft, chewy cookie that’s sturdy enough to hold a generous dollop of jelly without falling apart. The secret lies in the combination of sugars, the right kind of peanut butter, and a crucial chilling step that guarantees a thick, flavorful cookie every single time. Get ready to bake a batch of pure, edible nostalgia.
Ingredients
- For the Peanut Butter Cookies:
- 1 ½ cups (180g) All-Purpose Flour
- ½ teaspoon Baking Soda
- ¼ teaspoon Baking Powder
- ¼ teaspoon Salt
- ½ cup (113g) Unsalted Butter, softened to room temperature
- ¾ cup (150g) Packed Light Brown Sugar
- ¼ cup (50g) Granulated Sugar
- 1 cup (250g) Creamy Peanut Butter (commercial brand like Jif or Skippy recommended)
- 1 large Egg, at room temperature
- 1 teaspoon Pure Vanilla Extract
- For the Filling and Topping:
- ½ cup (160g) Strawberry or Raspberry Jam or Preserves (a thicker consistency works best)
- 2 tablespoons Granulated Sugar, for rolling
Step-by-Step Instructions for Perfect PB&J Cookies
Follow these instructions carefully to achieve the perfect balance of chewy, nutty, and sweet. We break down every step, explaining the ‘why’ behind the ‘how’ to ensure your baking success.
Step 1: Prepare Your Dry Ingredients
In a medium-sized bowl, whisk together the all-purpose flour, baking soda, baking powder, and salt. Whisking not only combines these ingredients but also aerates them, which contributes to a lighter cookie texture. Set this bowl aside for later.
Step 2: Cream the Butter, Sugars, and Peanut Butter
In the bowl of a stand mixer fitted with a paddle attachment, or in a large bowl with a hand mixer, beat the softened unsalted butter, light brown sugar, and granulated sugar on medium-high speed until the mixture is light, fluffy, and pale in color. This process, known as creaming, should take about 3-4 minutes. Don’t rush this step! It’s essential for incorporating air into the dough, which results in a softer, chewier cookie. Once creamed, add the creamy peanut butter and beat for another 1-2 minutes until it is fully incorporated and the mixture is smooth.
Step 3: Incorporate the Wet Ingredients
Add the room temperature egg and pure vanilla extract to the peanut butter mixture. Beat on medium speed until just combined, scraping down the sides and bottom of the bowl as needed to ensure everything is evenly mixed. The egg acts as a binder, and the vanilla deepens the flavor profile.
Step 4: Combine Wet and Dry Ingredients
Reduce the mixer speed to low and slowly add the dry flour mixture to the wet ingredients. Mix only until the flour is just incorporated. Be very careful not to overmix at this stage. Overmixing develops the gluten in the flour, which can lead to tough, dense cookies instead of the soft and chewy texture we’re aiming for.
Step 5: Chill the Dough (The Non-Negotiable Step!)
Cover the bowl with plastic wrap and refrigerate the cookie dough for at least 1 hour, and up to 3 days. Chilling the dough is the most important secret to thick, flavorful cookies. It solidifies the fat (butter), which prevents the cookies from spreading too much in the oven. It also allows the flavors to meld and deepen, resulting in a more intense peanut butter taste.
Step 6: Preheat and Prepare for Baking
When you’re ready to bake, preheat your oven to 350°F (175°C). Line two large baking sheets with parchment paper or silicone baking mats. This prevents the cookies from sticking and makes for easy cleanup. Place the 2 tablespoons of granulated sugar for rolling in a small, shallow bowl.
Step 7: Shape the Cookies
Remove the chilled dough from the refrigerator. Using a medium cookie scoop (about 1.5 tablespoons), portion out the dough into uniform balls. Roll each ball between your palms to smooth it out, then roll it in the granulated sugar to coat it completely. This sugar coating adds a delightful, slightly crunchy exterior. Place the sugar-coated balls about 2 inches apart on the prepared baking sheets.
Step 8: Create the “Thumbprint” Indent
Using the back of a ½ teaspoon measuring spoon (or your thumb, if you prefer), gently press an indentation into the center of each dough ball. Don’t press all the way through. The back of a measuring spoon creates a perfect, uniform well for the jelly. If the edges of the cookie crack a little, you can gently press them back together.
Step 9: Fill with Jelly
Carefully spoon or pipe about ½ teaspoon of your chosen jam or preserves into the indentation of each cookie. Using a thicker jam or preserve is key, as a thin jelly can become runny and bubble over during baking. A small piping bag or a zip-top bag with the corner snipped off can make this process neater and easier.
Step 10: Bake to Golden Perfection
Bake the cookies for 11-13 minutes, or until the edges are lightly golden brown and the centers look set. The cookies might appear slightly underbaked in the very center when you pull them out, but they will continue to cook on the hot baking sheet. This is the secret to a soft, chewy center.
Step 11: Cool Completely
Let the cookies cool on the baking sheets for 5-10 minutes before transferring them to a wire rack to cool completely. The initial cooling time on the pan is crucial for them to set up properly. If you try to move them too soon, they may fall apart.
Nutrition Facts
- Servings: Approximately 24-28 cookies
- Calories per serving (1 cookie): Approximately 150-170 kcal
Disclaimer: The nutritional information provided is an estimate and can vary based on the specific ingredients and brands used.
Preparation Time
- Active Preparation Time: 25 minutes
- Chilling Time: 1 hour (minimum)
- Baking Time: 11-13 minutes per batch
- Total Time: Approximately 1 hour 45 minutes
How to Serve Your Peanut Butter and Jelly Cookies
These versatile cookies are more than just a simple snack. Here are some delightful ways to serve and enjoy them:
- The Classic Way: Nothing beats a freshly baked PB&J cookie with a tall, cold glass of milk. It’s the ultimate comfort pairing.
- The Lunchbox Hero: Tuck one or two cookies into a lunchbox for a surprise treat that will make anyone’s day brighter. They are sturdy enough to travel well.
- The After-School Special: Have a plate of these waiting for the kids (or yourself!) after a long day at school or work. They are the perfect pick-me-up.
- With a Hot Beverage: The nutty, sweet flavor pairs beautifully with a hot cup of coffee in the morning or a soothing herbal tea in the evening.
- As a Gourmet Dessert:
- Cookie Ice Cream Sandwich: Place a scoop of vanilla bean or strawberry ice cream between two cookies for an epic dessert.
- Crumble Topping: Crumble a cookie over a bowl of ice cream, yogurt, or a smoothie bowl for added texture and flavor.
- For Gifting and Parties:
- Bake Sale Star: These are always one of the first items to sell out at a bake sale. Their classic appeal is undeniable.
- Holiday Cookie Platter: Add a splash of color and nostalgia to your Christmas or holiday cookie trays.
- Thoughtful Gift: Package them in a decorative tin or a cellophane bag tied with a ribbon for a wonderful homemade gift for teachers, neighbors, or friends.
Additional Tips for Baking Success
Unlock the full potential of your Peanut Butter and Jelly Cookies with these five expert tips.
1. Choose Your Peanut Butter Wisely
For the best results in baking, stick to a commercial, no-stir creamy peanut butter like Jif, Skippy, or a store-brand equivalent. Natural peanut butters, where the oil separates, can have an inconsistent texture and fat content, often leading to cookies that are either too greasy or too crumbly and dry. The emulsifiers in commercial peanut butter ensure a consistent, soft, and chewy cookie every time.
2. Don’t Skip the Chill
We mentioned it in the instructions, but it bears repeating: chilling the dough is absolutely crucial. A minimum of one hour in the fridge is mandatory. This step prevents the cookies from spreading into thin, flat discs in the oven. Chilled dough holds its shape, resulting in thicker, chewier cookies with a more concentrated peanut butter flavor. For even better results, chill the dough overnight.
3. The Perfect Thumbprint Technique
While using your thumb is the classic method, it can sometimes lead to cracked edges or an uneven well. For perfectly uniform indentations, use the back of a round ½ teaspoon measuring spoon. Press it gently into the center of each dough ball right after rolling it in sugar. This creates a neat, perfectly sized divot that holds the jelly beautifully.
4. Pick the Right Jelly or Jam
The type of “jelly” you use matters. A thin, runny jelly will likely bubble over the sides of the cookie and can make the center soggy. Opt for a thick jam or, even better, preserves. Preserves contain chunks of fruit that hold up well to the heat of the oven and provide a wonderful texture. Raspberry and strawberry are classic choices, but apricot or grape also work wonderfully.
5. Know When to Pull Them from the Oven
The key to a soft and chewy cookie is to slightly underbake it. Keep a close eye on your cookies. You should pull them from the oven when the edges are set and a light golden brown, but the very center still looks a touch soft. They will firm up as they cool on the hot baking sheet. Overbaking will lead to a dry, hard, and crumbly cookie, so it’s always better to err on the side of caution.
Frequently Asked Questions (FAQ)
Here are answers to some common questions about making these incredible Peanut Butter and Jelly Cookies.
1. Why did my cookies spread out and become too flat?
This is the most common cookie problem and usually comes down to two things: the temperature of your dough and the temperature of your butter. If your butter was too soft (verging on melted) when you creamed it, or if you skipped the crucial step of chilling the dough, the fat will melt too quickly in the oven, causing the cookies to spread. Ensure your butter is at a cool room temperature (it should give slightly when pressed but not be greasy) and always chill your dough for at least one hour.
2. Can I use crunchy peanut butter instead of creamy?
Absolutely! If you love extra texture, you can substitute crunchy peanut butter for creamy in a 1:1 ratio. The cookie base will have little bits of peanuts throughout, adding a delightful crunch that complements the soft cookie and gooey jelly center. The overall structure and chewiness of the cookie will remain the same.
3. Can I make this recipe gluten-free?
Yes, you can adapt this recipe to be gluten-free with good results. Simply substitute the all-purpose flour with a high-quality, 1-to-1 gluten-free baking flour blend (one that contains xanthan gum). Follow the rest of the recipe as written. The texture may be slightly different—often a bit more delicate—but they will still be delicious.
4. How do I store these cookies, and how long will they last?
To keep your Peanut Butter and Jelly Cookies fresh, store them in an airtight container at room temperature. They will stay soft and delicious for up to 5 days. You can also freeze the baked cookies. Let them cool completely, then place them in a single layer on a baking sheet to flash-freeze for 30 minutes. Once firm, transfer them to a freezer-safe bag or container. They can be frozen for up to 3 months. Thaw at room temperature before enjoying.
5. Can I prepare the dough in advance?
Yes, this dough is perfect for making ahead of time. You can prepare the dough, cover it tightly, and store it in the refrigerator for up to 3 days. Alternatively, you can freeze the dough for longer storage. Shape the dough into balls, create the thumbprint indent (but don’t fill it with jelly yet), and place them on a parchment-lined baking sheet. Freeze until solid, then transfer the frozen dough balls to a freezer bag. They can be stored for up to 3 months. When ready to bake, place the frozen dough balls on a baking sheet, fill with jelly, and bake as directed, adding 1-2 extra minutes to the baking time.

Peanut Butter and Jelly Cookies Recipe
Ingredients
- For the Peanut Butter Cookies:
- 1 ½ cups (180g) All-Purpose Flour
- ½ teaspoon Baking Soda
- ¼ teaspoon Baking Powder
- ¼ teaspoon Salt
- ½ cup (113g) Unsalted Butter, softened to room temperature
- ¾ cup (150g) Packed Light Brown Sugar
- ¼ cup (50g) Granulated Sugar
- 1 cup (250g) Creamy Peanut Butter (commercial brand like Jif or Skippy recommended)
- 1 large Egg, at room temperature
- 1 teaspoon Pure Vanilla Extract
- For the Filling and Topping:
- ½ cup (160g) Strawberry or Raspberry Jam or Preserves (a thicker consistency works best)
- 2 tablespoons Granulated Sugar, for rolling
Instructions
Step 1: Prepare Your Dry Ingredients
In a medium-sized bowl, whisk together the all-purpose flour, baking soda, baking powder, and salt. Whisking not only combines these ingredients but also aerates them, which contributes to a lighter cookie texture. Set this bowl aside for later.
Step 2: Cream the Butter, Sugars, and Peanut Butter
In the bowl of a stand mixer fitted with a paddle attachment, or in a large bowl with a hand mixer, beat the softened unsalted butter, light brown sugar, and granulated sugar on medium-high speed until the mixture is light, fluffy, and pale in color. This process, known as creaming, should take about 3-4 minutes. Don’t rush this step! It’s essential for incorporating air into the dough, which results in a softer, chewier cookie. Once creamed, add the creamy peanut butter and beat for another 1-2 minutes until it is fully incorporated and the mixture is smooth.
Step 3: Incorporate the Wet Ingredients
Add the room temperature egg and pure vanilla extract to the peanut butter mixture. Beat on medium speed until just combined, scraping down the sides and bottom of the bowl as needed to ensure everything is evenly mixed. The egg acts as a binder, and the vanilla deepens the flavor profile.
Step 4: Combine Wet and Dry Ingredients
Reduce the mixer speed to low and slowly add the dry flour mixture to the wet ingredients. Mix only until the flour is just incorporated. Be very careful not to overmix at this stage. Overmixing develops the gluten in the flour, which can lead to tough, dense cookies instead of the soft and chewy texture we’re aiming for.
Step 5: Chill the Dough (The Non-Negotiable Step!)
Cover the bowl with plastic wrap and refrigerate the cookie dough for at least 1 hour, and up to 3 days. Chilling the dough is the most important secret to thick, flavorful cookies. It solidifies the fat (butter), which prevents the cookies from spreading too much in the oven. It also allows the flavors to meld and deepen, resulting in a more intense peanut butter taste.
Step 6: Preheat and Prepare for Baking
When you’re ready to bake, preheat your oven to 350°F (175°C). Line two large baking sheets with parchment paper or silicone baking mats. This prevents the cookies from sticking and makes for easy cleanup. Place the 2 tablespoons of granulated sugar for rolling in a small, shallow bowl.
Step 7: Shape the Cookies
Remove the chilled dough from the refrigerator. Using a medium cookie scoop (about 1.5 tablespoons), portion out the dough into uniform balls. Roll each ball between your palms to smooth it out, then roll it in the granulated sugar to coat it completely. This sugar coating adds a delightful, slightly crunchy exterior. Place the sugar-coated balls about 2 inches apart on the prepared baking sheets.
Step 8: Create the “Thumbprint” Indent
Using the back of a ½ teaspoon measuring spoon (or your thumb, if you prefer), gently press an indentation into the center of each dough ball. Don’t press all the way through. The back of a measuring spoon creates a perfect, uniform well for the jelly. If the edges of the cookie crack a little, you can gently press them back together.
Step 9: Fill with Jelly
Carefully spoon or pipe about ½ teaspoon of your chosen jam or preserves into the indentation of each cookie. Using a thicker jam or preserve is key, as a thin jelly can become runny and bubble over during baking. A small piping bag or a zip-top bag with the corner snipped off can make this process neater and easier.
Step 10: Bake to Golden Perfection
Bake the cookies for 11-13 minutes, or until the edges are lightly golden brown and the centers look set. The cookies might appear slightly underbaked in the very center when you pull them out, but they will continue to cook on the hot baking sheet. This is the secret to a soft, chewy center.
Step 11: Cool Completely
Let the cookies cool on the baking sheets for 5-10 minutes before transferring them to a wire rack to cool completely. The initial cooling time on the pan is crucial for them to set up properly. If you try to move them too soon, they may fall apart.
Nutrition
- Serving Size: One Normal Portion
- Calories: 150-170


