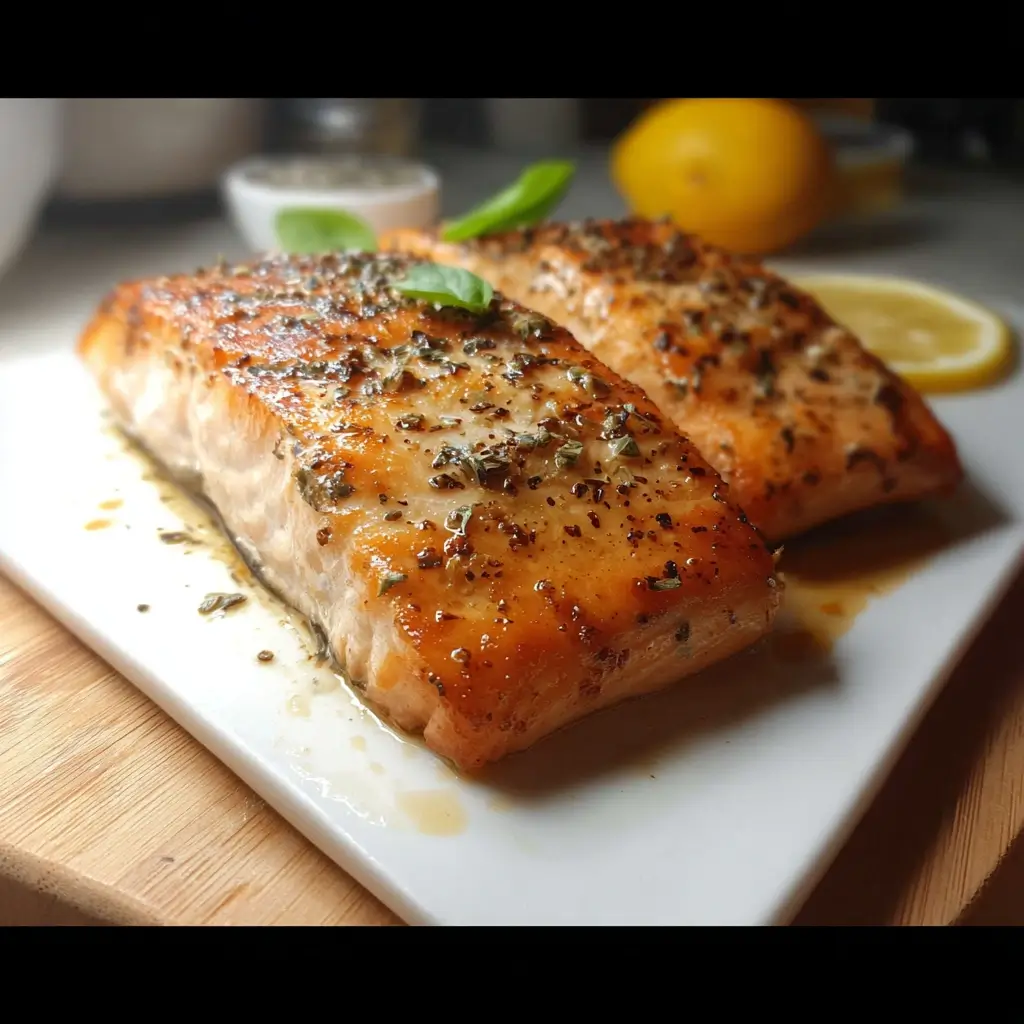
Of all the dishes in my weekly rotation, the one that consistently feels like a five-star treat with minimal effort is Pan-Seared Salmon. I still remember the first time I truly nailed it. The kitchen filled with the rich, savory aroma of searing fish, the sizzle in the cast-iron skillet was like a round of applause, and the final result was a revelation. The skin was so shatteringly crisp it was like eating a delicious, salty potato chip, while the flesh beneath was perfectly moist, flaky, and infused with the simple elegance of garlic and lemon. My family, usually a tough crowd, fell silent at the dinner table, followed by a chorus of “Wow, you have to make this again!” That’s the magic of this recipe. It transforms a simple, healthy ingredient into a show-stopping meal that feels both sophisticated and comforting. It’s my go-to for a quick weeknight dinner, a healthy lunch, or even when I want to impress guests without spending hours in the kitchen. This guide is the culmination of all my trials, errors, and triumphs, designed to help you achieve that same restaurant-quality perfection right in your own home.
Why This Pan-Seared Salmon Recipe is a Game-Changer
Before we dive into the skillet, let’s talk about why this specific method for pan-searing salmon stands head and shoulders above the rest. In a world of countless recipes, this one has become my gold standard for a few key reasons:
- Simplicity at its Finest: This recipe relies on a handful of high-quality ingredients. There are no complicated marinades or fancy techniques. The goal is to enhance the naturally rich, buttery flavor of the salmon, not mask it. It’s proof that sometimes, the most memorable meals are the most straightforward.
- The Crispy Skin Secret: The holy grail of seared salmon is that impossibly crispy skin. This recipe is built around the non-negotiable techniques required to achieve it every single time. From preparing the fillet to managing the heat, each step is a crucial part of the crispy-skin equation.
- Speed and Efficiency: From fridge to plate, this entire meal can be ready in under 20 minutes. This makes it an absolute hero for busy weeknights when you’re craving something nutritious and delicious but are short on time and energy.
- Health and Nutrition: Salmon is a nutritional powerhouse, packed with high-quality protein, essential vitamins, and, most famously, heart-healthy omega-3 fatty acids. Pan-searing is a healthy cooking method that requires minimal oil, preserving the fish’s inherent benefits.
- Endless Versatility: While this recipe is perfect on its own, it’s also a blank canvas. We’ll explore countless ways to serve it, from a simple side of roasted asparagus to flaking it over a complex salad or grain bowl.
The Science of the Perfect Sear: Understanding the Maillard Reaction
To truly master pan-seared salmon, it helps to understand the magic happening in the pan. What creates that golden-brown, intensely flavorful crust on the salmon skin? The answer is a beautiful bit of chemistry known as the Maillard reaction.
Named after French chemist Louis-Camille Maillard, this reaction is what happens when amino acids (the building blocks of protein) and reducing sugars react with heat. It’s not just simple browning or caramelization (which involves only sugars). The Maillard reaction creates hundreds of new aroma and flavor compounds, resulting in a complexity that you can’t get from just steaming or poaching.
To trigger this reaction for our salmon, a few conditions are critical:
- A Dry Surface: Moisture is the enemy of the sear. Water boils at 212°F (100°C), but the Maillard reaction kicks into high gear around 300°F (150°C). If the salmon skin is wet, the pan’s energy will be spent steaming the water off the surface first, preventing the temperature from getting high enough for proper browning. This is why patting the salmon completely dry is the most important step in this entire recipe.
- Sufficient Heat: The pan needs to be hot enough to initiate the reaction quickly. A medium-high heat provides the perfect balance—hot enough to sear and crisp the skin without burning it before the inside has a chance to cook.
- The Right Fat: The oil in the pan does more than just prevent sticking. It acts as a conductor, transferring heat efficiently and evenly from the pan’s surface to the entire surface of the salmon skin, ensuring a uniform, golden crust.
By understanding and respecting these principles, you’re not just following a recipe; you’re becoming a technician of taste, deliberately creating the flavors and textures that make this dish so incredible.
Choosing Your Star Ingredient: A Guide to Buying the Best Salmon
The quality of your final dish is directly tied to the quality of your main ingredient. Not all salmon is created equal, and knowing what to look for at the fish counter can make a significant difference.
Fresh vs. Frozen
Don’t shy away from the freezer aisle! Often, “fresh” salmon at the counter was previously frozen and then thawed for display. High-quality frozen salmon is typically “flash-frozen” on the fishing boat just moments after being caught. This process locks in freshness, flavor, and nutrients incredibly well. If you buy frozen, ensure you thaw it correctly: place it in the refrigerator overnight on a plate to catch any moisture. For a quicker thaw, you can place the vacuum-sealed fillet in a bowl of cold water for about 30-60 minutes.
Wild-Caught vs. Farm-Raised
- Wild-Caught Salmon: Varieties like King (Chinook), Sockeye, and Coho are caught in their natural habitats. They tend to be leaner with a more robust, complex flavor. Their vibrant red-orange color comes from their natural diet of krill and shrimp. Many consider it the superior choice for flavor and natural diet.
- Farm-Raised Salmon (Aquacultured): Typically Atlantic salmon, these fish are raised in contained pens. They have a higher fat content, which results in a milder, more buttery flavor and a softer texture. This extra fat can be very forgiving during cooking, making it less likely to dry out. Look for salmon from farms that practice sustainable aquaculture.
For this recipe, both work beautifully. The higher fat content in farmed salmon can help yield an extra-crispy skin, but the firm texture of wild salmon holds up wonderfully to the high heat of the sear.
Skin-On or Skinless?
For pan-searing, skin-on is non-negotiable. The skin serves two critical purposes. First, it acts as a protective barrier between the delicate flesh and the hot pan, preventing the fish from overcooking and falling apart. Second, when rendered properly, it becomes the best part of the dish—a crispy, savory, bacon-of-the-sea cracker. If you can only find skinless fillets, the recipe will still work, but you will miss out on this signature texture.
What to Look For at the Counter
When buying fresh, unfrozen salmon, use your senses:
- Smell: It should smell fresh and oceanic, like the sea. It should never smell “fishy,” sour, or like ammonia.
- Look: The flesh should be vibrant and moist, not dull or dry. The color will vary by species, but it should look rich. Look for clean, sharp lines if it has been cut.
- Feel: If you’re allowed to touch it (or if you ask the fishmonger to), the flesh should be firm and spring back when gently pressed.
The Ultimate Pan-Seared Salmon with Garlic and Lemon
This is the foundational recipe, perfected for flavor, texture, and simplicity.
Ingredients
- Salmon: 2 (6-ounce / 170g) salmon fillets, skin-on, about 1-1.5 inches thick
- Oil: 1 tablespoon of a high-smoke-point oil (like avocado oil, grapeseed oil, or canola oil)
- Salt: ½ teaspoon coarse sea salt or kosher salt, divided
- Pepper: ¼ teaspoon freshly cracked black pepper
- Butter: 2 tablespoons unsalted butter
- Garlic: 3 cloves garlic, thinly sliced
- Lemon: ½ lemon, juiced, plus extra wedges for serving
- Herbs (Optional): 1 tablespoon fresh parsley or dill, finely chopped
Instructions
- Prepare the Salmon (The Most Important Step): Remove the salmon from the refrigerator about 15-20 minutes before cooking to let it come closer to room temperature. This promotes even cooking. Using a paper towel, pat the entire surface of both fillets, especially the skin side, until they are completely and utterly dry. Any moisture left on the skin will create steam and prevent it from crisping.
- Season Generously: Season the flesh side of the salmon with half of the salt and all of the black pepper. Season the skin side generously with the remaining salt. The salt helps draw out the last bit of moisture and aids in crisping.
- Heat the Pan: Place a large skillet (cast-iron or stainless steel are best) over medium-high heat. Add the tablespoon of oil. Let the pan and oil get hot. You’ll know it’s ready when the oil begins to shimmer slightly or a drop of water evaporates instantly.
- Sear Skin-Side Down: Gently place the salmon fillets in the hot pan, skin-side down. Press down firmly on the back of each fillet with a fish spatula for about 10-15 seconds. This ensures the entire surface of the skin makes contact with the pan for a perfectly even, crispy crust.
- Cook Undisturbed: Let the salmon cook, undisturbed, for 4-6 minutes. The exact time will depend on the thickness of your fillet. Resist the urge to move it! Watch the side of the fillet; you will see the color change as it cooks upwards. You are looking for the cook line to travel about two-thirds of the way up the side of the fish. The skin should release easily from the pan when it’s ready to be flipped. If it sticks, give it another 30-60 seconds.
- Flip and Add Aromatics: Flip the salmon carefully with a thin spatula. Immediately turn the heat down to medium-low. Add the 2 tablespoons of butter to the pan. Once it melts, add the sliced garlic and swirl the pan to let it sizzle in the butter.
- Baste and Finish Cooking: Cook for another 1-3 minutes on the flesh side, depending on thickness and desired doneness. As it cooks, tilt the pan towards you and use a spoon to baste the top of the salmon with the melted garlic butter. This infuses the fish with flavor and keeps it moist.
- Deglaze and Serve: Remove the skillet from the heat. Squeeze the fresh lemon juice into the pan (be careful, it may spatter). Swirl it with the garlic butter to create a simple pan sauce. Sprinkle with fresh parsley or dill. Serve the salmon immediately, spooning the delicious pan sauce over the top.
Nutrition Facts
- Servings: 2
- Calories per serving: Approximately 485 kcal
- Note: Nutritional information is an estimate and can vary based on the exact size of the salmon fillet, type of oil, and amount of butter used.
Preparation Time
- Prep Time: 5 minutes
- Cook Time: 8-10 minutes
- Total Time: 15 minutes
How to Serve Pan-Seared Salmon
The beauty of this salmon is how well it pairs with almost anything. Here are some of my favorite ways to build a meal around it:
- Classic and Elegant
- Roasted Asparagus: Toss asparagus with olive oil, salt, and pepper, and roast at 400°F (200°C) until tender-crisp.
- Creamy Mashed Potatoes: A fluffy bed of mashed potatoes is perfect for soaking up the garlic-lemon pan sauce.
- Steamed Green Beans: A simple, healthy side that adds a pop of color and freshness.
- Healthy and Light
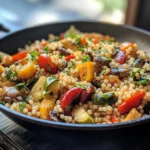
- Quinoa Salad: Serve the salmon alongside a vibrant quinoa salad with cucumber, tomatoes, feta, and a lemon vinaigrette.
- Atop a Large Green Salad: Flake the salmon over a bed of arugula or mixed greens, and use the pan sauce as your dressing.
- With Zucchini Noodles: A fantastic low-carb option. Sauté zucchini noodles with a little garlic and olive oil.
- Hearty and Comforting
- Lemony Rice Pilaf: The citrus notes in the rice will complement the salmon perfectly.
- Roasted Root Vegetables: Think carrots, parsnips, and potatoes, all roasted until caramelized and sweet.
- Crusty Bread: Essential for sopping up every last drop of that incredible pan sauce.
- Simple Garnishes
- A dollop of Lemon-Dill Yogurt Sauce
- A sprinkle of Capers for a briny kick
- Extra Fresh Lemon Wedges on the side
Additional Tips for Salmon Perfection
After making this dish dozens of times, I’ve picked up a few extra tricks that ensure foolproof success.
- Don’t Crowd the Pan: If you’re cooking more than two fillets, use a very large skillet or cook them in two separate batches. Overcrowding the pan will lower its temperature, causing the salmon to steam instead of sear. Give each fillet plenty of space.
- Score the Skin (Optional Pro-Tip): For very thick fillets or for an extra insurance policy against the skin buckling, you can make 2-3 shallow, diagonal cuts through the skin before seasoning. This helps the skin stay flat and render its fat more evenly.
- Embrace the Fish Spatula: A flexible, slotted metal spatula, often called a fish spatula, is the ideal tool for this job. Its thin edge allows you to get underneath the delicate skin without tearing it, and the slots allow excess oil to drain away.
- Trust the Thermometer for Perfect Doneness: The most reliable way to avoid overcooking salmon is to use an instant-read thermometer. Insert it into the thickest part of the fillet.
- 120-125°F (49-52°C): Medium-rare, with a slightly translucent center.
- 130-135°F (54-57°C): Medium, mostly opaque and flaky.
- 140°F (60°C): Medium-well, fully opaque.
- Remember that the fish will continue to cook for a few degrees after you remove it from the heat (carryover cooking).
- Let It Rest: Just like a good steak, salmon benefits from a brief rest. After removing it from the pan, let it sit for 2-3 minutes before serving. This allows the juices to redistribute throughout the fillet, ensuring it’s moist and tender in every bite.
FAQ: Your Pan-Seared Salmon Questions Answered
1. What is the best type of pan to use for searing salmon?
A cast-iron skillet is the number one choice. It holds heat incredibly well and distributes it evenly, which is essential for a great sear. A heavy-bottomed stainless steel pan is a close second. While you can use a non-stick pan, it’s often difficult to get it hot enough for a truly hard sear without damaging the non-stick coating.
2. My salmon skin always sticks to the pan! What am I doing wrong?
This is the most common issue, and it’s usually caused by one of three things:
- The pan isn’t hot enough: The oil must be shimmering before the fish goes in.
- The skin wasn’t dry enough: Pat it dry, then pat it again. Seriously.
- You’re trying to flip it too soon: The crispy skin will naturally release from the pan when it’s ready. If you feel resistance, give it another minute. Don’t force it.
3. Can I make this recipe with skinless salmon?
Yes, you absolutely can. The cooking time will be shorter, so you’ll need to watch it closely. Sear the first side for about 3-4 minutes until golden, then flip and cook for another 1-2 minutes while basting with the garlic butter. You won’t get the crispy skin, but you’ll still have a delicious, flaky, and flavorful piece of fish.
4. How do I store and reheat leftover salmon?
Store leftover salmon in an airtight container in the refrigerator for up to 2 days. The best way to reheat it without drying it out is low and slow. Place it on a baking sheet and warm it in a 275°F (135°C) oven for about 10-15 minutes, or until just warmed through. You can also flake the cold salmon and use it in salads or grain bowls, which is often my preferred method for leftovers. Microwaving is not recommended as it can overcook the fish and create an unpleasant smell.
5. Is the white stuff that sometimes comes out of the salmon bad?
Not at all! That white substance is called albumin. It’s a protein that exists in liquid form in the raw fish. As the salmon cooks and its muscle fibers contract, they push the albumin to the surface, where it coagulates and turns white. While it’s perfectly safe to eat, seeing a lot of it can be a sign that the fish was cooked a bit too aggressively or for too long. A gentler heat and not overcooking can help minimize its appearance.

Pan-Seared Salmon Recipe
Ingredients
- Salmon: 2 (6-ounce / 170g) salmon fillets, skin-on, about 1-1.5 inches thick
- Oil: 1 tablespoon of a high-smoke-point oil (like avocado oil, grapeseed oil, or canola oil)
- Salt: ½ teaspoon coarse sea salt or kosher salt, divided
- Pepper: ¼ teaspoon freshly cracked black pepper
- Butter: 2 tablespoons unsalted butter
- Garlic: 3 cloves garlic, thinly sliced
- Lemon: ½ lemon, juiced, plus extra wedges for serving
- Herbs (Optional): 1 tablespoon fresh parsley or dill, finely chopped
Instructions
- Prepare the Salmon (The Most Important Step): Remove the salmon from the refrigerator about 15-20 minutes before cooking to let it come closer to room temperature. This promotes even cooking. Using a paper towel, pat the entire surface of both fillets, especially the skin side, until they are completely and utterly dry. Any moisture left on the skin will create steam and prevent it from crisping.
- Season Generously: Season the flesh side of the salmon with half of the salt and all of the black pepper. Season the skin side generously with the remaining salt. The salt helps draw out the last bit of moisture and aids in crisping.
- Heat the Pan: Place a large skillet (cast-iron or stainless steel are best) over medium-high heat. Add the tablespoon of oil. Let the pan and oil get hot. You’ll know it’s ready when the oil begins to shimmer slightly or a drop of water evaporates instantly.
- Sear Skin-Side Down: Gently place the salmon fillets in the hot pan, skin-side down. Press down firmly on the back of each fillet with a fish spatula for about 10-15 seconds. This ensures the entire surface of the skin makes contact with the pan for a perfectly even, crispy crust.
- Cook Undisturbed: Let the salmon cook, undisturbed, for 4-6 minutes. The exact time will depend on the thickness of your fillet. Resist the urge to move it! Watch the side of the fillet; you will see the color change as it cooks upwards. You are looking for the cook line to travel about two-thirds of the way up the side of the fish. The skin should release easily from the pan when it’s ready to be flipped. If it sticks, give it another 30-60 seconds.
- Flip and Add Aromatics: Flip the salmon carefully with a thin spatula. Immediately turn the heat down to medium-low. Add the 2 tablespoons of butter to the pan. Once it melts, add the sliced garlic and swirl the pan to let it sizzle in the butter.
- Baste and Finish Cooking: Cook for another 1-3 minutes on the flesh side, depending on thickness and desired doneness. As it cooks, tilt the pan towards you and use a spoon to baste the top of the salmon with the melted garlic butter. This infuses the fish with flavor and keeps it moist.
- Deglaze and Serve: Remove the skillet from the heat. Squeeze the fresh lemon juice into the pan (be careful, it may spatter). Swirl it with the garlic butter to create a simple pan sauce. Sprinkle with fresh parsley or dill. Serve the salmon immediately, spooning the delicious pan sauce over the top.
Nutrition
- Serving Size: One Normal Portion
- Calories: 485