

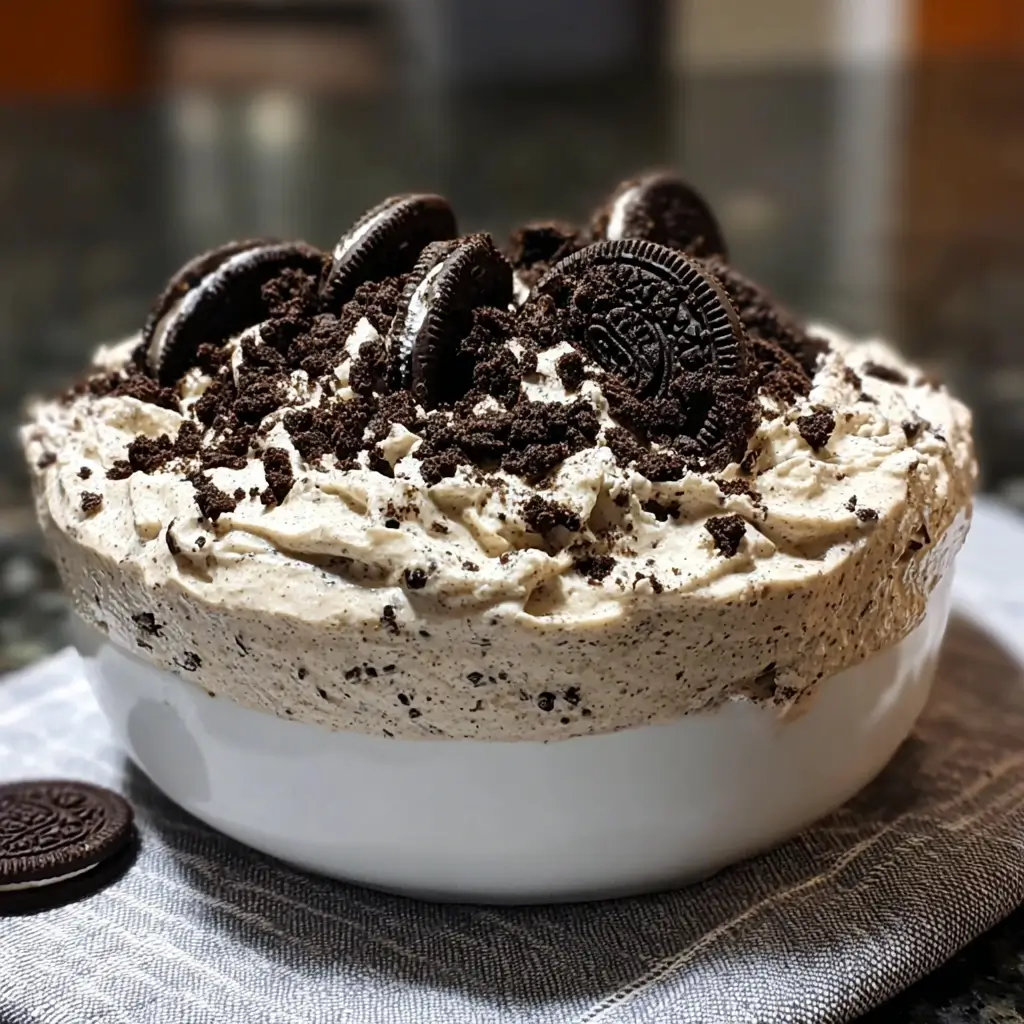

It was one of those Saturday afternoons, the kind where the promise of a lazy evening and a sweet treat hangs tantalizingly in the air. My kids had been hinting (not so subtly) about wanting “something with Oreos” all week. I’d stumbled upon the idea of an Oreo Mousse and decided to give it a whirl, hoping for something more sophisticated than just crushed cookies in milk. The result? Absolute magic. The first spoonful was a revelation – an ethereally light, cloud-like mousse, intensely chocolatey from the Oreos, with a subtle tang from the cream cheese that balanced the sweetness perfectly. My eldest, usually a tough critic, declared it “the best dessert ever,” while my youngest just hummed happily, face smeared with chocolate. It’s since become a go-to for family gatherings, potlucks, and those “just because” moments. It’s ridiculously easy, requires no baking (a huge plus in my book!), and consistently wows everyone. Trust me, this Oreo Mousse isn’t just a dessert; it’s an experience, a creamy, dreamy escape that you’ll want to revisit time and time again.
**The Ultimate No-Bake Oreo Mousse: A Decadent Delight for Every Occasion**
Welcome to what might just become your new favorite dessert recipe! Oreo Mousse is a culinary paradox: incredibly simple to make, yet impressively elegant and devastatingly delicious. It’s the kind of treat that appeals to both the sophisticated palate and the inner child in all of us. Imagine a light, airy, cloud-like texture, perfectly sweetened, and bursting with the iconic cookies and cream flavor of Oreos. Whether you’re a seasoned baker or a complete novice in the kitchen, this no-bake Oreo Mousse recipe is designed for success. It’s perfect for last-minute dessert emergencies, special celebrations, or simply when you need a comforting, indulgent pick-me-up. The beauty of this recipe lies not only in its taste and texture but also in its versatility. You can dress it up for a fancy dinner party or keep it casual for a family movie night. Get ready to fall in love with the creamy, dreamy world of homemade Oreo Mousse!
**Ingredients for Heavenly Oreo Mousse**
To create this spectacular Oreo Mousse, you’ll need a handful of simple, readily available ingredients. The magic happens when these components come together, creating a symphony of textures and flavors. Precision is key in baking and dessert making, even for no-bake recipes, so try to measure your ingredients accurately.
- Oreos (Regular or Double Stuf): 24-30 cookies (approximately 250-320g). You’ll need some for the mousse itself and some for garnish. The amount can vary based on how “Oreo-intense” you want your mousse and how much you want for the base/topping. I typically use one standard pack.
- Heavy Cream (Chilled): 2 cups (480 ml). It must be cold to whip properly. This is the backbone of the mousse’s light texture.
- Cream Cheese (Full-Fat, Softened): 8 ounces (226g). Bring it to room temperature for at least 30-60 minutes before starting. This ensures it blends smoothly without lumps.
- Powdered Sugar (Confectioners’ Sugar): 1/2 cup (60g), sifted. Adjust to your sweetness preference. Sifting prevents lumps.
- Vanilla Extract: 1 teaspoon. Use pure vanilla extract for the best flavor.
- Optional: Unsalted Butter (Melted): 4 tablespoons (56g). Only if you want a distinct crust layer at the bottom of your serving dishes, made from some of the crushed Oreos.
- Optional Garnish: Extra crushed Oreos, mini Oreos, chocolate shavings, whipped cream swirls, chocolate sauce.
A Note on Ingredients:
- Oreos: Classic Oreos work best. Double Stuf will give a bit more cream filling flavor. You can experiment with Golden Oreos or flavored Oreos (like Mint or Peanut Butter) for exciting variations, which we’ll discuss later.
- Heavy Cream: Ensure it has at least 35% milk fat. “Whipping cream” can also work, but heavy cream generally provides a more stable whip. Do not substitute with half-and-half or milk; it won’t whip.
- Cream Cheese: Full-fat cream cheese provides the best flavor and texture. Low-fat versions can sometimes result in a slightly runnier or less rich mousse. Ensure it’s truly softened to avoid lumps.
- Powdered Sugar: Granulated sugar will result in a gritty texture, so powdered sugar is essential for a smooth mousse.
**Step-by-Step Instructions for Perfect Oreo Mousse**
Follow these detailed instructions carefully, and you’ll be rewarded with a flawless Oreo Mousse every time. The process is straightforward, focusing on gentle folding to maintain that airy texture.
1. Prepare the Oreos:
* Separate the Oreos. Scrape the cream filling from about half of the cookies (12-15 cookies) and set the filling aside. You can add this filling to the cream cheese mixture later for extra Oreo flavor, or simply discard it if you prefer a less sweet mousse.
* Place all the Oreo cookie wafers (both the ones you scraped and the whole ones) into a food processor. Pulse until they are fine crumbs. If you don’t have a food processor, place them in a sturdy zip-top bag and crush them with a rolling pin or a heavy pan.
* For a crust (optional): If you want a crust layer, take about 1/2 to 3/4 cup of the Oreo crumbs and mix them with 4 tablespoons of melted unsalted butter. Press this mixture into the bottom of your serving glasses or a small trifle bowl. Chill while you prepare the mousse.
* Set aside about 1/4 cup of the remaining plain Oreo crumbs for garnish. The rest will go into the mousse.
2. Whip the Heavy Cream:
* Ensure your mixing bowl and whisk attachment (or hand mixer beaters) are clean and preferably chilled.
* Pour the 2 cups of cold heavy cream into the mixing bowl.
* Beat on medium-high speed until soft peaks form. Soft peaks are when the cream holds its shape somewhat but the peaks gently flop over when you lift the whisk.
* Gradually add 1/4 cup of the sifted powdered sugar while continuing to beat.
* Continue beating until stiff peaks form. Stiff peaks stand straight up when the whisk is lifted, or curl slightly at the tip, but hold their shape firmly. Be careful not to overbeat, or you’ll start making butter!
* Set the whipped cream aside in the refrigerator while you prepare the cream cheese base.
3. Prepare the Cream Cheese Base:
* In a separate large mixing bowl, place the 8 ounces of softened cream cheese.
* Add the remaining 1/4 cup of sifted powdered sugar and the 1 teaspoon of vanilla extract.
* If you saved the Oreo cream fillings, you can add them now.
* Beat with an electric mixer (you can use the same beaters, no need to wash if they just had cream on them) on medium speed until the mixture is completely smooth, creamy, and free of lumps. Scrape down the sides of the bowl as needed. This step is crucial for a non-lumpy mousse.
4. Combine and Fold:
* Gently fold about one-third of the whipped cream into the cream cheese mixture using a rubber spatula. This lightens the cream cheese base, making it easier to incorporate the rest of the whipped cream without deflating it. Use sweeping, circular motions, bringing the mixture from the bottom of the bowl up and over.
* Once partially combined, add the remaining whipped cream and continue to fold gently until just combined and no white streaks remain. It’s important to be gentle here to maintain the airiness from the whipped cream.
* Now, gently fold in the Oreo crumbs (reserving the portion for garnish). Fold until they are evenly distributed, but again, don’t overmix. A few streaks of cookie crumbs are perfectly fine.
5. Assemble and Chill:
* Spoon or pipe the Oreo mousse mixture into your prepared serving dishes (individual glasses, ramekins, a small trifle bowl, or the dish with the Oreo crust if you made one).
* If piping, you can use a piping bag with a large round or star tip for a neater presentation. If spooning, smooth the tops with the back of a spoon.
* Cover the dishes loosely with plastic wrap.
* Chill in the refrigerator for at least 4 hours, or preferably overnight. Chilling is essential for the mousse to set properly and for the flavors to meld. The longer it chills, the better the texture and taste.
6. Garnish and Serve:
* Just before serving, garnish your Oreo Mousse. Sprinkle with the reserved Oreo crumbs. You can also add a dollop of fresh whipped cream, a mini Oreo cookie on top, chocolate shavings, or a drizzle of chocolate sauce.
* Serve chilled and enjoy the delightful, creamy, Oreo-packed goodness!
**Nutrition Facts (Estimated)**
Please note that these are approximate values and can vary based on the specific brands of ingredients used, the exact number of Oreos, and portion sizes.
- Servings: This recipe typically yields 6-8 servings.
- Calories per serving (estimated for 6 servings): Approximately 550-650 calories.
- Calories per serving (estimated for 8 servings): Approximately 410-490 calories.
Breakdown (Approximate per serving, based on 8 servings):
- Fat: 35-45g
- Saturated Fat: 20-28g
- Cholesterol: 100-120mg
- Sodium: 200-280mg
- Carbohydrates: 40-50g
- Fiber: 1-2g
- Sugar: 30-38g
- Protein: 5-7g
This dessert is undeniably indulgent, rich in fats and sugars due to the heavy cream, cream cheese, and Oreos. It’s best enjoyed as an occasional treat. For a slightly lighter version, you could try reducing the sugar slightly, but significantly altering the cream cheese or heavy cream will change the fundamental texture and richness of the mousse.
**Preparation & Chilling Time**
Understanding the time commitment helps in planning, especially if you’re making this for an event.
- Active Preparation Time: 20-30 minutes. This includes crushing cookies, whipping cream, mixing the base, and assembling. If you’re very efficient, you might do it in 15-20 minutes.
- Chilling Time: Minimum 4 hours.
- Optimal Chilling Time: Overnight (8-12 hours). This allows the mousse to fully set and the flavors to deepen and meld beautifully.
- Total Time (including minimum chilling): Approximately 4 hours 30 minutes.
- Total Time (including optimal chilling): Approximately 8 hours 30 minutes to 12 hours 30 minutes.
While the active prep is quick, the chilling time is non-negotiable for the best texture. This makes Oreo Mousse an excellent make-ahead dessert!
**How to Serve Your Oreo Mousse Masterpiece**
Presentation can elevate even the simplest dessert. Here are some delightful ways to serve your Oreo Mousse:
- Individual Serving Glasses or Ramekins:
- Classic Look: Small, clear glass tumblers or footed dessert glasses showcase the creamy texture and any layers beautifully.
- Rustic Charm: Serve in small mason jars for a trendy, casual feel.
- Elegant Portions: Use small, elegant ramekins.
- Garnish: Top with a swirl of whipped cream (use a piping bag with a star tip), a sprinkle of extra Oreo crumbs, and a whole mini Oreo or a half Oreo cookie standing upright. A mint leaf can add a pop of color.
- Small Trifle Bowl:
- Layered Effect: If you made an Oreo crust, this will be the bottom layer. You can also create additional layers within the mousse itself – for example, a layer of mousse, a sprinkle of Oreo crumbs, another layer of mousse.
- Family Style: A small trifle bowl allows for a slightly larger, shareable dessert, perfect for a family gathering.
- Garnish: Decorate the entire top surface lavishly with crushed Oreos, chocolate shavings, and perhaps some artfully placed whole Oreos around the edge.
- Oreo Mousse Parfaits:
- Alternating Layers: In taller glasses, alternate layers of Oreo mousse with layers of plain whipped cream and layers of crushed Oreo cookies. This creates a visually stunning dessert with varied textures.
- Sauce Drizzle: Drizzle chocolate sauce or caramel sauce between layers or on top.
- No-Bake Oreo Mousse Pie:
- Crumb Crust: Prepare a standard Oreo crumb crust (about 1.5 cups Oreo crumbs mixed with 6 tablespoons melted butter) in a 9-inch pie dish. Press firmly and chill.
- Filling: Pour the prepared Oreo mousse into the chilled crust.
- Set and Serve: Chill until fully set (at least 6 hours, or overnight). Garnish generously before slicing and serving. This turns the mousse into a stunning no-bake pie.
- Mini Mousse Cups for Parties:
- Bite-Sized: Use small shot glasses or appetizer cups for elegant, bite-sized portions perfect for buffets or dessert tables.
- Easy Handling: Guests can easily pick them up. Garnish simply with a tiny sprinkle of crumbs or a single mini Oreo.
Serving Temperature:
- Always serve Oreo Mousse chilled, straight from the refrigerator. If it sits out at room temperature for too long, it will soften and lose its delightful texture.
**Additional Tips for Oreo Mousse Perfection**
Unlock the full potential of your Oreo Mousse with these five expert tips:
- Chill Your Tools: For the best whipped cream, ensure your heavy cream is very cold. Additionally, chilling your mixing bowl and whisk attachment (or beaters) in the freezer for 10-15 minutes before whipping can significantly help the cream whip up faster and achieve greater volume and stability. This is especially helpful in warmer kitchens.
- The Art of Folding: This is paramount for a light, airy mousse. When combining the whipped cream with the cream cheese base, and later the Oreo crumbs, use a large rubber spatula. Start by lightening the cream cheese mixture with a small amount of whipped cream. Then, for the remainder, use gentle, deliberate folding motions: cut down through the center of the mixture, sweep along the bottom of the bowl, and bring it up and over, turning the bowl as you go. Repeat until just combined. Overmixing will deflate the air you worked so hard to incorporate.
- Soften Cream Cheese Properly: Lumps are the enemy of a smooth mousse. Ensure your cream cheese is truly at room temperature. If you’re short on time, you can unwrap it, cut it into small cubes, and let it sit on the counter for about 20-30 minutes. Microwaving can make it too soft or oily, so avoid that if possible. Beat it thoroughly with the sugar and vanilla until absolutely smooth before adding any other ingredients.
- Taste and Adjust Sweetness: The recipe provides a guideline for powdered sugar, but sweetness is subjective. After combining the cream cheese, sugar, and vanilla, give it a little taste (before adding whipped cream). If you prefer it sweeter, add a little more powdered sugar, one tablespoon at a time, mixing well after each addition. Remember that Oreos also add sweetness.
- Don’t Rush the Chill: Patience is a virtue, especially with no-bake desserts. While 4 hours is the minimum chilling time, allowing the Oreo Mousse to chill overnight makes a noticeable difference. The flavors meld more deeply, the cookies soften slightly into the mousse creating a more cohesive texture, and the mousse sets up more firmly, making it easier to serve and providing a better mouthfeel. It’s the secret to transforming a good mousse into a great one.
**Frequently Asked Questions (FAQ) about Oreo Mousse**
Here are answers to some common questions you might have about making Oreo Mousse:
Q1: Can I make Oreo Mousse ahead of time?
A: Absolutely! Oreo Mousse is an excellent make-ahead dessert. You can prepare it up to 2 days in advance. Simply cover it well with plastic wrap (press the plastic wrap gently onto the surface of the mousse to prevent a skin from forming, or just cover the dishes tightly) and store it in the refrigerator. Garnish just before serving for the freshest look.
Q2: Can I use different types of Oreos for this mousse?
A: Yes, you can! This is where you can get creative.
* Golden Oreos: For a vanilla-based “cookies and cream” mousse.
* Mint Oreos: For a refreshing chocolate-mint mousse. You might even add a tiny drop of peppermint extract to the cream cheese base.
* Peanut Butter Oreos: For a decadent chocolate peanut butter version. Consider swirling in a tablespoon or two of creamy peanut butter into the cream cheese base.
* Red Velvet Oreos: For a fun twist with a hint of red color.
Remember that flavored Oreos might slightly alter the sweetness or overall flavor profile, so taste and adjust other components if needed.
Q3: My mousse didn’t set properly and is too runny. What went wrong?
A: Several factors could contribute to a runny mousse:
* Heavy cream not whipped enough: Ensure your cream is whipped to stiff peaks. If it’s only at soft peaks, it won’t provide enough structure.
* Overmixing when folding: If you were too vigorous when folding the whipped cream or Oreo crumbs, you might have deflated the air, leading to a denser, runnier result.
* Not enough chilling time: The mousse needs adequate time in the refrigerator to firm up.
* Warm ingredients/environment: If your cream wasn’t cold enough or your kitchen is very warm, it can affect whipping and setting.
* Incorrect ingredient ratios: Too much liquid or not enough cream cheese/whipped cream solids.
If it’s only slightly soft, try chilling it for longer. If it’s very runny, it might be best enjoyed as a very loose dessert spooned over cake or ice cream.
Q4: Can I make this Oreo Mousse gluten-free?
A: Yes, you can easily adapt this recipe to be gluten-free. Simply substitute the regular Oreos with gluten-free chocolate sandwich cookies. Many brands offer excellent gluten-free alternatives that closely mimic the taste and texture of Oreos. Ensure all other ingredients (like vanilla extract) are also certified gluten-free if catering to someone with celiac disease.
Q5: How should I store leftover Oreo Mousse?
A: Leftover Oreo Mousse should be stored in an airtight container or individual serving dishes covered tightly with plastic wrap in the refrigerator. It will keep well for up to 3-4 days. The texture might change slightly over time, with the Oreo crumbs becoming softer, but it will still be delicious. Freezing Oreo Mousse is generally not recommended as the texture can become icy and separate upon thawing due to the high dairy content.
Oreo Mousse Recipe
Ingredients
- Oreos (Regular or Double Stuf): 24-30 cookies (approximately 250-320g). You’ll need some for the mousse itself and some for garnish. The amount can vary based on how “Oreo-intense” you want your mousse and how much you want for the base/topping. I typically use one standard pack.
- Heavy Cream (Chilled): 2 cups (480 ml). It must be cold to whip properly. This is the backbone of the mousse’s light texture.
- Cream Cheese (Full-Fat, Softened): 8 ounces (226g). Bring it to room temperature for at least 30-60 minutes before starting. This ensures it blends smoothly without lumps.
- Powdered Sugar (Confectioners’ Sugar): 1/2 cup (60g), sifted. Adjust to your sweetness preference. Sifting prevents lumps.
- Vanilla Extract: 1 teaspoon. Use pure vanilla extract for the best flavor.
- Optional: Unsalted Butter (Melted): 4 tablespoons (56g). Only if you want a distinct crust layer at the bottom of your serving dishes, made from some of the crushed Oreos.
- Optional Garnish: Extra crushed Oreos, mini Oreos, chocolate shavings, whipped cream swirls, chocolate sauce.
Instructions
1. Prepare the Oreos:
* Separate the Oreos. Scrape the cream filling from about half of the cookies (12-15 cookies) and set the filling aside. You can add this filling to the cream cheese mixture later for extra Oreo flavor, or simply discard it if you prefer a less sweet mousse.
* Place all the Oreo cookie wafers (both the ones you scraped and the whole ones) into a food processor. Pulse until they are fine crumbs. If you don’t have a food processor, place them in a sturdy zip-top bag and crush them with a rolling pin or a heavy pan.
* For a crust (optional): If you want a crust layer, take about 1/2 to 3/4 cup of the Oreo crumbs and mix them with 4 tablespoons of melted unsalted butter. Press this mixture into the bottom of your serving glasses or a small trifle bowl. Chill while you prepare the mousse.
* Set aside about 1/4 cup of the remaining plain Oreo crumbs for garnish. The rest will go into the mousse.
2. Whip the Heavy Cream:
* Ensure your mixing bowl and whisk attachment (or hand mixer beaters) are clean and preferably chilled.
* Pour the 2 cups of cold heavy cream into the mixing bowl.
* Beat on medium-high speed until soft peaks form. Soft peaks are when the cream holds its shape somewhat but the peaks gently flop over when you lift the whisk.
* Gradually add 1/4 cup of the sifted powdered sugar while continuing to beat.
* Continue beating until stiff peaks form. Stiff peaks stand straight up when the whisk is lifted, or curl slightly at the tip, but hold their shape firmly. Be careful not to overbeat, or you’ll start making butter!
* Set the whipped cream aside in the refrigerator while you prepare the cream cheese base.
3. Prepare the Cream Cheese Base:
* In a separate large mixing bowl, place the 8 ounces of softened cream cheese.
* Add the remaining 1/4 cup of sifted powdered sugar and the 1 teaspoon of vanilla extract.
* If you saved the Oreo cream fillings, you can add them now.
* Beat with an electric mixer (you can use the same beaters, no need to wash if they just had cream on them) on medium speed until the mixture is completely smooth, creamy, and free of lumps. Scrape down the sides of the bowl as needed. This step is crucial for a non-lumpy mousse.
4. Combine and Fold:
* Gently fold about one-third of the whipped cream into the cream cheese mixture using a rubber spatula. This lightens the cream cheese base, making it easier to incorporate the rest of the whipped cream without deflating it. Use sweeping, circular motions, bringing the mixture from the bottom of the bowl up and over.
* Once partially combined, add the remaining whipped cream and continue to fold gently until just combined and no white streaks remain. It’s important to be gentle here to maintain the airiness from the whipped cream.
* Now, gently fold in the Oreo crumbs (reserving the portion for garnish). Fold until they are evenly distributed, but again, don’t overmix. A few streaks of cookie crumbs are perfectly fine.
5. Assemble and Chill:
* Spoon or pipe the Oreo mousse mixture into your prepared serving dishes (individual glasses, ramekins, a small trifle bowl, or the dish with the Oreo crust if you made one).
* If piping, you can use a piping bag with a large round or star tip for a neater presentation. If spooning, smooth the tops with the back of a spoon.
* Cover the dishes loosely with plastic wrap.
* Chill in the refrigerator for at least 4 hours, or preferably overnight. Chilling is essential for the mousse to set properly and for the flavors to meld. The longer it chills, the better the texture and taste.
6. Garnish and Serve:
* Just before serving, garnish your Oreo Mousse. Sprinkle with the reserved Oreo crumbs. You can also add a dollop of fresh whipped cream, a mini Oreo cookie on top, chocolate shavings, or a drizzle of chocolate sauce.
* Serve chilled and enjoy the delightful, creamy, Oreo-packed goodness!
Nutrition
- Serving Size: One Normal Portion
- Calories: 550-650
- Sugar: 30-38g
- Sodium: 200-280mg
- Fat: 35-45g
- Saturated Fat: 20-28g
- Carbohydrates: 40-50g
- Fiber: 1-2g
- Protein: 5-7g
- Cholesterol: 100-120mg


