

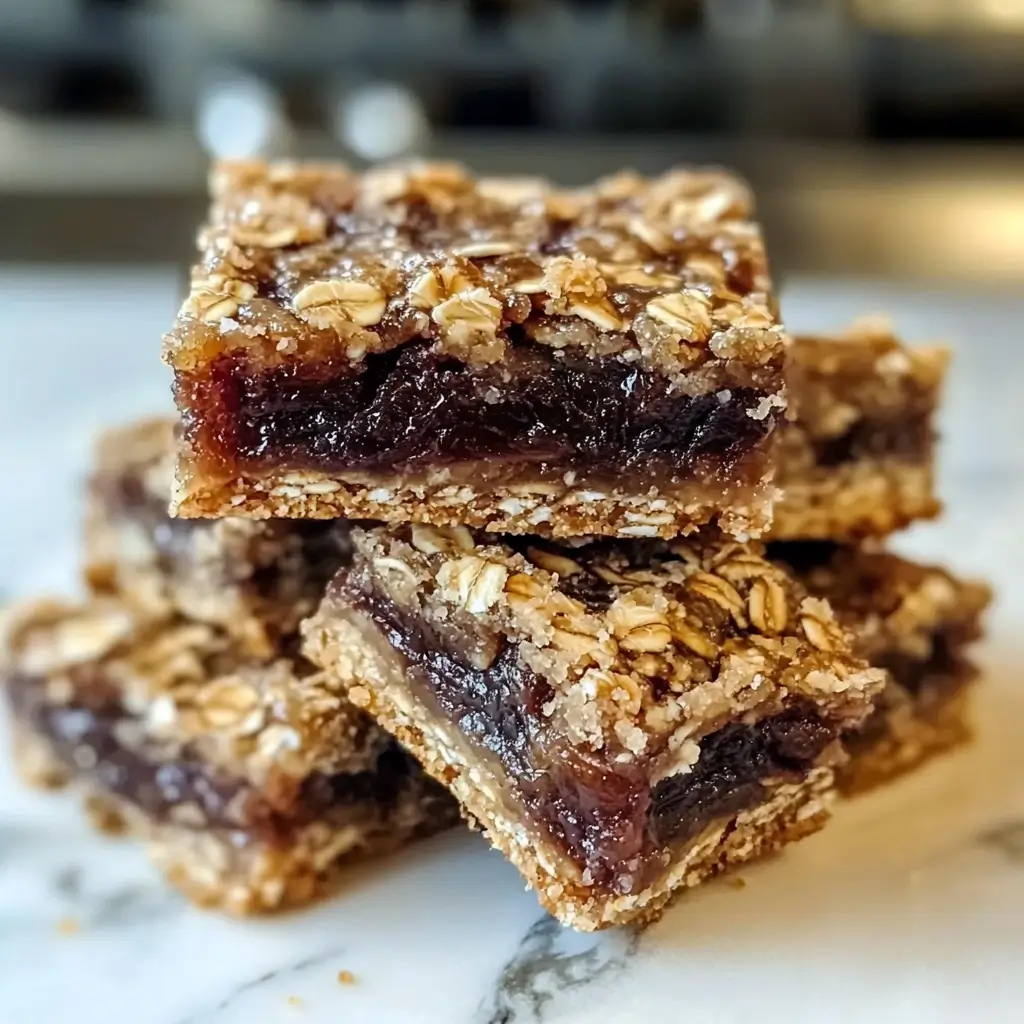

Oatmeal Fig Bars have become a staple in our household, and for good reason. From the moment the warm, inviting aroma of baked oats and sweet figs fills the kitchen, you know you’re in for a treat. These aren’t your overly processed, store-bought fig bars; these are homemade, wholesome, and bursting with flavor. My family, especially my little ones, absolutely adore them. They are the perfect grab-and-go snack for busy mornings, a delightful addition to lunchboxes, or a satisfying afternoon treat paired with a glass of milk or a cup of tea. The chewy oat base, combined with the sweet and slightly jammy fig filling, creates a textural and flavor combination that is simply irresistible. What I love most is that I know exactly what goes into them – no hidden ingredients or artificial flavors, just simple, good-for-you ingredients that come together to create something truly special. If you’re looking for a healthier alternative to sugary snacks that doesn’t compromise on taste, then look no further. These Oatmeal Fig Bars are a guaranteed crowd-pleaser, and I’m thrilled to share this recipe with you so you can experience the joy of baking and enjoying these delightful bars in your own home.
Ingredients
To embark on your Oatmeal Fig Bar baking journey, gather these simple yet wholesome ingredients. Each component plays a crucial role in creating the perfect balance of texture and flavor, resulting in a bar that is both satisfying and nutritious. Using high-quality ingredients will significantly enhance the final product, so opt for the best you can find. Let’s break down each ingredient and understand its importance:
- For the Crust:
- 2 cups Rolled Oats (not instant): Rolled oats are the heart of these bars, providing a chewy texture and a nutty flavor. It’s crucial to use rolled oats, sometimes labeled as old-fashioned oats, rather than instant oats. Instant oats are too finely processed and will result in a mushy, less textured crust. Rolled oats offer a hearty bite and contribute significantly to the overall structure of the bars. They are also a fantastic source of fiber, adding to the nutritional value of this snack. You can use certified gluten-free rolled oats if you need to cater to gluten sensitivities.
- 1 cup All-Purpose Flour: Flour provides structure and binding to the crust, holding everything together. All-purpose flour is readily available and works perfectly in this recipe. If you are looking for a slightly denser texture, you could substitute a portion of the all-purpose flour with whole wheat flour, but be mindful that this will alter the overall texture and may require a slight adjustment in liquid. For a gluten-free option, a gluten-free all-purpose flour blend can be used, ensuring it is designed for baking and contains binders like xanthan gum or guar gum.
- 1 cup Packed Light Brown Sugar: Brown sugar adds sweetness and moisture to the crust, contributing to its soft and chewy texture. The molasses in brown sugar also imparts a subtle caramel-like flavor that complements the oats and figs beautifully. Light brown sugar is preferred for its milder molasses flavor, but dark brown sugar can be used if you prefer a richer, more intense caramel note. Make sure to pack the brown sugar when measuring to ensure the correct amount.
- 1 cup Unsalted Butter, melted: Melted butter is essential for binding the dry ingredients together and creating a tender and flavorful crust. Unsalted butter is recommended as it allows you to control the salt content in the recipe. If you only have salted butter, you can omit the added salt in the recipe, but be mindful of the overall saltiness. Ensure the butter is melted and slightly cooled before adding it to the dry ingredients to prevent cooking the flour. For a dairy-free option, you can substitute with a plant-based butter alternative that is formulated for baking.
- 1 teaspoon Baking Soda: Baking soda is a leavening agent that helps the crust rise slightly and become tender. It reacts with the brown sugar and butter to create a light and airy texture. Make sure your baking soda is fresh for optimal leavening power. Expired baking soda may not be as effective, resulting in denser bars.
- 1/2 teaspoon Salt: Salt enhances the flavors of all the other ingredients and balances the sweetness. It’s a crucial component in baking, even in sweet recipes. Use fine sea salt or table salt. If using kosher salt, you may need slightly more as it is less dense than table salt.
- 1 teaspoon Vanilla Extract: Vanilla extract adds a warm and aromatic flavor that enhances the overall taste of the crust. Use pure vanilla extract for the best flavor. Imitation vanilla extract can be used, but it lacks the depth and complexity of pure vanilla.
- For the Fig Filling:
- 1 pound Dried Figs, stems removed and roughly chopped: Dried figs are the star of the filling, providing a naturally sweet and chewy texture. Mission figs or Calimyrna figs both work well. Mission figs are darker and have a richer, more intense fig flavor, while Calimyrna figs are lighter in color and have a slightly milder, nuttier flavor. Ensure the stems are removed as they can be tough and unpleasant. Roughly chopping the figs helps them soften and spread evenly during cooking. If your figs are very dry, you can soak them in hot water for about 10-15 minutes to soften them before chopping.
- 1/2 cup Water: Water is used to help soften the figs and create a jam-like consistency for the filling. It helps to rehydrate the dried figs and allows them to break down and become spreadable. You can adjust the amount of water slightly depending on the dryness of your figs; if they are very moist, you might need slightly less water.
- 1/4 cup Lemon Juice: Lemon juice adds a bright, tangy flavor that balances the sweetness of the figs and enhances their natural taste. Freshly squeezed lemon juice is always preferred for its brighter flavor, but bottled lemon juice can be used in a pinch. The acidity of the lemon juice also helps to preserve the fig filling and prevent it from being overly sweet.
- 1/4 teaspoon Ground Cinnamon (optional): Cinnamon adds a warm and comforting spice note to the fig filling, complementing the flavors of figs and oats. It’s an optional ingredient, but it enhances the overall flavor profile and adds a touch of warmth. You can also experiment with other spices like nutmeg or cardamom for a different flavor dimension.
Instructions
Now that you have all your ingredients ready, let’s move on to the step-by-step instructions to create these delicious Oatmeal Fig Bars. Follow these instructions carefully for the best results. Baking is a science, and precise measurements and techniques are key to success.
- Preheat Oven and Prepare Pan: Begin by preheating your oven to 350°F (175°C). This ensures the oven is at the correct temperature when you place the bars in, allowing for even baking. While the oven is preheating, prepare a 9×13 inch baking pan. Grease the pan thoroughly with butter or cooking spray to prevent the bars from sticking. Alternatively, you can line the pan with parchment paper, leaving an overhang on the sides. This makes it incredibly easy to lift the bars out of the pan once they are baked and cooled. The parchment paper method is highly recommended for clean removal and easy cleanup.
- Make the Fig Filling: In a medium saucepan, combine the chopped dried figs and water. Place the saucepan over medium heat and bring the mixture to a simmer. Simmer gently for about 10-15 minutes, or until the figs have softened and the mixture has thickened slightly. Stir occasionally to prevent sticking. The figs should become plump and easily mashed. Once softened, remove the saucepan from the heat and stir in the lemon juice and cinnamon (if using). Mash the fig mixture with a potato masher or a fork until it reaches a chunky jam-like consistency. You can also use an immersion blender for a smoother filling, but a slightly chunky texture is often preferred for fig bars. Set the fig filling aside to cool slightly while you prepare the crust.
- Prepare the Crust: In a large mixing bowl, combine the rolled oats, flour, brown sugar, baking soda, and salt. Whisk these dry ingredients together thoroughly to ensure they are evenly distributed. This step is important to prevent pockets of baking soda or salt in the final bars. In a separate bowl or directly in a microwave-safe container, melt the butter. You can melt the butter in the microwave in short intervals, stirring in between, or melt it in a saucepan over low heat. Be careful not to overheat or brown the butter. Once melted, add the vanilla extract to the melted butter and stir to combine. Pour the melted butter mixture into the bowl with the dry ingredients.
- Combine Wet and Dry Ingredients for Crust: Using a spatula or your hands, mix the wet and dry ingredients together until just combined. Do not overmix. The mixture will be crumbly, but it should hold together when pressed. Overmixing can develop the gluten in the flour, resulting in a tougher crust. Mix just until the ingredients are moistened and a crumbly dough forms.
- Assemble the Bars: Press approximately two-thirds of the oat mixture into the prepared baking pan. Use your fingers or the back of a spoon to evenly press the mixture into the bottom of the pan, creating a firm and even base for the bars. Ensure the crust is pressed firmly and reaches all corners of the pan. Spread the cooled fig filling evenly over the oat crust layer. Use a spatula or the back of a spoon to distribute the filling in an even layer, reaching all the edges of the crust. Crumble the remaining one-third of the oat mixture evenly over the fig filling. You can create larger crumbs or smaller crumbs depending on your preference. Gently press the crumb topping down slightly to help it adhere to the fig filling.
- Bake the Bars: Place the baking pan in the preheated oven and bake for 25-30 minutes, or until the bars are golden brown around the edges and the topping is lightly golden. The baking time may vary slightly depending on your oven, so keep an eye on the bars towards the end of the baking time. A toothpick inserted into the center of the bars should come out with moist crumbs, not wet batter.
- Cool and Cut: Once baked, remove the pan from the oven and let the bars cool completely in the pan on a wire rack before cutting. This is crucial as the bars need to set and firm up as they cool. Cutting them while still warm can result in crumbly bars. Cooling can take at least 1-2 hours, or you can cool them completely overnight. Once completely cooled, lift the bars out of the pan using the parchment paper overhang (if used) or carefully cut them into squares or rectangles directly in the pan. For cleaner cuts, use a sharp knife and wipe it clean between cuts if necessary.
Nutrition Facts
Understanding the nutritional profile of your Oatmeal Fig Bars is helpful, especially if you are mindful of your dietary intake. Please remember that these are approximate values and can vary slightly based on the specific brands and ingredients used. These values are based on an estimated serving size of 1 bar, assuming the recipe yields 16 bars from a 9×13 inch pan.
(Approximate Values per Serving – 1 Bar)
- Calories: 220-250 kcal
- Total Fat: 9-11g
- Saturated Fat: 5-6g
- Unsaturated Fat: 3-4g
- Cholesterol: 25-30mg
- Sodium: 100-120mg
- Total Carbohydrates: 35-40g
- Dietary Fiber: 4-5g
- Sugars: 18-20g (naturally occurring from figs and added sugar)
- Protein: 3-4g
Key Nutritional Highlights:
- Good Source of Fiber: Oatmeal and figs are both excellent sources of dietary fiber. Fiber is essential for digestive health, helps regulate blood sugar levels, and promotes feelings of fullness, making these bars a satisfying snack.
- Source of Energy: The carbohydrates from oats and figs provide sustained energy, making these bars a great option for a pre- or post-workout snack or a mid-day energy boost.
- Naturally Sweetened: The sweetness primarily comes from figs and brown sugar. While they do contain sugar, the natural sugars from figs are accompanied by fiber and other nutrients.
- Moderate Fat Content: The fat content primarily comes from butter, contributing to the tender texture and flavor. While saturated fat is present, it’s important to consume these bars as part of a balanced diet.
- Plant-Based Goodness: These bars are primarily plant-based, relying on oats and figs as key ingredients, offering vitamins and minerals naturally present in these foods.
Disclaimer: These nutritional facts are estimates. For precise nutritional information, you can use online nutritional calculators or consult with a registered dietitian, especially if you have specific dietary needs or concerns.
Preparation Time
The beauty of these Oatmeal Fig Bars lies not only in their delicious taste but also in their relatively simple and straightforward preparation. Here’s a breakdown of the time involved in making these delightful treats:
- Prep Time: 20-25 minutes
- This includes gathering ingredients, chopping figs, melting butter, and mixing the crust and filling components. The fig filling simmering time is also included in the prep time as it can be done concurrently with other prep tasks.
- Bake Time: 25-30 minutes
- This is the time the bars spend in the oven baking until golden brown and set.
- Cooling Time: 2-3 hours (or longer, ideally overnight)
- This is crucial for the bars to fully set and firm up before cutting. While technically passive time, it’s an essential part of the process.
- Total Time (excluding cooling): 45-55 minutes
- Total Time (including cooling): Approximately 2 hours 45 minutes to 3 hours 30 minutes (or overnight cooling)
Tips for Efficient Preparation:
- Read the Recipe First: Before you start, read through the entire recipe to understand all the steps and ensure you have all the ingredients and equipment ready.
- Mise en Place: “Mise en place” is a French culinary term meaning “everything in its place.” This involves prepping all your ingredients before you start cooking or baking. Chop the figs, measure out all dry and wet ingredients, and have everything organized and ready to go. This will significantly speed up the process.
- Simultaneous Tasks: While the fig filling is simmering, you can prepare the crust ingredients. This multi-tasking can save you time.
- Parchment Paper Lining: Lining the pan with parchment paper saves time on greasing and makes for much easier cleanup.
While the cooling time might seem lengthy, it’s hands-off time and crucial for achieving the right texture. You can easily prepare these bars in the evening and let them cool overnight, ready to be enjoyed the next day. The active preparation and baking time are relatively short, making these Oatmeal Fig Bars a manageable and rewarding baking project even for busy individuals.
How to Serve
Oatmeal Fig Bars are incredibly versatile and can be enjoyed in a variety of ways, making them perfect for different occasions and preferences. Here are some delightful serving suggestions to elevate your enjoyment of these wholesome treats:
- As a Snack:
- On-the-Go: These bars are ideal for grab-and-go snacking. Wrap them individually and take them with you to work, school, or on outings.
- Mid-Afternoon Treat: Enjoy a bar as a satisfying and healthy mid-afternoon snack to curb cravings and provide a boost of energy.
- Pre- or Post-Workout Fuel: The combination of carbohydrates and fiber makes them a good option for a pre-workout energy source or a post-workout recovery snack.
- As Part of a Meal:
- Breakfast: Pair a fig bar with yogurt and fresh fruit for a balanced and wholesome breakfast.
- Lunchbox Addition: Include a fig bar in lunchboxes for both kids and adults as a healthier alternative to processed snacks.
- Dessert: Serve them as a light and satisfying dessert after dinner, especially for those who prefer less intensely sweet desserts.
- Serving Temperature and Pairings:
- Room Temperature: They are delicious served at room temperature, showcasing their chewy texture and flavors.
- Slightly Warmed: For a cozy treat, gently warm a fig bar in the microwave for a few seconds. This softens the filling and enhances the aroma. Be careful not to overheat them.
- With Beverages:
- Milk: A classic pairing, especially for children.
- Coffee or Tea: The flavors of coffee or tea complement the sweetness of the fig bars beautifully.
- Herbal Tea: Pair with chamomile or peppermint tea for a relaxing evening treat.
- Iced Coffee or Cold Brew: Enjoy with a refreshing iced coffee or cold brew during warmer months.
- Toppings and Accompaniments (Optional):
- Drizzle of Honey or Maple Syrup: For extra sweetness, drizzle a small amount of honey or maple syrup over the bars.
- Sprinkle of Nuts or Seeds: Add a sprinkle of chopped nuts like walnuts or pecans, or seeds like sesame or pumpkin seeds for added texture and flavor.
- Dollop of Yogurt or Whipped Cream: Serve with a dollop of plain yogurt, Greek yogurt, or lightly sweetened whipped cream for a more decadent dessert option.
- Fresh Fruit: Accompany with fresh fruit like berries, sliced apples, or pears to complement the fig flavor and add freshness.
No matter how you choose to serve them, Oatmeal Fig Bars are a delightful and versatile treat that is sure to be enjoyed. Experiment with different pairings and serving suggestions to find your favorite way to savor these wholesome bars.
Additional Tips
To ensure your Oatmeal Fig Bars turn out perfectly every time and to add your personal touch, here are five helpful additional tips to consider:
- Fig Filling Consistency is Key: Pay close attention to the consistency of your fig filling. You want it to be thick and jam-like, but not too dry. If the fig mixture seems too dry while simmering, add a tablespoon or two more water. If it becomes too watery, simmer for a bit longer to allow excess liquid to evaporate. The ideal consistency should be spreadable but not runny, ensuring it stays within the oat layers during baking and doesn’t make the bars soggy. Properly cooked fig filling is crucial for the overall texture and flavor of the bars.
- Don’t Overmix the Crust Dough: When combining the wet and dry ingredients for the oat crust, mix just until everything is moistened and a crumbly dough forms. Overmixing can develop the gluten in the flour, leading to a tougher and less tender crust. A gently mixed dough will result in a more delicate and crumbly texture, which is desirable for these bars. Think of it like making pie crust – you want to handle the dough as little as possible.
- Customize Your Spices and Flavors: Feel free to experiment with different spices and flavorings to customize your Oatmeal Fig Bars to your liking. While cinnamon is a classic choice, consider adding a pinch of nutmeg, cardamom, or even ginger to the fig filling or the crust. A little orange zest in the crust or a splash of almond extract in the fig filling can also add delightful layers of flavor. Don’t be afraid to get creative and explore flavor combinations that appeal to you.
- Storage for Freshness: To maintain the freshness and chewy texture of your Oatmeal Fig Bars, store them properly. Once completely cooled, cut the bars and store them in an airtight container at room temperature for up to 3-4 days. For longer storage, you can store them in the refrigerator for up to a week. Bring them to room temperature before serving for the best texture. For even longer storage, you can freeze them in an airtight container or freezer bags for up to 2-3 months. Thaw them at room temperature before enjoying.
- Variations and Ingredient Swaps: This recipe is quite versatile, and you can make several variations to suit dietary needs or preferences:
- Gluten-Free: Use certified gluten-free rolled oats and a gluten-free all-purpose flour blend. Ensure your baking soda and vanilla extract are also gluten-free if necessary.
- Vegan/Dairy-Free: Substitute the butter with a plant-based butter alternative designed for baking. Ensure it has a similar fat content to butter for the best texture.
- Nut-Free: This recipe is naturally nut-free, but always check the labels of your ingredients to ensure they are processed in a nut-free facility if you have severe nut allergies.
- Add Nuts or Seeds: If you enjoy nuts, you can add chopped walnuts, pecans, almonds, or sunflower seeds to the crust or the topping for added crunch and flavor.
- Different Dried Fruits: While fig filling is classic, you can experiment with other dried fruits like dates, apricots, or a mix of dried fruits for a different flavor profile. Adjust the liquid amount as needed depending on the dryness of the fruit.
By keeping these tips in mind, you’ll be well-equipped to bake perfect Oatmeal Fig Bars that are not only delicious but also tailored to your preferences and needs.
FAQ Section
Here are some frequently asked questions about making Oatmeal Fig Bars, along with detailed answers to help you troubleshoot and bake with confidence:
Q1: My fig filling is too dry/thick. How can I fix it?
A: If your fig filling is too dry or thick, it’s likely that the figs absorbed too much water during simmering, or they were very dry to begin with. To fix this, you can add a tablespoon or two of water to the saucepan and simmer gently for another minute or two, stirring constantly. This will help to rehydrate the figs and loosen the filling. Start with a small amount of water and add more gradually until you reach a spreadable, jam-like consistency. Remember to mash it again after adding water to ensure it’s evenly textured.
Q2: My Oatmeal Fig Bars are crumbly and don’t hold together well. What went wrong?
A: Crumbly bars can be due to a few factors:
* Not enough butter: Ensure you used the correct amount of melted butter as specified in the recipe. Butter is a key binder.
* Overmixing the dough: While you shouldn’t overmix, undermixing can also lead to crumbly bars. Make sure the wet and dry ingredients are just combined until moistened, but not still completely separate dry patches of flour.
* Too much dry ingredients: Double-check your measurements of flour and oats. Too much dry ingredients can make the bars dry and crumbly.
* Cutting while warm: It’s crucial to let the bars cool completely before cutting. Warm bars are more prone to crumbling. Allow ample cooling time for them to set properly.
Q3: Can I use instant oats instead of rolled oats?
A: It’s highly recommended to use rolled oats (old-fashioned oats) for this recipe, not instant oats. Instant oats are much finer and more processed than rolled oats. Using instant oats will likely result in a mushy, less textured crust that may not hold its shape well. Rolled oats provide the necessary chewiness and structure for the bars. If you only have quick-cooking oats (which are slightly finer than rolled oats but not as fine as instant), you can use them in a pinch, but the texture will still be slightly softer than with rolled oats.
Q4: Can I make these bars ahead of time?
A: Yes, Oatmeal Fig Bars are excellent for making ahead of time! In fact, they often taste even better the next day as the flavors meld together. You can bake them a day or two in advance and store them at room temperature in an airtight container. They are also freezer-friendly, making them perfect for meal prepping or baking ahead for events. Simply cool them completely, cut into bars, and freeze in an airtight container or freezer bags for up to 2-3 months. Thaw at room temperature before serving.
Q5: Can I reduce the sugar in this recipe?
A: While you can reduce the sugar to some extent, it’s important to understand its role in the recipe. Brown sugar contributes to both sweetness and moisture, as well as the chewy texture. Reducing it significantly may affect the texture and overall flavor. You could try reducing the brown sugar by about 1/4 cup, but going much lower might result in drier and less sweet bars. The natural sweetness from the figs is already a significant component. If you are looking for a less sweet option, focus on using less brown sugar rather than trying to replace it with sugar substitutes, as substitutes can also alter the texture and baking behavior of the recipe.
Print
Oatmeal Fig Bars Recipe
Ingredients
- For the Crust:
- 2 cups Rolled Oats (not instant): Rolled oats are the heart of these bars, providing a chewy texture and a nutty flavor. It’s crucial to use rolled oats, sometimes labeled as old-fashioned oats, rather than instant oats. Instant oats are too finely processed and will result in a mushy, less textured crust. Rolled oats offer a hearty bite and contribute significantly to the overall structure of the bars. They are also a fantastic source of fiber, adding to the nutritional value of this snack. You can use certified gluten-free rolled oats if you need to cater to gluten sensitivities.
- 1 cup All-Purpose Flour: Flour provides structure and binding to the crust, holding everything together. All-purpose flour is readily available and works perfectly in this recipe. If you are looking for a slightly denser texture, you could substitute a portion of the all-purpose flour with whole wheat flour, but be mindful that this will alter the overall texture and may require a slight adjustment in liquid. For a gluten-free option, a gluten-free all-purpose flour blend can be used, ensuring it is designed for baking and contains binders like xanthan gum or guar gum.
- 1 cup Packed Light Brown Sugar: Brown sugar adds sweetness and moisture to the crust, contributing to its soft and chewy texture. The molasses in brown sugar also imparts a subtle caramel-like flavor that complements the oats and figs beautifully. Light brown sugar is preferred for its milder molasses flavor, but dark brown sugar can be used if you prefer a richer, more intense caramel note. Make sure to pack the brown sugar when measuring to ensure the correct amount.
- 1 cup Unsalted Butter, melted: Melted butter is essential for binding the dry ingredients together and creating a tender and flavorful crust. Unsalted butter is recommended as it allows you to control the salt content in the recipe. If you only have salted butter, you can omit the added salt in the recipe, but be mindful of the overall saltiness. Ensure the butter is melted and slightly cooled before adding it to the dry ingredients to prevent cooking the flour. For a dairy-free option, you can substitute with a plant-based butter alternative that is formulated for baking.
- 1 teaspoon Baking Soda: Baking soda is a leavening agent that helps the crust rise slightly and become tender. It reacts with the brown sugar and butter to create a light and airy texture. Make sure your baking soda is fresh for optimal leavening power. Expired baking soda may not be as effective, resulting in denser bars.
- 1/2 teaspoon Salt: Salt enhances the flavors of all the other ingredients and balances the sweetness. It’s a crucial component in baking, even in sweet recipes. Use fine sea salt or table salt. If using kosher salt, you may need slightly more as it is less dense than table salt.
- 1 teaspoon Vanilla Extract: Vanilla extract adds a warm and aromatic flavor that enhances the overall taste of the crust. Use pure vanilla extract for the best flavor. Imitation vanilla extract can be used, but it lacks the depth and complexity of pure vanilla.
- For the Fig Filling:
- 1 pound Dried Figs, stems removed and roughly chopped: Dried figs are the star of the filling, providing a naturally sweet and chewy texture. Mission figs or Calimyrna figs both work well. Mission figs are darker and have a richer, more intense fig flavor, while Calimyrna figs are lighter in color and have a slightly milder, nuttier flavor. Ensure the stems are removed as they can be tough and unpleasant. Roughly chopping the figs helps them soften and spread evenly during cooking. If your figs are very dry, you can soak them in hot water for about 10–15 minutes to soften them before chopping.
- 1/2 cup Water: Water is used to help soften the figs and create a jam-like consistency for the filling. It helps to rehydrate the dried figs and allows them to break down and become spreadable. You can adjust the amount of water slightly depending on the dryness of your figs; if they are very moist, you might need slightly less water.
- 1/4 cup Lemon Juice: Lemon juice adds a bright, tangy flavor that balances the sweetness of the figs and enhances their natural taste. Freshly squeezed lemon juice is always preferred for its brighter flavor, but bottled lemon juice can be used in a pinch. The acidity of the lemon juice also helps to preserve the fig filling and prevent it from being overly sweet.
- 1/4 teaspoon Ground Cinnamon (optional): Cinnamon adds a warm and comforting spice note to the fig filling, complementing the flavors of figs and oats. It’s an optional ingredient, but it enhances the overall flavor profile and adds a touch of warmth. You can also experiment with other spices like nutmeg or cardamom for a different flavor dimension.
Instructions
- Preheat Oven and Prepare Pan: Begin by preheating your oven to 350°F (175°C). This ensures the oven is at the correct temperature when you place the bars in, allowing for even baking. While the oven is preheating, prepare a 9×13 inch baking pan. Grease the pan thoroughly with butter or cooking spray to prevent the bars from sticking. Alternatively, you can line the pan with parchment paper, leaving an overhang on the sides. This makes it incredibly easy to lift the bars out of the pan once they are baked and cooled. The parchment paper method is highly recommended for clean removal and easy cleanup.
- Make the Fig Filling: In a medium saucepan, combine the chopped dried figs and water. Place the saucepan over medium heat and bring the mixture to a simmer. Simmer gently for about 10-15 minutes, or until the figs have softened and the mixture has thickened slightly. Stir occasionally to prevent sticking. The figs should become plump and easily mashed. Once softened, remove the saucepan from the heat and stir in the lemon juice and cinnamon (if using). Mash the fig mixture with a potato masher or a fork until it reaches a chunky jam-like consistency. You can also use an immersion blender for a smoother filling, but a slightly chunky texture is often preferred for fig bars. Set the fig filling aside to cool slightly while you prepare the crust.
- Prepare the Crust: In a large mixing bowl, combine the rolled oats, flour, brown sugar, baking soda, and salt. Whisk these dry ingredients together thoroughly to ensure they are evenly distributed. This step is important to prevent pockets of baking soda or salt in the final bars. In a separate bowl or directly in a microwave-safe container, melt the butter. You can melt the butter in the microwave in short intervals, stirring in between, or melt it in a saucepan over low heat. Be careful not to overheat or brown the butter. Once melted, add the vanilla extract to the melted butter and stir to combine. Pour the melted butter mixture into the bowl with the dry ingredients.
- Combine Wet and Dry Ingredients for Crust: Using a spatula or your hands, mix the wet and dry ingredients together until just combined. Do not overmix. The mixture will be crumbly, but it should hold together when pressed. Overmixing can develop the gluten in the flour, resulting in a tougher crust. Mix just until the ingredients are moistened and a crumbly dough forms.
- Assemble the Bars: Press approximately two-thirds of the oat mixture into the prepared baking pan. Use your fingers or the back of a spoon to evenly press the mixture into the bottom of the pan, creating a firm and even base for the bars. Ensure the crust is pressed firmly and reaches all corners of the pan. Spread the cooled fig filling evenly over the oat crust layer. Use a spatula or the back of a spoon to distribute the filling in an even layer, reaching all the edges of the crust. Crumble the remaining one-third of the oat mixture evenly over the fig filling. You can create larger crumbs or smaller crumbs depending on your preference. Gently press the crumb topping down slightly to help it adhere to the fig filling.
- Bake the Bars: Place the baking pan in the preheated oven and bake for 25-30 minutes, or until the bars are golden brown around the edges and the topping is lightly golden. The baking time may vary slightly depending on your oven, so keep an eye on the bars towards the end of the baking time. A toothpick inserted into the center of the bars should come out with moist crumbs, not wet batter.
- Cool and Cut: Once baked, remove the pan from the oven and let the bars cool completely in the pan on a wire rack before cutting. This is crucial as the bars need to set and firm up as they cool. Cutting them while still warm can result in crumbly bars. Cooling can take at least 1-2 hours, or you can cool them completely overnight. Once completely cooled, lift the bars out of the pan using the parchment paper overhang (if used) or carefully cut them into squares or rectangles directly in the pan. For cleaner cuts, use a sharp knife and wipe it clean between cuts if necessary.
Nutrition
- Serving Size: one normal portion
- Calories: 220-250
- Sugar: 18-20g
- Sodium: 100-120mg
- Fat: 9-11g
- Saturated Fat: 5-6g
- Unsaturated Fat: 3-4g
- Carbohydrates: 35-40g
- Fiber: 4-5g
- Protein: 3-4g
- Cholesterol: 25-30mg


