


Let me tell you, this No-Bake Banana Split Cake isn’t just a dessert; it’s an experience, a trip down memory lane, and quite frankly, a lifesaver when you need a showstopper dessert without turning on the oven. The first time I made this for a family get-together, I was a little apprehensive. Would it be too sweet? Would the layers hold? My worries vanished the moment I saw the first slice disappear, followed by a chorus of “Mmmms” and “What IS this?!” Even my notoriously picky nephew, who usually turns his nose up at anything with fruit, went back for seconds. It’s become our go-to for summer barbecues, potlucks, and even just a “we deserve a treat” kind of Tuesday. The combination of the buttery graham cracker crust, the tangy-sweet cream cheese layer, the fresh fruit, and the classic banana split toppings is pure, unadulterated joy. It’s cool, creamy, and has all those beloved flavors perfectly balanced. Plus, the “no-bake” aspect? A true gift, especially on a hot day or when oven space is at a premium. It looks incredibly impressive, like you’ve slaved away for hours, but it’s surprisingly simple to assemble.
The Ultimate No-Bake Banana Split Cake: A Crowd-Pleasing Delight
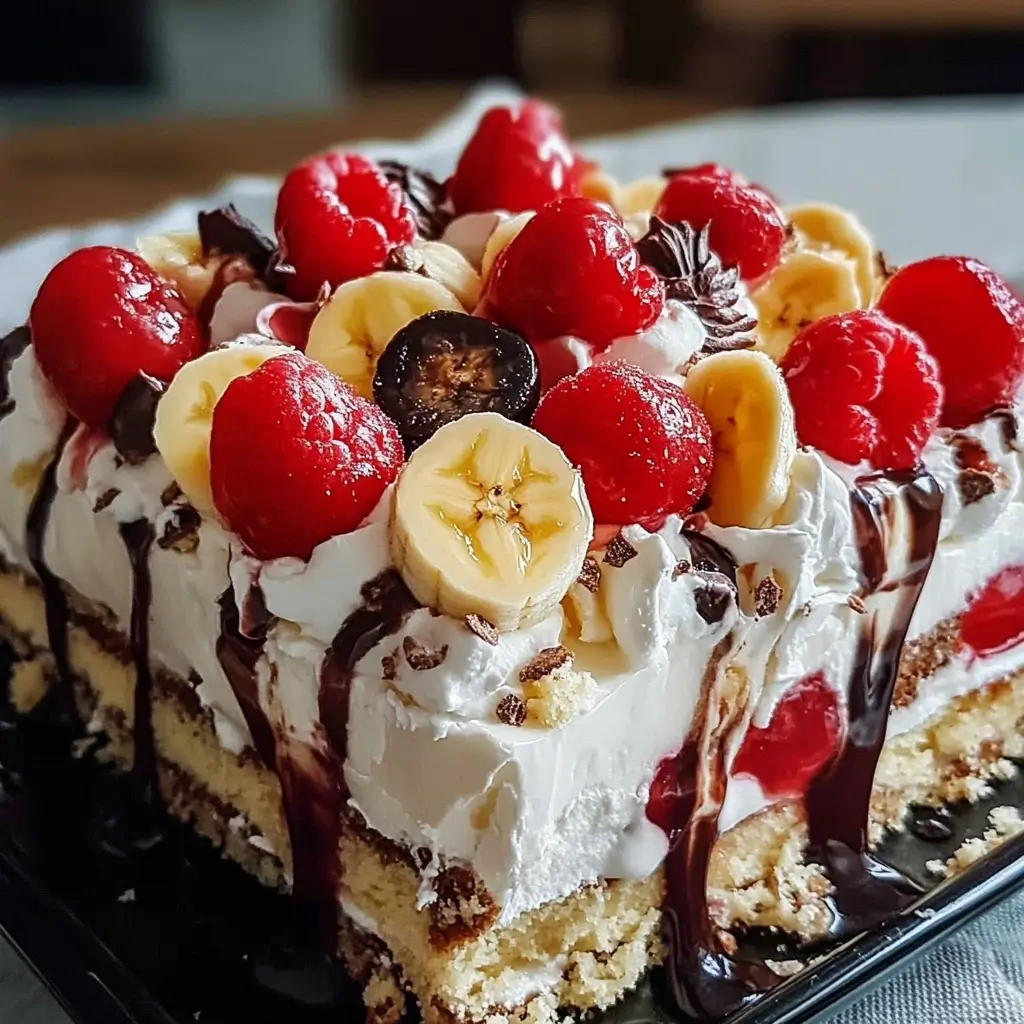
Imagine all the classic, irresistible flavors of a traditional banana split – sweet bananas, juicy pineapple, luscious strawberries, rich chocolate, fluffy whipped cream, and crunchy nuts – all layered into an easy-to-make, even easier-to-devour cake. This No-Bake Banana Split Cake, often fondly referred to as a “Banana Split Lasagna” or “Banana Split Lush,” is a dessert that promises to delight guests of all ages. Its vibrant layers are a feast for the eyes, and its creamy, fruity, and chocolatey profile is a party for your taste buds. Perfect for any occasion, from summer picnics and potlucks to holiday gatherings or simply a weeknight treat, this recipe requires no oven time, making it an ideal choice for warm weather or when you’re short on baking energy. Get ready to receive rave reviews and requests for the recipe!
Why You’ll Adore This No-Bake Banana Split Cake
There are countless reasons why this dessert has become a beloved favorite in so many households, and why it’s destined to become one in yours too.
- Effortlessly Easy: The “no-bake” in its name is the first clue. This recipe is incredibly simple to assemble, requiring no complicated techniques or baking skills. If you can crush crackers, spread cream cheese, and layer ingredients, you can make this cake!
- No Oven Needed: This is a massive plus, especially during hot summer months when the last thing you want to do is heat up your kitchen. It also frees up oven space if you’re preparing a larger meal.
- Crowd-Pleaser Guaranteed: The familiar and beloved flavors of a banana split are universally appealing. Kids love it, adults adore it – it’s a guaranteed hit at any gathering.
- Visually Stunning: The beautiful, distinct layers make this dessert a true showstopper. It looks impressive on any dessert table and is sure to draw oohs and aahs.
- Perfectly Balanced Flavors: The combination of the buttery, slightly salty crust, the tangy and sweet cream cheese layer, the fresh fruit, and the rich toppings creates a harmonious blend of tastes and textures.
- Make-Ahead Marvel: This dessert actually benefits from chilling time, allowing the flavors to meld and the layers to set. You can prepare it a day in advance, making party planning much less stressful.
- Customizable: While the classic combination is fantastic, you can easily tweak the recipe to suit your preferences or what you have on hand. Different crusts, fruits, or toppings can create a new experience every time.
- Nostalgic Charm: For many, the taste of a banana split evokes fond childhood memories. This cake taps into that nostalgia, offering a comforting and joyful eating experience.
Ingredients for Your No-Bake Banana Split Cake Masterpiece
To create this delightful dessert, you’ll need a few simple, readily available ingredients. For the best results, use good quality components.
For the Graham Cracker Crust:
- Graham Cracker Crumbs: 2 cups (from about 14-16 full graham cracker sheets)
- Unsalted Butter: 1/2 cup (1 stick or 113g), melted
- Granulated Sugar: 1/4 cup (50g)
For the Cream Cheese Layer:
- Cream Cheese: 2 packages (8 ounces / 226g each), softened to room temperature
- Powdered Sugar (Confectioners’ Sugar): 1 cup (120g), sifted
- Vanilla Extract: 1 teaspoon
- Frozen Whipped Topping (e.g., Cool Whip): 1 container (8 ounces / 227g), thawed and divided (you’ll use some here and reserve the rest for the top layer)
For the Fruit & Topping Layers:
- Ripe Bananas: 3 to 4 medium, firm but ripe, sliced about 1/4-inch thick
- Crushed Pineapple: 1 can (20 ounces / 567g), very well drained (press out as much liquid as possible)
- Fresh Strawberries: 1 pint (about 16 ounces / 450g), hulled and sliced (or 1 (16-ounce) package frozen sliced strawberries, thawed and well-drained)
- Additional Frozen Whipped Topping: The remainder of the 8-ounce container, plus an optional additional 8-ounce container if you prefer a thicker whipped topping layer.
- Chocolate Syrup: 1/4 to 1/2 cup, for drizzling
- Chopped Nuts: 1/2 cup (e.g., pecans, walnuts, or peanuts), toasted for extra flavor (optional)
- Maraschino Cherries: 10-12, stems removed, halved or left whole, for garnish (pat them dry)
- Rainbow Sprinkles: (Optional, for extra fun!)
Step-by-Step Instructions: Assembling Your Dream Dessert
Follow these simple steps to create your delicious No-Bake Banana Split Cake. The key is patience with draining the fruit and chilling the dessert.
1. Prepare the Graham Cracker Crust:
* In a medium bowl, combine the graham cracker crumbs and granulated sugar.
* Pour the melted butter over the crumb mixture and stir with a fork until all the crumbs are moistened and the mixture resembles wet sand.
* Press the mixture firmly and evenly into the bottom of a 9×13 inch baking dish or pan. You can use the bottom of a glass or measuring cup to help create a compact layer.
* Place the crust in the freezer for at least 15-20 minutes (or refrigerator for 30 minutes) to firm up while you prepare the next layer. This helps prevent the crust from mixing with the cream cheese layer.
2. Whip Up the Cream Cheese Layer:
* In a large bowl, beat the softened cream cheese with an electric mixer (handheld or stand mixer) on medium speed until smooth and creamy, with no lumps.
* Gradually add the sifted powdered sugar and vanilla extract, beating until well combined and fluffy. Scrape down the sides of the bowl as needed.
* Gently fold in 1 cup (about half of an 8-ounce container) of the thawed whipped topping into the cream cheese mixture until just combined. Be careful not to overmix, as this can deflate the whipped topping.
* Spread this cream cheese mixture evenly over the chilled graham cracker crust.
3. Layer the Bananas:
* Slice the bananas (about 1/4-inch thick) and arrange them in a single, even layer over the cream cheese mixture. Try to cover the entire surface. Tip: To prevent browning if you’re not serving it the same day, you can lightly toss the banana slices in a tiny bit of lemon juice, but this is often not necessary if covered quickly by the next layer.
4. Add the Pineapple Perfection:
* Ensure your crushed pineapple is extremely well drained. Press it firmly in a fine-mesh sieve to remove as much juice as possible. Excess liquid can make the dessert soggy.
* Carefully spread the drained crushed pineapple evenly over the banana layer.
5. Spread the Strawberry Sweetness:
* Arrange the sliced fresh strawberries (or thawed and well-drained frozen strawberries) in an even layer over the pineapple.
6. Crown with Whipped Topping:
* Gently spread the remaining thawed whipped topping (from the first container, and the additional container if using) evenly over the strawberry layer, covering the fruit completely and sealing the edges.
7. Garnish Generously (The Fun Part!):
* Drizzle the chocolate syrup artfully over the whipped topping. You can do this in stripes, zigzags, or any pattern you like.
* Sprinkle the chopped toasted nuts evenly over the dessert.
* Decorate with maraschino cherries. You can place them strategically or scatter them.
* Add rainbow sprinkles if desired for an extra pop of color and fun.
8. Chill to Perfection:
* Cover the dish tightly with plastic wrap or a lid.
* Refrigerate for at least 4-6 hours, but preferably overnight (8-12 hours). This chilling time is crucial. It allows the layers to set properly, making it easier to slice, and gives the flavors a chance to meld together beautifully.
Nutrition Facts (Estimated)
- Servings: 12-15 slices
- Calories per serving (approximate): 350-450 calories, depending on the specific ingredients used (e.g., full-fat vs. light cream cheese/whipped topping, amount of nuts and chocolate).
Disclaimer: Nutritional information is an estimate and can vary based on specific brands, ingredient substitutions, and portion sizes. This is provided as a general guideline.
Preparation & Chill Time: Quick to Make, Worth the Wait
Understanding the time commitment helps in planning:
- Preparation Time (Active Work): Approximately 30-40 minutes (includes crushing graham crackers, mixing layers, slicing fruit).
- Crust Chilling Time: 15-20 minutes (freezer) or 30 minutes (refrigerator).
- Final Chilling Time (Crucial): Minimum 4-6 hours, ideally 8-12 hours or overnight.
Total Time (from start to serving, including chilling): Approximately 5 hours to 13 hours.
While the active prep is quick, don’t skimp on the chilling time! It truly makes a difference in the texture and flavor cohesion of this delightful dessert.
How to Serve Your No-Bake Banana Split Cake Like a Pro
Serving this dessert is straightforward, but a few touches can elevate the experience:
- Chill is Key: Serve the cake directly from the refrigerator. It’s best enjoyed cold.
- Clean Slices: For neat slices, dip a sharp knife in hot water and wipe it clean between each cut. This helps to glide through the layers without too much smearing.
- Individual Portions:
- Slice into squares or rectangles and serve on dessert plates.
- For a more “banana split” feel, you can scoop it into bowls, though neat layers are part of its charm when sliced.
- Garnish Just Before Serving (Optional additions):
- While the main garnishes are added before chilling, you can add a tiny dollop of fresh whipped cream on each slice if desired.
- A fresh mint sprig can add a touch of color.
- Perfect Occasions:
- Summer Barbecues & Picnics: Its cool and refreshing nature makes it ideal.
- Potlucks: Easy to transport (keep it in a cooler!) and always a crowd-pleaser.
- Birthdays: A fun and festive alternative to traditional birthday cake, especially for banana split lovers.
- Holidays: A lighter dessert option for Thanksgiving or Christmas, or a festive treat for Easter.
- Weeknight Treat: Simple enough to whip up when a craving strikes!
- Pairings:
- A light cup of coffee or tea complements it well.
- A glass of cold milk is a classic pairing.
Additional Tips for No-Bake Banana Split Cake Perfection
- Drain Pineapple THOROUGHLY: This cannot be stressed enough. Excess pineapple juice is the number one enemy of a firm No-Bake Banana Split Cake. Place the crushed pineapple in a fine-mesh sieve and press down firmly with the back of a spoon or a spatula to squeeze out as much liquid as possible. Let it sit and drain for a bit too. Some people even pat it with paper towels.
- Banana Strategy: Slice bananas just before you’re ready to layer them to minimize browning. If you’re making it far ahead or are particularly concerned, you can very lightly toss the banana slices with a teaspoon or two of lemon juice (or pineapple juice from the can before you drain it well) to prevent discoloration. However, if they are quickly covered by the pineapple layer, browning is usually minimal.
- Toast Your Nuts: If using nuts, toasting them brings out their flavor and adds a wonderful crunch. Spread them on a baking sheet and toast in a 350°F (175°C) oven for 5-7 minutes, or until fragrant. Let them cool completely before chopping and sprinkling.
- Soften Cream Cheese Properly: Ensure your cream cheese is truly at room temperature. This makes it much easier to beat until smooth and prevents lumps in your cream cheese layer. If you’re short on time, you can unwrap the cream cheese, cut it into cubes, and let it sit on the counter for about 30-60 minutes.
- Don’t Rush the Chill: This dessert needs its chill time. It allows the layers to set, the crust to firm up, and the flavors to meld beautifully. Rushing this step can result in a dessert that’s a bit loose and harder to slice neatly. Overnight is truly best.
Frequently Asked Questions (FAQ) About No-Bake Banana Split Cake
Q1: Can I make this No-Bake Banana Split Cake ahead of time?
A: Absolutely! In fact, it’s recommended. This dessert is best made at least 4-6 hours in advance, or even better, the day before you plan to serve it. This allows all the layers to set properly and the flavors to meld together. Cover it tightly with plastic wrap and store it in the refrigerator.
Q2: How long will No-Bake Banana Split Cake last in the refrigerator?
A: Properly covered, it will last for 2-3 days in the refrigerator. Keep in mind that the bananas may start to brown slightly after the first day, even when covered, and the graham cracker crust can soften over time. It’s definitely at its freshest and best within the first 48 hours.
Q3: Can I use different fruits or nuts?
A: Yes, you can customize it!
* Fruits: While banana, pineapple, and strawberry are classic, you could try adding or substituting with other fruits like kiwi, mango, or blueberries. Ensure any fruit used is well-drained if canned or frozen.
* Nuts: Pecans and walnuts are popular choices. Peanuts would also be classic. Almonds or even macadamia nuts could offer a different twist. Always toast them for best flavor. If there are nut allergies, simply omit them.
* Crust: You could experiment with an Oreo cookie crust (omit the sugar in the crust recipe) or a Nilla Wafer crust for a different flavor profile.
Q4: Can I use homemade whipped cream instead of frozen whipped topping (Cool Whip)?
A: Yes, you can, but with a caveat. Homemade whipped cream is delicious but not as stable as store-bought stabilized whipped topping. If using homemade whipped cream, it’s best to stabilize it by adding a bit of unflavored gelatin, powdered sugar (which helps), or a commercial whipped cream stabilizer. For the cream cheese layer, ensure your homemade whipped cream is stiffly beaten. For the top layer, it might not hold its shape as long or as well, especially if the dessert sits out for a bit. Serve it soon after garnishing if using unstabilized homemade whipped cream on top. Generally, for the integrity and longevity of the layers in a “lush” style dessert, stabilized whipped topping works best.
Q5: Can I make this recipe gluten-free?
A: Yes, relatively easily! The main gluten-containing component is the graham cracker crust. You can substitute gluten-free graham crackers to make gluten-free crumbs. Alternatively, you could use a crust made from gluten-free cookies (like gluten-free shortbread or vanilla wafers) or even a nut-based crust (like almond flour mixed with melted butter and a little sugar). Ensure all other ingredients, like chocolate syrup, are certified gluten-free if catering to a strict allergy.
No-Bake Banana Split Cake Recipe
Ingredients
For the Graham Cracker Crust:
- Graham Cracker Crumbs: 2 cups (from about 14-16 full graham cracker sheets)
- Unsalted Butter: 1/2 cup (1 stick or 113g), melted
- Granulated Sugar: 1/4 cup (50g)
For the Cream Cheese Layer:
- Cream Cheese: 2 packages (8 ounces / 226g each), softened to room temperature
- Powdered Sugar (Confectioners’ Sugar): 1 cup (120g), sifted
- Vanilla Extract: 1 teaspoon
- Frozen Whipped Topping (e.g., Cool Whip): 1 container (8 ounces / 227g), thawed and divided (you’ll use some here and reserve the rest for the top layer)
For the Fruit & Topping Layers:
- Ripe Bananas: 3 to 4 medium, firm but ripe, sliced about 1/4-inch thick
- Crushed Pineapple: 1 can (20 ounces / 567g), very well drained (press out as much liquid as possible)
- Fresh Strawberries: 1 pint (about 16 ounces / 450g), hulled and sliced (or 1 (16-ounce) package frozen sliced strawberries, thawed and well-drained)
- Additional Frozen Whipped Topping: The remainder of the 8-ounce container, plus an optional additional 8-ounce container if you prefer a thicker whipped topping layer.
- Chocolate Syrup: 1/4 to 1/2 cup, for drizzling
- Chopped Nuts: 1/2 cup (e.g., pecans, walnuts, or peanuts), toasted for extra flavor (optional)
- Maraschino Cherries: 10-12, stems removed, halved or left whole, for garnish (pat them dry)
- Rainbow Sprinkles: (Optional, for extra fun!)
Instructions
For the Graham Cracker Crust:
- Graham Cracker Crumbs: 2 cups (from about 14-16 full graham cracker sheets)
- Unsalted Butter: 1/2 cup (1 stick or 113g), melted
- Granulated Sugar: 1/4 cup (50g)
For the Cream Cheese Layer:
- Cream Cheese: 2 packages (8 ounces / 226g each), softened to room temperature
- Powdered Sugar (Confectioners’ Sugar): 1 cup (120g), sifted
- Vanilla Extract: 1 teaspoon
- Frozen Whipped Topping (e.g., Cool Whip): 1 container (8 ounces / 227g), thawed and divided (you’ll use some here and reserve the rest for the top layer)
For the Fruit & Topping Layers:
- Ripe Bananas: 3 to 4 medium, firm but ripe, sliced about 1/4-inch thick
- Crushed Pineapple: 1 can (20 ounces / 567g), very well drained (press out as much liquid as possible)
- Fresh Strawberries: 1 pint (about 16 ounces / 450g), hulled and sliced (or 1 (16-ounce) package frozen sliced strawberries, thawed and well-drained)
- Additional Frozen Whipped Topping: The remainder of the 8-ounce container, plus an optional additional 8-ounce container if you prefer a thicker whipped topping layer.
- Chocolate Syrup: 1/4 to 1/2 cup, for drizzling
- Chopped Nuts: 1/2 cup (e.g., pecans, walnuts, or peanuts), toasted for extra flavor (optional)
- Maraschino Cherries: 10-12, stems removed, halved or left whole, for garnish (pat them dry)
- Rainbow Sprinkles: (Optional, for extra fun!)
Nutrition
- Serving Size: One Normal Portion
- Calories: 350-450


