


Of all the traditions our family has embraced for Halloween, from carving pumpkins with mismatched, goofy faces to the annual argument over who gets to be the “scary one” for trick-or-treating, nothing has stuck quite like the making of these Mummy Brownies. The first time I made them, I was just looking for a simple, festive treat to bring to my daughter’s school party. I wasn’t expecting them to become the stuff of legend. But when I pulled that pan of perfectly fudgy, chocolatey brownies, wrapped in their sweet white chocolate “bandages” and staring up with those adorable candy eyes, the reaction was immediate. My kids’ eyes went wide, and my husband, a notorious dessert critic, declared them “the best Halloween thing you’ve ever made.” Now, every October, the request comes: “Are we making the Mummy Brownies this year?” The beauty of this recipe isn’t just in its spooky-cute appearance; it’s in the brownie itself. This isn’t a dry, cakey imposter. This is a rich, intensely chocolatey, and unbelievably fudgy brownie that serves as the perfect decadent base for the fun decorations. The process is a joy, a little messy, and the perfect way to create delicious memories in the heart of the spookiest season.
The Ultimate Mummy Brownies: A Fudgy, Festive, and Frighteningly Good Recipe
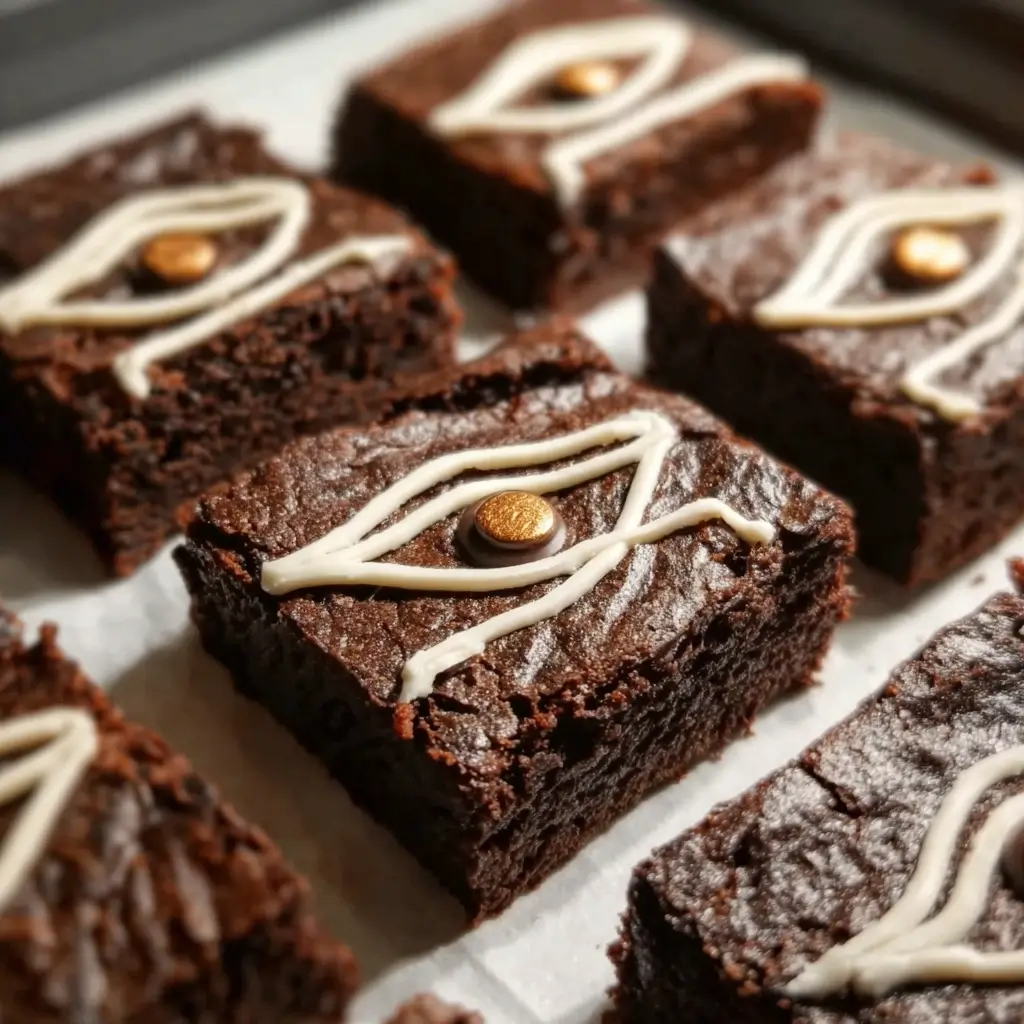
Get ready to create the star of your Halloween dessert table. This recipe walks you through creating an exceptionally fudgy brownie from scratch, followed by a simple yet impressive decoration technique that transforms them into adorable mummies. It’s a treat that tastes even better than it looks, and it looks absolutely spooktacular!
The Heart of the Haunt: A Deep Dive into Your Mummy Brownie Ingredients
Understanding the role of each ingredient is the first step toward baking perfection. A great brownie is a work of chemistry, and using the right components in the right way ensures a fudgy, rich, and decadent result every single time. We’ve broken down not just what you need, but why you need it.
For the Fudgy Brownie Base:
- 1 cup (226g or 2 sticks) Unsalted Butter, melted: Butter is the foundation of flavor and texture. Using unsalted butter gives you complete control over the salt content of your recipe. Melting the butter, rather than creaming it with sugar, is a key secret to a dense, fudgy brownie versus a light, cakey one. The melted fat coats the flour proteins, inhibiting gluten development and ensuring a tender crumb.
- 1 cup (200g) Granulated Sugar: This provides the primary sweetness and contributes to that classic, shiny, crackle-top on a perfect brownie. When whisked vigorously with the eggs, it dissolves and helps create the meringue-like layer that becomes the paper-thin crust.
- ¾ cup (165g) Packed Light Brown Sugar: Brown sugar is a game-changer for moisture. The molasses content in brown sugar not only adds a deeper, more complex caramel note to the flavor profile but also makes the brownies incredibly moist and helps them stay fresh for longer.
- 4 Large Eggs, at room temperature: Eggs are the powerhouse binder and emulsifier in this recipe. They provide structure, richness from the yolks, and a bit of lift. Bringing them to room temperature is crucial; cold eggs can cause the melted butter to re-solidify and seize, resulting in a lumpy batter. Room temperature eggs mix more evenly, creating a more uniform and stable batter.
- 1 tablespoon Pure Vanilla Extract: Don’t skimp on this! Pure vanilla extract isn’t just a background flavor; it beautifully enhances and rounds out the deep notes of the chocolate. It elevates the brownie from simply “sweet” to complex and aromatic.
- 1 cup (85g) High-Quality Unsweetened Cocoa Powder: This is where the intense chocolate flavor comes from. For the richest, darkest, and most fudgy result, we recommend using a Dutch-processed cocoa powder. The “Dutching” process neutralizes its acidity, resulting in a smoother, less bitter flavor and a darker color that’s perfect for a spooky Halloween treat. Sifting it is non-negotiable to prevent lumps.
- 1 cup (120g) All-Purpose Flour: Flour provides the structure that holds everything together. The key here is to use just enough to give the brownies body, but not so much that they become dry or cakey. Be careful not to overmix once the flour is added, as this will develop gluten and lead to a tough, chewy texture instead of a tender, fudgy one.
- 1 teaspoon Kosher Salt: Salt in a sweet recipe might seem counterintuitive, but it is absolutely essential. It acts as a flavor enhancer, balancing the sweetness from the sugars and intensifying the chocolate flavor, making it taste richer and more complex.
- 1 cup (170g) Semi-Sweet Chocolate Chips (Optional, but highly recommended): For the ultimate chocolate lover, adding chocolate chips creates pockets of gooey, melted chocolate throughout the brownie, adding another layer of texture and decadent flavor.
For the Spooky Mummy Decoration:
- 12 ounces (about 2 cups or 340g) High-Quality White Chocolate Chips or Chopped White Chocolate: This will form the mummy’s “bandages.” Quality matters here; cheaper white chocolate or “white baking chips” (which often contain palm oil instead of cocoa butter) can be difficult to melt smoothly and may have a waxy texture. A good quality white chocolate will melt into a fluid, pipeable consistency.
- ½ teaspoon Coconut Oil or Vegetable Oil (Optional): This is a secret weapon for melting white chocolate. Adding a very small amount of a neutral oil helps to thin the chocolate slightly, making it smoother and much easier to drizzle into perfect, thin bandage-like strips.
- 1 set (approx. 48) Candy Eyeballs: These are the key to bringing your mummies to life! They can be found in the baking aisle of most grocery stores, especially around Halloween, or online. Having a mix of sizes can add extra character to your mummies.
Weaving the Magic: Step-by-Step Mummy Brownie Instructions
Follow these detailed instructions carefully to ensure your brownie-making and decorating process is a haunting success. We’ve broken it down into two main parts: baking the perfect brownie base and then transforming them into spooky mummies.
Part 1: Crafting the Perfect Fudgy Brownie Base
This is where the flavor is born. A great decoration needs a delicious canvas.
- Step 1: Preparation is Key: Preheat your oven to 350°F (175°C). Grease a 9×13-inch baking pan with butter or nonstick spray. For flawless removal, create a “parchment paper sling.” Cut two pieces of parchment paper to fit the pan, leaving an overhang on the sides. Place one sheet in the pan, then the other sheet crosswise. This overhang will act as handles, allowing you to lift the entire slab of brownies out of the pan once cooled.
- Step 2: The Chocolate Foundation: In a large, microwave-safe bowl, combine the melted unsalted butter, granulated sugar, and packed light brown sugar. Whisk them together vigorously for about a minute. The mixture should look glossy and slightly grainy. This step helps to dissolve the sugar, which is crucial for achieving that coveted crackly top.
- Step 3: Incorporating the Eggs and Vanilla: Add the room temperature eggs one at a time, whisking well after each addition until fully incorporated. The mixture should become smooth, thick, and paler in color. After the eggs are mixed in, whisk in the pure vanilla extract.
- Step 4: The Dry Ingredients: Place a fine-mesh sieve over your bowl. Add the unsweetened cocoa powder, all-purpose flour, and salt to the sieve. Sift the dry ingredients directly into the wet mixture. This aerates the flour and cocoa and, most importantly, removes any stubborn lumps. Using a rubber spatula, gently fold the dry ingredients into the wet until just combined. “Folding” means scraping around the side of the bowl and then across the bottom, turning the batter over on itself. Stop mixing as soon as you no longer see streaks of flour. Overmixing is the enemy of fudgy brownies! If using, gently fold in the semi-sweet chocolate chips.
- Step 5: Baking to Perfection: Pour the thick, glossy batter into your prepared 9×13-inch pan and use the spatula to spread it into an even layer, ensuring it reaches all the corners. Bake on the center rack of your preheated oven for 28-33 minutes. The signs of a perfectly baked brownie are: the edges will look set and be slightly pulling away from the sides of the pan, and the center will look set but still be soft. The ultimate test is the toothpick test: insert a toothpick into the center. It should come out with a few moist, fudgy crumbs attached. If it comes out clean, the brownies are overbaked. If it comes out with wet batter, they need a few more minutes.
- Step 6: The Crucial Cooling Period: This may be the hardest step, but it is non-negotiable for fudgy brownies and clean cuts. Remove the pan from the oven and place it on a wire cooling rack. Let the brownies cool completely in the pan, for at least 2 hours, or even longer. Rushing this step will result in a gooey mess when you try to cut them. For extra firm brownies that are even easier to decorate, you can chill them in the refrigerator for 30-60 minutes after they have cooled to room temperature.
Part 2: Bringing Your Mummies to Life – The Decoration Process
Now for the fun part! Let’s turn your delicious brownies into a spooky masterpiece.
- Step 7: Cutting the Brownies: Once the brownies are completely cool, use the parchment paper sling to lift the entire slab out of the pan and onto a cutting board. Using a large, sharp knife, cut the brownies into 16 rectangles (a 4×4 grid). For extra-clean cuts, wipe the knife clean with a damp paper towel between each slice.
- Step 8: Applying the Eyes: Arrange the brownie rectangles on a baking sheet or platter, leaving a little space between each one. Take your candy eyeballs and “glue” them onto each brownie using a tiny dab of leftover brownie batter, melted chocolate, or frosting. Place two eyes on each brownie, sometimes close together, sometimes far apart, to give each mummy its own unique personality. Placing the eyes before the bandages makes them look like they are peeking out.
- Step 9: Preparing the “Bandages”: Place the high-quality white chocolate chips in a microwave-safe bowl. If using, add the ½ teaspoon of coconut or vegetable oil. Microwave in 20-second intervals, stirring well after each interval, until the chocolate is smooth and completely melted. Be careful not to overheat it, as white chocolate can burn or seize easily. Alternatively, you can melt the chocolate in a heatproof bowl set over a saucepan of simmering water (a double boiler).
- Step 10: Wrapping Your Mummies: Transfer the melted white chocolate into a piping bag fitted with a small round tip, or into a simple Ziploc-style sandwich bag. If using a Ziploc bag, snip a tiny corner off. Now, working quickly while the chocolate is fluid, drizzle the white chocolate back and forth over each brownie in a random, overlapping pattern to create the look of mummy bandages. Be sure to leave the area around the eyes somewhat open so they can peek through. Let the white chocolate set completely at room temperature (about 30 minutes) or speed up the process by placing them in the refrigerator for 10-15 minutes.
Nutrition Facts (An Educated Estimate)
Please note that these values are an approximation and can vary based on the specific brands of ingredients used.
- Servings: 16 Brownies
- Calories per serving: Approximately 310-340 kcal
Ghoulishly Good Timing: Preparation & Total Time
Planning is everything when it comes to holiday baking. Here’s a breakdown of how long your mummy-making adventure will take.
- Preparation Time: 20 minutes (for mixing the batter and preparing the pan)
- Bake Time: 28-33 minutes
- Cooling Time: 2 hours (essential and cannot be skipped!)
- Decoration Time: 20-30 minutes
- Total Time: Approximately 3 hours, 20 minutes (most of which is hands-off cooling time)
How to Serve Your Spooktacular Mummy Brownies
Presentation can elevate your spooky treats from simple dessert to a centerpiece. Here are some fun and festive ways to serve your Mummy Brownies:
- The Classic Halloween Party Platter: Arrange the Mummy Brownies on a black or orange platter. For an extra spooky effect, scatter some plastic spiders or candy corn around them. This is a simple, effective way to make them the star of the dessert table.
- A “Graveyard” Dirt Cup: Crumble a Mummy Brownie and layer it in a clear cup with chocolate pudding and crushed Oreo “dirt.” Have the candy eyes peeking out from the top layer for a fun, interactive dessert.
- A La Mode with a Ghoulish Twist: Serve a slightly warmed Mummy Brownie with a scoop of vanilla ice cream. Drizzle the plate with a “blood-red” raspberry or strawberry coulis for a delicious and gruesome-looking pairing.
- Packaged as Party Favors: Wrap individual brownies in clear cellophane bags and tie them with black and orange ribbon. They make perfect take-home treats for guests at a Halloween party or classroom celebration.
- The Centerpiece of a Dessert Charcuterie Board: Create a Halloween-themed dessert board with your Mummy Brownies as the main attraction. Surround them with other festive goodies like candy corn, pumpkin-shaped cookies, orange and black M&Ms, and caramel apples.
Pro-Tips for Perfect Mummification (5 Essential Tips)
Elevate your brownie game from good to ghoulishly great with these expert tips.
- Embrace the Parchment Paper Sling: We mentioned it in the instructions, but it bears repeating. This simple trick is a game-changer. It guarantees that you can lift your entire batch of brownies out of the pan without a single one breaking, ensuring perfect squares for decorating.
- Don’t Overbake! The Secret to Fudginess: The line between a fudgy brownie and a dry, cakey one is very thin. Trust the toothpick test when it shows moist crumbs, not a clean stick. The brownies will continue to cook from residual heat as they cool in the pan, so pulling them out at the right moment is critical for that dense, gooey texture.
- Chill Out for Clean Cuts and Easy Decorating: Patience is a virtue, especially in brownie baking. A completely cooled—or even slightly chilled—brownie is structurally sound. It will cut cleanly without crumbling and provide a firm, stable base for your white chocolate bandages, preventing them from melting into the surface.
- Master the Drizzle Technique: For perfect bandages, the consistency of your melted white chocolate is key. If it’s too thick, it will come out in clumps. If it’s too thin, it will run everywhere. The optional ½ teaspoon of coconut oil is your best friend here. For the application, a Ziploc bag with a tiny corner snipped off gives you fantastic control without needing special equipment.
- Get Creative with Your Mummies’ Personalities: Don’t feel like every mummy has to look the same! Use different sizes of candy eyeballs. Place the eyes asymmetrically. Make some bandages thick and some thin. Let some brownies have one eye peeking out. This is a fun step for kids to help with, as imperfection adds to the charm.
Mummy Brownie Mysteries Unwrapped: FAQ Section
Here are answers to some of the most common questions about making these frightfully fun treats.
1. Can I use a boxed brownie mix instead of making them from scratch?
Absolutely! If you’re short on time, a high-quality boxed brownie mix is a great shortcut. To elevate a boxed mix, consider these tips: use melted butter instead of oil, use milk or coffee instead of water, and add an extra egg yolk for richness. Follow the box instructions for baking, then proceed with our cooling and decorating steps.
2. My white chocolate seized up and became a clumpy mess! What went wrong?
This is a common issue! White chocolate is very sensitive. The most likely culprit is moisture or overheating. Even a tiny drop of water can cause the chocolate to “seize” and become grainy. Make sure your bowl and utensils are bone dry. Also, microwave it in short, 20-second bursts and stir in between. If it does seize, you can sometimes save it by vigorously stirring in a teaspoon of boiling water or more melted coconut oil, but prevention is the best course.
3. How do I store leftover Mummy Brownies, and how long do they last?
Leftover Mummy Brownies can be stored in an airtight container at room temperature for up to 4 days. The brown sugar in the recipe helps keep them nice and moist. You can also refrigerate them, which will make them even fudgier, but it’s best to bring them to room temperature before serving for the best flavor and texture. For longer storage, they freeze beautifully for up to 3 months.
4. Can I make these Mummy Brownies gluten-free?
Yes, you can. The best way to adapt this recipe is to use a high-quality, 1-to-1 gluten-free all-purpose flour blend that contains xanthan gum. Substitute it in the same amount as the regular all-purpose flour. The texture will be slightly different but still deliciously fudgy and decadent.
5. My kids want to help make these. What are the best steps for them to do?
This is a perfect recipe for kids! They can help with all the safe steps. Let them:
- Whisk the sugars and eggs together.
- Help sift and fold in the dry ingredients (with guidance).
- Carefully place the candy eyeballs on the cut brownies.
- The best part: Drizzling the white chocolate “bandages” (with adult supervision, especially if the chocolate is still warm). It’s a fun, messy step where precision isn’t required
Mummy Brownies Recipe
Ingredients
For the Fudgy Brownie Base:
- 1 cup (226g or 2 sticks) Unsalted Butter, melted: Butter is the foundation of flavor and texture. Using unsalted butter gives you complete control over the salt content of your recipe. Melting the butter, rather than creaming it with sugar, is a key secret to a dense, fudgy brownie versus a light, cakey one. The melted fat coats the flour proteins, inhibiting gluten development and ensuring a tender crumb.
- 1 cup (200g) Granulated Sugar: This provides the primary sweetness and contributes to that classic, shiny, crackle-top on a perfect brownie. When whisked vigorously with the eggs, it dissolves and helps create the meringue-like layer that becomes the paper-thin crust.
- ¾ cup (165g) Packed Light Brown Sugar: Brown sugar is a game-changer for moisture. The molasses content in brown sugar not only adds a deeper, more complex caramel note to the flavor profile but also makes the brownies incredibly moist and helps them stay fresh for longer.
- 4 Large Eggs, at room temperature: Eggs are the powerhouse binder and emulsifier in this recipe. They provide structure, richness from the yolks, and a bit of lift. Bringing them to room temperature is crucial; cold eggs can cause the melted butter to re-solidify and seize, resulting in a lumpy batter. Room temperature eggs mix more evenly, creating a more uniform and stable batter.
- 1 tablespoon Pure Vanilla Extract: Don’t skimp on this! Pure vanilla extract isn’t just a background flavor; it beautifully enhances and rounds out the deep notes of the chocolate. It elevates the brownie from simply “sweet” to complex and aromatic.
- 1 cup (85g) High-Quality Unsweetened Cocoa Powder: This is where the intense chocolate flavor comes from. For the richest, darkest, and most fudgy result, we recommend using a Dutch-processed cocoa powder. The “Dutching” process neutralizes its acidity, resulting in a smoother, less bitter flavor and a darker color that’s perfect for a spooky Halloween treat. Sifting it is non-negotiable to prevent lumps.
- 1 cup (120g) All-Purpose Flour: Flour provides the structure that holds everything together. The key here is to use just enough to give the brownies body, but not so much that they become dry or cakey. Be careful not to overmix once the flour is added, as this will develop gluten and lead to a tough, chewy texture instead of a tender, fudgy one.
- 1 teaspoon Kosher Salt: Salt in a sweet recipe might seem counterintuitive, but it is absolutely essential. It acts as a flavor enhancer, balancing the sweetness from the sugars and intensifying the chocolate flavor, making it taste richer and more complex.
- 1 cup (170g) Semi-Sweet Chocolate Chips (Optional, but highly recommended): For the ultimate chocolate lover, adding chocolate chips creates pockets of gooey, melted chocolate throughout the brownie, adding another layer of texture and decadent flavor.
For the Spooky Mummy Decoration:
- 12 ounces (about 2 cups or 340g) High-Quality White Chocolate Chips or Chopped White Chocolate: This will form the mummy’s “bandages.” Quality matters here; cheaper white chocolate or “white baking chips” (which often contain palm oil instead of cocoa butter) can be difficult to melt smoothly and may have a waxy texture. A good quality white chocolate will melt into a fluid, pipeable consistency.
- ½ teaspoon Coconut Oil or Vegetable Oil (Optional): This is a secret weapon for melting white chocolate. Adding a very small amount of a neutral oil helps to thin the chocolate slightly, making it smoother and much easier to drizzle into perfect, thin bandage-like strips.
- 1 set (approx. 48) Candy Eyeballs: These are the key to bringing your mummies to life! They can be found in the baking aisle of most grocery stores, especially around Halloween, or online. Having a mix of sizes can add extra character to your mummies.
Instructions
Part 1: Crafting the Perfect Fudgy Brownie Base
This is where the flavor is born. A great decoration needs a delicious canvas.
- Step 1: Preparation is Key: Preheat your oven to 350°F (175°C). Grease a 9×13-inch baking pan with butter or nonstick spray. For flawless removal, create a “parchment paper sling.” Cut two pieces of parchment paper to fit the pan, leaving an overhang on the sides. Place one sheet in the pan, then the other sheet crosswise. This overhang will act as handles, allowing you to lift the entire slab of brownies out of the pan once cooled.
- Step 2: The Chocolate Foundation: In a large, microwave-safe bowl, combine the melted unsalted butter, granulated sugar, and packed light brown sugar. Whisk them together vigorously for about a minute. The mixture should look glossy and slightly grainy. This step helps to dissolve the sugar, which is crucial for achieving that coveted crackly top.
- Step 3: Incorporating the Eggs and Vanilla: Add the room temperature eggs one at a time, whisking well after each addition until fully incorporated. The mixture should become smooth, thick, and paler in color. After the eggs are mixed in, whisk in the pure vanilla extract.
- Step 4: The Dry Ingredients: Place a fine-mesh sieve over your bowl. Add the unsweetened cocoa powder, all-purpose flour, and salt to the sieve. Sift the dry ingredients directly into the wet mixture. This aerates the flour and cocoa and, most importantly, removes any stubborn lumps. Using a rubber spatula, gently fold the dry ingredients into the wet until just combined. “Folding” means scraping around the side of the bowl and then across the bottom, turning the batter over on itself. Stop mixing as soon as you no longer see streaks of flour. Overmixing is the enemy of fudgy brownies! If using, gently fold in the semi-sweet chocolate chips.
- Step 5: Baking to Perfection: Pour the thick, glossy batter into your prepared 9×13-inch pan and use the spatula to spread it into an even layer, ensuring it reaches all the corners. Bake on the center rack of your preheated oven for 28-33 minutes. The signs of a perfectly baked brownie are: the edges will look set and be slightly pulling away from the sides of the pan, and the center will look set but still be soft. The ultimate test is the toothpick test: insert a toothpick into the center. It should come out with a few moist, fudgy crumbs attached. If it comes out clean, the brownies are overbaked. If it comes out with wet batter, they need a few more minutes.
- Step 6: The Crucial Cooling Period: This may be the hardest step, but it is non-negotiable for fudgy brownies and clean cuts. Remove the pan from the oven and place it on a wire cooling rack. Let the brownies cool completely in the pan, for at least 2 hours, or even longer. Rushing this step will result in a gooey mess when you try to cut them. For extra firm brownies that are even easier to decorate, you can chill them in the refrigerator for 30-60 minutes after they have cooled to room temperature.
Part 2: Bringing Your Mummies to Life – The Decoration Process
Now for the fun part! Let’s turn your delicious brownies into a spooky masterpiece.
- Step 7: Cutting the Brownies: Once the brownies are completely cool, use the parchment paper sling to lift the entire slab out of the pan and onto a cutting board. Using a large, sharp knife, cut the brownies into 16 rectangles (a 4×4 grid). For extra-clean cuts, wipe the knife clean with a damp paper towel between each slice.
- Step 8: Applying the Eyes: Arrange the brownie rectangles on a baking sheet or platter, leaving a little space between each one. Take your candy eyeballs and “glue” them onto each brownie using a tiny dab of leftover brownie batter, melted chocolate, or frosting. Place two eyes on each brownie, sometimes close together, sometimes far apart, to give each mummy its own unique personality. Placing the eyes before the bandages makes them look like they are peeking out.
- Step 9: Preparing the “Bandages”: Place the high-quality white chocolate chips in a microwave-safe bowl. If using, add the ½ teaspoon of coconut or vegetable oil. Microwave in 20-second intervals, stirring well after each interval, until the chocolate is smooth and completely melted. Be careful not to overheat it, as white chocolate can burn or seize easily. Alternatively, you can melt the chocolate in a heatproof bowl set over a saucepan of simmering water (a double boiler).
- Step 10: Wrapping Your Mummies: Transfer the melted white chocolate into a piping bag fitted with a small round tip, or into a simple Ziploc-style sandwich bag. If using a Ziploc bag, snip a tiny corner off. Now, working quickly while the chocolate is fluid, drizzle the white chocolate back and forth over each brownie in a random, overlapping pattern to create the look of mummy bandages. Be sure to leave the area around the eyes somewhat open so they can peek through. Let the white chocolate set completely at room temperature (about 30 minutes) or speed up the process by placing them in the refrigerator for 10-15 minutes.
Nutrition
- Serving Size: One Normal Portion
- Calories: 310-340 kcal


