


Honestly, finding a recipe that satisfies everyone in my household on a busy weeknight can feel like searching for treasure without a map. Between picky eaters, varying schedules, and the sheer exhaustion that often sets in by dinnertime, simplicity and flavor are paramount. That’s precisely why this Mexican Beef and Rice Skillet recipe has become an absolute rockstar in our meal rotation. The first time I made it, the aroma alone had my kids wandering into the kitchen asking, “What smells SO good?” Seeing them devour bowls full of savory ground beef, fluffy rice, vibrant veggies, and melty cheese – without a single complaint – was a major win. My husband, who appreciates a hearty meal after a long day, declared it a “keeper” immediately. It’s not just the incredible taste, packed with those comforting Mexican-inspired spices we all love, but the sheer ease of it all. Everything cooks together in one pan, meaning minimal cleanup (a parent’s dream!) and maximum flavor infusion. It’s become our go-to for a satisfying, relatively quick, and consistently delicious dinner that feels both comforting and exciting. This isn’t just food; it’s a weeknight problem-solver that brings smiles to the table every single time.
A Family Favorite: Why You’ll Love This Mexican Beef and Rice Skillet
Before we dive into the nuts and bolts of creating this culinary masterpiece in your own kitchen, let’s talk about why this specific Mexican Beef and Rice Skillet recipe stands out from the crowd. It’s more than just combining ingredients; it’s about creating an experience – one of ease, comfort, and deliciousness that resonates with home cooks everywhere.
- One-Pan Wonder: Let’s be honest, the fewer dishes to wash, the better. This entire meal comes together in a single skillet, typically an oven-safe one if you like that extra-melty baked cheese finish, but perfectly achievable on the stovetop alone. From browning the beef to simmering the rice, everything happens in one vessel. This not only saves precious time on cleanup but also allows the flavors to meld together beautifully. Every grain of rice absorbs the savory beef juices, the tangy tomato base, and the warmth of the spices. It’s efficiency and flavor working in perfect harmony.
- Weeknight Warrior: Got 45 minutes? Then you’ve got time for this incredible meal. It’s designed for those evenings when time is tight, but you still crave something wholesome and satisfying. The preparation is straightforward – some chopping, some browning, some stirring – and much of the cook time is hands-off simmering. It hits that sweet spot between quick convenience and home-cooked goodness.
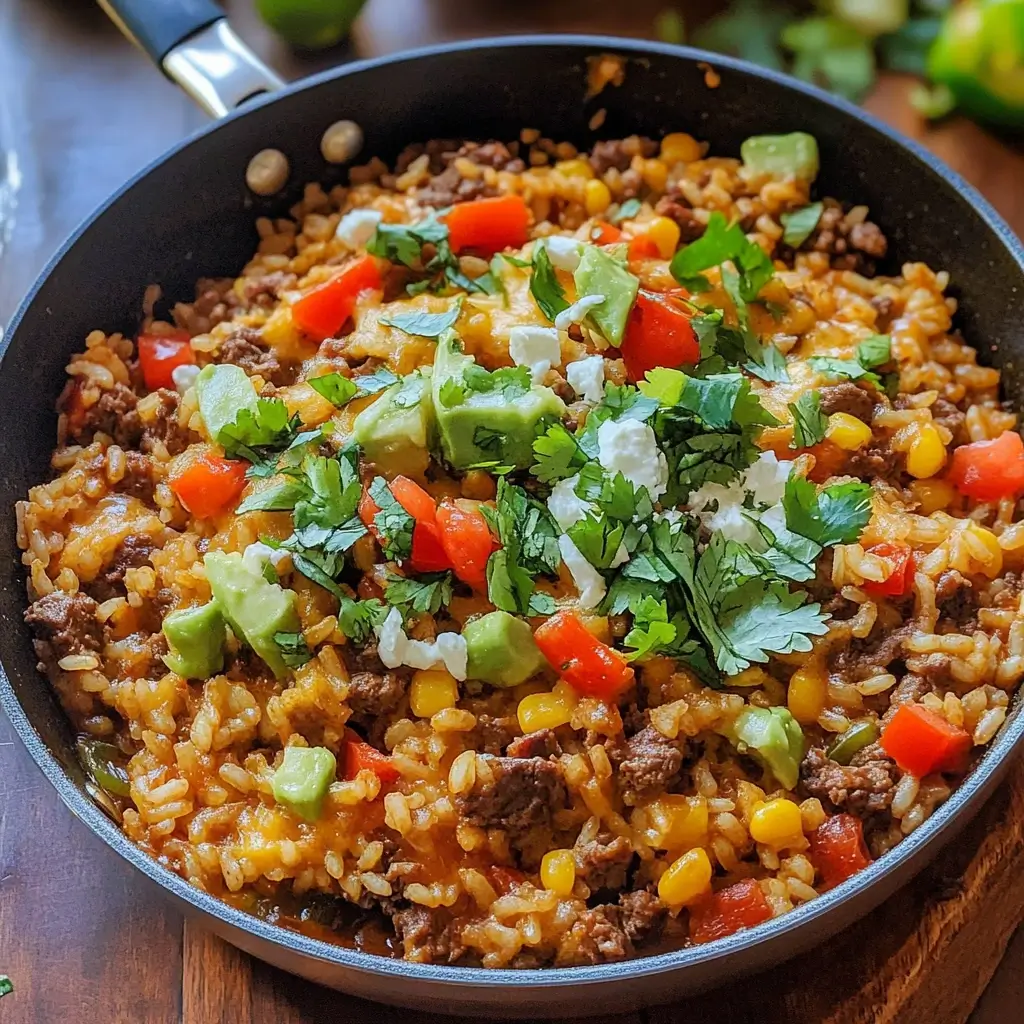
- Flavor Explosion: This dish is anything but bland. It boasts a robust flavor profile inspired by classic Mexican cuisine. Savory ground beef forms the hearty base, complemented by aromatic onions and garlic. A carefully selected blend of spices – chili powder, cumin, oregano – provides warmth and depth without necessarily being overly spicy (though you can easily adjust the heat!). The tanginess of diced tomatoes and the subtle sweetness of corn balance the richness, while black beans add earthy notes and extra texture. Finally, the blanket of melted cheese brings it all together with creamy, savory indulgence.
- Customizable Canvas: Think of this recipe as a fantastic starting point. It’s incredibly adaptable to your preferences and what you have on hand. Don’t like black beans? Try pinto beans or kidney beans. Want more veggies? Stir in diced zucchini, chopped spinach, or extra bell peppers. Need to use up leftover chicken or turkey? Substitute it for the beef. You can adjust the spice level, swap the cheese, or add different toppings to make it uniquely yours. This flexibility makes it a reliable recipe you can return to again and again, never getting bored.
- Budget-Friendly: Utilizing common pantry staples like rice, canned beans, tomatoes, and spices, along with affordable ground beef, makes this a relatively economical meal. It stretches a pound of ground beef into a hearty dish that can easily feed a family, providing great value without sacrificing flavor or satisfaction.
- Crowd-Pleaser: Whether you’re feeding picky kids or discerning adults, this skillet meal generally hits the mark. The combination of familiar flavors – seasoned beef, rice, cheese – is comforting and widely appealing. It’s hearty enough for big appetites but balanced enough for everyone to enjoy. It’s the kind of meal that disappears quickly and often prompts requests for seconds.
This Mexican Beef and Rice Skillet isn’t just dinner; it’s a dependable, delicious solution for busy lives, offering maximum flavor and satisfaction with minimal fuss.
Ingredients You’ll Need
Gathering your ingredients before you start cooking, a practice known as mise en place, makes the entire process smoother and more enjoyable. Here’s what you’ll need to create this flavorful skillet meal, designed to serve approximately 4-6 people:
- 1 tablespoon Olive Oil or Avocado Oil: For sautéing the vegetables and browning the beef. Use a neutral-flavored oil with a suitable smoke point.
- 1 pound Lean Ground Beef (85/15 or 90/10 recommended): Using leaner beef means less excess fat to drain off. You can substitute ground turkey, chicken, or even plant-based crumbles for variation (adjust cooking fat as needed).
- 1 medium Yellow Onion (about 1 cup chopped): Provides a foundational aromatic sweetness. White onion works too.
- 1 medium Bell Pepper (any color, about 1 cup chopped): Green adds a slightly grassy note, while red, yellow, or orange peppers lend sweetness and vibrant color. Use a mix if you like!
- 2-3 cloves Garlic (minced, about 1 tablespoon): Essential for aromatic depth. Adjust amount based on your love for garlic. Fresh is best, but garlic powder (about 1 teaspoon) can substitute in a pinch.
- 1 ½ cups Long-Grain White Rice (uncooked): This type of rice holds its shape well and absorbs the cooking liquid beautifully. Do not use instant rice, as the liquid ratios and cooking times will be incorrect. Rinse the rice briefly under cold water before using to remove excess starch, which helps prevent gumminess.
- 1 tablespoon Chili Powder: Provides the characteristic warm, slightly smoky, and mildly spicy flavor. Choose a blend you enjoy.
- 2 teaspoons Ground Cumin: Offers earthy, warm notes crucial to Mexican-inspired dishes.
- 1 teaspoon Dried Oregano (preferably Mexican oregano): Adds a pungent, slightly citrusy, and earthy flavor. Mexican oregano has a different flavor profile than Mediterranean oregano, but either will work.
- ½ teaspoon Garlic Powder: Enhances the garlic flavor already present.
- ½ teaspoon Onion Powder: Boosts the savory onion notes.
- ½ teaspoon Smoked Paprika (optional but recommended): Adds a lovely layer of smokiness.
- ¼ – ½ teaspoon Red Pepper Flakes (optional): For adding adjustable heat. Start with less and add more if desired.
- 1 teaspoon Salt (or to taste): Essential for bringing out all the flavors. Start with this amount and adjust later.
- ½ teaspoon Black Pepper (or to taste): For a touch of pungent spice.
- 1 (15-ounce) can Diced Tomatoes (undrained): Petite diced or regular diced work well. Fire-roasted diced tomatoes add an extra layer of smoky flavor. Do not drain the juice; it’s part of the cooking liquid.
- 1 (15-ounce) can Black Beans (rinsed and drained): Adds protein, fiber, and classic Southwestern flavor. Rinsing removes excess sodium and the sometimes metallic taste from the canning liquid. Pinto beans or kidney beans are good substitutes.
- 1 cup Frozen or Canned Corn (drained if canned): Adds pops of sweetness and texture. No need to thaw frozen corn before adding.
- 2 ½ cups Beef Broth (low-sodium recommended): Provides the primary cooking liquid for the rice and adds rich flavor. Using low-sodium allows you to control the saltiness better. Chicken or vegetable broth can be substituted.
- 2 tablespoons Tomato Paste: Adds concentrated tomato flavor and depth, helping to create a richer sauce base.
- 1 ½ cups Shredded Cheese (Mexican blend, Cheddar, Monterey Jack, or a mix): Melts beautifully over the top. Use more or less depending on your preference. Shredding your own cheese from a block often results in better melting than pre-shredded varieties (which contain anti-caking agents).
- Optional Garnishes: Fresh cilantro (chopped), green onions (sliced), sour cream or Greek yogurt, avocado slices or guacamole, salsa or pico de gallo, lime wedges, crushed tortilla chips, pickled jalapeños.
Having these ingredients measured and prepped will set you up for success!
Step-by-Step Instructions
Follow these instructions carefully for a perfectly cooked and incredibly flavorful Mexican Beef and Rice Skillet. Using a large, deep skillet (at least 12 inches, preferably oven-safe if you want to melt the cheese under the broiler) is recommended.
- Prep Your Aromatics and Veggies: If you haven’t already, finely chop the yellow onion and the bell pepper. Mince the garlic cloves. Set them aside. Rinse and drain the can of black beans thoroughly. If using canned corn, drain it. Rinse the uncooked long-grain white rice under cold running water for about 30 seconds, then drain well.
- Brown the Ground Beef: Heat the olive oil or avocado oil in your large skillet over medium-high heat. Once shimmering, add the ground beef. Break it apart with a spoon and cook, stirring occasionally, until it’s fully browned and no pink remains (about 5-7 minutes).
- Drain Excess Fat: Carefully tilt the skillet and spoon out any excess fat rendered from the beef. Leaving a tablespoon or so is fine for flavor, but remove the majority to prevent a greasy final dish.
- Sauté Aromatics and Peppers: Push the browned beef to one side of the skillet. Add the chopped onion and bell pepper to the empty side. Sauté, stirring occasionally, for about 4-5 minutes, until the onion becomes translucent and the peppers soften slightly.
- Incorporate Garlic and Spices: Add the minced garlic to the vegetables and cook for about 1 minute more, until fragrant. Be careful not to burn the garlic. Now, stir the vegetables and garlic into the ground beef, combining everything. Sprinkle the chili powder, ground cumin, dried oregano, garlic powder, onion powder, smoked paprika (if using), red pepper flakes (if using), salt, and black pepper over the mixture. Stir well to coat the beef and vegetables evenly. Cook for another minute, allowing the spices to bloom and become fragrant – this toasting step enhances their flavor.
- Add Tomato Paste and Rice: Stir in the tomato paste, mixing it thoroughly into the beef and vegetable mixture. Cook for 1 minute more, allowing the paste to caramelize slightly. Add the rinsed and drained long-grain white rice to the skillet. Stir continuously for about 1-2 minutes, coating the rice grains with the flavorful mixture. This helps the rice absorb flavor and prevents clumping.
- Incorporate Liquids and Remaining Ingredients: Pour in the beef broth and the can of undrained diced tomatoes (including the juice). Add the rinsed and drained black beans and the corn (frozen or drained canned). Stir everything together well, ensuring the rice is submerged in the liquid. Scrape the bottom of the skillet to loosen any browned bits – these add great flavor!
- Simmer to Perfection: Bring the mixture to a gentle boil over medium-high heat. Once boiling, immediately reduce the heat to low, cover the skillet tightly with a lid, and let it simmer. It’s crucial to maintain a low simmer, not a rapid boil.
- Cook the Rice: Let the mixture simmer covered for 20-25 minutes, or until the rice is tender and most of the liquid has been absorbed. Avoid lifting the lid frequently during the first 15-20 minutes, as this releases steam needed to cook the rice properly. If, after 20 minutes, the rice is still firm and the liquid is gone, add another ¼ to ½ cup of hot broth or water, cover, and continue simmering for 5-10 minutes more.
- Check for Doneness and Rest: After the simmering time, remove the lid and check if the rice is tender. Fluff the rice gently with a fork. If it’s cooked through and the consistency looks right (not too wet, not too dry), turn off the heat. If it seems a little too wet, let it stand uncovered for a few minutes to allow excess moisture to evaporate. Let the skillet rest, covered, off the heat for 5 minutes. This allows the rice to finish steaming and absorb any remaining liquid, resulting in a better texture.
- Add the Cheese: Sprinkle the shredded cheese evenly over the top of the beef and rice mixture. You have two options here:
- Stovetop Method: Simply place the lid back on the skillet for 2-3 minutes, allowing the residual heat to melt the cheese.
- Broiler Method (for oven-safe skillets): Preheat your oven’s broiler. Place the skillet under the broiler (keeping a close eye on it!) for 1-3 minutes, or until the cheese is melted, bubbly, and slightly golden brown in spots. Watch carefully to prevent burning.
- Garnish and Serve: Once the cheese is melted, remove the skillet from the heat (or broiler). Garnish generously with chopped fresh cilantro and/or sliced green onions, if desired. Serve immediately, offering additional toppings on the side.
Enjoy your delicious, home-cooked Mexican Beef and Rice Skillet!
Nutritional Information (Estimated)
Please note that these values are estimates and can vary significantly based on the specific ingredients used (e.g., fat content of beef, type of cheese, brand of broth, added toppings). This information is provided as a general guideline.
- Servings: This recipe typically yields 4 to 6 servings.
- Calories per Serving (Approximate): Depending on the serving size (dividing into 4 larger or 6 smaller portions) and specific ingredients, each serving contains roughly 450-600 calories.
Factors influencing nutritional content:
- Ground Beef: Using leaner ground beef (90/10 or 93/7) will reduce fat and calories compared to 80/20 or 85/15. Thoroughly draining the fat is crucial.
- Cheese: The amount and type of cheese significantly impact fat and calories. Using less cheese or a reduced-fat variety will lower these values.
- Broth: Using low-sodium broth helps control sodium intake.
- Toppings: Added toppings like sour cream, guacamole, and tortilla chips will increase the overall calorie, fat, and sodium content per serving. Opting for Greek yogurt instead of sour cream or loading up on fresh salsa and vegetables are lighter choices.
- Portion Size: Adjusting the serving size will directly affect the per-serving nutritional information.
For precise nutritional information, it’s recommended to use an online recipe calculator and input your exact ingredients and quantities.
Preparation and Cook Time
Understanding the time commitment helps plan your meal effectively. This Mexican Beef and Rice Skillet is designed for efficiency, making it ideal for weeknight dinners.
- Preparation Time: Approximately 15 minutes. This includes chopping the onion and bell pepper, mincing the garlic, rinsing the rice and beans, opening cans, and measuring spices. If you buy pre-chopped vegetables, this time can be reduced.
- Cook Time: Approximately 30-35 minutes. This covers browning the beef (5-7 min), sautéing vegetables (5 min), toasting spices and rice (3-4 min), bringing to a boil, simmering covered (20-25 min), resting (5 min), and melting the cheese (2-3 min).
- Total Time: Approximately 45-50 minutes from starting prep to serving.
This timeframe positions the recipe perfectly as a manageable yet satisfying meal for busy evenings when you want something home-cooked without spending hours in the kitchen.
Serving Suggestions: Elevate Your Skillet Meal
While this Mexican Beef and Rice Skillet is a delicious and complete meal on its own, adding toppings and simple sides can enhance the flavors, textures, and overall dining experience. Here are some ideas:
Favorite Toppings (Offer bowls of these for a “build-your-own” experience):
- Cool & Creamy:
- Sour Cream: A classic choice for adding coolness and tang.
- Plain Greek Yogurt: A healthier alternative to sour cream, offering similar tang and creaminess with added protein.
- Avocado: Sliced or diced fresh avocado adds healthy fats and a buttery texture.
- Guacamole: Takes the avocado up a notch with added lime, onion, and cilantro.
- Fresh & Zesty:
- Chopped Fresh Cilantro: Brightens the dish with its distinctive fresh flavor.
- Sliced Green Onions: Adds a mild oniony bite and fresh crunch.
- Pico de Gallo: A fresh salsa made with diced tomatoes, onion, cilantro, jalapeño, and lime juice – adds moisture and vibrant flavor.
- Your Favorite Salsa: Whether mild, medium, or hot, jarred or homemade, salsa adds moisture and another layer of flavor.
- Lime Wedges: A squeeze of fresh lime juice just before eating brightens all the flavors significantly.
- Crunchy & Spicy:
- Crushed Tortilla Chips: Adds a delightful salty crunch. Sprinkle on top just before serving to prevent sogginess.
- Pickled or Fresh Jalapeño Slices: For those who like an extra kick of heat.
- Hot Sauce: A few dashes of your favorite brand for personalized spice.
- Extra Cheese:
- Cotija Cheese: A crumbly, salty Mexican cheese that adds a different texture and flavor profile than the melted cheese.
Simple Sides:
- Warm Tortillas: Corn or flour tortillas are perfect for scooping up the skillet mixture or eating alongside.
- Simple Green Salad: A light salad with a vinaigrette dressing provides a fresh counterpoint to the rich skillet. Think romaine, mixed greens, cucumber, and a light lime or cilantro-lime dressing.
- Steamed Vegetables: A side of simple steamed broccoli, green beans, or zucchini adds extra greens to the meal.
- Refried Beans: While there are beans in the skillet, a side of creamy refried beans is always a welcome addition to a Mexican-inspired meal.
Presenting the skillet directly on the table (on a trivet!) and arranging bowls of toppings around it creates a fun, interactive, and visually appealing meal.
Pro Tips for Skillet Success
Take your Mexican Beef and Rice Skillet from great to absolutely fantastic with these five expert tips:
- Don’t Skip Rinsing the Rice: Rinsing long-grain white rice under cold water for 30 seconds before cooking removes excess surface starch. This simple step is crucial for preventing the rice from becoming overly sticky or gummy as it cooks in the skillet. It helps ensure fluffy, distinct grains that absorb the sauce beautifully.
- Bloom Your Spices: Don’t just dump the spices in with the liquid. Add them to the skillet after cooking the aromatics (onion, pepper, garlic) and stir them into the beef and vegetable mixture over the heat for about a minute before adding liquids. This “blooming” process toasts the spices lightly, intensifying their aroma and deepening their flavor profile significantly. You’ll notice a richer, more complex taste in the final dish.
- Control the Simmer: Once you add the liquids and bring the mixture to a boil, immediately reduce the heat to maintain a low, gentle simmer. Covering the skillet tightly traps steam, which is essential for cooking the rice evenly. If the heat is too high, the liquid can evaporate too quickly, leaving the rice undercooked and potentially scorching the bottom. Conversely, if it doesn’t simmer enough, the rice might take longer to cook. Find that sweet spot where you see just a few gentle bubbles.
- The Importance of Resting: Just like with cooking plain rice, allowing the finished skillet to rest off the heat, covered, for about 5 minutes before serving is key. This step allows the rice to finish absorbing any residual moisture and lets the steam distribute evenly, resulting in a perfectly tender texture throughout. It also gives the flavors a final chance to meld. Fluff gently with a fork after resting, not before.
- Taste and Adjust Seasoning Before Adding Cheese: Before you sprinkle that glorious layer of cheese, take a small taste of the beef and rice mixture (be careful, it’s hot!). Adjust the seasoning if needed. Does it need more salt? A bit more chili powder for warmth? A pinch more cumin? Maybe an extra squeeze of lime juice (if you have it) to brighten things up? Seasoning correctly before the cheese goes on ensures the entire dish is perfectly balanced, as the cheese will primarily add richness and saltiness.
By incorporating these tips, you’ll enhance the texture, flavor, and overall success of your Mexican Beef and Rice Skillet every time you make it.
Frequently Asked Questions (FAQ)
Here are answers to some common questions about making this Mexican Beef and Rice Skillet:
- Q: Can I use a different type of meat?
- A: Absolutely! Ground turkey or ground chicken are excellent leaner alternatives. Because they have less fat, you might want to be slightly more generous with the initial cooking oil and ensure you don’t overcook them during the browning stage, as they can dry out more easily than beef. Seasoning might need a slight adjustment, as beef has a naturally richer flavor. You could even try using chorizo (remove casings first) for a spicier, smokier version – just be mindful of the extra fat and adjust added salt accordingly.
- Q: How can I make this recipe vegetarian or vegan?
- A: This dish adapts well to vegetarian or vegan diets.
- Vegetarian: Substitute the ground beef with a plant-based ground alternative (cook according to package directions), or replace it with an extra can of beans (like pinto or kidney beans) and perhaps some finely chopped mushrooms or lentils for texture. Use vegetable broth instead of beef broth. Keep the cheese for a vegetarian version.
- Vegan: Follow the vegetarian substitutions (plant-based ground or extra beans/veg) using vegetable broth. Omit the cheese entirely or use your favorite dairy-free shredded cheese alternative. Ensure all other ingredients (like broth) are certified vegan if necessary.
- A: This dish adapts well to vegetarian or vegan diets.
- Q: Can I use brown rice instead of white rice?
- A: Yes, you can use brown rice, but it requires adjustments. Brown rice takes significantly longer to cook (typically 40-50 minutes simmering time) and usually requires more liquid than white rice. You’ll likely need to increase the beef broth amount by at least ½ to 1 cup. Start with an extra ½ cup and add more hot broth during the simmering process if the skillet looks dry before the rice is tender. Keep the simmer low and be patient; check for tenderness around the 40-minute mark. The final texture will also be slightly chewier than with white rice.
- Q: Is this Mexican Beef and Rice Skillet freezer-friendly?
- A: Yes, it freezes reasonably well, although the texture of the rice might be slightly softer upon reheating. Let the skillet cool completely. You can freeze it directly in an oven-safe, freezer-safe skillet if it has a tight-fitting lid, or transfer it to airtight freezer containers or heavy-duty freezer bags. Freeze for up to 2-3 months. To reheat, thaw it overnight in the refrigerator. Reheat gently on the stovetop over medium-low heat, adding a splash of broth or water to prevent drying out, stirring occasionally until heated through. Alternatively, reheat portions in the microwave. If you froze it without cheese, you can add fresh cheese during the reheating process.
- Q: How spicy is this dish, and how can I adjust the heat?
- A: As written, using standard chili powder, the dish is generally mild to medium in spiciness, focusing more on warm, savory flavors than intense heat. However, spice levels can vary based on your chili powder blend.
- To Increase Heat: Add more red pepper flakes (start with ¼ teaspoon and increase), include a finely minced jalapeño or serrano pepper when you sauté the onions and bell peppers (remove seeds for less heat), add a pinch of cayenne pepper along with the other spices, or serve with hot sauce on the side. Using a “hot” variety of chili powder will also increase the spice.
- To Decrease Heat: Omit the optional red pepper flakes entirely. Ensure your chili powder is a mild blend. You can also reduce the amount of chili powder slightly if you are very sensitive to spice, though this will impact the overall flavor profile. Serving with cooling toppings like sour cream or avocado also helps balance any perceived heat.
- A: As written, using standard chili powder, the dish is generally mild to medium in spiciness, focusing more on warm, savory flavors than intense heat. However, spice levels can vary based on your chili powder blend.

Mexican Beef and Rice Skillet Recipe
Ingredients
- 1 tablespoon Olive Oil or Avocado Oil: For sautéing the vegetables and browning the beef. Use a neutral-flavored oil with a suitable smoke point.
- 1 pound Lean Ground Beef (85/15 or 90/10 recommended): Using leaner beef means less excess fat to drain off. You can substitute ground turkey, chicken, or even plant-based crumbles for variation (adjust cooking fat as needed).
- 1 medium Yellow Onion (about 1 cup chopped): Provides a foundational aromatic sweetness. White onion works too.
- 1 medium Bell Pepper (any color, about 1 cup chopped): Green adds a slightly grassy note, while red, yellow, or orange peppers lend sweetness and vibrant color. Use a mix if you like!
- 2–3 cloves Garlic (minced, about 1 tablespoon): Essential for aromatic depth. Adjust amount based on your love for garlic. Fresh is best, but garlic powder (about 1 teaspoon) can substitute in a pinch.
- 1 ½ cups Long-Grain White Rice (uncooked): This type of rice holds its shape well and absorbs the cooking liquid beautifully. Do not use instant rice, as the liquid ratios and cooking times will be incorrect. Rinse the rice briefly under cold water before using to remove excess starch, which helps prevent gumminess.
- 1 tablespoon Chili Powder: Provides the characteristic warm, slightly smoky, and mildly spicy flavor. Choose a blend you enjoy.
- 2 teaspoons Ground Cumin: Offers earthy, warm notes crucial to Mexican-inspired dishes.
- 1 teaspoon Dried Oregano (preferably Mexican oregano): Adds a pungent, slightly citrusy, and earthy flavor. Mexican oregano has a different flavor profile than Mediterranean oregano, but either will work.
- ½ teaspoon Garlic Powder: Enhances the garlic flavor already present.
- ½ teaspoon Onion Powder: Boosts the savory onion notes.
- ½ teaspoon Smoked Paprika (optional but recommended): Adds a lovely layer of smokiness.
- ¼ – ½ teaspoon Red Pepper Flakes (optional): For adding adjustable heat. Start with less and add more if desired.
- 1 teaspoon Salt (or to taste): Essential for bringing out all the flavors. Start with this amount and adjust later.
- ½ teaspoon Black Pepper (or to taste): For a touch of pungent spice.
- 1 (15-ounce) can Diced Tomatoes (undrained): Petite diced or regular diced work well. Fire-roasted diced tomatoes add an extra layer of smoky flavor. Do not drain the juice; it’s part of the cooking liquid.
- 1 (15-ounce) can Black Beans (rinsed and drained): Adds protein, fiber, and classic Southwestern flavor. Rinsing removes excess sodium and the sometimes metallic taste from the canning liquid. Pinto beans or kidney beans are good substitutes.
- 1 cup Frozen or Canned Corn (drained if canned): Adds pops of sweetness and texture. No need to thaw frozen corn before adding.
- 2 ½ cups Beef Broth (low-sodium recommended): Provides the primary cooking liquid for the rice and adds rich flavor. Using low-sodium allows you to control the saltiness better. Chicken or vegetable broth can be substituted.
- 2 tablespoons Tomato Paste: Adds concentrated tomato flavor and depth, helping to create a richer sauce base.
- 1 ½ cups Shredded Cheese (Mexican blend, Cheddar, Monterey Jack, or a mix): Melts beautifully over the top. Use more or less depending on your preference. Shredding your own cheese from a block often results in better melting than pre-shredded varieties (which contain anti-caking agents).
- Optional Garnishes: Fresh cilantro (chopped), green onions (sliced), sour cream or Greek yogurt, avocado slices or guacamole, salsa or pico de gallo, lime wedges, crushed tortilla chips, pickled jalapeños.
Instructions
- Prep Your Aromatics and Veggies: If you haven’t already, finely chop the yellow onion and the bell pepper. Mince the garlic cloves. Set them aside. Rinse and drain the can of black beans thoroughly. If using canned corn, drain it. Rinse the uncooked long-grain white rice under cold running water for about 30 seconds, then drain well.
- Brown the Ground Beef: Heat the olive oil or avocado oil in your large skillet over medium-high heat. Once shimmering, add the ground beef. Break it apart with a spoon and cook, stirring occasionally, until it’s fully browned and no pink remains (about 5-7 minutes).
- Drain Excess Fat: Carefully tilt the skillet and spoon out any excess fat rendered from the beef. Leaving a tablespoon or so is fine for flavor, but remove the majority to prevent a greasy final dish.
- Sauté Aromatics and Peppers: Push the browned beef to one side of the skillet. Add the chopped onion and bell pepper to the empty side. Sauté, stirring occasionally, for about 4-5 minutes, until the onion becomes translucent and the peppers soften slightly.
- Incorporate Garlic and Spices: Add the minced garlic to the vegetables and cook for about 1 minute more, until fragrant. Be careful not to burn the garlic. Now, stir the vegetables and garlic into the ground beef, combining everything. Sprinkle the chili powder, ground cumin, dried oregano, garlic powder, onion powder, smoked paprika (if using), red pepper flakes (if using), salt, and black pepper over the mixture. Stir well to coat the beef and vegetables evenly. Cook for another minute, allowing the spices to bloom and become fragrant – this toasting step enhances their flavor.
- Add Tomato Paste and Rice: Stir in the tomato paste, mixing it thoroughly into the beef and vegetable mixture. Cook for 1 minute more, allowing the paste to caramelize slightly. Add the rinsed and drained long-grain white rice to the skillet. Stir continuously for about 1-2 minutes, coating the rice grains with the flavorful mixture. This helps the rice absorb flavor and prevents clumping.
- Incorporate Liquids and Remaining Ingredients: Pour in the beef broth and the can of undrained diced tomatoes (including the juice). Add the rinsed and drained black beans and the corn (frozen or drained canned). Stir everything together well, ensuring the rice is submerged in the liquid. Scrape the bottom of the skillet to loosen any browned bits – these add great flavor!
- Simmer to Perfection: Bring the mixture to a gentle boil over medium-high heat. Once boiling, immediately reduce the heat to low, cover the skillet tightly with a lid, and let it simmer. It’s crucial to maintain a low simmer, not a rapid boil.
- Cook the Rice: Let the mixture simmer covered for 20-25 minutes, or until the rice is tender and most of the liquid has been absorbed. Avoid lifting the lid frequently during the first 15-20 minutes, as this releases steam needed to cook the rice properly. If, after 20 minutes, the rice is still firm and the liquid is gone, add another ¼ to ½ cup of hot broth or water, cover, and continue simmering for 5-10 minutes more.
- Check for Doneness and Rest: After the simmering time, remove the lid and check if the rice is tender. Fluff the rice gently with a fork. If it’s cooked through and the consistency looks right (not too wet, not too dry), turn off the heat. If it seems a little too wet, let it stand uncovered for a few minutes to allow excess moisture to evaporate. Let the skillet rest, covered, off the heat for 5 minutes. This allows the rice to finish steaming and absorb any remaining liquid, resulting in a better texture.
- Add the Cheese: Sprinkle the shredded cheese evenly over the top of the beef and rice mixture. You have two options here:
- Stovetop Method: Simply place the lid back on the skillet for 2-3 minutes, allowing the residual heat to melt the cheese.
- Broiler Method (for oven-safe skillets): Preheat your oven’s broiler. Place the skillet under the broiler (keeping a close eye on it!) for 1-3 minutes, or until the cheese is melted, bubbly, and slightly golden brown in spots. Watch carefully to prevent burning.
- Garnish and Serve: Once the cheese is melted, remove the skillet from the heat (or broiler). Garnish generously with chopped fresh cilantro and/or sliced green onions, if desired. Serve immediately, offering additional toppings on the side.
Nutrition
- Serving Size: One Normal Portion
- Calories: 450-600


