


Of all the spooky, ghoulish, and downright delightful treats that have graced our family’s Halloween table, none have captured the hearts (and taste buds) of my little goblins quite like these Melted Witch Pudding Parfaits. I still remember the first time I made them. The kitchen was a flurry of controlled chaos—Oreo dust on the counters, a splash of green food coloring on my apron, and the sound of pure, unadulterated joy from the kids as they saw the “witch” begin to melt into her bubbly, green brew. When we brought them out at their school Halloween party, the reaction was electric. A chorus of “Whoa!” and “Cool!” echoed around the room, and they vanished faster than a ghost in the morning light. It’s more than just a dessert; it’s a showstopper, an activity, and a memory-maker all rolled into one. This recipe has become our non-negotiable Halloween tradition, a deliciously spooky centerpiece that proves the best magic happens right in your own kitchen.
Bewitching Your Kitchen: The Ultimate Melted Witch Pudding Parfaits
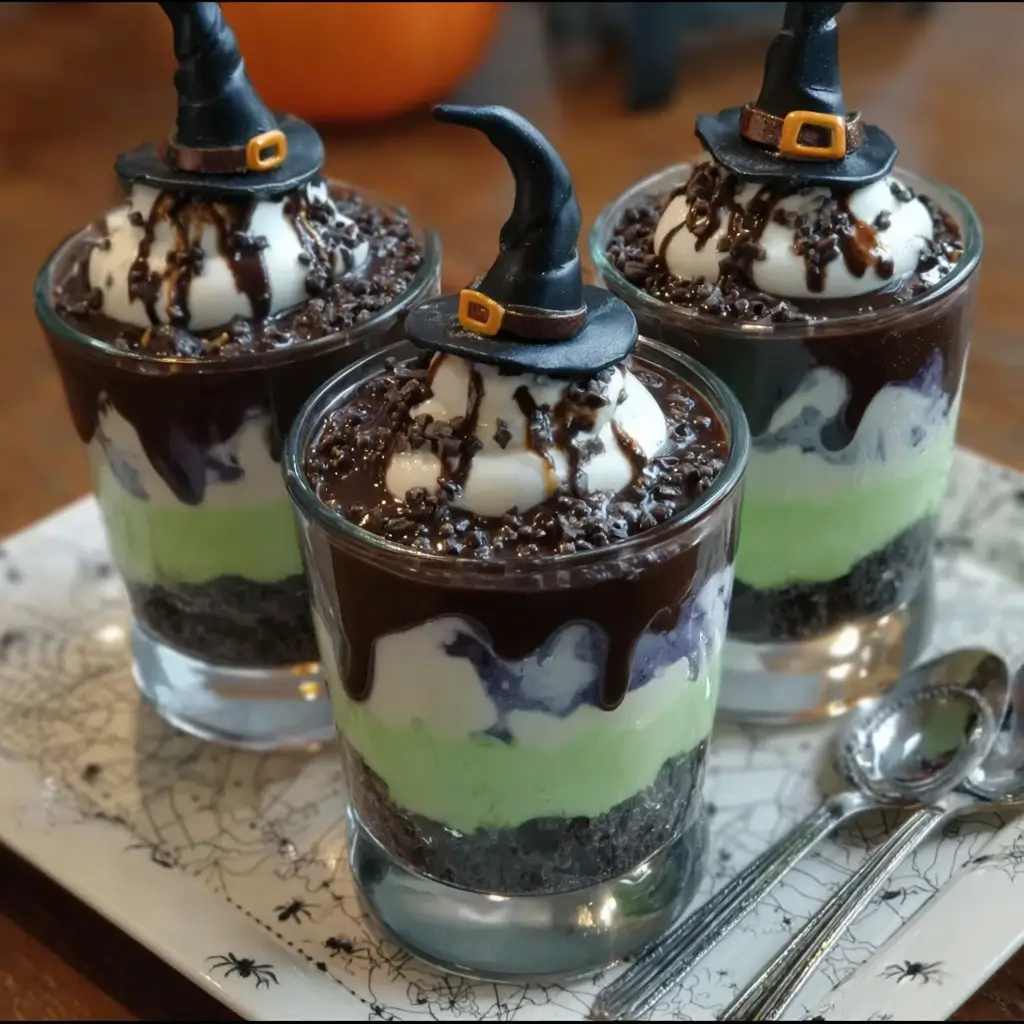
Welcome, brave food adventurer, to a recipe that is part potion, part dessert, and all Halloween fun! The Melted Witch Pudding Parfait is a visually stunning and incredibly delicious treat that looks far more complicated to create than it actually is. It’s the perfect no-bake dessert for Halloween parties, spooky movie nights, or just a festive family activity. The magic lies in the layers: rich, dark cookie “dirt,” a vibrant, bubbling green “witch’s brew” pudding, and the iconic, unmistakable legs and hat of a poor, melted witch. Get ready to cast a culinary spell that will have everyone screaming for more!
Ingredients for Your Cauldron (The Recipe)
Before you begin your magical concoction, you must gather your mystical ingredients. This recipe is designed to be simple, using common pantry staples to create something truly extraordinary. Precision is key when potion-making, so follow these measurements for the perfect result. This recipe yields approximately 6-8 parfaits, depending on the size of your glasses.
For the Spooky Graveyard “Dirt”:
- 1 package (14.3 oz or 400g) Chocolate Sandwich Cookies (like Oreos): This is the foundation of our spooky scene. The dark, crumbly texture perfectly mimics rich, dark earth.
- 2 tablespoons (30g) Unsalted Butter, melted: This helps bind some of the cookie crumbs together, giving the “dirt” a more realistic, slightly clumpy texture.
For the Bubbling Green “Witch’s Brew” Pudding:
- 2 packages (3.4 oz or 96g each) Instant Vanilla Pudding Mix: The instant variety is crucial for a quick and easy no-bake dessert that sets up perfectly.
- 4 cups (950ml) Cold Whole Milk: Whole milk provides the richest, creamiest texture for the pudding. For the pudding to set properly, ensure the milk is very cold.
- 1 teaspoon Vanilla Extract: This enhances the flavor of the pudding, giving it a deeper, more delicious base.
- Green Food Coloring (Gel or Liquid): The key to our witch’s demise! Gel food coloring provides a more vibrant, concentrated color with less liquid. Start with a few drops and add more until you achieve a spooky, eerie green.
For the Witch’s Hat & Legs:
- 8-10 Chocolate Wafer Cookies or the separated tops of the Chocolate Sandwich Cookies: These form the wide brim of the witch’s hat.
- 8-10 Hershey’s Kisses or similar cone-shaped chocolates: This creates the pointed top of the hat.
- 2 tablespoons Black or Chocolate Decorating Icing in a tube: This is our magical “glue” to assemble the hats.
- 16-20 Pretzel Sticks, broken in half: These will become the witch’s iconic striped stockings. Breaking them gives you the perfect length for sticking out of the pudding.
For Ghoulish Garnishes (Optional but Highly Recommended):
- Halloween Sprinkles: Think eyeballs, bats, bones, and spooky-colored nonpareils. These are the “eye of newt” and “toe of frog” for our potion.
- Gummy Worms or Bugs: Let a few of these creepy crawlies escape from the graveyard dirt for an extra touch of frightful fun.
- Whipped Topping: A small dollop can represent the final bubbling froth of the potion.
Casting the Spell: Step-by-Step Instructions
Follow these instructions carefully, and you’ll conjure up the most enchanting Halloween dessert. We’ll break it down into manageable stages: preparing the components and then assembling your masterpiece.
Step 1: Prepare the Graveyard Dirt
The foundation of our parfait needs to be perfectly crumbly and delicious.
- Separate and Crush: If using the sandwich cookies for the witch hat brims, carefully twist apart 8-10 cookies and set the plain wafer sides aside. Place the remaining whole cookies (and the cream-filled sides from the separated ones) into a large, resealable plastic bag.
- Release Your Inner Monster: Squeeze the excess air out of the bag and seal it tightly. Using a rolling pin, meat mallet, or the bottom of a heavy-duty glass, crush the cookies into a coarse crumb. You’re not looking for a fine powder; a variety of textures with some slightly larger pieces will look more like real dirt.
- Add the Binder: Pour the crushed cookie crumbs into a medium bowl. Drizzle the melted butter over the top and toss with a fork until the crumbs are lightly coated. This step is optional but adds a lovely richness and helps the dirt layer hold its shape. Set the bowl aside.
Step 2: Brew the Eerie Green Pudding Potion
Now for the star of the show—the vibrant, green pool where our witch has met her fate.
- Combine the Dry and Wet: In a large mixing bowl, whisk together the two packages of instant vanilla pudding mix. Slowly pour in the 4 cups of cold whole milk, whisking continuously to prevent any lumps from forming.
- Infuse the Flavor: Add the teaspoon of vanilla extract and whisk it in.
- Create the Color: This is the most magical part. Begin by adding 5-6 drops of green food coloring to the pudding mixture. Whisk thoroughly until the color is uniform. Assess the shade. Is it a spooky, vibrant witch-green? If not, add a few more drops at a time, mixing completely after each addition, until you achieve your desired eerie hue. Remember, the color may deepen slightly as it sets.
- Chill and Set: Once you are happy with the color, cover the bowl with plastic wrap and place it in the refrigerator to set. This will take at least 15-20 minutes. The pudding should be thick enough to hold its shape when spooned.
Step 3: Craft the Witch’s Accessories
While the pudding is chilling, it’s the perfect time to assemble the tell-tale signs of a witch’s presence: her hat and her legs.
- Assemble the Hats: Lay your 8-10 chocolate wafer cookies (the “brims”) on a piece of parchment paper. Squeeze a small dot of the black decorating icing into the center of each cookie. Unwrap a Hershey’s Kiss and gently press it onto the icing, creating a perfect miniature witch hat. Let these set for a few minutes so the “glue” can harden.
- Prepare the Legs: Take your pretzel sticks and break them in half. You will need two “legs” for each parfait you plan to make. Simply set these aside; they are ready for assembly.
Step 4: The Grand Assembly – Layering the Parfaits
The moment of truth! It’s time to layer all your components into a stunning and spooky dessert. For the best visual effect, use clear glasses, mason jars, or trifle dishes.
- First Layer – The Ground: Spoon about 2-3 tablespoons of the prepared cookie “dirt” into the bottom of each glass. This creates the graveyard floor.
- Second Layer – The Melted Witch: Remove the thickened green pudding from the refrigerator. Carefully spoon a generous layer of the green pudding over the cookie dirt. Fill the glass about two-thirds full. Be gentle to keep the layers as distinct as possible.
- Third Layer – More Dirt: Sprinkle another tablespoon of cookie dirt around the edge of the pudding layer. This makes it look like the witch melted right into the ground.
- Position the Legs: Take two broken pretzel-stick halves and insert them into the pudding near the edge of the glass, so they stick out like a pair of legs kicking in the air.
- Add the Hat: Place one of your prepared witch hats on top of the pudding, either in the center or slightly off to the side, as if it were tossed aside in the melting commotion.
- Final Garnish: Now, bring your creation to life! Sprinkle some Halloween-themed sprinkles over the pudding and dirt. Drape a gummy worm over the side of the glass. Add a dollop of whipped cream “froth” if desired. Get creative!
Step 5: Chill and Serve
For the best flavor and texture, it’s ideal to let the assembled parfaits chill in the refrigerator for at least 30 minutes before serving. This allows the flavors to meld and ensures the dessert is refreshingly cold. Serve with a long spoon to allow your guests to dig through all the delicious layers.
Nutrition Facts
Please note that this is an approximation. The final nutritional values will vary based on the specific brands of ingredients used, the size of your parfaits, and any additional garnishes.
- Servings: 8 parfaits
- Calories per serving (approximate): 420-480 kcal
This is a decadent treat, perfect for a special occasion like Halloween. It’s a dessert meant to be indulged in and enjoyed as part of the celebration.
Preparation Time
This no-bake recipe is surprisingly quick to put together, making it perfect for busy party-prep days.
- Active Preparation Time: 25-30 minutes (crushing cookies, mixing pudding, assembling hats)
- Chilling Time: 45 minutes (20 for the pudding to set, 25+ for the final parfaits)
- Total Time: Approximately 1 hour and 15 minutes
How to Serve Your Melted Witch Masterpiece
Presentation is everything when serving a dessert this fun. Here are some ideas to elevate your serving game and make these parfaits the star of your Halloween spread.
- Choose Your Vessel Wisely:
- Classic Parfait Glasses: Tall, clear glasses showcase the layers beautifully and provide an elegant touch.
- Stemless Wine Glasses: These offer a modern and sophisticated look, with a wide bowl that’s perfect for decorating.
- Mason Jars: For a rustic or farmhouse Halloween theme, mason jars are a fantastic choice. You can even tie some orange and black ribbon around the rim.
- Clear Plastic Cups: If serving a large crowd or young children, clear plastic cups are a safe and practical option that still allows everyone to see the spooky layers.
- Create a DIY Parfait Bar:
- Set up a “Build Your Own Melted Witch” station for a fun party activity.
- Lay out all the components in separate bowls: the cookie dirt, the green pudding, the witch hats, and the pretzel legs.
- Provide a variety of extra ghoulish garnishes in small dishes:
- Gummy eyeballs
- Candy bones
- Chocolate “rocks”
- Red gel icing for a “bloody” effect
- Different colored sprinkles
- Miniature candy pumpkins
- Set a Spooky Scene:
- Arrange the finished parfaits on a black or dark wood serving platter.
- Scatter extra cookie crumbs, plastic spiders, and candy corn around the base of the glasses.
- For a truly theatrical effect, carefully place a small bowl of dry ice and a little warm water nearby to create a rolling, spooky fog around the desserts (always handle dry ice with gloves and ensure proper ventilation).
Additional Tips for Potion-Making Perfection
Here are five extra tips to ensure your Melted Witch Pudding Parfaits are foolproof and extra fabulous.
- Make-Ahead Magic: You can prepare all the components a day in advance to save time. Store the cookie crumbs in an airtight container at room temperature. Prepare the pudding and keep it covered in the fridge. Assemble the witch hats and store them in a container. When it’s party time, all you have to do is the fun part: layering and decorating!
- Flavor Variations for Your Brew: While vanilla is a classic crowd-pleaser, feel free to experiment! Add a quarter teaspoon of mint extract to the pudding for a “Minty Witch’s Brew,” or use instant cheesecake-flavored pudding for a tangy twist. You could even make a purple “Wizard’s Potion” using a mix of red and blue food coloring.
- Dietary Modifications: This recipe is easily adaptable. For a gluten-free version, use gluten-free chocolate sandwich cookies and gluten-free pretzels. For a dairy-free parfait, use a dairy-free pudding mix (many are naturally DF), substitute the whole milk with cold almond or oat milk, and use dairy-free chocolate for the hats. Always double-check labels to be sure.
- Achieving Clean Layers: The secret to those beautiful, distinct layers is patience. When adding the pudding on top of the dirt, spoon it in gently starting from the center and letting it spread to the edges. When adding the top dirt layer, use a small spoon to carefully sprinkle it around the perimeter to avoid smudging the glass.
- An Adults-Only Potion: Hosting a Halloween party for grown-ups? Turn this into a boozy delight! After the pudding has been mixed but before it sets, whisk in 1/4 to 1/2 cup of a complementary liqueur. Irish cream (like Baileys), chocolate liqueur (like Godiva), or even a vanilla-flavored vodka would be devilishly delicious additions.
Frequently Asked Questions (FAQ)
Here are answers to some common questions you might have while brewing up this spooky treat.
1. Can I use homemade pudding instead of an instant mix?
Absolutely! Homemade vanilla or chocolate pudding would be delicious. Simply prepare your favorite stovetop pudding recipe and let it cool completely, pressing plastic wrap directly onto the surface to prevent a skin from forming. Once cooled, stir in the green food coloring and proceed with the layering. Note that homemade pudding may result in a slightly softer set.
2. How long will these parfaits last in the refrigerator?
The assembled parfaits can be stored, covered, in the refrigerator for up to 2 days. However, they are best enjoyed within the first 24 hours. After that, the pretzel “legs” will lose their crunch and the cookie “dirt” will become soft as it absorbs moisture from the pudding.
3. My pudding seems runny and didn’t set properly. What did I do wrong?
The most common culprits for runny instant pudding are: not using cold enough milk (it must be cold to react with the mix), using the wrong type of milk (some non-dairy milks don’t set as well with standard instant pudding), or not using the correct milk-to-mix ratio. Double-check the package directions and ensure you’ve whisked it thoroughly and given it enough time to chill and thicken.
4. What are some other creative ideas for the witch’s “legs”?
If you don’t have pretzel sticks, you have plenty of other fun options! You can use striped paper straws cut into small sections, black licorice strings, or even Pocky sticks (chocolate-covered biscuit sticks) for a different look and taste.
5. Can I freeze the Melted Witch Pudding Parfaits?
It is not recommended to freeze these parfaits. Pudding’s texture changes significantly upon thawing, often becoming watery and grainy. Furthermore, the cookies and pretzels would become completely soggy. This dessert is definitely best made fresh and enjoyed chilled from the refrigerator.

Melted Witch Pudding Parfaits Recipe
Ingredients
For the Spooky Graveyard “Dirt”:
- 1 package (14.3 oz or 400g) Chocolate Sandwich Cookies (like Oreos): This is the foundation of our spooky scene. The dark, crumbly texture perfectly mimics rich, dark earth.
- 2 tablespoons (30g) Unsalted Butter, melted: This helps bind some of the cookie crumbs together, giving the “dirt” a more realistic, slightly clumpy texture.
For the Bubbling Green “Witch’s Brew” Pudding:
- 2 packages (3.4 oz or 96g each) Instant Vanilla Pudding Mix: The instant variety is crucial for a quick and easy no-bake dessert that sets up perfectly.
- 4 cups (950ml) Cold Whole Milk: Whole milk provides the richest, creamiest texture for the pudding. For the pudding to set properly, ensure the milk is very cold.
- 1 teaspoon Vanilla Extract: This enhances the flavor of the pudding, giving it a deeper, more delicious base.
- Green Food Coloring (Gel or Liquid): The key to our witch’s demise! Gel food coloring provides a more vibrant, concentrated color with less liquid. Start with a few drops and add more until you achieve a spooky, eerie green.
For the Witch’s Hat & Legs:
- 8–10 Chocolate Wafer Cookies or the separated tops of the Chocolate Sandwich Cookies: These form the wide brim of the witch’s hat.
- 8–10 Hershey’s Kisses or similar cone-shaped chocolates: This creates the pointed top of the hat.
- 2 tablespoons Black or Chocolate Decorating Icing in a tube: This is our magical “glue” to assemble the hats.
- 16–20 Pretzel Sticks, broken in half: These will become the witch’s iconic striped stockings. Breaking them gives you the perfect length for sticking out of the pudding.
For Ghoulish Garnishes (Optional but Highly Recommended):
- Halloween Sprinkles: Think eyeballs, bats, bones, and spooky-colored nonpareils. These are the “eye of newt” and “toe of frog” for our potion.
- Gummy Worms or Bugs: Let a few of these creepy crawlies escape from the graveyard dirt for an extra touch of frightful fun.
- Whipped Topping: A small dollop can represent the final bubbling froth of the potion.
Instructions
Step 1: Prepare the Graveyard Dirt
The foundation of our parfait needs to be perfectly crumbly and delicious.
- Separate and Crush: If using the sandwich cookies for the witch hat brims, carefully twist apart 8-10 cookies and set the plain wafer sides aside. Place the remaining whole cookies (and the cream-filled sides from the separated ones) into a large, resealable plastic bag.
- Release Your Inner Monster: Squeeze the excess air out of the bag and seal it tightly. Using a rolling pin, meat mallet, or the bottom of a heavy-duty glass, crush the cookies into a coarse crumb. You’re not looking for a fine powder; a variety of textures with some slightly larger pieces will look more like real dirt.
- Add the Binder: Pour the crushed cookie crumbs into a medium bowl. Drizzle the melted butter over the top and toss with a fork until the crumbs are lightly coated. This step is optional but adds a lovely richness and helps the dirt layer hold its shape. Set the bowl aside.
Step 2: Brew the Eerie Green Pudding Potion
Now for the star of the show—the vibrant, green pool where our witch has met her fate.
- Combine the Dry and Wet: In a large mixing bowl, whisk together the two packages of instant vanilla pudding mix. Slowly pour in the 4 cups of cold whole milk, whisking continuously to prevent any lumps from forming.
- Infuse the Flavor: Add the teaspoon of vanilla extract and whisk it in.
- Create the Color: This is the most magical part. Begin by adding 5-6 drops of green food coloring to the pudding mixture. Whisk thoroughly until the color is uniform. Assess the shade. Is it a spooky, vibrant witch-green? If not, add a few more drops at a time, mixing completely after each addition, until you achieve your desired eerie hue. Remember, the color may deepen slightly as it sets.
- Chill and Set: Once you are happy with the color, cover the bowl with plastic wrap and place it in the refrigerator to set. This will take at least 15-20 minutes. The pudding should be thick enough to hold its shape when spooned.
Step 3: Craft the Witch’s Accessories
While the pudding is chilling, it’s the perfect time to assemble the tell-tale signs of a witch’s presence: her hat and her legs.
- Assemble the Hats: Lay your 8-10 chocolate wafer cookies (the “brims”) on a piece of parchment paper. Squeeze a small dot of the black decorating icing into the center of each cookie. Unwrap a Hershey’s Kiss and gently press it onto the icing, creating a perfect miniature witch hat. Let these set for a few minutes so the “glue” can harden.
- Prepare the Legs: Take your pretzel sticks and break them in half. You will need two “legs” for each parfait you plan to make. Simply set these aside; they are ready for assembly.
Step 4: The Grand Assembly – Layering the Parfaits
The moment of truth! It’s time to layer all your components into a stunning and spooky dessert. For the best visual effect, use clear glasses, mason jars, or trifle dishes.
- First Layer – The Ground: Spoon about 2-3 tablespoons of the prepared cookie “dirt” into the bottom of each glass. This creates the graveyard floor.
- Second Layer – The Melted Witch: Remove the thickened green pudding from the refrigerator. Carefully spoon a generous layer of the green pudding over the cookie dirt. Fill the glass about two-thirds full. Be gentle to keep the layers as distinct as possible.
- Third Layer – More Dirt: Sprinkle another tablespoon of cookie dirt around the edge of the pudding layer. This makes it look like the witch melted right into the ground.
- Position the Legs: Take two broken pretzel-stick halves and insert them into the pudding near the edge of the glass, so they stick out like a pair of legs kicking in the air.
- Add the Hat: Place one of your prepared witch hats on top of the pudding, either in the center or slightly off to the side, as if it were tossed aside in the melting commotion.
- Final Garnish: Now, bring your creation to life! Sprinkle some Halloween-themed sprinkles over the pudding and dirt. Drape a gummy worm over the side of the glass. Add a dollop of whipped cream “froth” if desired. Get creative!
Step 5: Chill and Serve
For the best flavor and texture, it’s ideal to let the assembled parfaits chill in the refrigerator for at least 30 minutes before serving. This allows the flavors to meld and ensures the dessert is refreshingly cold. Serve with a long spoon to allow your guests to dig through all the delicious layers.
Nutrition
- Serving Size: One Normal Portion
- Calories: 420-480 kcal


