

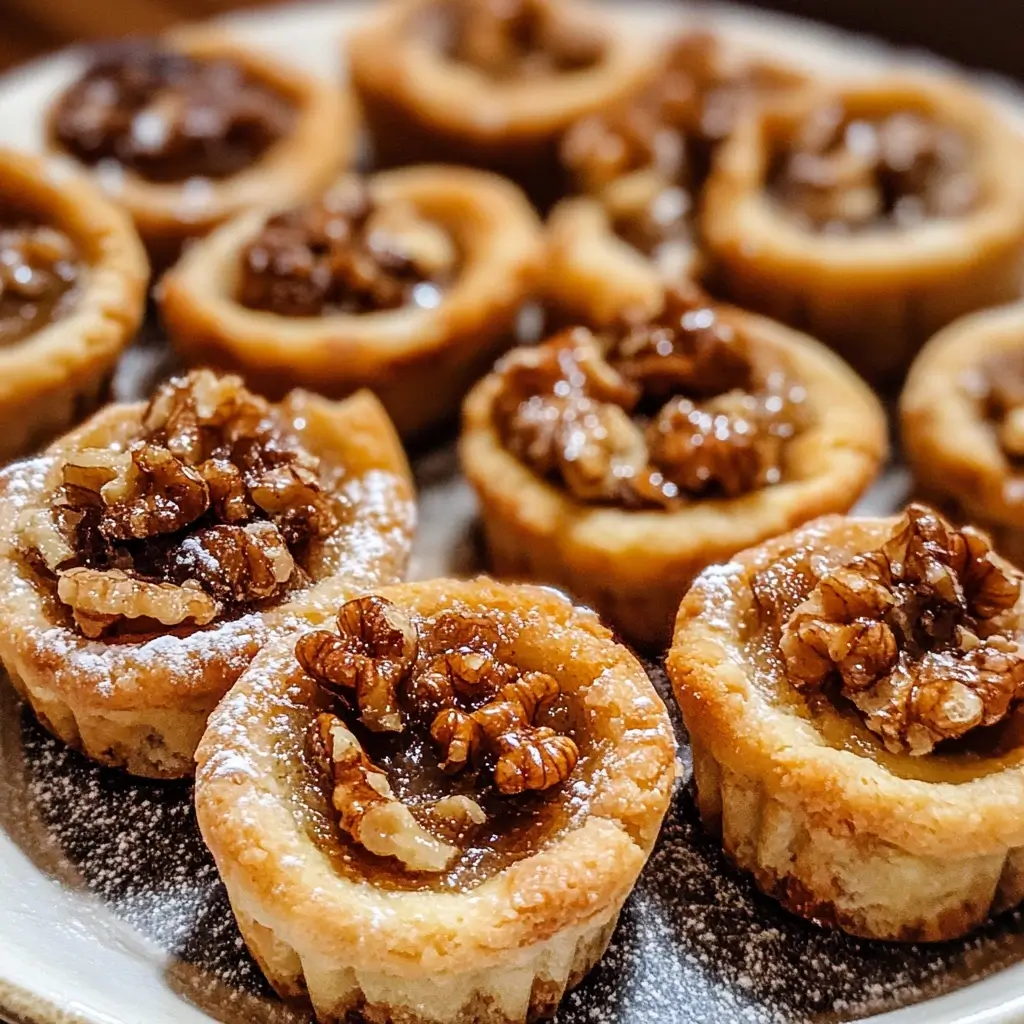

Okay, let’s dive into crafting a truly delightful and comprehensive guide to making Maple Walnut Tassies! These little bites of heaven are a personal favorite in my household, especially as the leaves start to turn and the air gets crisp. The first time I made them, my family hovered around the kitchen, drawn in by the intoxicating aroma of baking butter, maple, and toasted walnuts. They disappeared from the cooling rack almost faster than I could bake them! The flaky, tender cream cheese pastry is the perfect vessel for the rich, gooey, and intensely flavorful maple-walnut filling. It’s like a miniature pecan pie but with a distinctly Canadian soul, sophisticated yet comforting. They’ve since become a staple for holiday gatherings, cookie exchanges, and those moments when only a perfectly sweet, nutty treat will do. I’ve tweaked this recipe over the years to achieve what I believe is the perfect balance of textures and flavors, and I’m so excited to share it with you. Get ready to create some magic in your own kitchen!
Ingredients
This recipe yields delightful, bite-sized tassies. We’ll break down the ingredients for both the tender cream cheese pastry and the luscious maple walnut filling. Using high-quality ingredients will truly make these little gems shine.
For the Cream Cheese Pastry Crust (makes approximately 24 tassies):
- 1 cup (120g) all-purpose flour, plus more for dusting
- 1/2 cup (113g / 1 stick) unsalted butter, cold and cut into small cubes
- 3 ounces (85g) full-fat cream cheese, cold and cut into small cubes
- 1/8 teaspoon fine sea salt
For the Maple Walnut Filling:
- 1 large egg, lightly beaten
- 3/4 cup (180ml) pure maple syrup (preferably Grade A Dark Robust or Grade B for stronger flavor)
- 1 tablespoon unsalted butter, melted
- 1 teaspoon pure vanilla extract
- 1/4 teaspoon fine sea salt
- 1 cup (approximately 100-120g) walnuts, finely chopped (toasting them beforehand is highly recommended for enhanced flavor)
A Deeper Look at Our Star Ingredients:
- All-Purpose Flour: The backbone of our pastry. Standard all-purpose flour provides the structure needed for a tender yet sturdy crust that can hold our delicious filling. Ensure it’s fresh for the best results.
- Unsalted Butter (Cold): Crucial for a flaky crust. Using cold butter, cut into small pieces, creates little pockets of fat. As the tassies bake, the water in the butter turns to steam, puffing up the dough and creating those desirable flaky layers. Unsalted butter allows you to control the salt content precisely.
- Cream Cheese (Cold): This is the secret to an incredibly tender and slightly tangy crust. Like butter, it should be cold and cubed. Full-fat cream cheese yields the richest flavor and best texture.
- Pure Maple Syrup: The heart and soul of the filling. Don’t skimp here – use 100% pure maple syrup. The grade can impact the flavor intensity. Grade A Dark Robust (formerly known as Grade B) has a more pronounced maple flavor that stands up beautifully in baking. Grade A Amber Rich is also lovely but will be milder. Avoid “pancake syrup,” which is mostly corn syrup and artificial flavors.
- Walnuts: These provide the essential nutty crunch and earthy flavor that pairs so perfectly with maple. Chopping them finely ensures they distribute well within the small tassie cups and are easy to bite into. Toasting the walnuts before chopping them deepens their flavor significantly – a small step that makes a big difference.
- Large Egg: This acts as a binder for the filling, giving it structure and richness as it bakes. It helps the filling set up into a delightful, slightly gooey consistency.
- Vanilla Extract: A classic baking enhancer, pure vanilla extract rounds out the sweetness of the maple syrup and complements the nutty walnuts.
- Salt: A pinch in both the crust and the filling is essential. Salt doesn’t just make things salty; it enhances all the other flavors, balances sweetness, and makes the overall taste profile more complex and satisfying.
Instructions
Follow these steps carefully for perfectly baked Maple Walnut Tassies. Working with cold ingredients for the pastry is key!
Part 1: Making the Cream Cheese Pastry Dough
- Combine Dry Ingredients: In a medium-sized mixing bowl, whisk together the 1 cup of all-purpose flour and 1/8 teaspoon of fine sea salt.
- Cut in Fats: Add the cold, cubed 1/2 cup of unsalted butter and 3 ounces of cold, cubed cream cheese to the flour mixture. Using a pastry blender, your fingertips, or a food processor (on pulse mode), cut the fats into the flour until the mixture resembles coarse crumbs with some pea-sized pieces of butter and cream cheese still visible. If using a food processor, be careful not to over-process; a few short pulses are usually sufficient.
- Form the Dough: Gently gather the mixture together with your hands and form it into a cohesive disc. It might seem a bit crumbly at first, but it will come together. Avoid overworking the dough, as this can lead to a tough crust.
- Chill the Dough: Wrap the dough disc tightly in plastic wrap. Refrigerate for at least 30 minutes, or up to 2 hours. This chilling period is crucial: it allows the gluten to relax (resulting in a more tender crust), firms up the fats (making it easier to handle and promoting flakiness), and prevents the crust from shrinking during baking.
Part 2: Preparing the Maple Walnut Filling & Assembling the Tassies
- Preheat Oven & Prepare Pan: Preheat your oven to 375°F (190°C). Have a 24-cup mini muffin tin ready. There’s no need to grease the tin if it’s non-stick, as the butter in the crust will prevent sticking. If your tin is prone to sticking, a very light greasing or paper liners can be used.
- Toast Walnuts (Optional but Recommended): If you haven’t already, spread the walnuts on a baking sheet and toast in the preheated oven for 5-7 minutes, or until fragrant and lightly browned. Keep a close eye on them as nuts can burn quickly. Let them cool slightly, then chop finely.
- Make the Filling: In a separate medium bowl, whisk together the 1 lightly beaten large egg, 3/4 cup of pure maple syrup, 1 tablespoon of melted unsalted butter, 1 teaspoon of pure vanilla extract, and 1/4 teaspoon of fine sea salt until well combined.
- Add Walnuts: Stir the 1 cup of finely chopped (and preferably toasted) walnuts into the maple syrup mixture.
Part 3: Shaping the Crusts & Baking
- Divide the Dough: Remove the chilled dough from the refrigerator. If it’s very firm, let it sit at room temperature for 5-10 minutes to become slightly more pliable. Divide the dough into 24 equal pieces. Rolling the dough into a log and cutting it into 24 slices can help with uniformity. Each piece will be about 1 tablespoon in size.
- Shape the Crusts: Roll each piece of dough into a small ball. Place one ball into each cup of the mini muffin tin. Using your thumb or a small, floured tart tamper, press the dough evenly against the bottom and up the sides of each muffin cup, creating a small pastry shell. Aim for a thin, even crust. If the dough becomes sticky, lightly flour your fingers or the tamper.
- Fill the Tassies: Carefully spoon the maple walnut filling into each unbaked pastry shell. Fill them almost to the top, but be mindful not to overfill, as the filling will bubble up slightly during baking. About 1 to 1.5 teaspoons of filling per tassie is usually perfect.
- Bake: Place the mini muffin tin in the preheated oven. Bake for 20-25 minutes, or until the crusts are golden brown and the filling is bubbly and appears set around the edges. The center might still look a little soft, but it will firm up as it cools.
- Cool: Once baked, remove the tin from the oven and place it on a wire cooling rack. Let the tassies cool in the tin for about 10-15 minutes. This allows them to firm up slightly, making them easier to remove without breaking.
- Remove and Cool Completely: Carefully remove the tassies from the mini muffin tin. You might need to gently twist them or use a small offset spatula or thin knife to loosen any edges. Place them on the wire rack to cool completely before serving or storing. The filling will continue to set as they cool.
Nutrition Facts
- Servings: This recipe makes approximately 24 Maple Walnut Tassies.
- Calories per serving (1 tassie): Approximately 120-150 calories.
Disclaimer: The nutritional information provided is an estimate and can vary based on the specific ingredients used (e.g., brand of maple syrup, exact fat content of butter and cream cheese) and precise serving sizes. This estimate is based on the ingredients and quantities listed in this recipe. The primary contributors to the calorie count are the butter and cream cheese in the crust, the maple syrup, and the walnuts in the filling.
Preparation Time
Understanding the time commitment can help you plan your baking session effectively.
- Active Preparation Time (Dough & Filling): Approximately 30-40 minutes.
- Dough making: 10-15 minutes
- Filling making: 5-10 minutes
- Shaping crusts and filling tassies: 15-20 minutes
- Chilling Time (Dough): At least 30 minutes (can be extended up to 2 days if well-wrapped in the refrigerator, or frozen for longer). This is mostly inactive time.
- Baking Time: 20-25 minutes.
- Cooling Time:
- In tin: 10-15 minutes
- On rack (to cool completely): At least 30-60 minutes, or longer until they reach room temperature.
- Total Estimated Time (from start to ready-to-eat): Approximately 2 hours to 2.5 hours, including minimum chilling and cooling times. If you chill the dough for longer, the total time will increase accordingly.
This timeline shows that while the active work isn’t overwhelmingly long, the chilling and cooling stages are essential for the best results, so factor those in when planning.
How to Serve
Maple Walnut Tassies are versatile little treats that can be served in numerous delightful ways. Their bite-sized nature makes them perfect for a variety of occasions.
- As part of a dessert platter:
- Arrange them artfully with other small cookies, mini cheesecakes, or fruit tarts for a beautiful and varied dessert spread, ideal for parties and gatherings.
- Their golden-brown color and nutty topping make them visually appealing.
- With coffee or tea:
- The rich maple and walnut flavors pair wonderfully with a hot cup of black coffee, a creamy latte, or a robust black tea like Earl Grey or English Breakfast.
- They make for an elegant afternoon tea treat or a sweet ending to a brunch.
- For holiday gatherings:
- These tassies are a fantastic addition to Thanksgiving, Christmas, or New Year’s Eve dessert tables. Their warm, comforting flavors are perfect for the festive season.
- Package them in decorative boxes or tins to give as homemade holiday gifts.
- As a sweet snack:
- Keep a batch on hand for when a sweet craving strikes. They are satisfyingly rich, so one or two is often enough.
- Elevated Presentation Ideas:
- Dust with powdered sugar: Just before serving, a light dusting of confectioners’ sugar can add a touch of elegance, resembling a gentle snowfall.
- Serve slightly warm: While delicious at room temperature, gently warming them for a few seconds in the microwave can make the filling extra gooey and enhance the aromas (be careful not to overheat).
- With a tiny dollop of whipped cream: For an extra touch of indulgence, serve each tassie with a very small dollop of lightly sweetened or unsweetened whipped cream, or even a mascarpone cream.
- Alongside ice cream: A couple of tassies next to a scoop of vanilla bean, butter pecan, or maple walnut ice cream makes for a more substantial and decadent dessert.
No matter how you choose to serve them, these Maple Walnut Tassies are sure to be a hit, impressing guests with their homemade charm and irresistible flavor.
Additional Tips
To ensure your Maple Walnut Tassies turn out perfectly every time, consider these five helpful tips:
- Don’t Overwork the Pastry Dough: This is perhaps the most crucial tip for achieving a tender, flaky crust. Mix the dough only until it just comes together. Overworking develops the gluten in the flour, which can result in a tough, chewy crust instead of a delicate, melt-in-your-mouth one. Embrace the shaggy look before chilling; it will hydrate and come together more smoothly later.
- Toast Your Walnuts: While optional, toasting the walnuts before chopping and adding them to the filling significantly enhances their flavor. It brings out their natural oils, making them more aromatic and intensely nutty, which beautifully complements the sweet maple syrup. Spread them on a baking sheet and toast at 350-375°F (175-190°C) for 5-8 minutes, watching carefully to prevent burning. Let them cool before chopping.
- Use High-Quality, Pure Maple Syrup: The flavor of your tassies hinges on the quality of your maple syrup. Opt for 100% pure maple syrup, not pancake syrup (which is often corn syrup with artificial flavoring). Grade A Dark Robust (formerly Grade B) or Very Dark Strong Taste (formerly Grade C) will provide the most intense and complex maple flavor, which is ideal for baking as it won’t get lost.
- Chill Dough Thoroughly and Don’t Skip It: Chilling the pastry dough serves multiple purposes. It allows the flour to hydrate fully, relaxes the gluten (for tenderness), and solidifies the fats (butter and cream cheese). Cold fat creates steam during baking, leading to flakier layers. Properly chilled dough is also much easier to handle and less likely to shrink excessively in the muffin cups during baking.
- Avoid Overbaking: Keep a close eye on the tassies as they approach the end of their baking time. The crusts should be a beautiful golden brown, and the filling should be bubbly around the edges and mostly set. The very center might still look a little soft or jiggly, but it will continue to cook and firm up from residual heat as the tassies cool in the pan and then on the rack. Overbaking can make the filling too hard or dry.
By keeping these tips in mind, you’ll be well on your way to baking batch after batch of exquisite Maple Walnut Tassies that will delight everyone who tries them.
FAQ Section (5 Q/A)
Here are answers to some frequently asked questions about making Maple Walnut Tassies:
- Q: Can I use pecans instead of walnuts in this recipe?
- A: Absolutely! Pecans are a classic pairing with maple and work wonderfully as a direct substitute for walnuts in this recipe. The flavor profile will be slightly different – pecans tend to be a bit sweeter and richer than walnuts – but equally delicious. Prepare them the same way: toast for enhanced flavor (if desired) and chop finely. This would essentially make them Maple Pecan Tassies, a delightful variation.
- Q: Can I make the pastry dough ahead of time? How should I store it?
- A: Yes, the cream cheese pastry dough is very well-suited for making ahead. You can prepare the dough, wrap it tightly in plastic wrap, and store it in the refrigerator for up to 2-3 days. If you need to store it for longer, the dough can be frozen for up to 2-3 months. Wrap it first in plastic wrap, then in a layer of aluminum foil or place it in a freezer-safe bag. Thaw frozen dough in the refrigerator overnight before using. You might need to let it sit at room temperature for 10-15 minutes to become pliable enough to work with.
- Q: How do I know when the Maple Walnut Tassies are perfectly baked?
- A: There are a few key indicators. The pastry crusts should be a clear golden brown, not pale. The filling will look bubbly, especially around the edges where it meets the crust. The surface of the filling should appear mostly set; if you gently nudge the pan, the center of the filling shouldn’t slosh around like liquid, though it might still have a slight jiggle. Remember, the filling will continue to set as it cools. Overbaking can lead to a dry filling, so err on the side of a slightly soft center if you’re unsure. Typically, 20-25 minutes at 375°F (190°C) is the sweet spot.
- Q: My pastry crusts shrank a lot during baking. What did I do wrong?
- A: Crust shrinkage can be frustrating! Several factors can contribute:
- Dough overworked: Overmixing develops gluten, which can cause the dough to contract when baked.
- Not enough chilling: Chilling allows gluten to relax and fats to firm up. Warm or insufficiently chilled dough is more prone to shrinking. Ensure at least 30 minutes of chill time, and even longer is better.
- Dough stretched too thin: When pressing the dough into the muffin cups, if it’s stretched too much, it will try to revert to its original shape.
- Oven temperature too low: An oven that’s not hot enough can cause the fat to melt out before the structure sets, leading to shrinkage and a greasy result. Ensure your oven is properly preheated.
Try to handle the dough gently and ensure it’s well-chilled before shaping and baking.
- A: Crust shrinkage can be frustrating! Several factors can contribute:
- Q: How should I store leftover Maple Walnut Tassies, and how long will they last?
- A: Once the tassies have cooled completely to room temperature, they should be stored in an airtight container.
- At room temperature: They will keep well for 2-3 days. The crust will remain relatively crisp for the first day or so.
- In the refrigerator: For longer storage, you can refrigerate them in an airtight container for up to a week. The crust might soften slightly in the refrigerator due to moisture. You can refresh them by warming them briefly in a low oven (around 300°F / 150°C) for a few minutes to help re-crisp the crust.
- Freezing: Maple Walnut Tassies also freeze beautifully. Place the completely cooled tassies in a single layer on a baking sheet and freeze until solid. Then, transfer them to a freezer-safe airtight container or bag, placing parchment paper between layers if needed. They can be frozen for up to 2-3 months. Thaw them at room temperature or in the refrigerator.
- A: Once the tassies have cooled completely to room temperature, they should be stored in an airtight container.

Maple Walnut Tassies Recipe
Ingredients
For the Cream Cheese Pastry Crust (makes approximately 24 tassies):
- 1 cup (120g) all-purpose flour, plus more for dusting
- 1/2 cup (113g / 1 stick) unsalted butter, cold and cut into small cubes
- 3 ounces (85g) full-fat cream cheese, cold and cut into small cubes
- 1/8 teaspoon fine sea salt
For the Maple Walnut Filling:
- 1 large egg, lightly beaten
- 3/4 cup (180ml) pure maple syrup (preferably Grade A Dark Robust or Grade B for stronger flavor)
- 1 tablespoon unsalted butter, melted
- 1 teaspoon pure vanilla extract
- 1/4 teaspoon fine sea salt
- 1 cup (approximately 100-120g) walnuts, finely chopped (toasting them beforehand is highly recommended for enhanced flavor)
Instructions
Part 1: Making the Cream Cheese Pastry Dough
- Combine Dry Ingredients: In a medium-sized mixing bowl, whisk together the 1 cup of all-purpose flour and 1/8 teaspoon of fine sea salt.
- Cut in Fats: Add the cold, cubed 1/2 cup of unsalted butter and 3 ounces of cold, cubed cream cheese to the flour mixture. Using a pastry blender, your fingertips, or a food processor (on pulse mode), cut the fats into the flour until the mixture resembles coarse crumbs with some pea-sized pieces of butter and cream cheese still visible. If using a food processor, be careful not to over-process; a few short pulses are usually sufficient.
- Form the Dough: Gently gather the mixture together with your hands and form it into a cohesive disc. It might seem a bit crumbly at first, but it will come together. Avoid overworking the dough, as this can lead to a tough crust.
- Chill the Dough: Wrap the dough disc tightly in plastic wrap. Refrigerate for at least 30 minutes, or up to 2 hours. This chilling period is crucial: it allows the gluten to relax (resulting in a more tender crust), firms up the fats (making it easier to handle and promoting flakiness), and prevents the crust from shrinking during baking.
Part 2: Preparing the Maple Walnut Filling & Assembling the Tassies
- Preheat Oven & Prepare Pan: Preheat your oven to 375°F (190°C). Have a 24-cup mini muffin tin ready. There’s no need to grease the tin if it’s non-stick, as the butter in the crust will prevent sticking. If your tin is prone to sticking, a very light greasing or paper liners can be used.
- Toast Walnuts (Optional but Recommended): If you haven’t already, spread the walnuts on a baking sheet and toast in the preheated oven for 5-7 minutes, or until fragrant and lightly browned. Keep a close eye on them as nuts can burn quickly. Let them cool slightly, then chop finely.
- Make the Filling: In a separate medium bowl, whisk together the 1 lightly beaten large egg, 3/4 cup of pure maple syrup, 1 tablespoon of melted unsalted butter, 1 teaspoon of pure vanilla extract, and 1/4 teaspoon of fine sea salt until well combined.
- Add Walnuts: Stir the 1 cup of finely chopped (and preferably toasted) walnuts into the maple syrup mixture.
Part 3: Shaping the Crusts & Baking
- Divide the Dough: Remove the chilled dough from the refrigerator. If it’s very firm, let it sit at room temperature for 5-10 minutes to become slightly more pliable. Divide the dough into 24 equal pieces. Rolling the dough into a log and cutting it into 24 slices can help with uniformity. Each piece will be about 1 tablespoon in size.
- Shape the Crusts: Roll each piece of dough into a small ball. Place one ball into each cup of the mini muffin tin. Using your thumb or a small, floured tart tamper, press the dough evenly against the bottom and up the sides of each muffin cup, creating a small pastry shell. Aim for a thin, even crust. If the dough becomes sticky, lightly flour your fingers or the tamper.
- Fill the Tassies: Carefully spoon the maple walnut filling into each unbaked pastry shell. Fill them almost to the top, but be mindful not to overfill, as the filling will bubble up slightly during baking. About 1 to 1.5 teaspoons of filling per tassie is usually perfect.
- Bake: Place the mini muffin tin in the preheated oven. Bake for 20-25 minutes, or until the crusts are golden brown and the filling is bubbly and appears set around the edges. The center might still look a little soft, but it will firm up as it cools.
- Cool: Once baked, remove the tin from the oven and place it on a wire cooling rack. Let the tassies cool in the tin for about 10-15 minutes. This allows them to firm up slightly, making them easier to remove without breaking.
- Remove and Cool Completely: Carefully remove the tassies from the mini muffin tin. You might need to gently twist them or use a small offset spatula or thin knife to loosen any edges. Place them on the wire rack to cool completely before serving or storing. The filling will continue to set as they cool.
Nutrition
- Serving Size: One Normal Portion
- Calories: 120-150


