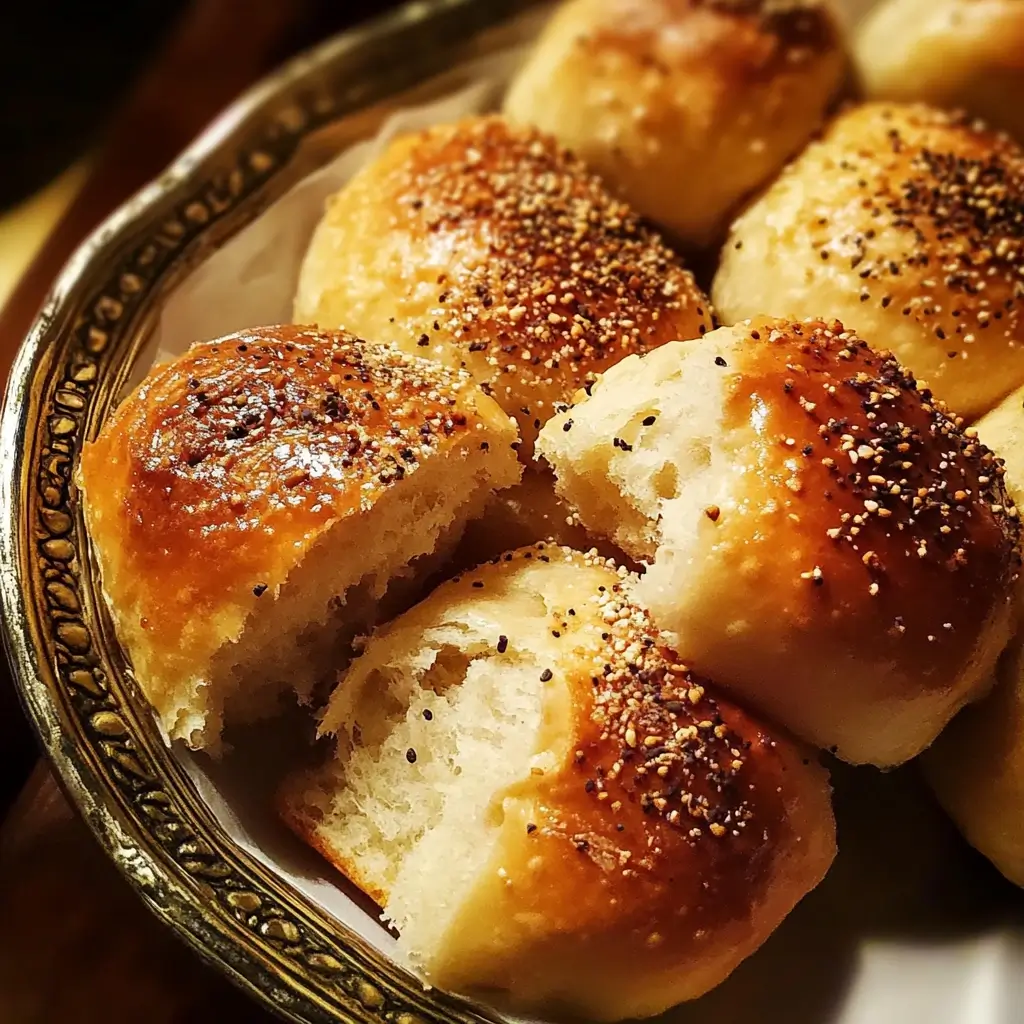
For years, I’ve been on a quest for the perfect yeast roll – the kind that’s impossibly soft, slightly sweet, and melts in your mouth. Store-bought rolls simply don’t cut it, and many recipes I’ve tried were either too finicky, too time-consuming, or just didn’t deliver on the promise of pillowy perfection. Then I stumbled upon this make-ahead yeast roll recipe, and let me tell you, it’s been a game-changer. From holiday dinners to casual weeknight meals, these rolls have become a staple in our home. The best part? You can prepare the dough ahead of time, leaving you stress-free on busy days. The aroma that fills the kitchen as they bake is simply heavenly, and the taste? Pure bliss. My family devours them in minutes, always asking for seconds (and thirds!). If you’re looking for a reliable, delicious, and make-ahead friendly yeast roll recipe, look no further. This is it. Prepare to be amazed by the light, airy texture and the utterly irresistible flavor of these homemade delights.
Ingredients
Creating these heavenly make-ahead yeast rolls starts with gathering the right ingredients. Each component plays a crucial role in achieving that perfect texture and flavor. Let’s break down what you’ll need and why each ingredient is important:
- Active Dry Yeast (2 ¼ teaspoons or one ¼-ounce packet): Yeast is the heart of any yeast roll recipe. It’s a living organism that, when activated, produces carbon dioxide, causing the dough to rise and become light and airy. Active dry yeast needs to be proofed, meaning it needs to be dissolved in warm liquid to ensure it’s alive and ready to work its magic. Using fresh, active yeast is crucial for successful rolls. If your yeast is old, it may not activate properly, resulting in dense, flat rolls.
- Warm Water (½ cup, about 105-115°F): Warm water is essential for proofing the yeast. The temperature range is critical; too cold, and the yeast won’t activate; too hot, and you risk killing the yeast. Using a kitchen thermometer is the best way to ensure you have the right temperature. This warm water provides the ideal environment for the yeast to become active and bubbly, a sign that it’s ready to be incorporated into the dough.
- Granulated Sugar (¼ cup): Sugar serves multiple purposes in this recipe. First, it provides food for the yeast, helping it to activate and rise properly. Second, it adds a touch of sweetness to the rolls, balancing the savory flavors and making them utterly irresistible. Granulated sugar dissolves easily and distributes evenly throughout the dough, contributing to the overall flavor and texture.
- Whole Milk (1 cup, warmed to about 105-115°F): Milk adds richness, flavor, and tenderness to the rolls. Warming the milk to a similar temperature as the water is important because it helps to maintain the optimal temperature for yeast activity when combined with the yeast mixture. Whole milk is preferred for its higher fat content, which contributes to a softer, more flavorful roll. However, you can use 2% milk if desired, though the rolls might be slightly less rich.
- Unsalted Butter (⅓ cup, melted and slightly cooled): Butter is a key ingredient for both flavor and texture. Melted butter adds richness and a subtle buttery flavor throughout the rolls. Using unsalted butter allows you to control the total salt content in the recipe. Cooling the melted butter slightly before adding it to the dough is important to prevent it from overheating the yeast and other ingredients.
- Large Egg (1): An egg adds structure, richness, and color to the rolls. The protein in the egg helps to bind the dough together, while the fat contributes to tenderness and a slightly richer flavor. Using a large egg ensures the right proportion in the recipe.
- All-Purpose Flour (4 ½ – 5 cups, plus more for dusting): Flour is the foundation of these rolls, providing structure and body. All-purpose flour is versatile and works well for yeast rolls, giving them a tender yet slightly chewy texture. The range in flour quantity (4 ½ – 5 cups) is important because flour absorbency can vary depending on humidity and brand. Start with 4 ½ cups and gradually add more as needed until the dough comes together and is slightly sticky but manageable. Having extra flour on hand for dusting your work surface and hands is essential for preventing the dough from sticking and making it easier to handle.
- Salt (1 ½ teaspoons): Salt is a crucial ingredient in bread making. It not only enhances the flavor of the rolls, balancing the sweetness and richness, but also controls the yeast activity. Salt slows down the yeast fermentation, allowing for a more controlled rise and preventing the dough from rising too quickly and becoming weak. Using the correct amount of salt is essential for both flavor and texture.
Instructions
Now that you have all your ingredients ready, let’s embark on the delightful journey of making these make-ahead yeast rolls. Follow these step-by-step instructions carefully for baking success:
- Proof the Yeast: In a large bowl, combine the warm water (105-115°F) and granulated sugar. Sprinkle the active dry yeast over the top. Let it stand for 5-10 minutes, or until the yeast is foamy and bubbly. This is a crucial step to ensure your yeast is active and will make your rolls rise properly. If the yeast doesn’t foam, it may be old or inactive, and you’ll need to use fresh yeast.
- Combine Wet Ingredients: Once the yeast is proofed, add the warmed milk, melted and slightly cooled butter, and the egg to the bowl with the yeast mixture. Whisk these wet ingredients together until they are well combined. This mixture forms the liquid base for your dough and will contribute to the final flavor and texture of the rolls.
- Gradually Add Flour and Salt: In a separate large bowl (or the bowl of a stand mixer fitted with a dough hook), whisk together 4 ½ cups of all-purpose flour and the salt. Make a well in the center of the flour mixture and pour in the wet ingredients.
- Mix and Knead the Dough: Using a wooden spoon or a stand mixer on low speed, gradually mix the wet and dry ingredients until a shaggy dough forms. If using a stand mixer, switch to the dough hook. Knead the dough on low speed for 8-10 minutes, or until it becomes smooth and elastic. If kneading by hand, turn the dough out onto a lightly floured surface and knead for 10-12 minutes. The dough should be slightly sticky but not overly so. If it’s too sticky to handle, add flour one tablespoon at a time, kneading until it’s manageable. The kneading process develops the gluten in the flour, which is essential for the structure and texture of the rolls.
- First Rise (Bulk Fermentation): Place the kneaded dough in a lightly oiled large bowl, turning to coat all sides with oil. Cover the bowl with plastic wrap or a clean kitchen towel. Let the dough rise in a warm place for 1-1 ½ hours, or until it has doubled in size. A warm place (around 75-80°F) is ideal for yeast activity. You can place the bowl in a slightly warmed oven (turned off), a sunny spot, or a proofing box if you have one. This first rise, also known as bulk fermentation, allows the yeast to work its magic and develop flavor in the dough.
- Punch Down and Divide the Dough: Once the dough has doubled, gently punch it down to release the air. Turn the dough out onto a lightly floured surface. Divide the dough into 12-15 equal portions. You can use a kitchen scale for precise portions, or simply eyeball it.
- Shape the Rolls: Shape each portion of dough into a smooth round roll. To do this, gently flatten a piece of dough, then bring the edges to the center and pinch to seal. Turn the roll seam-down and gently roll it under your cupped hand on the counter to create a smooth, round shape.
- Second Rise (Proofing): Grease a 9×13 inch baking pan. Place the shaped rolls in the prepared pan, leaving a little space between each roll for expansion. Cover the pan loosely with plastic wrap or a clean kitchen towel. Let the rolls rise in a warm place for 45-60 minutes, or until they are puffy and almost doubled in size. This second rise, known as proofing, is crucial for achieving light and airy rolls.
- Preheat Oven and Bake: While the rolls are proofing, preheat your oven to 375°F (190°C). Once the rolls are nicely puffed, bake for 18-22 minutes, or until they are golden brown on top and sound hollow when tapped on the bottom. Keep an eye on them towards the end of baking to prevent over-browning.
- Brush with Butter (Optional): As soon as the rolls come out of the oven, brush the tops with melted butter (optional, but highly recommended!). This adds extra flavor, shine, and keeps the tops soft.
- Cool and Serve: Let the rolls cool in the pan for a few minutes before serving. They are best enjoyed warm.
Make-Ahead Instructions:
- Option 1: Refrigerate Dough Overnight (or up to 24 hours): After the first rise (step 5), punch down the dough, divide it, and shape the rolls as instructed (steps 6 & 7). Place the shaped rolls in a greased baking pan, cover tightly with plastic wrap, and refrigerate overnight or for up to 24 hours. When ready to bake, remove the pan from the refrigerator and let the rolls rise at room temperature for about 1-1 ½ hours, or until they are puffy and almost doubled. Then, bake as directed in step 9.
- Option 2: Freeze Shaped Rolls: After shaping the rolls (step 7), place them in a single layer on a baking sheet lined with parchment paper. Freeze for 1-2 hours, or until solid. Once frozen, transfer the rolls to a freezer-safe bag or container and store in the freezer for up to 2-3 months. When ready to bake, remove the frozen rolls from the freezer and place them in a greased baking pan. Cover loosely with plastic wrap and let them thaw and rise at room temperature for 3-4 hours, or until they are puffy and almost doubled. Then, bake as directed in step 9, you may need to add a few extra minutes of baking time if baking from frozen.
Nutrition Facts
(Please note: Nutritional information is an estimate and can vary based on specific ingredients used and portion sizes.)
Servings: Approximately 12-15 rolls
Serving Size: 1 roll
Approximate Nutrition Facts per serving (1 roll):
- Calories: 180-220 kcal
- Protein: 4-5g
- Fat: 7-9g
- Saturated Fat: 4-5g
- Trans Fat: 0g
- Cholesterol: 30-40mg
- Sodium: 150-200mg
- Carbohydrates: 25-30g
- Fiber: 1-2g
- Sugar: 4-6g
Important Considerations:
- These values are estimates. Actual nutritional content will depend on the precise ingredients used (e.g., brand of butter, type of milk) and the exact size of each roll.
- These rolls are a source of carbohydrates and fats, providing energy. They also contain some protein.
- If you are following a specific dietary plan, it’s always best to calculate the nutrition facts based on the exact ingredients you use or consult a nutrition professional.
Preparation Time
Making these make-ahead yeast rolls involves both active and inactive time. Here’s a breakdown to help you plan your baking schedule:
- Active Time: This is the time you’ll be actively working on the recipe.
- Proofing Yeast: 5-10 minutes
- Mixing Dough: 10-15 minutes
- Kneading Dough: 8-12 minutes (depending on method)
- Dividing and Shaping Rolls: 15-20 minutes
- Baking: 18-22 minutes
- Inactive Time: This is the time the dough spends rising or resting, requiring minimal intervention from you.
- First Rise (Bulk Fermentation): 1-1.5 hours
- Second Rise (Proofing): 45-60 minutes
- Make-Ahead Refrigeration (Optional): Overnight or up to 24 hours
- Make-Ahead Freezing & Thawing (Optional): Freezing 1-2 hours, Thawing 3-4 hours
Overall Time: From start to finish (without make-ahead options), expect to spend approximately 3-4.5 hours, including both active and inactive time. The beauty of this recipe is the make-ahead flexibility, allowing you to break up the preparation over multiple days and significantly reduce the active time on the day you want to serve the rolls.
How to Serve
These make-ahead yeast rolls are incredibly versatile and can be served in countless ways. Their soft, buttery texture and slightly sweet flavor make them the perfect accompaniment to both savory and sweet dishes. Here are some delightful serving suggestions:
- Classic Dinner Rolls:
- Serve warm alongside your favorite dinner entrees such as roasted chicken, pot roast, lasagna, or grilled salmon.
- Offer a side of softened butter, flavored butter (like garlic herb butter or honey butter), or olive oil for dipping.
- Perfect for holiday meals like Thanksgiving, Christmas, or Easter.
- Sandwich Rolls:
- Split the rolls and use them as soft and delicious sandwich buns for pulled pork, BBQ chicken, turkey, or ham sandwiches.
- They are also excellent for vegetarian sandwiches with fillings like roasted vegetables, hummus, or black bean burgers.
- Elevate your lunchtime sandwiches with the homemade goodness of these rolls.
- Sliders:
- Shape the rolls into smaller sizes (about half the size of regular rolls) and bake them as sliders.
- Fill them with mini burgers, pulled chicken, or meatball sliders for appetizers or party snacks.
- Slider rolls are fun and easy to eat, making them perfect for gatherings.
- Breakfast or Brunch Rolls:
- Enjoy them warm with a smear of jam, jelly, or honey for a simple and satisfying breakfast.
- Serve them alongside scrambled eggs, bacon, sausage, or a breakfast casserole for a complete brunch spread.
- Their slight sweetness makes them a lovely treat with coffee or tea in the morning.
- Soup or Salad Companions:
- Serve warm rolls alongside a bowl of hearty soup, chili, or stew for dipping and soaking up the delicious broth.
- Pair them with a fresh green salad or a creamy potato soup for a balanced and comforting meal.
- They add a comforting carbohydrate element to lighter meals.
- Dessert Rolls (with a twist):
- While these are not overly sweet, you can enhance their sweetness by brushing them with melted butter and sprinkling with cinnamon sugar after baking.
- Serve them with a scoop of vanilla ice cream or a drizzle of caramel sauce for a simple dessert.
- Consider making them into mini cinnamon rolls by swirling cinnamon sugar and butter into the dough before shaping and baking.
No matter how you choose to serve them, these make-ahead yeast rolls are sure to be a crowd-pleaser. Their versatility and deliciousness make them a welcome addition to any meal or occasion.
Additional Tips for Perfect Yeast Rolls
Baking with yeast can sometimes seem intimidating, but with a few helpful tips, you can consistently achieve perfect, fluffy yeast rolls. Here are five additional tips to ensure your baking success:
- Yeast is Key: Proof it Properly: Always proof your yeast to ensure it’s active before adding it to the rest of the ingredients. The foamy, bubbly mixture indicates that the yeast is alive and ready to work. If your yeast doesn’t proof, don’t proceed with the recipe; start with fresh yeast to avoid disappointment. Using water that is the correct temperature (105-115°F) is also crucial for proper yeast activation.
- Don’t Over-Flour the Dough: While it’s tempting to add more flour if your dough seems sticky, resist the urge to over-flour. Too much flour will result in dry, dense rolls. The dough should be slightly sticky but still manageable. If kneading by hand, use a bench scraper to help manage sticky dough and lightly flour your hands and work surface as needed, adding flour sparingly. A slightly sticky dough generally yields softer, more tender rolls.
- Warm Environment for Rising: Yeast thrives in a warm environment. Find a warm place for your dough to rise, ideally around 75-80°F. A slightly warmed (but turned off!) oven, a sunny spot in your kitchen, or even placing the bowl in a warm water bath can create the ideal conditions for rising. In colder environments, the rising time will be significantly longer, so be patient. Proper rising is essential for light and airy rolls.
- Gentle Handling is Best: When shaping and handling the dough, be gentle. Overworking the dough after the first rise can deflate it and result in tougher rolls. Shape the rolls smoothly and evenly, but avoid pressing or squeezing the dough too much. Gentle shaping helps to maintain the airiness developed during rising.
- Don’t Overbake: Overbaked rolls will be dry and hard. Bake them until they are golden brown on top and sound hollow when tapped on the bottom. Start checking for doneness around 18 minutes and adjust baking time as needed based on your oven. Brushing the rolls with melted butter immediately after baking not only adds flavor but also helps to keep the tops soft and prevent them from drying out.
By following these tips, along with the recipe instructions, you’ll be well on your way to baking consistently perfect, delicious make-ahead yeast rolls that will impress everyone.
FAQ Section
Baking yeast rolls can bring up a few common questions, especially for those new to bread making. Here are answers to some frequently asked questions about these make-ahead yeast rolls:
Q1: Can I use instant yeast instead of active dry yeast?
A: Yes, you can substitute instant yeast for active dry yeast in this recipe. If using instant yeast, you can skip the proofing step and add the instant yeast directly to the dry ingredients. The rising times should remain roughly the same. However, proofing active dry yeast is a good way to ensure its viability, especially if you are unsure about the freshness of your yeast.
Q2: My dough didn’t rise. What could be the reason?
A: There are several reasons why your dough might not rise:
- Inactive Yeast: The most common reason is inactive yeast. Ensure your yeast is fresh and proof it properly to check its activity.
- Water/Milk Temperature: If the water or milk used to proof the yeast or make the dough was too hot (over 120°F), it could kill the yeast. Too cold (below 100°F), and it might not activate properly. Use a thermometer to ensure the correct temperature range (105-115°F).
- Cold Environment: Yeast needs warmth to rise. If your kitchen is too cold, the rising process will be very slow or may stall completely. Find a warmer spot for your dough to rise.
- Too Much Salt: While salt is necessary, too much salt can inhibit yeast activity. Ensure you are using the correct amount of salt as specified in the recipe.
Q3: Can I make these rolls ahead of time and reheat them?
A: Yes, these are make-ahead rolls! You have a few options:
- Refrigerated Dough: You can refrigerate the shaped rolls overnight or for up to 24 hours and bake them the next day.
- Frozen Rolls: You can freeze the shaped, unbaked rolls and bake them from frozen.
- Baked and Reheated: You can bake the rolls completely, let them cool, and then reheat them gently before serving. To reheat, wrap them in foil and warm them in a low oven (300°F) for about 10-15 minutes, or until heated through. Alternatively, you can microwave them briefly, but they are best reheated in the oven to retain their texture.
Q4: My rolls are dense and not fluffy. What did I do wrong?
A: Dense rolls can be caused by:
- Not Enough Kneading: Insufficient kneading can result in underdeveloped gluten, which is necessary for a light and airy texture. Knead the dough for the recommended time (8-12 minutes) until it is smooth and elastic.
- Over-Flouring: Adding too much flour can make the dough dense. Stick to the recommended flour amount and add only a little more if absolutely necessary to manage stickiness.
- Under-Proofing: Not allowing the dough to rise sufficiently during both the first and second rise can result in dense rolls. Ensure the dough doubles in size during the first rise and the shaped rolls are puffy before baking.
- Overbaking: Overbaking can dry out the rolls, making them seem denser. Avoid overbaking and check for doneness at the lower end of the baking time range.
Q5: Can I add herbs or cheese to these rolls?
A: Absolutely! These rolls are a great base for customization. You can easily add herbs or cheese to enhance their flavor:
- Herbs: Knead in finely chopped fresh herbs like rosemary, thyme, or chives during the kneading process. About 1-2 tablespoons of fresh herbs is a good starting point.
- Cheese: Add shredded cheese like cheddar, Parmesan, or mozzarella during the last few minutes of kneading or sprinkle cheese on top of the rolls before baking. About ½ – 1 cup of shredded cheese can be incorporated.
- Garlic: Add roasted garlic or garlic powder to the dough for a savory garlic roll.
Experiment with flavors to create your own signature yeast rolls! These make-ahead yeast rolls are a forgiving and versatile recipe that will become a cherished part of your baking repertoire. Enjoy the process and the delicious results!
Print
Make-Ahead Yeast Rolls Recipe
Ingredients
- Active Dry Yeast (2 ¼ teaspoons or one ¼-ounce packet): Yeast is the heart of any yeast roll recipe. It’s a living organism that, when activated, produces carbon dioxide, causing the dough to rise and become light and airy. Active dry yeast needs to be proofed, meaning it needs to be dissolved in warm liquid to ensure it’s alive and ready to work its magic. Using fresh, active yeast is crucial for successful rolls. If your yeast is old, it may not activate properly, resulting in dense, flat rolls.
- Warm Water (½ cup, about 105-115°F): Warm water is essential for proofing the yeast. The temperature range is critical; too cold, and the yeast won’t activate; too hot, and you risk killing the yeast. Using a kitchen thermometer is the best way to ensure you have the right temperature. This warm water provides the ideal environment for the yeast to become active and bubbly, a sign that it’s ready to be incorporated into the dough.
- Granulated Sugar (¼ cup): Sugar serves multiple purposes in this recipe. First, it provides food for the yeast, helping it to activate and rise properly. Second, it adds a touch of sweetness to the rolls, balancing the savory flavors and making them utterly irresistible. Granulated sugar dissolves easily and distributes evenly throughout the dough, contributing to the overall flavor and texture.
- Whole Milk (1 cup, warmed to about 105-115°F): Milk adds richness, flavor, and tenderness to the rolls. Warming the milk to a similar temperature as the water is important because it helps to maintain the optimal temperature for yeast activity when combined with the yeast mixture. Whole milk is preferred for its higher fat content, which contributes to a softer, more flavorful roll. However, you can use 2% milk if desired, though the rolls might be slightly less rich.
- Unsalted Butter (⅓ cup, melted and slightly cooled): Butter is a key ingredient for both flavor and texture. Melted butter adds richness and a subtle buttery flavor throughout the rolls. Using unsalted butter allows you to control the total salt content in the recipe. Cooling the melted butter slightly before adding it to the dough is important to prevent it from overheating the yeast and other ingredients.
- Large Egg (1): An egg adds structure, richness, and color to the rolls. The protein in the egg helps to bind the dough together, while the fat contributes to tenderness and a slightly richer flavor. Using a large egg ensures the right proportion in the recipe.
- All-Purpose Flour (4 ½ – 5 cups, plus more for dusting): Flour is the foundation of these rolls, providing structure and body. All-purpose flour is versatile and works well for yeast rolls, giving them a tender yet slightly chewy texture. The range in flour quantity (4 ½ – 5 cups) is important because flour absorbency can vary depending on humidity and brand. Start with 4 ½ cups and gradually add more as needed until the dough comes together and is slightly sticky but manageable. Having extra flour on hand for dusting your work surface and hands is essential for preventing the dough from sticking and making it easier to handle.
- Salt (1 ½ teaspoons): Salt is a crucial ingredient in bread making. It not only enhances the flavor of the rolls, balancing the sweetness and richness, but also controls the yeast activity. Salt slows down the yeast fermentation, allowing for a more controlled rise and preventing the dough from rising too quickly and becoming weak. Using the correct amount of salt is essential for both flavor and texture.
Instructions
- Proof the Yeast: In a large bowl, combine the warm water (105-115°F) and granulated sugar. Sprinkle the active dry yeast over the top. Let it stand for 5-10 minutes, or until the yeast is foamy and bubbly. This is a crucial step to ensure your yeast is active and will make your rolls rise properly. If the yeast doesn’t foam, it may be old or inactive, and you’ll need to use fresh yeast.
- Combine Wet Ingredients: Once the yeast is proofed, add the warmed milk, melted and slightly cooled butter, and the egg to the bowl with the yeast mixture. Whisk these wet ingredients together until they are well combined. This mixture forms the liquid base for your dough and will contribute to the final flavor and texture of the rolls.
- Gradually Add Flour and Salt: In a separate large bowl (or the bowl of a stand mixer fitted with a dough hook), whisk together 4 ½ cups of all-purpose flour and the salt. Make a well in the center of the flour mixture and pour in the wet ingredients.
- Mix and Knead the Dough: Using a wooden spoon or a stand mixer on low speed, gradually mix the wet and dry ingredients until a shaggy dough forms. If using a stand mixer, switch to the dough hook. Knead the dough on low speed for 8-10 minutes, or until it becomes smooth and elastic. If kneading by hand, turn the dough out onto a lightly floured surface and knead for 10-12 minutes. The dough should be slightly sticky but not overly so. If it’s too sticky to handle, add flour one tablespoon at a time, kneading until it’s manageable. The kneading process develops the gluten in the flour, which is essential for the structure and texture of the rolls.
- First Rise (Bulk Fermentation): Place the kneaded dough in a lightly oiled large bowl, turning to coat all sides with oil. Cover the bowl with plastic wrap or a clean kitchen towel. Let the dough rise in a warm place for 1-1 ½ hours, or until it has doubled in size. A warm place (around 75-80°F) is ideal for yeast activity. You can place the bowl in a slightly warmed oven (turned off), a sunny spot, or a proofing box if you have one. This first rise, also known as bulk fermentation, allows the yeast to work its magic and develop flavor in the dough.
- Punch Down and Divide the Dough: Once the dough has doubled, gently punch it down to release the air. Turn the dough out onto a lightly floured surface. Divide the dough into 12-15 equal portions. You can use a kitchen scale for precise portions, or simply eyeball it.
- Shape the Rolls: Shape each portion of dough into a smooth round roll. To do this, gently flatten a piece of dough, then bring the edges to the center and pinch to seal. Turn the roll seam-down and gently roll it under your cupped hand on the counter to create a smooth, round shape.
- Second Rise (Proofing): Grease a 9×13 inch baking pan. Place the shaped rolls in the prepared pan, leaving a little space between each roll for expansion. Cover the pan loosely with plastic wrap or a clean kitchen towel. Let the rolls rise in a warm place for 45-60 minutes, or until they are puffy and almost doubled in size. This second rise, known as proofing, is crucial for achieving light and airy rolls.
- Preheat Oven and Bake: While the rolls are proofing, preheat your oven to 375°F (190°C). Once the rolls are nicely puffed, bake for 18-22 minutes, or until they are golden brown on top and sound hollow when tapped on the bottom. Keep an eye on them towards the end of baking to prevent over-browning.
- Brush with Butter (Optional): As soon as the rolls come out of the oven, brush the tops with melted butter (optional, but highly recommended!). This adds extra flavor, shine, and keeps the tops soft.
- Cool and Serve: Let the rolls cool in the pan for a few minutes before serving. They are best enjoyed warm.
Make-Ahead Instructions:
- Option 1: Refrigerate Dough Overnight (or up to 24 hours): After the first rise (step 5), punch down the dough, divide it, and shape the rolls as instructed (steps 6 & 7). Place the shaped rolls in a greased baking pan, cover tightly with plastic wrap, and refrigerate overnight or for up to 24 hours. When ready to bake, remove the pan from the refrigerator and let the rolls rise at room temperature for about 1-1 ½ hours, or until they are puffy and almost doubled. Then, bake as directed in step 9.
- Option 2: Freeze Shaped Rolls: After shaping the rolls (step 7), place them in a single layer on a baking sheet lined with parchment paper. Freeze for 1-2 hours, or until solid. Once frozen, transfer the rolls to a freezer-safe bag or container and store in the freezer for up to 2-3 months. When ready to bake, remove the frozen rolls from the freezer and place them in a greased baking pan. Cover loosely with plastic wrap and let them thaw and rise at room temperature for 3-4 hours, or until they are puffy and almost doubled. Then, bake as directed in step 9, you may need to add a few extra minutes of baking time if baking from frozen.
Nutrition
- Serving Size: one normal portion
- Calories: 180-220 kcal
- Sugar: 4-6g
- Sodium: 150-200mg
- Fat: 7-9g
- Saturated Fat: 4-5g
- Trans Fat: 0g
- Carbohydrates: 25-30g
- Fiber: 1-2g
- Protein: 4-5g
- Cholesterol: 30-40mg