


It started as a challenge. My kids, like many, have a built-in radar for anything green and leafy. Mention spinach in a meal, and you’d think I had suggested adding broccoli to their ice cream. I was on a mission to create a breakfast that was not only packed with the nutrients they needed for a busy day of school and play but was also something they would genuinely get excited about. The solution, I discovered, wasn’t to hide the green but to make it part of something visually spectacular. That’s how the Layered Mixed-Berry Green Power Smoothie was born. The first time I served it in tall, clear glasses, their eyes widened. They saw the vibrant purple-red layer, the creamy white divider, and the brilliant green base not as a “healthy drink” but as a fun, colorful parfait. The magic happened when they took that first sip – the sweet, tangy burst of berries followed by the surprisingly delicious, creamy green layer. It was an instant hit. Now, this smoothie isn’t just a weekend treat; it’s a requested weekday breakfast, a post-soccer practice refuel, and my personal secret weapon for a morning energy boost. It’s proof that healthy can be utterly irresistible.
Layered Mixed-Berry Green Power Smoothie: The Ultimate Recipe
This recipe is designed to create two distinct, thick layers that won’t immediately blend. The secret is using plenty of frozen fruit and managing the amount of liquid. The ingredients are broken down by layer for clarity.
Ingredients for the Green Power Layer (Bottom Layer)
- Spinach: 2 packed cups, fresh
- Banana: 1 large, frozen and sliced
- Pineapple Chunks: ½ cup, frozen
- Avocado: ¼ of a medium, ripe avocado (for extra creaminess and healthy fats)
- Plant-Based Milk: ½ cup unsweetened almond milk (or milk of your choice, add more if needed)
- Chia Seeds: 1 tablespoon (helps to thicken and adds Omega-3s)
Ingredients for the Mixed-Berry Layer (Top Layer)
- Mixed Berries: 1 ½ cups, frozen (a blend of strawberries, blueberries, raspberries, and blackberries works best)
- Greek Yogurt: ½ cup plain Greek yogurt (or a dairy-free alternative like coconut yogurt for a vegan option)
- Plant-Based Milk: ¼ to ½ cup unsweetened almond milk (start with less and add as needed)
- Honey or Maple Syrup: 1-2 teaspoons, optional (adjust to your sweetness preference)
Step-by-Step Instructions
Crafting this layered masterpiece is an art, but a simple one. Follow these steps carefully for perfect separation and stunning results.
Step 1: Prepare the Green Power Layer
First, we create the foundation of our smoothie. The green layer needs to be thick and smooth to support the berry layer on top.
- Combine Ingredients: In the carafe of a high-speed blender, add all the ingredients for the Green Power Layer: the packed spinach, frozen banana slices, frozen pineapple chunks, the piece of avocado, chia seeds, and ½ cup of almond milk.
- Blend to Perfection: Secure the lid and start the blender on a low setting. Gradually increase the speed to high. Blend for 60-90 seconds, or until the mixture is completely smooth, creamy, and free of any leafy specks. If the blender is struggling, you can add another tablespoon of milk, but be careful not to make it too thin. The consistency should be thick, like a soft-serve ice cream.
- Pour the Base: Evenly divide this vibrant green mixture between two tall, clear serving glasses. Fill each glass about halfway. Use a spatula to smooth the top surface if you wish.
Step 2: Prepare the Mixed-Berry Layer
Now for the jewel-toned top layer. It’s crucial to rinse your blender carafe quickly between layers to prevent the colors from mixing.
- Rinse Blender: Give your blender a quick rinse with water to remove any residual green smoothie. This ensures your berry layer stays a beautiful, vibrant purple-red.
- Combine Ingredients: Add all the ingredients for the Mixed-Berry Layer to the clean blender: the frozen mixed berries, Greek yogurt, and just ¼ cup of almond milk to start. Add the optional sweetener now if you’re using it.
- Blend Carefully: Again, start the blender on low and increase to high. This layer is often thicker due to the high volume of frozen fruit. You may need to stop and scrape down the sides with a spatula. If it’s too thick to blend, add the remaining ¼ cup of milk one tablespoon at a time until it reaches a thick but pourable consistency. The goal is for it to be slightly less dense or of similar density to the green layer.
- The Layering Technique: This is the most important part for achieving that beautiful, distinct look. Take a large spoon and hold it just above the surface of the green layer in one of the glasses. Slowly and gently pour the berry smoothie over the back of the spoon. This disperses the smoothie, preventing it from plunging into and mixing with the green layer. Continue pouring slowly until the glass is full. Repeat with the second glass.
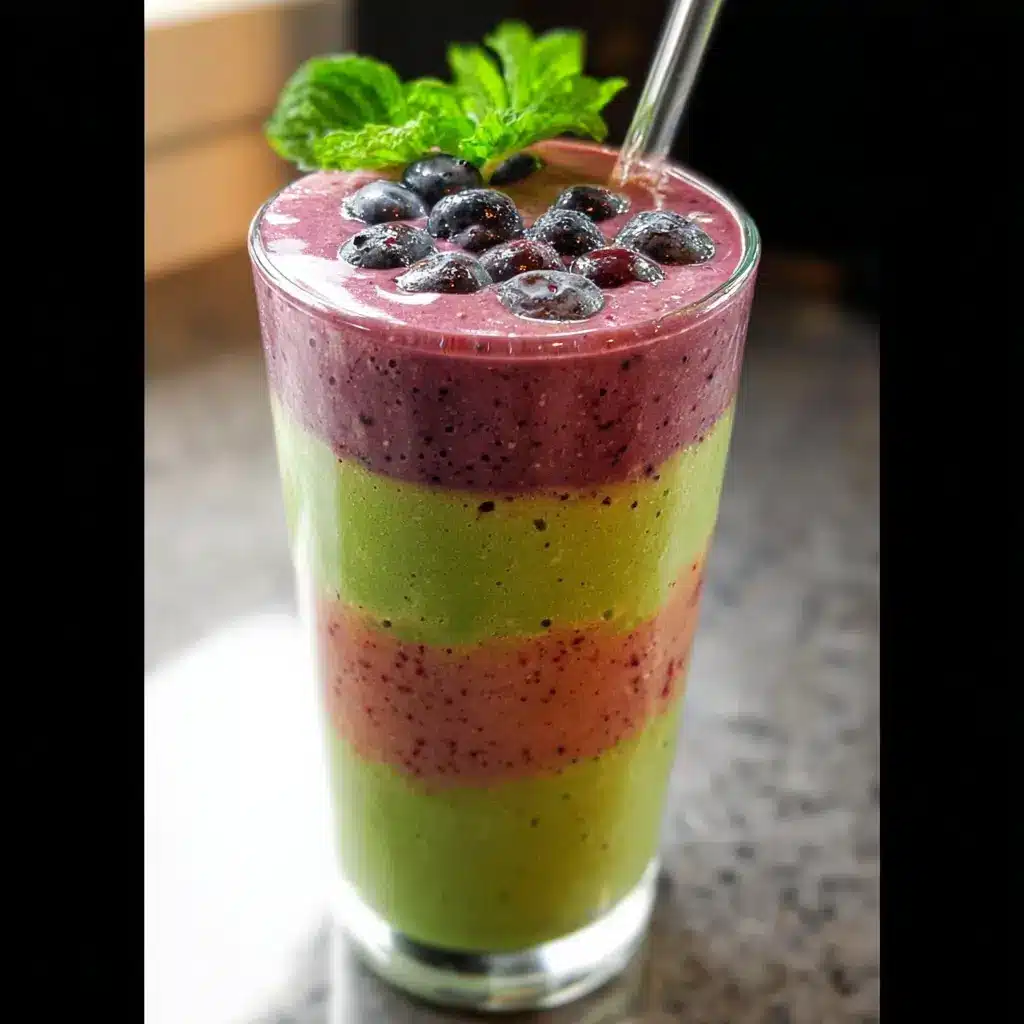
Step 3: Garnish and Serve Immediately
The final flourish makes all the difference. Garnish your beautiful layered smoothies with a few fresh berries, a sprinkle of granola, or a mint sprig before serving immediately.
Nutrition Facts
- Servings: 2 large smoothies
- Calories Per Serving: Approximately 380-420 kcal
Disclaimer: The nutritional information provided is an estimate and can vary based on the specific ingredients and quantities used, such as the type of milk, the addition of sweeteners, or other optional mix-ins.
The calories in this smoothie are what we call “nutrient-dense.” They are packed with fiber, protein, healthy fats, vitamins (like Vitamin C, K, and A), and powerful antioxidants from the berries and greens. It’s a fantastic way to consume a wide array of micronutrients in one delicious, easy-to-digest meal.
Preparation Time
- Prep Time: 5 minutes
- Cook Time (Blending): 5 minutes
- Total Time: 10 minutes
This 10-minute recipe is the perfect solution for busy mornings when you need a substantial and energizing meal without spending a lot of time in the kitchen.
How to Serve Your Layered Smoothie
Presentation elevates this simple smoothie into a café-worthy experience. Here’s how to serve it for maximum visual and culinary impact.
- Choose the Right Glassware: The beauty of this smoothie is its layers, so you must show them off!
- Tall Glasses: Collins or highball glasses are perfect as they elongate the layers.
- Mason Jars: For a rustic, trendy feel, a large mason jar is an excellent choice. The wide mouth also makes it easy to eat with a spoon.
- Tulip Glasses: A shapely glass can add an extra touch of elegance, making it feel like a special treat.
- Garnish Generously: Toppings add texture, flavor, and a professional finish. Think of the top of your smoothie as a blank canvas.
- Fresh Fruit: A few fresh blueberries, a sliced strawberry, or a raspberry placed on top provides a hint of what’s inside.
- Textural Crunch: Sprinkle a small amount of your favorite granola, some chopped nuts (like almonds or walnuts), or a dusting of hemp hearts or shredded coconut.
- A Touch of Green: A single fresh mint sprig adds a pop of contrasting color and a hint of fresh aroma.
- Drizzle: For an extra decadent touch, a thin drizzle of honey, maple syrup, or even melted dark chocolate can be a wonderful addition.
- Don’t Forget the Straw (and Spoon!):
- Provide a wide-mouthed straw, preferably a reusable metal or glass one, as this smoothie is quite thick.
- Serving it with a long-handled spoon (like an iced tea spoon) is also a great idea. This allows the drinker to either stir the layers together if they choose or eat them one by one.
Additional Tips for Smoothie Mastery
Take your smoothie game from good to great with these five expert tips.
- A High-Speed Blender is Your Best Friend: While any blender can make a smoothie, a high-speed blender (like a Vitamix or Blendtec) is a game-changer for green smoothies. It will pulverize the tough cell walls of spinach and chia seeds, resulting in a perfectly silky, non-gritty texture. If you don’t have one, blend your greens and liquid first for an extra minute before adding the other ingredients. This will help break them down more effectively.
- Frozen Fruit is Non-Negotiable: For a thick, cold, and creamy smoothie, frozen fruit is the secret ingredient. Using fresh fruit will result in a much thinner, more juice-like consistency. The frozen banana is especially critical as it provides natural sweetness and an incredible ice-cream-like texture. If you only have fresh fruit, add a cup of ice, but be aware this can slightly water down the flavor.
- Master Meal Prep with Smoothie Packs: Save precious time on busy mornings by preparing smoothie packs. For each serving, place the portioned solid ingredients for each layer into separate freezer-safe bags or containers. For the green layer pack, add the spinach, frozen banana, and pineapple. For the berry layer pack, add the mixed berries. When you’re ready to blend, just dump the contents of the green pack into the blender with its liquid, blend, pour, and repeat with the berry pack. It cuts prep time down to just a couple of minutes.
- Become a Consistency Connoisseur: The perfect smoothie thickness is a personal preference. Learning to adjust it is key.
- To Make it Thicker: The best methods are to add more frozen fruit, a few more ice cubes, another tablespoon of chia seeds (let it sit for 5 minutes to gel), or a scoop of rolled oats.
- To Make it Thinner: Simply add more of your chosen liquid (almond milk, water, etc.) a tablespoon at a time, until it reaches your desired consistency. Be careful not to add too much at once.
- Balance Your Flavors and Sweetness: The green layer gets its sweetness from the banana and pineapple. The berry layer is naturally sweet but can be tart. Before adding any sweetener like honey or maple syrup, taste the berry blend first. The ripeness of your fruit will greatly affect the overall sweetness. Using a very ripe banana in the green layer can often mean you need little to no added sugar in the berry layer. For a completely sugar-free option, you can add a pitted Medjool date to the blend for natural sweetness and fiber.
Frequently Asked Questions (FAQ)
Here are answers to some of the most common questions about making this layered smoothie.
1. Can I make this smoothie ahead of time?
While smoothies are best enjoyed fresh, you can make this ahead of time with a few caveats. The layers will inevitably start to blend and merge over time as they settle. It will still taste delicious, but you will lose the beautiful visual effect. If you need to make it ahead, you can store it in an airtight container (like a mason jar with a lid) in the refrigerator for up to 24 hours. The colors may darken slightly due to oxidation. To minimize this, you can add a small squeeze of lemon juice to each layer, which acts as a natural preservative. When you’re ready to drink it, give it a good stir. The best “make-ahead” method remains the smoothie pack tip mentioned above.
2. How do I make this smoothie vegan and dairy-free?
This recipe is very easy to adapt for a vegan or dairy-free diet! The green layer is already vegan as written (using plant-based milk). The only ingredient you need to substitute is in the berry layer.
- Swap the Greek Yogurt: Instead of regular Greek yogurt, use a plant-based yogurt. Coconut yogurt is an excellent choice as it’s thick and creamy, which helps maintain the right consistency for layering. Plain or vanilla-flavored soy yogurt or almond milk yogurt will also work well.
- Check Your Sweetener: If you’re opting for a sweetener, simply use maple syrup, agave nectar, or date syrup instead of honey to ensure the entire recipe is 100% vegan.
3. My smoothie layers are mixing together! What am I doing wrong?
This is the most common challenge with layered smoothies, and it almost always comes down to two things: consistency and pouring technique.
- Check Your Consistency: Both of your smoothie layers need to be thick. If your green layer is too thin, the heavier berry layer will sink right into it. If your berry layer is too thin, it will run and bleed into the green. The ideal texture is like thick, spoonable yogurt or soft-serve. The solution is usually to use more frozen fruit and less liquid.
- Perfect Your Pour: Do not pour the top layer directly into the center of the bottom layer. This concentrated stream will punch through the surface. The trick is to pour very slowly and gently over the back of a spoon held just above the bottom layer. This distributes the weight and allows the top layer to float.
4. Is this layered green smoothie good for weight loss?
This smoothie can be an excellent part of a weight loss or healthy eating plan. It is high in fiber from the fruits, vegetables, and chia seeds, which promotes a feeling of fullness and can help reduce overall calorie intake. The protein from the Greek yogurt (or a protein-rich plant-based alternative) also contributes to satiety. However, it’s important to be mindful of your ingredients. Smoothies can quickly become high in calories and sugar if you add too much fruit juice, sweeteners, or high-fat ingredients. To optimize it for weight management, stick to the recipe, use unsweetened milk, be mindful of or omit the added sweeteners, and consider it a full meal replacement rather than a drink alongside a large breakfast.
5. Can I use different fruits or greens?
Absolutely! This recipe is a fantastic template for customization. Feel free to experiment based on your preferences and what you have on hand.
- Greens: If you’re not a fan of spinach, you can use kale (be sure to remove the tough stems first). For a milder flavor, romaine lettuce is a surprisingly good option.
- Fruits: For the green layer, you could swap the pineapple for frozen mango for an even creamier, more tropical flavor. For the berry layer, you can use any single berry you love, like a pure strawberry or raspberry layer. Cherries also make a delicious, deep-red top layer. The key is to keep the fruit frozen to maintain the thick consistency needed for layering. Let your creativity and your taste buds be your guide

Layered Mixed-Berry Green Power Smoothie Recipe
Ingredients
Ingredients for the Green Power Layer (Bottom Layer)
- Spinach: 2 packed cups, fresh
- Banana: 1 large, frozen and sliced
- Pineapple Chunks: ½ cup, frozen
- Avocado: ¼ of a medium, ripe avocado (for extra creaminess and healthy fats)
- Plant-Based Milk: ½ cup unsweetened almond milk (or milk of your choice, add more if needed)
- Chia Seeds: 1 tablespoon (helps to thicken and adds Omega-3s)
Ingredients for the Mixed-Berry Layer (Top Layer)
- Mixed Berries: 1 ½ cups, frozen (a blend of strawberries, blueberries, raspberries, and blackberries works best)
- Greek Yogurt: ½ cup plain Greek yogurt (or a dairy-free alternative like coconut yogurt for a vegan option)
- Plant-Based Milk: ¼ to ½ cup unsweetened almond milk (start with less and add as needed)
- Honey or Maple Syrup: 1-2 teaspoons, optional (adjust to your sweetness preference)
Instructions
Step 1: Prepare the Green Power Layer
First, we create the foundation of our smoothie. The green layer needs to be thick and smooth to support the berry layer on top.
- Combine Ingredients: In the carafe of a high-speed blender, add all the ingredients for the Green Power Layer: the packed spinach, frozen banana slices, frozen pineapple chunks, the piece of avocado, chia seeds, and ½ cup of almond milk.
- Blend to Perfection: Secure the lid and start the blender on a low setting. Gradually increase the speed to high. Blend for 60-90 seconds, or until the mixture is completely smooth, creamy, and free of any leafy specks. If the blender is struggling, you can add another tablespoon of milk, but be careful not to make it too thin. The consistency should be thick, like a soft-serve ice cream.
- Pour the Base: Evenly divide this vibrant green mixture between two tall, clear serving glasses. Fill each glass about halfway. Use a spatula to smooth the top surface if you wish.
Step 2: Prepare the Mixed-Berry Layer
Now for the jewel-toned top layer. It’s crucial to rinse your blender carafe quickly between layers to prevent the colors from mixing.
- Rinse Blender: Give your blender a quick rinse with water to remove any residual green smoothie. This ensures your berry layer stays a beautiful, vibrant purple-red.
- Combine Ingredients: Add all the ingredients for the Mixed-Berry Layer to the clean blender: the frozen mixed berries, Greek yogurt, and just ¼ cup of almond milk to start. Add the optional sweetener now if you’re using it.
- Blend Carefully: Again, start the blender on low and increase to high. This layer is often thicker due to the high volume of frozen fruit. You may need to stop and scrape down the sides with a spatula. If it’s too thick to blend, add the remaining ¼ cup of milk one tablespoon at a time until it reaches a thick but pourable consistency. The goal is for it to be slightly less dense or of similar density to the green layer.
- The Layering Technique: This is the most important part for achieving that beautiful, distinct look. Take a large spoon and hold it just above the surface of the green layer in one of the glasses. Slowly and gently pour the berry smoothie over the back of the spoon. This disperses the smoothie, preventing it from plunging into and mixing with the green layer. Continue pouring slowly until the glass is full. Repeat with the second glass.
Step 3: Garnish and Serve Immediately
The final flourish makes all the difference. Garnish your beautiful layered smoothies with a few fresh berries, a sprinkle of granola, or a mint sprig before serving immediately.
Nutrition
- Serving Size: One Normal Portion
- Calories: 380-420 kcal


