Of all the weeknight dinner miracles I’ve discovered since getting an air fryer, this one sits at the very top of the list. For years, I was locked in a battle with my family over “healthy” chicken. The moment they heard “no breading,” I’d get a collective groan. They associated it with dry, bland, boring chicken breast that was more of a chore to eat than a pleasure. I was on a mission to prove them wrong. I wanted the juicy, flavorful, and satisfying experience of a classic chicken tender without the carbs, gluten, and heavy oils from deep-frying. After countless attempts, tweaking spice blends and cook times, this recipe was born. The first time I served these Air Fryer Chicken Tenders with no breading, the silence at the dinner table was my first clue. Then came the “Whoa, what did you do to these?” and the “Can I have more?” It was a total victory. The chicken was unbelievably juicy, coated in a savory, slightly crispy “skin” formed by the spices and the magic of the circulating hot air. It looked and tasted indulgent, yet I knew it was packed with protein and made with just a teaspoon of oil. This recipe has become our go-to for busy weeknights, a quick protein for salads, and a healthy snack that everyone genuinely loves. It’s the recipe that single-handedly made my family fall in love with healthy eating, and I’m so excited to share it with you.
The Ultimate Juicy Air Fryer Chicken Tenders (No Breading)
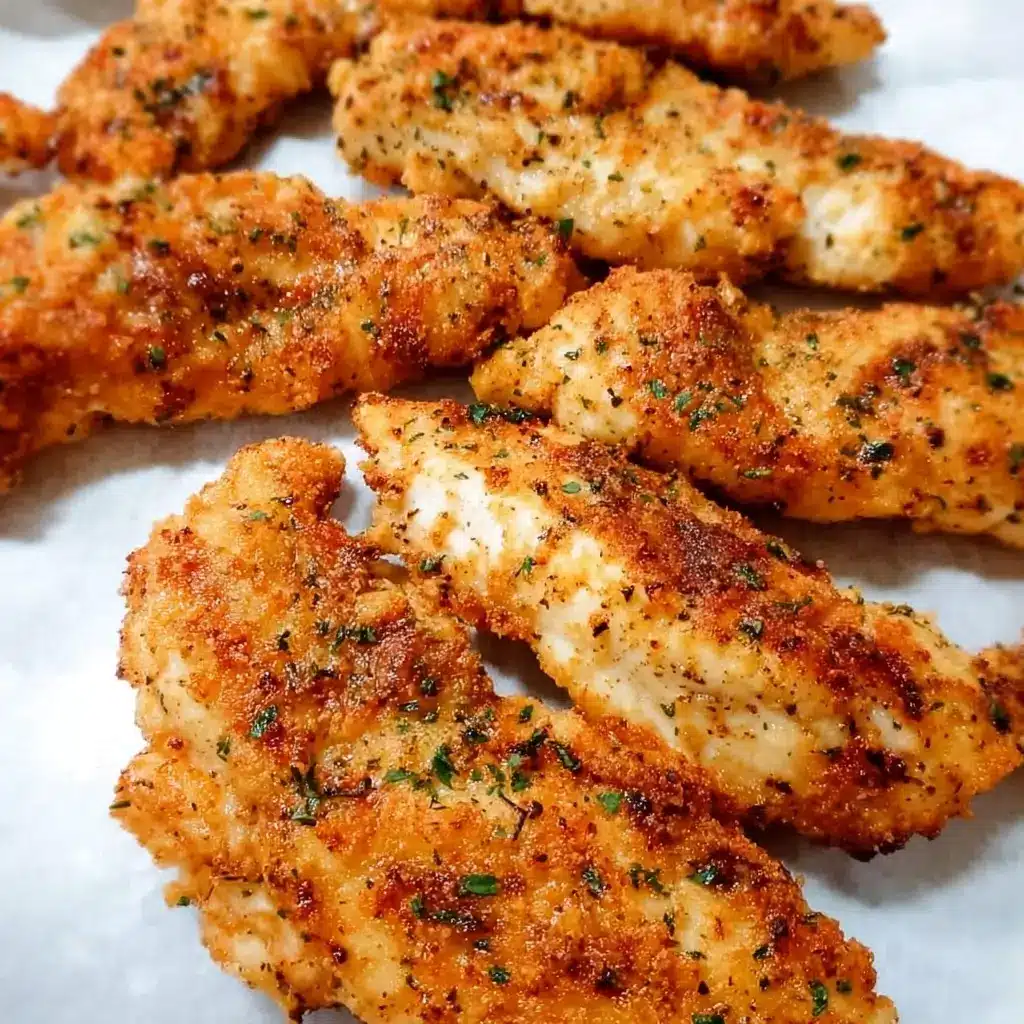
This recipe proves that you don’t need a heavy coating to achieve perfectly seasoned, incredibly moist, and wonderfully delicious chicken tenders. The air fryer works its magic, creating a beautifully browned exterior while locking in all the natural juices. Prepare to be amazed by the simplicity and flavor of this guilt-free family favorite.
Why You Will Absolutely Love This Recipe
Before we dive into the details, let’s talk about why this specific recipe will become a staple in your kitchen:
- Incredibly Fast: We’re talking less than 20 minutes from fridge to plate. It’s the perfect solution for those hectic weeknights when you need a healthy meal on the table, fast.
- Healthy and Diet-Friendly: With no breading, this recipe is naturally low-carb, keto-friendly, gluten-free, and Paleo. It’s pure protein and flavor, fitting seamlessly into virtually any healthy eating plan.
- Minimal Ingredients, Maximum Flavor: You only need a handful of common pantry spices to create a taste that is savory, smoky, and utterly addictive.
- Unbelievably Juicy: This is the biggest selling point. By following our method, you will banish dry chicken from your life forever. We’ll show you how to get a tender, moist result every single time.
- Endlessly Versatile: These tenders are a blank canvas. Eat them on their own, dip them in your favorite sauce, slice them over a salad, or stuff them into a wrap. The possibilities are endless.
- Effortless Cleanup: Say goodbye to greasy pans and oil splatters. The entire recipe is made in the air fryer basket, which means cleanup is as simple as a quick wash.
The Science Behind Perfect No-Breading Chicken
How do you get that satisfying, crispy-edged, golden-brown exterior without any flour or breadcrumbs? The secret lies in a combination of food science and air fryer technology.
- The Maillard Reaction: This is the chemical reaction between amino acids (from the protein in the chicken) and reducing sugars that gives browned food its distinctive flavor and color. By patting the chicken dry and coating it with a small amount of oil and spices, we create the perfect surface for this reaction to occur. The high, dry heat of the air fryer accelerates this process, essentially “roasting” the spice coating onto the chicken, creating a savory crust.
- Convection Heat: An air fryer is essentially a small, powerful convection oven. It circulates extremely hot air at high speed around the food. This intense heat cooks the chicken quickly from all sides at once. This rapid cooking process is crucial for moisture retention. It sears the outside of the chicken tenders, creating that flavorful crust we mentioned, which in turn traps the juices inside, preventing them from evaporating and leaving you with a dry, tough piece of meat. You get the best of both worlds: a beautifully browned exterior and a succulent, tender interior.
Ingredients You’ll Need
The beauty of this recipe is its simplicity. We’re using a classic, crowd-pleasing spice blend that you likely already have in your cabinet.
- Chicken Tenderloins: 1.5 lbs (about 680g). You can also use chicken breasts sliced into 1-inch thick strips.
- Olive Oil: 1 tablespoon. Avocado oil also works wonderfully.
- Smoked Paprika: 2 teaspoons. This is key for that beautiful color and smoky, rich flavor.
- Garlic Powder: 1.5 teaspoons. For a deep, savory, aromatic base.
- Onion Powder: 1.5 teaspoons. Adds a subtle sweetness and complexity.
- Dried Oregano: 1 teaspoon. Brings a touch of earthy, herbaceous brightness.
- Fine Sea Salt: 1 teaspoon. To enhance all the other flavors.
- Black Pepper: ½ teaspoon, freshly ground for the best taste.
- Optional: ¼ teaspoon of cayenne pepper for a gentle kick of heat.
Step-by-Step Instructions
Follow these simple steps for flawless, juicy chicken tenders every time. The key is in the preparation and not overcrowding the air fryer basket.
Step 1: Prepare the Chicken
Remove the chicken tenderloins from the packaging. The most important first step is to pat them completely dry with paper towels. Removing excess surface moisture is crucial for getting the spices to adhere properly and for achieving that perfect golden-brown sear instead of just steaming the chicken. If your tenderloins have the tough white tendon still attached, you can easily remove it. Simply hold the end of the tendon with a paper towel (for grip) and slide a fork underneath it, with the tendon between the tines. Pull the tendon through the fork while pushing the fork down; it should slide right out.
Step 2: Create the Spice Blend
In a small bowl, combine the smoked paprika, garlic powder, onion powder, dried oregano, salt, and black pepper (and cayenne, if using). Whisk them together until they are thoroughly mixed. This ensures that every single chicken tender gets an even coating of all the flavors.
Step 3: Season the Chicken
Place the dry chicken tenderloins in a medium-sized bowl or a large zip-top bag. Drizzle the olive oil over the chicken and toss well to coat each piece evenly. The oil acts as a binder for the spices and helps the chicken brown in the air fryer. Now, sprinkle the prepared spice blend all over the oiled chicken. Use your hands or seal the bag and shake vigorously to ensure every nook and cranny of the chicken is generously coated.
Step 4: Prepare the Air Fryer
For the best results, preheat your air fryer to 400°F (200°C) for about 3-5 minutes. Preheating helps the chicken start cooking immediately upon contact with the hot basket, giving you a better sear and a juicier result.
Step 5: Air Fry the Tenders
Carefully arrange the seasoned chicken tenders in the preheated air fryer basket in a single layer. It is critical not to overcrowd the basket. Leave a little space between each tender to allow the hot air to circulate freely around them. If you overcrowd the basket, the chicken will steam instead of “frying,” and you won’t get that delicious browning. You may need to cook in two batches depending on the size of your air fryer.
Step 6: Cook to Perfection
Air fry at 400°F (200°C) for 10-14 minutes, flipping the tenders halfway through the cooking time. The exact time will vary depending on the thickness of your tenders and the specific model of your air fryer. The chicken is done when it is golden brown and the internal temperature reaches 165°F (74°C) on an instant-read meat thermometer. Using a thermometer is the only guaranteed way to ensure perfectly cooked, juicy chicken that is also safe to eat.
Step 7: Rest and Serve
Once cooked, immediately remove the chicken tenders from the air fryer basket and transfer them to a plate. Let them rest for 3-5 minutes before serving. This crucial step allows the juices to redistribute throughout the meat, ensuring every bite is as moist and flavorful as possible. Serve hot with your favorite dipping sauces and sides.
Nutrition Facts
Please note that these are estimates and can vary based on the exact ingredients and portion sizes used.
- Servings: 4
- Calories per serving: Approximately 290 kcal
Preparation Time
- Prep Time: 5 minutes
- Cook Time: 10-14 minutes
- Total Time: 15-19 minutes
How to Serve Your Delicious Chicken Tenders
These versatile chicken tenders are a fantastic centerpiece for a wide variety of meals. Here are some of our favorite ways to serve them:
Classic Dipping Platter
Serve them hot and fresh with a vibrant array of dipping sauces. This is perfect for a fun family dinner, an appetizer for a party, or a satisfying snack.
- Classic Honey Mustard
- Smoky BBQ Sauce
- Creamy Ranch Dressing (or a healthier Greek yogurt-based version)
- Spicy Buffalo Sauce with a side of blue cheese dressing
- Sweet Chili Sauce
- Homemade Aioli (garlic and olive oil mayonnaise)
- Marinara Sauce for an Italian twist
As the Star of a Main Course Salad
Let the tenders cool slightly, then slice them and place them on top of a fresh, crisp salad for a light yet incredibly satisfying lunch or dinner.
- Chicken Caesar Salad: Toss with romaine lettuce, Parmesan cheese, croutons (or leave them out for a low-carb version), and Caesar dressing.
- Southwest Chicken Salad: Serve over a bed of mixed greens with black beans, corn, cherry tomatoes, avocado, red onion, and a cilantro-lime vinaigrette.
- Greek Chicken Salad: Combine with chopped cucumber, tomatoes, olives, feta cheese, and a lemon-herb dressing.
In Wraps, Sandwiches, or Bowls
These tenders are a meal-prepper’s dream. They are perfect for adding a boost of protein to lunches throughout the week.
- Chicken Wraps: Stuff into a whole-wheat or low-carb tortilla with lettuce, tomato, cheese, and your favorite sauce.
- Grain Bowls: Slice and add to a bowl of quinoa or brown rice, along with roasted vegetables like broccoli and bell peppers, and a drizzle of tahini sauce.
- Low-Carb “Pasta”: Serve alongside zucchini noodles or spaghetti squash tossed in pesto or a light tomato sauce.
Additional Tips for Perfect Results
Unlock the full potential of this recipe with these five expert tips.
- Don’t Skip the “Pat Dry” Step: We mentioned it in the instructions, but it bears repeating. Water is the enemy of browning. Taking an extra 30 seconds to pat the chicken completely dry with paper towels will make a massive difference in the final texture and appearance of your tenders.
- Invest in a Meat Thermometer: If you take one tip away from this article, let it be this one. An instant-read meat thermometer is the single best tool for guaranteeing juicy, perfectly cooked chicken every single time. Ovens and air fryers vary, and chicken thickness is never uniform. Cooking to temperature (165°F / 74°C) instead of just time removes all the guesswork and prevents overcooking.
- Give Them Space to Breathe: The golden rule of air frying is to never overcrowd the basket. The tenders need to be in a single layer with space between them for the hot air to do its job. Cooking in two batches might take a few extra minutes, but the vastly superior result—golden and crispy-edged instead of pale and soggy—is more than worth it.
- Shake to Coat for Even Flavor: For the most even seasoning distribution, use a large zip-top bag. Add the oiled chicken, dump in the spices, seal the bag (removing most of the air), and shake it like you mean it. This method ensures every surface of the chicken is coated for maximum flavor in every bite.
- Experiment with Spice Blends: This recipe is a fantastic base. Don’t be afraid to customize it! Create different flavor profiles by swapping out the spices. Try a blend of chili powder and cumin for a taco-inspired tender, or use lemon pepper and dill for a bright, fresh flavor. The possibilities are limitless.
Frequently Asked Questions (FAQ)
Here are answers to some of the most common questions about making no-breading chicken tenders in the air fryer.
1. Can I use frozen chicken tenders for this recipe?
Yes, you can, but it requires a slight adjustment. Do not thaw them first. Place the frozen tenders directly in the air fryer and cook them at 380°F (190°C) for about 5-7 minutes to thaw them out. Then, remove them from the basket, pat them dry, toss them with the oil and spices as directed in the recipe, and return them to the 400°F (200°C) air fryer to cook for another 10-12 minutes, or until the internal temperature reaches 165°F (74°C). Cooking from frozen will take longer overall.
2. My chicken tenders always come out dry. What am I doing wrong?
The most common culprit for dry chicken is overcooking. Every air fryer is different, and the thickness of chicken tenders can vary significantly. This is why relying solely on a timer can be risky. The solution is to use an instant-read meat thermometer. Start checking the temperature a few minutes before the recommended cook time is up. Pull the tenders out the moment they hit 165°F (74°C) in the thickest part. Also, be sure not to skip the 3-5 minute resting period after cooking, as this helps lock in the juices.
3. Do I really need to preheat my air fryer?
While some recipes work fine without it, preheating is highly recommended for this one. Placing the chicken into an already hot environment kickstarts the Maillard reaction immediately, helping to create a better “sear” on the outside and cooking the chicken faster. This quick cooking is essential for keeping the inside juicy. Think of it like placing a steak in a cold pan versus a hot one—the hot pan gives you a much better crust.
4. What is the difference between chicken tenders and chicken tenderloins?
The terms are often used interchangeably, but there is a technical difference. The chicken tenderloin (or “pectoralis minor”) is the small strip of muscle loosely attached to the underside of the chicken breast. It is naturally the most tender part of the chicken. “Chicken tenders” can refer to these tenderloins, or they can be strips of meat cut from the larger chicken breast. For this recipe, either will work beautifully, but true chicken tenderloins will give you the most reliably tender result.
5. How do I get the spices to stick better without any breading?
There are two key factors here. First, as mentioned multiple times, is ensuring the chicken is patted very dry. Spices won’t stick to a wet surface. Second is using a binder, which in this case is the olive oil. Tossing the chicken in the oil first creates a slightly tacky surface that the spice blend can cling to. Make sure every piece is lightly but evenly coated in the oil before you add the seasoning for the best adhesion.

Juicy Air Fryer Chicken Tenders (No Breading) Recipe
Ingredients
- Chicken Tenderloins: 1.5 lbs (about 680g). You can also use chicken breasts sliced into 1-inch thick strips.
- Olive Oil: 1 tablespoon. Avocado oil also works wonderfully.
- Smoked Paprika: 2 teaspoons. This is key for that beautiful color and smoky, rich flavor.
- Garlic Powder: 1.5 teaspoons. For a deep, savory, aromatic base.
- Onion Powder: 1.5 teaspoons. Adds a subtle sweetness and complexity.
- Dried Oregano: 1 teaspoon. Brings a touch of earthy, herbaceous brightness.
- Fine Sea Salt: 1 teaspoon. To enhance all the other flavors.
- Black Pepper: ½ teaspoon, freshly ground for the best taste.
- Optional: ¼ teaspoon of cayenne pepper for a gentle kick of heat.
Instructions
Step 1: Prepare the Chicken
Remove the chicken tenderloins from the packaging. The most important first step is to pat them completely dry with paper towels. Removing excess surface moisture is crucial for getting the spices to adhere properly and for achieving that perfect golden-brown sear instead of just steaming the chicken. If your tenderloins have the tough white tendon still attached, you can easily remove it. Simply hold the end of the tendon with a paper towel (for grip) and slide a fork underneath it, with the tendon between the tines. Pull the tendon through the fork while pushing the fork down; it should slide right out.
Step 2: Create the Spice Blend
In a small bowl, combine the smoked paprika, garlic powder, onion powder, dried oregano, salt, and black pepper (and cayenne, if using). Whisk them together until they are thoroughly mixed. This ensures that every single chicken tender gets an even coating of all the flavors.
Step 3: Season the Chicken
Place the dry chicken tenderloins in a medium-sized bowl or a large zip-top bag. Drizzle the olive oil over the chicken and toss well to coat each piece evenly. The oil acts as a binder for the spices and helps the chicken brown in the air fryer. Now, sprinkle the prepared spice blend all over the oiled chicken. Use your hands or seal the bag and shake vigorously to ensure every nook and cranny of the chicken is generously coated.
Step 4: Prepare the Air Fryer
For the best results, preheat your air fryer to 400°F (200°C) for about 3-5 minutes. Preheating helps the chicken start cooking immediately upon contact with the hot basket, giving you a better sear and a juicier result.
Step 5: Air Fry the Tenders
Carefully arrange the seasoned chicken tenders in the preheated air fryer basket in a single layer. It is critical not to overcrowd the basket. Leave a little space between each tender to allow the hot air to circulate freely around them. If you overcrowd the basket, the chicken will steam instead of “frying,” and you won’t get that delicious browning. You may need to cook in two batches depending on the size of your air fryer.
Step 6: Cook to Perfection
Air fry at 400°F (200°C) for 10-14 minutes, flipping the tenders halfway through the cooking time. The exact time will vary depending on the thickness of your tenders and the specific model of your air fryer. The chicken is done when it is golden brown and the internal temperature reaches 165°F (74°C) on an instant-read meat thermometer. Using a thermometer is the only guaranteed way to ensure perfectly cooked, juicy chicken that is also safe to eat.
Step 7: Rest and Serve
Once cooked, immediately remove the chicken tenders from the air fryer basket and transfer them to a plate. Let them rest for 3-5 minutes before serving. This crucial step allows the juices to redistribute throughout the meat, ensuring every bite is as moist and flavorful as possible. Serve hot with your favorite dipping sauces and sides.
Nutrition
- Serving Size: One Normal Portion
- Calories: 290