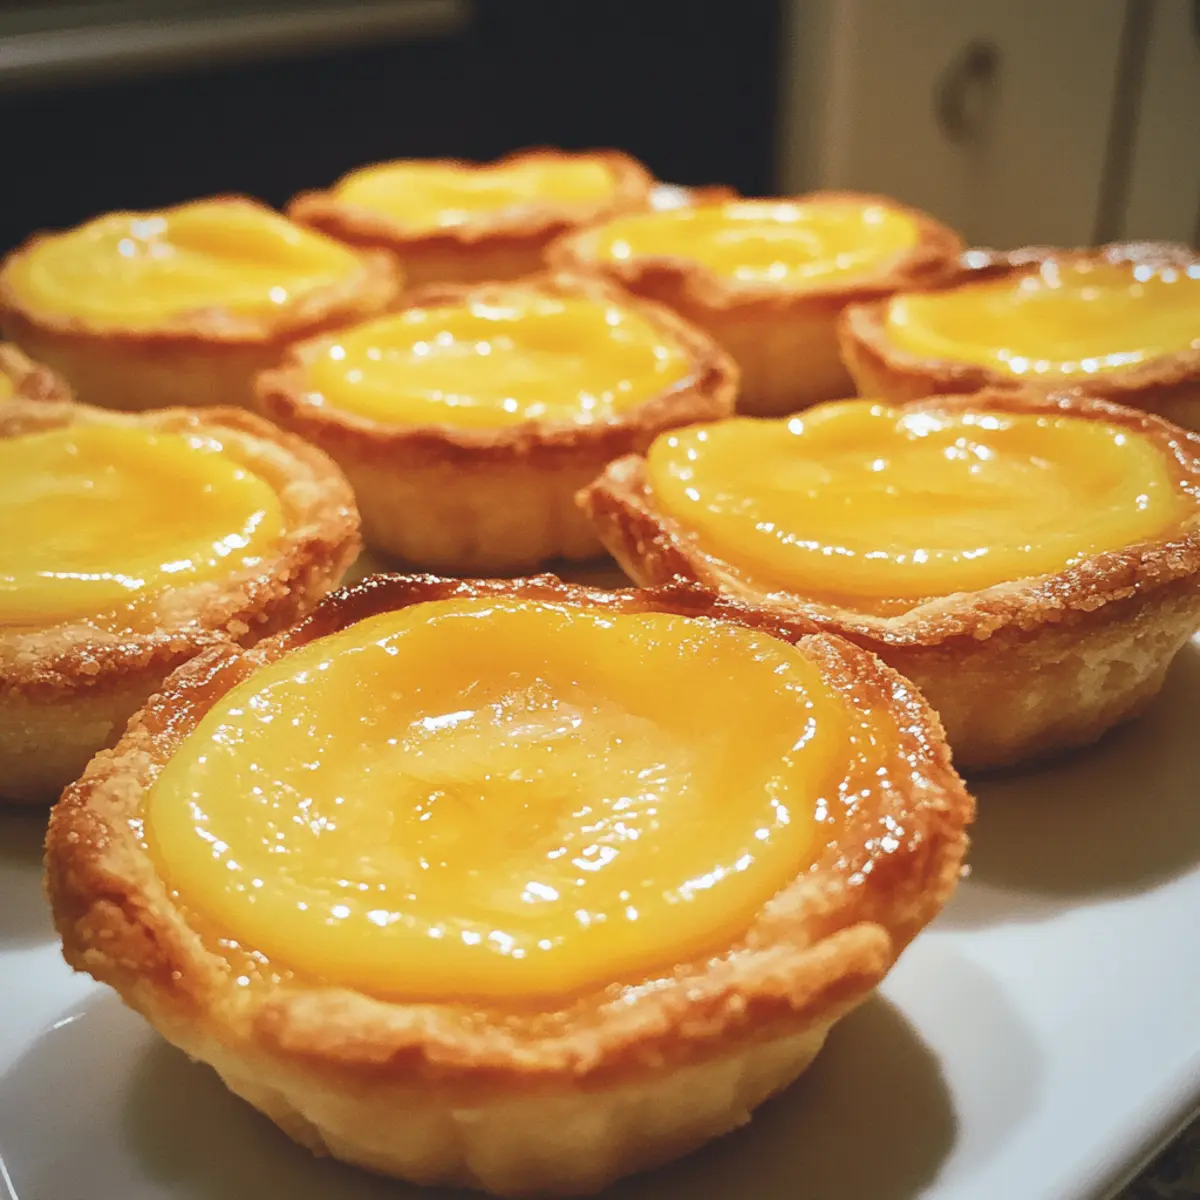
There’s something irresistibly charming about these Mini Lemon Cheesecake Tarts—the moment you bite into the buttery crust, it gives way to a silky, tangy lemon cream that brightens your day instantly. I came across this recipe when I wanted a fresh, crowd-pleasing dessert that wasn’t too heavy or fussy to make. Perfectly portioned for sharing (or savoring solo), these tarts blend the rich comfort of cheesecake with the zesty sparkle of lemon, making them a favorite for afternoon teas, dinner parties, or anytime you need a little sunshine on a plate. If you’re tired of the usual sweets and craving something both elegant and effortless, these tarts are about to become your new go-to treat.

Why choose Mini Lemon Cheesecake Tarts?
Bursting with flavor: These tarts offer a perfect balance of creamy cheesecake richness and refreshing lemon zest. Effortless to make: With simple steps and minimal ingredients, they’re ideal for busy home cooks. Perfectly portable: Their bite-size nature makes sharing easy and mess-free. Crowd-pleasers: Whether at parties or casual gatherings, they impress every palate. Versatile treat: Enjoy them chilled, or add fresh berries for a customized twist.
Mini Lemon Cheesecake Tarts Ingredients
For the Crust
- Graham cracker crumbs – use finely crushed crumbs for a crisp, buttery base.
- Unsalted butter – melted to bind the crumbs and add rich flavor.
- Granulated sugar – just a touch to enhance sweetness and balance the tartness.
For the Lemon Cheesecake Filling
- Cream cheese – softened for a smooth, creamy texture essential to the cheesecake base.
- Powdered sugar – blends seamlessly to sweeten without grit.
- Lemon juice – freshly squeezed to bring a bright, tangy zing.
- Lemon zest – adds fragrant, citrusy notes that amplify the lemon flavor.
- Heavy cream – whipped lightly to give a luscious, airy finish.
For Garnish (Optional)
- Fresh berries – raspberries or blueberries add a colorful, juicy contrast.
- Mint leaves – a fresh touch that elevates the presentation and aroma.
- Lemon slices or twists – visually reinforce that zesty lemon charm found inside these Mini Lemon Cheesecake Tarts.
How to Make Mini Lemon Cheesecake Tarts
- Preheat Oven: Preheat your oven to 350°F and position a 12-cup mini muffin tin on a baking sheet for easy handling. Lightly grease each cup.
- Combine Crust Ingredients: In a bowl, mix graham cracker crumbs, melted butter, and granulated sugar until the texture resembles wet sand, ensuring even coating and perfect buttery flavor.
- Press Crusts: Divide the crumb mixture evenly among the cups and firmly press it into the bottom and sides to form neat little tart shells ready for baking.
- Bake Crusts: Bake at 350°F for 8–10 minutes until edges turn golden brown; then remove from oven and let cool fully to ensure crisp, sturdy bases.
- Beat Cream Cheese: In a clean bowl, beat softened cream cheese on medium speed until smooth and fluffy, stopping occasionally to scrape down the sides for an even consistency.
- Add Sugar & Lemon: Mix in powdered sugar, fresh lemon juice, and lemon zest until well combined; the result is a bright, tangy filling bursting with vibrant citrus flavor that beautifully balances the rich cheesecake base.
- Whip Cream: In a separate bowl, whip heavy cream to soft peaks, taking care not to overbeat; gently fold into lemon cheesecake mixture for a light, airy texture, ensuring a cloud-like, pillowy finish.
- Fill Tarts: Spoon or pipe the lemon cheesecake filling into each cooled crust, filling each cup nearly to the top for an elegant, domed presentation, using a small offset spatula to smooth the tops before chilling.
- Chill Tarts: Refrigerate the filled tarts, covering loosely with plastic wrap, for at least 2 hours (or overnight) until the cheesecake sets firm and flavors meld into a luscious, tangy bite.
- Garnish & Serve: Just before serving, top tarts with fresh berries, mint leaves, or a lemon twist, plus an optional dusting of powdered sugar for extra sweetness and elegance.
Optional: Drizzle melted white chocolate over tarts for extra sweetness.
Exact quantities are listed in the recipe card below.

Make Ahead Options
These Mini Lemon Cheesecake Tarts are perfect for busy weeknights or special occasions! You can prepare the crusts up to 3 days in advance; simply bake them, cool fully, and store in an airtight container at room temperature. The luscious lemon cheesecake filling can also be made up to 24 hours ahead; refrigerate it in a separate container to keep it fresh. When you’re ready to serve, fill the crusts with the cheesecake mixture, allow them to chill for at least 2 hours (or overnight) to set, and garnish with berries and mint just before presenting. This allows you to enjoy delightful, fresh treats with minimal last-minute effort!
What to Serve with Mini Lemon Cheesecake Tarts?
Elevate your dessert experience with delightful pairings that beautifully complement the bright, tangy flavors of these chic tarts.
- Fresh Fruit Salad: A medley of seasonal fruits adds a refreshing burst, balancing the creamy tartness and enhancing the overall flavor profile.
- Lightly Sweetened Whipped Cream: A dollop of sweetened cream brings a silky texture that harmonizes with the lemony filling, creating a luscious experience.
- Herbal Tea: Enjoy a cup of soothing herbal tea, like chamomile or mint, which complements the citrus without overpowering its delicate flavor.
- Sparkling Water: Crisp, fizzy water with a squeeze of lemon can cleanse the palate, making each bite of cheesecake tart feel new and vibrant.
- Chocolate-Dipped Strawberries: The slight bitterness of dark chocolate contrasts delightfully with the tart’s sweetness, making for a romantic touch.
- Almond Biscotti: Crunchy and subtly sweet, these cookies offer a lovely texture contrast to the smooth tarts, perfect for dipping!
- Lemon Sorbet: For a refreshing twist, serve a scoop of lemon sorbet alongside. It enhances the citrus flavor and adds a cool, creamy element.
Each pairing is a tiny celebration, inviting your guests to linger over every bite and sip.
Expert Tips for Mini Lemon Cheesecake Tarts
- Use Room Temperature Cream Cheese: Softened cream cheese blends more smoothly, preventing lumps and giving your filling a silky texture.
- Don’t Overwhip Cream: Whip heavy cream just to soft peaks; overbeating can cause it to turn grainy and lose that light, airy feel in your tarts.
- Press Crust Firmly: Compact the graham cracker crust well to avoid crumbly edges and ensure sturdy tart shells that hold their shape.
- Fresh Lemon Juice is Key: Avoid bottled lemon juice for the best bright, natural citrus flavor that elevates the Mini Lemon Cheesecake Tarts.
- Chill Thoroughly: Allow tarts to set in the fridge for at least 2 hours so the filling firms up beautifully and flavors fully meld together.
- Handle Garnishes Delicately: Add berries and mint just before serving to keep their freshness and vibrant color, enhancing the tart’s appeal.
Variations & Substitutions for Mini Lemon Cheesecake Tarts
Feel free to mix and match these ideas to create a uniquely delicious twist on your Mini Lemon Cheesecake Tarts!
-
Gluten-Free Crust: Substitute graham cracker crumbs with gluten-free cookie crumbs to keep the crust deliciously intact without the gluten.
-
Dairy-Free Filling: Replace cream cheese with a vegan cream cheese alternative and use coconut cream instead of heavy cream for a luscious non-dairy option. This makes the tarts accessible for everyone!
-
Sugar-Free Sweetness: Use a sugar substitute like stevia or erythritol in place of granulated and powdered sugar, ensuring your tarts still feel indulgent without the extra calories.
-
Fruit Flavor Burst: Swap out lemon juice and zest for fresh lime or even orange juice and zest to reinvent the flavor while maintaining that refreshing zing. Each citrus brings its own lovely twist!
-
Chocolate Drizzle: After chilling, drizzle melted dark chocolate or white chocolate on top before garnishing for a rich, decadent flair that brings a lovely contrast to the tangy filling.
-
Baked Version: Instead of no-bake, bake the filling gently in the crust until set for a more traditional cheesecake texture. This gives a richer flavor to every delightful bite.
-
Nuts for Crunch: Fold in finely chopped nuts, like walnuts or pecans, into the crust for added texture and a nutty depth that perfectly complements the creamy filling.
-
Spiced Delight: Add a pinch of cinnamon or a dash of cardamom to the graham cracker crust or filling for a cozy aromatic note that beautifully enhances the overall flavor.
No matter which variations you choose, embracing creativity in the kitchen only adds to the joy of cooking!
How to Store and Freeze Mini Lemon Cheesecake Tarts
Fridge: Keep your Mini Lemon Cheesecake Tarts covered in an airtight container for up to 3 days to maintain their freshness and flavors.
Freezer: For longer storage, freeze the filled tarts (without toppings) by wrapping them individually in plastic wrap and placing in a freezer-safe container for up to 1 month.
Thawing: To enjoy frozen tarts, transfer them to the fridge for several hours or overnight before serving. This ensures they retain their texture and taste.
Reheating: These tarts are best served cold, so no reheating is necessary; simply enjoy them straight from the fridge!

Mini Lemon Cheesecake Tarts Recipe FAQs
How do I know if my lemons are ripe enough for the tarts?
Choose lemons that feel heavy for their size with bright, glossy skin. They should be firm but have a slight give when gently pressed—this means they’re juicy and perfect for zesting and juicing. Avoid lemons with dark spots all over or overly hard texture.
What’s the best way to store these Mini Lemon Cheesecake Tarts?
Keep them in an airtight container in the refrigerator to preserve their creamy texture and fresh lemon flavor. They stay delicious for about 3 days, but after that, the crust may begin to lose its crispness. Covering them loosely with plastic wrap before placing in a container helps prevent them from absorbing fridge odors.
Can I freeze Mini Lemon Cheesecake Tarts for later?
Absolutely! To freeze, first chill the tarts uncovered until firm. Then gently wrap each tart individually in plastic wrap and place all in a freezer-safe container or zip-top bag. They keep well for up to 1 month. When ready to eat, thaw them in the refrigerator overnight — this slow thaw keeps the texture silky and the crust intact.
What if my cheesecake filling becomes grainy or too firm?
This can happen if cream cheese isn’t fully softened or if the heavy cream is overwhipped. Be sure to bring cream cheese to room temperature before mixing and whip the cream only until soft peaks form. If graininess occurs, try gently warming the mixture over a double boiler while stirring—it can smooth it out before filling your crusts.
Are Mini Lemon Cheesecake Tarts safe for pets or people with allergies?
While delicious for humans, these tarts contain dairy and citrus, which aren’t suitable for most pets and can trigger allergies in sensitive individuals. Always keep desserts with cream cheese, sugar, and lemon juice out of pets’ reach, and let guests know about common allergens if you’re serving at gatherings.
Irresistibly Easy Mini Lemon Cheesecake Tarts You'll Love
Ingredients
Equipment
Method
- Preheat your oven to 350°F and position a 12-cup mini muffin tin on a baking sheet. Lightly grease each cup.
- In a bowl, mix graham cracker crumbs, melted butter, and granulated sugar until the mixture resembles wet sand.
- Divide the crumb mixture evenly among the cups and firmly press it into the bottom and sides.
- Bake at 350°F for 8–10 minutes until edges turn golden brown; then let cool fully.
- Beat softened cream cheese on medium speed until smooth and fluffy.
- Mix in powdered sugar, fresh lemon juice, and lemon zest until well combined.
- Whip heavy cream to soft peaks and gently fold into lemon cheesecake mixture.
- Spoon or pipe the lemon cheesecake filling into each cooled crust.
- Refrigerate the filled tarts for at least 2 hours until the cheesecake sets firm.
- Just before serving, top tarts with fresh berries, mint leaves, or a lemon twist.