


Korean beef, oh Korean beef! Let me tell you, this recipe has become an absolute staple in our household, and for very good reason. As a busy parent juggling work, school runs, and everything in between, weeknight dinners can often feel like a frantic race against the clock. But this Korean beef? It’s a game-changer. From the moment the tantalizing aroma of ginger and garlic starts wafting from the pressure cooker, you know you’re in for a treat. The beef emerges fall-apart tender, infused with a depth of flavor that belies its simple preparation. Even my pickiest eater (my son, who subsists mainly on air and chicken nuggets, or so it seems) devours this, usually going back for seconds, which is a win in my book! We’ve enjoyed it in grain bowls with fluffy rice and vibrant veggies, piled high on crusty rolls for incredibly satisfying sandwiches, and even tossed into refreshing salads for a protein-packed lunch. Honestly, if you’re looking for a meal that’s both incredibly delicious and unbelievably easy to make, especially when time is of the essence, then look no further. This pressure cooker Korean beef is about to become your new best friend in the kitchen. Trust me on this one, your taste buds (and your family!) will thank you.
Ingredients: The Flavor Powerhouse of Korean Beef
Let’s break down each ingredient in this Korean beef recipe, exploring why they are essential and how they contribute to the overall symphony of flavors. We’ll also discuss potential substitutions if you’re in a pinch or have dietary restrictions.
- 3-4 lbs Boneless Beef Chuck Roast – Cut into 1-inch Cubes: The star of the show! Beef chuck roast is the ideal cut for pressure cooking. Why? Because chuck roast is a tougher cut of meat with a good amount of marbling (those beautiful streaks of fat running through the meat). This marbling is key. As the chuck roast cooks under pressure, the connective tissue breaks down, and the fat renders, resulting in incredibly tender, juicy, and flavorful beef. Cutting the roast into 1-inch cubes is important for even cooking and faster pressure cooking time. Smaller pieces cook more quickly and absorb the marinade more effectively.
- Choosing Your Chuck Roast: When selecting your chuck roast, look for one that is well-marbled. The more marbling, the more tender and flavorful your beef will be. Don’t be afraid of a bit of fat; it’s your friend in this recipe!
- Beef Cube Size: Aim for roughly 1-inch cubes. While precise measurements aren’t crucial, consistency in size will help ensure even cooking. If you cut them too large, they may take longer to become tender. Too small, and they might shred too much.
- Substitution: While chuck roast is highly recommended, you could potentially use other cuts like brisket or short ribs. However, cooking times might need adjustments, and the final texture might vary slightly.
- 1 Large Onion, Sliced: Onions are foundational to so many delicious dishes, and Korean beef is no exception. They add a subtle sweetness and savory depth that enhances the overall flavor profile. When cooked alongside the beef, sliced onions soften beautifully and practically melt into the sauce, adding body and richness.
- Onion Type: Yellow or white onions are both excellent choices. Yellow onions tend to be slightly more pungent, while white onions are a bit milder. Either will work wonderfully in this recipe.
- Slicing Technique: Slicing the onion allows it to cook down and soften nicely in the pressure cooker. You can slice them thinly or into half-moons, depending on your preference. Thinner slices will practically disappear into the sauce, while thicker slices will retain a bit more texture.
- Substitution: Shallots could be used for a milder, slightly sweeter onion flavor. You could also use a leek (white and light green parts only, thoroughly washed and sliced), which will impart a delicate onion-like flavor.
- 1/4 cup Dried Mushrooms (Optional): Dried mushrooms are the secret weapon for adding an intense umami boost to this Korean beef. Umami is that savory, “meaty” flavor that deepens the complexity of the dish. Dried mushrooms, when rehydrated during cooking, release their concentrated flavor and add a wonderful earthy note that complements the other ingredients perfectly.
- Mushroom Variety: Shiitake mushrooms are a fantastic choice for their rich, earthy flavor. Porcini mushrooms would also be excellent, adding a more intense and nutty umami. A mix of dried mushrooms can also work beautifully, adding layers of flavor.
- Rehydration Power: The liquid from the sauce will rehydrate the dried mushrooms as they cook in the pressure cooker. They will plump up and become tender, adding a delightful chewiness to the dish.
- Substitution: If you don’t have dried mushrooms or prefer not to use them, you can omit them. However, they truly elevate the flavor profile. You could try adding a tablespoon of mushroom powder or a few dashes of Worcestershire sauce to try and replicate some of that umami depth, but it won’t be quite the same.
Marinade/Sauce Ingredients: The Symphony of Korean Flavors
This marinade/sauce is where the magic truly happens. Each ingredient plays a vital role in creating that signature Korean flavor profile: a balance of savory, sweet, spicy, and umami.
- 1/2 cup Soy Sauce or Coconut Aminos or Tamari: The salty backbone of the marinade. Soy sauce provides a rich, savory umami flavor that is essential to Korean cuisine. It also tenderizes the beef and contributes to the beautiful dark color of the sauce.
- Soy Sauce Types: Regular soy sauce, light soy sauce, or dark soy sauce can all be used. Regular soy sauce is a good all-purpose choice. Light soy sauce is saltier and less dark, while dark soy sauce is sweeter and darker. You can adjust based on your preference.
- Coconut Aminos (Gluten-Free, Paleo, Soy-Free): A fantastic soy-free alternative derived from coconut sap. It has a slightly sweeter and less salty flavor than soy sauce. If using coconut aminos, you might want to add a pinch of salt to enhance the savory notes.
- Tamari (Gluten-Free): A gluten-free soy sauce traditionally made with little to no wheat. It has a richer, less salty flavor than regular soy sauce. Tamari is a great option for those with gluten sensitivities who still want a soy-sauce-like flavor.
- Sodium Content: Be mindful of the sodium content of your chosen soy sauce or alternative, especially if you are watching your sodium intake. Low-sodium soy sauce is available.
- 3 tbsp Soju or Sake, or White Wine, or Rice Vinegar: This ingredient adds acidity and complexity to the marinade. Alcoholic options like soju, sake, and white wine help tenderize the meat and add depth of flavor. Rice vinegar provides a bright, tangy acidity if you prefer a non-alcoholic option.
- Soju (Korean Liquor): A clear, distilled Korean liquor, often made from rice. It has a subtle sweetness and a relatively neutral flavor that enhances the other marinade ingredients.
- Sake (Japanese Rice Wine): Similar to soju, sake adds a subtle sweetness and umami. Dry sake is recommended for this recipe to avoid adding excessive sweetness.
- White Wine (Dry): A dry white wine like Sauvignon Blanc or Pinot Grigio will work well, adding acidity and complexity. Avoid sweet wines.
- Rice Vinegar: A non-alcoholic option that provides a bright, tangy acidity. Rice vinegar is milder than white vinegar.
- Function: These liquids help to tenderize the beef, balance the sweetness, and add layers of flavor to the marinade.
- 2 tbsp Toasted Sesame Oil: Toasted sesame oil is a crucial ingredient in Korean cuisine, adding a distinctive nutty aroma and flavor. It’s essential for that authentic Korean taste.
- Toasted vs. Untoasted: Make sure to use toasted sesame oil. Untoasted sesame oil has a much milder flavor and won’t provide the same characteristic nutty aroma. Toasted sesame oil is typically darker in color and has a more pronounced scent.
- Flavor Impact: Sesame oil adds a rich, nutty, and slightly smoky flavor that is integral to the Korean flavor profile. It elevates the entire dish.
- Storage: Store toasted sesame oil in a cool, dark place to prevent it from going rancid.
- 7 Cloves Garlic: Garlic is a flavor powerhouse in Korean cooking! It adds pungency, aroma, and a savory depth that is essential to this dish.
- Fresh Garlic is Key: Use fresh garlic cloves for the best flavor. Pre-minced garlic in jars often lacks the same fresh, pungent aroma.
- Garlic Preparation: Roughly chop or mince the garlic before blending it into the marinade. The blender will break it down further.
- Garlic Lovers: If you are a big garlic fan, feel free to add an extra clove or two!
- 1 inch piece of Fresh Ginger, Peeled: Fresh ginger adds a warm, spicy, and slightly citrusy note that complements the garlic and other flavors beautifully. It also has tenderizing properties.
- Fresh Ginger is Best: Use fresh ginger root for the most vibrant flavor. Ginger powder can be used in a pinch, but fresh ginger is highly recommended.
- Peeling Ginger: Use a spoon to easily peel the ginger. Scrape the skin off with the edge of a spoon.
- Ginger Preparation: Roughly chop the ginger before blending it into the marinade.
- 1/4 cup Coconut Palm Sugar: A touch of sweetness is essential to balance the savory and spicy elements in Korean cuisine. Coconut palm sugar adds a subtle caramel-like sweetness that is less refined than white sugar.
- Coconut Palm Sugar Benefits: Coconut palm sugar has a lower glycemic index than white sugar and adds a slightly more complex flavor.
- Substitution Options:
- Brown Sugar: A common and readily available substitute. Light or dark brown sugar will work.
- Honey: Adds a floral sweetness and a slightly different flavor profile.
- Maple Syrup: Adds a distinct maple flavor. Use pure maple syrup, not pancake syrup.
- Adjusting Sweetness: Start with 1/4 cup and adjust to your taste. If you prefer a less sweet dish, you can reduce the amount slightly.
- 2 tsp Korean Chili Pepper Flakes, Gochugaru: Gochugaru is the star spice that provides the signature Korean chili flavor and a beautiful vibrant red color. It’s not just about heat; Gochugaru has a complex flavor profile with fruity, smoky, and slightly sweet notes.
- Gochugaru Characteristics: Korean chili flakes are different from regular chili flakes. They are typically sun-dried and have a coarser texture and a more complex flavor. They are fragrant with notes of citrus and are moderately spicy.
- Spice Level: Gochugaru provides a moderate level of heat. If you are sensitive to spice, start with 1 tsp and taste. You can always add more later.
- Finding Gochugaru: Gochugaru can be found in Asian grocery stores and online. It’s worth seeking out for authentic Korean flavor.
- Substitution (Not Recommended): Crushed red pepper flakes can be used in an absolute pinch, but they will not provide the same flavor profile. The dish will lack the characteristic Korean chili flavor. If substituting, use a pinch of crushed red pepper flakes as they are much spicier than Gochugaru. It’s highly recommended to buy Gochugaru for authentic results.
- 1 Kiwi, Peeled: Kiwi might seem like an unusual ingredient in a beef marinade, but it’s a brilliant secret weapon for tenderizing meat! Kiwi contains enzymes that break down protein fibers, resulting in incredibly tender beef.
- Enzymatic Tenderizing: Kiwi contains actinidin, an enzyme that effectively tenderizes meat.
- Quantity is Key: Use just one kiwi for this amount of beef. Too much kiwi can make the beef mushy.
- Flavor Impact: The kiwi flavor is very subtle and not noticeable in the final dish. It primarily functions as a tenderizer.
- Substitution: If you don’t have kiwi, you can use a small amount of grated pear or pineapple, which also contain tenderizing enzymes. However, kiwi is the most subtle in flavor. You can also skip the tenderizer altogether, but the beef might not be quite as melt-in-your-mouth tender.
Instructions: Simple Steps to Korean Beef Perfection
Follow these easy steps to create incredibly tender and flavorful Korean beef in your pressure cooker:
- Prepare the Instant Pot: Place the cubed beef chuck roast, sliced onion, and dried mushrooms (if using) directly into the Instant Pot insert. Layering doesn’t matter too much at this stage.
- Instant Pot Size: A 6-quart or larger Instant Pot is recommended for this recipe, especially when using 4 lbs of beef.
- No Browning Necessary: This recipe is designed for simplicity. There’s no need to brown the beef beforehand, saving you time and effort. The pressure cooking process itself will develop rich flavors.
- Blend the Marinade/Sauce: In a blender, combine all the marinade/sauce ingredients: soy sauce (or your chosen alternative), soju (or your chosen alternative), toasted sesame oil, garlic cloves, peeled ginger, coconut palm sugar (or your chosen alternative), Gochugaru, and peeled kiwi. Blend until completely smooth.
- High-Speed Blender Recommended: A high-speed blender will create the smoothest sauce. If you don’t have a high-speed blender, you can finely chop the garlic and ginger before blending to help them break down.
- Taste and Adjust: Before pouring the sauce over the beef, taste it and adjust seasonings to your liking. You might want to add a bit more soy sauce for saltiness, Gochugaru for spice, or coconut palm sugar for sweetness.
- Combine Sauce and Beef: Pour the blended marinade/sauce evenly over the beef, onion, and mushrooms in the Instant Pot. Ensure all the beef is coated in the sauce.
- Massage the Sauce: You can gently toss or massage the beef with the sauce to ensure even coating.
- Pressure Cook: Close the Instant Pot lid, ensuring the pressure release valve is set to the “sealing” position. Press the “Manual” or “Pressure Cook” button (depending on your Instant Pot model) and adjust the cooking time to 40 minutes.
- High Pressure Cooking: This recipe is designed for high-pressure cooking.
- Cooking Time Accuracy: 40 minutes is generally perfect for 3-4 lbs of chuck roast. If you are using significantly more or less beef, you may need to adjust the cooking time slightly.
- Pressure Build-Up: The Instant Pot will now take approximately 10-15 minutes to come to pressure. During this time, the sauce will start to heat up and the flavors will begin to meld.
- Normal Pressure Build-Up: Don’t be alarmed by the pressure build-up time. It’s normal and varies depending on the amount of liquid and the starting temperature of the ingredients.
- Natural Pressure Release (NPR) for 20 Minutes: Once the 40-minute cooking cycle is complete, the Instant Pot will beep and switch to “Keep Warm” mode. Allow the pressure to release naturally for 20 minutes. This means you do nothing and let the pressure dissipate slowly on its own.
- Importance of NPR: Natural Pressure Release is crucial for tender, juicy beef. It allows the beef to slowly relax and reabsorb juices, preventing it from becoming tough.
- 20-Minute NPR: A 20-minute NPR is ideal for this recipe.
- Quick Pressure Release (QPR) Any Remaining Pressure: After the 20-minute natural pressure release, carefully release any remaining pressure by turning the pressure release valve to the “venting” position. Be cautious of the steam escaping.
- Safety First: Always use caution when releasing pressure. Keep your hands and face away from the steam vent.
- Checking for Complete Pressure Release: Once all pressure is released, the float valve (the small pin next to the pressure release valve) will drop down. This indicates it is safe to open the lid.
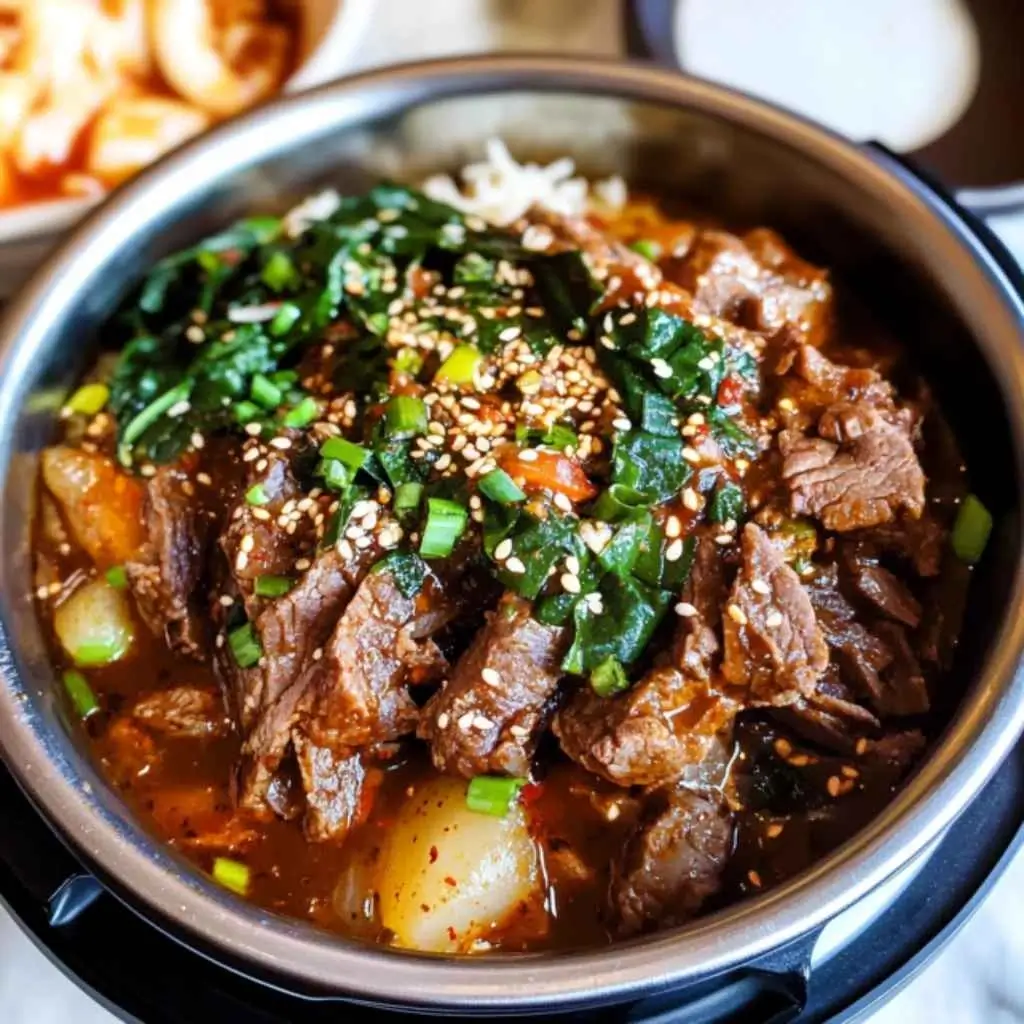
- Shred and Serve: Open the Instant Pot lid. The beef should be incredibly tender and easily shredded with two forks. Shred the beef directly in the pot, mixing it with the flavorful sauce. Serve hot with rice and your favorite vegetables.
- Shredding Technique: Use two forks to gently pull apart the beef into shreds. It should be very tender and require minimal effort.
- Sauce Consistency: The sauce will likely be slightly thin after pressure cooking. If you prefer a thicker sauce, you can use the “Sauté” function on your Instant Pot to simmer the sauce and reduce it slightly after shredding the beef (remove the beef to a separate bowl while you do this to prevent overcooking).
Nutrition Facts (Estimated)
- Servings: 8 servings
- Calories: Approximately 391 kcal per serving (This is an estimate and can vary depending on the specific ingredients used and serving size).
- Macronutrient Breakdown (Approximate per serving): (These are estimates and will vary)
- Protein: ~40-50g
- Fat: ~15-20g
- Carbohydrates: ~10-15g
- Note: This nutrition analysis is an estimate and should be used as a general guideline. For precise nutritional information, use a nutrition calculator with the specific brands and quantities of ingredients you use.
- Macronutrient Breakdown (Approximate per serving): (These are estimates and will vary)
Preparation Time
- Prep Time: 10 minutes
- Cook Time: 40 minutes (pressure cooking time) + ~10-15 minutes (pressure build-up) + 20 minutes (natural pressure release) = Approximately 70-75 minutes total time.
- Hands-On Time: The active cooking time is very minimal, mostly just prep and blending. The Instant Pot does most of the work!
- Make-Ahead Potential: This is an excellent make-ahead meal. The flavors deepen even more as the beef sits in the sauce.
How to Serve Your Delicious Korean Beef
This versatile Korean beef is fantastic served in so many ways! Here are some delicious ideas:
- Classic Grain Bowls:
- Fluffy steamed white rice or brown rice
- Quinoa or barley for a healthier grain option
- Topped with vibrant veggies like:
- Steamed or sautéed spinach or bok choy
- Quick-pickled cucumbers or carrots
- Kimchi for an extra Korean kick
- Bean sprouts
- Edamame
- Avocado slices
- Sesame seeds for garnish
- A drizzle of sriracha mayo or gochujang mayo for extra flavor
- Savory Sandwiches and Sliders:
- Pile shredded Korean beef onto toasted buns or rolls.
- Top with:
- Quick slaw or kimchi slaw
- Pickled onions
- Sriracha mayo or gochujang mayo
- Cilantro
- Serve as full-sized sandwiches or mini sliders for appetizers
- Refreshing Salads:
- Serve Korean beef over a bed of mixed greens or romaine lettuce.
- Add:
- Shredded carrots
- Sliced cucumbers
- Bell peppers
- Avocado
- Sesame ginger dressing or a light vinaigrette
- Toasted sesame seeds
- Korean Beef Tacos or Lettuce Wraps:
- Use warm tortillas or crisp lettuce cups (like butter lettuce or romaine) as vessels for the Korean beef.
- Fillings:
- Kimchi
- Quick-pickled vegetables
- Cilantro
- Sriracha mayo
- Korean Beef Nachos:
- Layer tortilla chips with Korean beef, shredded cheese (Monterey Jack or cheddar), and your favorite nacho toppings like:
- Pickled jalapeños
- Sour cream or Greek yogurt
- Guacamole
- Salsa
- Layer tortilla chips with Korean beef, shredded cheese (Monterey Jack or cheddar), and your favorite nacho toppings like:
Additional Tips for Perfect Pressure Cooker Korean Beef
- Don’t Skip the Natural Pressure Release: Resist the urge to quick release pressure immediately after cooking. The 20-minute natural pressure release is essential for achieving truly tender and juicy beef. It allows the meat fibers to relax and reabsorb the flavorful juices.
- Adjust Spice Level to Your Preference: Gochugaru provides a moderate level of heat. If you prefer milder flavors, start with 1 teaspoon and taste before adding more. If you like it spicier, you can add up to 1 tablespoon or even more, depending on your heat tolerance.
- Make it Ahead for Even Deeper Flavor: This Korean beef is even more delicious the next day! The flavors meld and deepen as it sits. It’s perfect for meal prepping on the weekend for easy weeknight dinners. Store it in an airtight container in the refrigerator for up to 3-4 days.
- Don’t Overcrowd the Instant Pot: Ensure you don’t overfill your Instant Pot. Overcrowding can hinder proper pressure cooking and may result in unevenly cooked beef. For 4 lbs of beef, a 6-quart or larger Instant Pot is recommended.
- Customize Your Veggies: Feel free to add other vegetables to the Instant Pot along with the onions and mushrooms. Carrots, potatoes (cut into chunks), or even bell peppers can be added for a heartier meal. Adjust cooking time slightly if adding dense vegetables like potatoes.
FAQ: Your Korean Beef Questions Answered
Q1: Can I make this recipe without an Instant Pot?
A: Yes, you can adapt this recipe for slow cooking in a slow cooker or braising in the oven. For a slow cooker, cook on low for 6-8 hours or on high for 3-4 hours, or until the beef is fall-apart tender. For braising in the oven, preheat oven to 325°F (160°C). Place beef, onions, mushrooms, and sauce in a Dutch oven or oven-safe pot. Cover and braise for 3-4 hours, or until beef is tender.
Q2: Can I use frozen beef chuck roast?
A: While it’s generally recommended to thaw meat before pressure cooking for even cooking, you can pressure cook frozen beef chuck roast. However, you will need to significantly increase the cooking time. Add approximately 20-30 minutes to the pressure cooking time (so cook for 60-70 minutes). Natural pressure release is still recommended. The texture might be slightly better with thawed beef, but frozen works in a pinch.
Q3: I don’t have Gochugaru. Can I substitute anything else?
A: Gochugaru is really key to the authentic Korean flavor. Crushed red pepper flakes can be used in an emergency, but use only a tiny pinch as they are much spicier and lack the complex flavor of Gochugaru. The flavor will be different. It’s highly recommended to purchase Gochugaru; it’s a versatile spice you’ll use in many Korean recipes and beyond!
Q4: Can I make this recipe Keto-friendly?
A: Yes, with a few modifications. The main ingredient to address is the coconut palm sugar. While the recipe notes suggest trying an extra kiwi, this might not be sufficient sweetness. You can try using a keto-friendly sweetener like erythritol or stevia instead of coconut palm sugar. Start with a smaller amount than 1/4 cup and adjust to taste, as these sweeteners can be very potent. Serve with cauliflower rice instead of regular rice for a fully keto meal.
Q5: Can I double this recipe?
A: Yes, you can easily double this recipe, especially if you have a larger Instant Pot (8-quart or larger). You likely won’t need to adjust the cooking time significantly, but ensure you don’t overcrowd the pot. If the pot is very full, you might add an extra 5-10 minutes to the pressure cooking time to ensure the beef is fully tender. The pressure build-up time might also be slightly longer with a larger volume of ingredients.
Print
Instant Pot Korean Beef Recipe
Ingredients
-
- 3-4 lbs Boneless Beef Chuck Roast – Cut into 1-inch Cubes: The star of the show! Beef chuck roast is the ideal cut for pressure cooking. Why? Because chuck roast is a tougher cut of meat with a good amount of marbling (those beautiful streaks of fat running through the meat). This marbling is key. As the chuck roast cooks under pressure, the connective tissue breaks down, and the fat renders, resulting in incredibly tender, juicy, and flavorful beef. Cutting the roast into 1-inch cubes is important for even cooking and faster pressure cooking time. Smaller pieces cook more quickly and absorb the marinade more effectively.
-
- Choosing Your Chuck Roast: When selecting your chuck roast, look for one that is well-marbled. The more marbling, the more tender and flavorful your beef will be. Don’t be afraid of a bit of fat; it’s your friend in this recipe!
-
- Beef Cube Size: Aim for roughly 1-inch cubes. While precise measurements aren’t crucial, consistency in size will help ensure even cooking. If you cut them too large, they may take longer to become tender. Too small, and they might shred too much.
-
- Substitution: While chuck roast is highly recommended, you could potentially use other cuts like brisket or short ribs. However, cooking times might need adjustments, and the final texture might vary slightly.
-
- 3-4 lbs Boneless Beef Chuck Roast – Cut into 1-inch Cubes: The star of the show! Beef chuck roast is the ideal cut for pressure cooking. Why? Because chuck roast is a tougher cut of meat with a good amount of marbling (those beautiful streaks of fat running through the meat). This marbling is key. As the chuck roast cooks under pressure, the connective tissue breaks down, and the fat renders, resulting in incredibly tender, juicy, and flavorful beef. Cutting the roast into 1-inch cubes is important for even cooking and faster pressure cooking time. Smaller pieces cook more quickly and absorb the marinade more effectively.
-
- 1 Large Onion, Sliced: Onions are foundational to so many delicious dishes, and Korean beef is no exception. They add a subtle sweetness and savory depth that enhances the overall flavor profile. When cooked alongside the beef, sliced onions soften beautifully and practically melt into the sauce, adding body and richness.
-
- Onion Type: Yellow or white onions are both excellent choices. Yellow onions tend to be slightly more pungent, while white onions are a bit milder. Either will work wonderfully in this recipe.
-
- Slicing Technique: Slicing the onion allows it to cook down and soften nicely in the pressure cooker. You can slice them thinly or into half-moons, depending on your preference. Thinner slices will practically disappear into the sauce, while thicker slices will retain a bit more texture.
-
- Substitution: Shallots could be used for a milder, slightly sweeter onion flavor. You could also use a leek (white and light green parts only, thoroughly washed and sliced), which will impart a delicate onion-like flavor.
-
- 1 Large Onion, Sliced: Onions are foundational to so many delicious dishes, and Korean beef is no exception. They add a subtle sweetness and savory depth that enhances the overall flavor profile. When cooked alongside the beef, sliced onions soften beautifully and practically melt into the sauce, adding body and richness.
-
- 1/4 cup Dried Mushrooms (Optional): Dried mushrooms are the secret weapon for adding an intense umami boost to this Korean beef. Umami is that savory, “meaty” flavor that deepens the complexity of the dish. Dried mushrooms, when rehydrated during cooking, release their concentrated flavor and add a wonderful earthy note that complements the other ingredients perfectly.
-
- Mushroom Variety: Shiitake mushrooms are a fantastic choice for their rich, earthy flavor. Porcini mushrooms would also be excellent, adding a more intense and nutty umami. A mix of dried mushrooms can also work beautifully, adding layers of flavor.
-
- Rehydration Power: The liquid from the sauce will rehydrate the dried mushrooms as they cook in the pressure cooker. They will plump up and become tender, adding a delightful chewiness to the dish.
-
- Substitution: If you don’t have dried mushrooms or prefer not to use them, you can omit them. However, they truly elevate the flavor profile. You could try adding a tablespoon of mushroom powder or a few dashes of Worcestershire sauce to try and replicate some of that umami depth, but it won’t be quite the same.
-
- 1/4 cup Dried Mushrooms (Optional): Dried mushrooms are the secret weapon for adding an intense umami boost to this Korean beef. Umami is that savory, “meaty” flavor that deepens the complexity of the dish. Dried mushrooms, when rehydrated during cooking, release their concentrated flavor and add a wonderful earthy note that complements the other ingredients perfectly.
Marinade/Sauce Ingredients: The Symphony of Korean Flavors
This marinade/sauce is where the magic truly happens. Each ingredient plays a vital role in creating that signature Korean flavor profile: a balance of savory, sweet, spicy, and umami.
-
- 1/2 cup Soy Sauce or Coconut Aminos or Tamari: The salty backbone of the marinade. Soy sauce provides a rich, savory umami flavor that is essential to Korean cuisine. It also tenderizes the beef and contributes to the beautiful dark color of the sauce.
-
- Soy Sauce Types: Regular soy sauce, light soy sauce, or dark soy sauce can all be used. Regular soy sauce is a good all-purpose choice. Light soy sauce is saltier and less dark, while dark soy sauce is sweeter and darker. You can adjust based on your preference.
-
- Coconut Aminos (Gluten-Free, Paleo, Soy-Free): A fantastic soy-free alternative derived from coconut sap. It has a slightly sweeter and less salty flavor than soy sauce. If using coconut aminos, you might want to add a pinch of salt to enhance the savory notes.
-
- Tamari (Gluten-Free): A gluten-free soy sauce traditionally made with little to no wheat. It has a richer, less salty flavor than regular soy sauce. Tamari is a great option for those with gluten sensitivities who still want a soy-sauce-like flavor.
-
- Sodium Content: Be mindful of the sodium content of your chosen soy sauce or alternative, especially if you are watching your sodium intake. Low-sodium soy sauce is available.
-
- 1/2 cup Soy Sauce or Coconut Aminos or Tamari: The salty backbone of the marinade. Soy sauce provides a rich, savory umami flavor that is essential to Korean cuisine. It also tenderizes the beef and contributes to the beautiful dark color of the sauce.
-
- 3 tbsp Soju or Sake, or White Wine, or Rice Vinegar: This ingredient adds acidity and complexity to the marinade. Alcoholic options like soju, sake, and white wine help tenderize the meat and add depth of flavor. Rice vinegar provides a bright, tangy acidity if you prefer a non-alcoholic option.
-
- Soju (Korean Liquor): A clear, distilled Korean liquor, often made from rice. It has a subtle sweetness and a relatively neutral flavor that enhances the other marinade ingredients.
-
- Sake (Japanese Rice Wine): Similar to soju, sake adds a subtle sweetness and umami. Dry sake is recommended for this recipe to avoid adding excessive sweetness.
-
- White Wine (Dry): A dry white wine like Sauvignon Blanc or Pinot Grigio will work well, adding acidity and complexity. Avoid sweet wines.
-
- Rice Vinegar: A non-alcoholic option that provides a bright, tangy acidity. Rice vinegar is milder than white vinegar.
-
- Function: These liquids help to tenderize the beef, balance the sweetness, and add layers of flavor to the marinade.
-
- 3 tbsp Soju or Sake, or White Wine, or Rice Vinegar: This ingredient adds acidity and complexity to the marinade. Alcoholic options like soju, sake, and white wine help tenderize the meat and add depth of flavor. Rice vinegar provides a bright, tangy acidity if you prefer a non-alcoholic option.
-
- 2 tbsp Toasted Sesame Oil: Toasted sesame oil is a crucial ingredient in Korean cuisine, adding a distinctive nutty aroma and flavor. It’s essential for that authentic Korean taste.
-
- Toasted vs. Untoasted: Make sure to use toasted sesame oil. Untoasted sesame oil has a much milder flavor and won’t provide the same characteristic nutty aroma. Toasted sesame oil is typically darker in color and has a more pronounced scent.
-
- Flavor Impact: Sesame oil adds a rich, nutty, and slightly smoky flavor that is integral to the Korean flavor profile. It elevates the entire dish.
-
- Storage: Store toasted sesame oil in a cool, dark place to prevent it from going rancid.
-
- 2 tbsp Toasted Sesame Oil: Toasted sesame oil is a crucial ingredient in Korean cuisine, adding a distinctive nutty aroma and flavor. It’s essential for that authentic Korean taste.
-
- 7 Cloves Garlic: Garlic is a flavor powerhouse in Korean cooking! It adds pungency, aroma, and a savory depth that is essential to this dish.
-
- Fresh Garlic is Key: Use fresh garlic cloves for the best flavor. Pre-minced garlic in jars often lacks the same fresh, pungent aroma.
-
- Garlic Preparation: Roughly chop or mince the garlic before blending it into the marinade. The blender will break it down further.
-
- Garlic Lovers: If you are a big garlic fan, feel free to add an extra clove or two!
-
- 7 Cloves Garlic: Garlic is a flavor powerhouse in Korean cooking! It adds pungency, aroma, and a savory depth that is essential to this dish.
-
- 1 inch piece of Fresh Ginger, Peeled: Fresh ginger adds a warm, spicy, and slightly citrusy note that complements the garlic and other flavors beautifully. It also has tenderizing properties.
-
- Fresh Ginger is Best: Use fresh ginger root for the most vibrant flavor. Ginger powder can be used in a pinch, but fresh ginger is highly recommended.
-
- Peeling Ginger: Use a spoon to easily peel the ginger. Scrape the skin off with the edge of a spoon.
-
- Ginger Preparation: Roughly chop the ginger before blending it into the marinade.
-
- 1 inch piece of Fresh Ginger, Peeled: Fresh ginger adds a warm, spicy, and slightly citrusy note that complements the garlic and other flavors beautifully. It also has tenderizing properties.
-
- 1/4 cup Coconut Palm Sugar: A touch of sweetness is essential to balance the savory and spicy elements in Korean cuisine. Coconut palm sugar adds a subtle caramel-like sweetness that is less refined than white sugar.
-
- Coconut Palm Sugar Benefits: Coconut palm sugar has a lower glycemic index than white sugar and adds a slightly more complex flavor.
-
- Substitution Options:
-
- Brown Sugar: A common and readily available substitute. Light or dark brown sugar will work.
-
- Honey: Adds a floral sweetness and a slightly different flavor profile.
-
- Maple Syrup: Adds a distinct maple flavor. Use pure maple syrup, not pancake syrup.
-
- Adjusting Sweetness: Start with 1/4 cup and adjust to your taste. If you prefer a less sweet dish, you can reduce the amount slightly.
-
- Substitution Options:
-
- 1/4 cup Coconut Palm Sugar: A touch of sweetness is essential to balance the savory and spicy elements in Korean cuisine. Coconut palm sugar adds a subtle caramel-like sweetness that is less refined than white sugar.
-
- 2 tsp Korean Chili Pepper Flakes, Gochugaru: Gochugaru is the star spice that provides the signature Korean chili flavor and a beautiful vibrant red color. It’s not just about heat; Gochugaru has a complex flavor profile with fruity, smoky, and slightly sweet notes.
-
- Gochugaru Characteristics: Korean chili flakes are different from regular chili flakes. They are typically sun-dried and have a coarser texture and a more complex flavor. They are fragrant with notes of citrus and are moderately spicy.
-
- Spice Level: Gochugaru provides a moderate level of heat. If you are sensitive to spice, start with 1 tsp and taste. You can always add more later.
-
- Finding Gochugaru: Gochugaru can be found in Asian grocery stores and online. It’s worth seeking out for authentic Korean flavor.
-
- Substitution (Not Recommended): Crushed red pepper flakes can be used in an absolute pinch, but they will not provide the same flavor profile. The dish will lack the characteristic Korean chili flavor. If substituting, use a pinch of crushed red pepper flakes as they are much spicier than Gochugaru. It’s highly recommended to buy Gochugaru for authentic results.
-
- 2 tsp Korean Chili Pepper Flakes, Gochugaru: Gochugaru is the star spice that provides the signature Korean chili flavor and a beautiful vibrant red color. It’s not just about heat; Gochugaru has a complex flavor profile with fruity, smoky, and slightly sweet notes.
-
- 1 Kiwi, Peeled: Kiwi might seem like an unusual ingredient in a beef marinade, but it’s a brilliant secret weapon for tenderizing meat! Kiwi contains enzymes that break down protein fibers, resulting in incredibly tender beef.
-
- Enzymatic Tenderizing: Kiwi contains actinidin, an enzyme that effectively tenderizes meat.
-
- Quantity is Key: Use just one kiwi for this amount of beef. Too much kiwi can make the beef mushy.
-
- Flavor Impact: The kiwi flavor is very subtle and not noticeable in the final dish. It primarily functions as a tenderizer.
-
- Substitution: If you don’t have kiwi, you can use a small amount of grated pear or pineapple, which also contain tenderizing enzymes. However, kiwi is the most subtle in flavor. You can also skip the tenderizer altogether, but the beef might not be quite as melt-in-your-mouth tender.
-
- 1 Kiwi, Peeled: Kiwi might seem like an unusual ingredient in a beef marinade, but it’s a brilliant secret weapon for tenderizing meat! Kiwi contains enzymes that break down protein fibers, resulting in incredibly tender beef.
Instructions
-
- Prepare the Instant Pot: Place the cubed beef chuck roast, sliced onion, and dried mushrooms (if using) directly into the Instant Pot insert. Layering doesn’t matter too much at this stage.
-
- Instant Pot Size: A 6-quart or larger Instant Pot is recommended for this recipe, especially when using 4 lbs of beef.
-
- No Browning Necessary: This recipe is designed for simplicity. There’s no need to brown the beef beforehand, saving you time and effort. The pressure cooking process itself will develop rich flavors.
-
- Prepare the Instant Pot: Place the cubed beef chuck roast, sliced onion, and dried mushrooms (if using) directly into the Instant Pot insert. Layering doesn’t matter too much at this stage.
-
- Blend the Marinade/Sauce: In a blender, combine all the marinade/sauce ingredients: soy sauce (or your chosen alternative), soju (or your chosen alternative), toasted sesame oil, garlic cloves, peeled ginger, coconut palm sugar (or your chosen alternative), Gochugaru, and peeled kiwi. Blend until completely smooth.
-
- High-Speed Blender Recommended: A high-speed blender will create the smoothest sauce. If you don’t have a high-speed blender, you can finely chop the garlic and ginger before blending to help them break down.
-
- Taste and Adjust: Before pouring the sauce over the beef, taste it and adjust seasonings to your liking. You might want to add a bit more soy sauce for saltiness, Gochugaru for spice, or coconut palm sugar for sweetness.
-
- Blend the Marinade/Sauce: In a blender, combine all the marinade/sauce ingredients: soy sauce (or your chosen alternative), soju (or your chosen alternative), toasted sesame oil, garlic cloves, peeled ginger, coconut palm sugar (or your chosen alternative), Gochugaru, and peeled kiwi. Blend until completely smooth.
-
- Combine Sauce and Beef: Pour the blended marinade/sauce evenly over the beef, onion, and mushrooms in the Instant Pot. Ensure all the beef is coated in the sauce.
-
- Massage the Sauce: You can gently toss or massage the beef with the sauce to ensure even coating.
-
- Combine Sauce and Beef: Pour the blended marinade/sauce evenly over the beef, onion, and mushrooms in the Instant Pot. Ensure all the beef is coated in the sauce.
-
- Pressure Cook: Close the Instant Pot lid, ensuring the pressure release valve is set to the “sealing” position. Press the “Manual” or “Pressure Cook” button (depending on your Instant Pot model) and adjust the cooking time to 40 minutes.
-
- High Pressure Cooking: This recipe is designed for high-pressure cooking.
-
- Cooking Time Accuracy: 40 minutes is generally perfect for 3-4 lbs of chuck roast. If you are using significantly more or less beef, you may need to adjust the cooking time slightly.
-
- Pressure Cook: Close the Instant Pot lid, ensuring the pressure release valve is set to the “sealing” position. Press the “Manual” or “Pressure Cook” button (depending on your Instant Pot model) and adjust the cooking time to 40 minutes.
-
- Pressure Build-Up: The Instant Pot will now take approximately 10-15 minutes to come to pressure. During this time, the sauce will start to heat up and the flavors will begin to meld.
-
- Normal Pressure Build-Up: Don’t be alarmed by the pressure build-up time. It’s normal and varies depending on the amount of liquid and the starting temperature of the ingredients.
-
- Pressure Build-Up: The Instant Pot will now take approximately 10-15 minutes to come to pressure. During this time, the sauce will start to heat up and the flavors will begin to meld.
-
- Natural Pressure Release (NPR) for 20 Minutes: Once the 40-minute cooking cycle is complete, the Instant Pot will beep and switch to “Keep Warm” mode. Allow the pressure to release naturally for 20 minutes. This means you do nothing and let the pressure dissipate slowly on its own.
-
- Importance of NPR: Natural Pressure Release is crucial for tender, juicy beef. It allows the beef to slowly relax and reabsorb juices, preventing it from becoming tough.
-
- 20-Minute NPR: A 20-minute NPR is ideal for this recipe.
-
- Natural Pressure Release (NPR) for 20 Minutes: Once the 40-minute cooking cycle is complete, the Instant Pot will beep and switch to “Keep Warm” mode. Allow the pressure to release naturally for 20 minutes. This means you do nothing and let the pressure dissipate slowly on its own.
-
- Quick Pressure Release (QPR) Any Remaining Pressure: After the 20-minute natural pressure release, carefully release any remaining pressure by turning the pressure release valve to the “venting” position. Be cautious of the steam escaping.
-
- Safety First: Always use caution when releasing pressure. Keep your hands and face away from the steam vent.
-
- Checking for Complete Pressure Release: Once all pressure is released, the float valve (the small pin next to the pressure release valve) will drop down. This indicates it is safe to open the lid.
-
- Quick Pressure Release (QPR) Any Remaining Pressure: After the 20-minute natural pressure release, carefully release any remaining pressure by turning the pressure release valve to the “venting” position. Be cautious of the steam escaping.
-
- Shred and Serve: Open the Instant Pot lid. The beef should be incredibly tender and easily shredded with two forks. Shred the beef directly in the pot, mixing it with the flavorful sauce. Serve hot with rice and your favorite vegetables.
-
- Shredding Technique: Use two forks to gently pull apart the beef into shreds. It should be very tender and require minimal effort.
-
- Sauce Consistency: The sauce will likely be slightly thin after pressure cooking. If you prefer a thicker sauce, you can use the “Sauté” function on your Instant Pot to simmer the sauce and reduce it slightly after shredding the beef (remove the beef to a separate bowl while you do this to prevent overcooking).
-
- Shred and Serve: Open the Instant Pot lid. The beef should be incredibly tender and easily shredded with two forks. Shred the beef directly in the pot, mixing it with the flavorful sauce. Serve hot with rice and your favorite vegetables.
Nutrition
- Serving Size: one normal portion
- Calories: 391 kcal
- Fat: 15-20g
- Carbohydrates: 10-15g
- Protein: 40-50g


