
This Healthy Chicken Piccata in the Instant Pot has become an absolute game-changer in our household. I’ll admit, I was initially skeptical about whether the Instant Pot could truly deliver that classic, pan-seared piccata texture and bright, zesty sauce I adore. But oh, how wrong I was! The first time I made this, my family, who are usually quite vocal critics of “healthy” versions of their favorite dishes, were completely silent – in the best way possible. They devoured every last bite, and the tangy lemon-caper sauce was so good, my husband was practically licking his plate. What I love most is how the Instant Pot makes this traditionally somewhat fussy dish incredibly weeknight-friendly. The chicken comes out unbelievably tender, infused with flavor, and the sauce is rich yet light. It’s become a staple in our meal rotation, proving that healthy eating can be both incredibly delicious and astonishingly easy.
Why This Healthy Instant Pot Chicken Piccata is a Winner
Chicken Piccata, with its vibrant lemon-butter-caper sauce, is a classic Italian-American dish beloved for its sophisticated yet comforting flavors. Traditionally, it involves pan-frying flour-dredged chicken cutlets and then creating a pan sauce. While delicious, this method can sometimes be time-consuming and involve a bit more oil than some prefer. This “Healthy Chicken Piccata in the Instant Pot” recipe reimagines the classic, delivering all the bright, tangy goodness you expect, but with a healthier profile and the incredible convenience of your favorite multi-cooker.
The magic of the Instant Pot shines here. It allows us to achieve incredibly tender, juicy chicken with minimal added fat, all while building a deeply flavorful sauce in the same pot. This significantly cuts down on active cooking time and, importantly, cleanup! We’re using lean chicken breasts, a lighter dredging technique, and relying on fresh, bold ingredients like lemon and capers to carry the flavor, rather than excessive butter or cream. This version is perfect for anyone looking for a satisfying, restaurant-quality meal that fits into a health-conscious lifestyle without sacrificing an ounce of taste. It’s a dish that feels elegant enough for guests but is simple enough for a busy Tuesday night. Get ready to impress yourself and your loved ones with this vibrant, easy, and undeniably delicious take on a timeless favorite.
Understanding Chicken Piccata: A Brief Background
Before we dive into our healthy Instant Pot adaptation, let’s briefly touch upon what makes Chicken Piccata so special. The term “piccata” in Italian culinary lingo typically refers to a preparation method where meat (traditionally veal, or “vitello alla piccata”) is sliced thin, sautéed, and served with a pan sauce. This sauce is almost universally characterized by lemon, butter, and often capers or parsley.
The dish gained immense popularity in the United States, where chicken became a more common and accessible protein choice than veal. The Americanized Chicken Piccata maintained the core flavor profile: the tartness of lemon, the richness of butter (though we’re moderating this for our healthy version), and the salty, briny punch of capers. The chicken is usually lightly floured to help it brown and to give the sauce a little body.
Our Instant Pot version honors these traditional elements while streamlining the process and making it more conducive to modern, health-aware cooking. We’re leveraging the pressure cooker’s ability to tenderize chicken quickly and infuse it with the sauce’s flavors, all while using less oil for searing and relying on the natural juices and broth to form the sauce base.
Key Ingredients for Your Healthy Instant Pot Chicken Piccata
The beauty of Chicken Piccata lies in its relatively simple ingredient list, where each component plays a crucial role in building the final flavor profile. For our healthy Instant Pot version, we’re focusing on fresh, high-quality ingredients:
- Boneless, Skinless Chicken Breasts: The star of the show. Using lean chicken breast keeps the dish light. We’ll aim for medium-sized breasts that can be either pounded thin for quicker cooking and more surface area for sauce, or cut into cutlets.
- All-Purpose Flour (or a Gluten-Free Alternative): A light dusting of flour helps to create a subtle crust on the chicken when seared and also aids in slightly thickening the sauce. For a gluten-free option, a good quality gluten-free all-purpose blend, almond flour, or even arrowroot starch can work well.
- Olive Oil & a Touch of Unsalted Butter: We’ll use olive oil for its healthy monounsaturated fats to sear the chicken. A small amount of unsalted butter can be added towards the end for that classic piccata richness and mouthfeel, but it’s used more judiciously than in traditional recipes.
- Low-Sodium Chicken Broth: This forms the liquid base of our sauce, adding depth of flavor without excessive sodium. Always opt for low-sodium so you can control the saltiness of the final dish.
- Fresh Lemon Juice: Absolutely essential and non-negotiable! Freshly squeezed lemon juice provides the bright, zesty acidity that defines piccata. Bottled juice simply doesn’t compare.
- Capers: These small, unopened flower buds, usually preserved in brine or salt, deliver a unique salty, tangy, and slightly floral punch that is iconic to piccata. Drained capers are a must.
- Garlic: Freshly minced garlic adds an aromatic foundation to the sauce.
- Fresh Parsley: Chopped fresh parsley, stirred in at the end and used as a garnish, adds a burst of freshness and color that beautifully complements the rich and tangy sauce.
- Salt and Black Pepper: For seasoning the chicken and the sauce to taste.
- Optional Cornstarch or Arrowroot Slurry: If you prefer a slightly thicker sauce, a slurry made from cornstarch (or arrowroot starch for a gluten-free/grain-free option) and cold water can be whisked in at the end.
By choosing these ingredients thoughtfully, we ensure our Healthy Instant Pot Chicken Piccata is packed with flavor, not unnecessary calories or fat.
Healthy Instant Pot Chicken Piccata: The Recipe
This recipe is designed for a standard 6-quart Instant Pot. Adjustments might be needed for different sizes.
### Ingredients
- 1.5 lbs boneless, skinless chicken breasts (approximately 3-4 medium breasts)
- 1/4 cup all-purpose flour (or almond flour/gluten-free all-purpose blend for GF)
- 1/2 teaspoon kosher salt, plus more to taste
- 1/4 teaspoon black pepper, plus more to taste
- 1/4 teaspoon paprika (optional, for color and subtle flavor)
- 1 tablespoon olive oil
- 1 tablespoon unsalted butter (can be divided, or use extra olive oil)
- 3-4 cloves garlic, minced (about 1 tablespoon)
- 1 cup low-sodium chicken broth
- 1/4 cup fresh lemon juice (from 1-2 large lemons)
- 2-3 tablespoons capers, drained and rinsed
- For slurry (optional, for a thicker sauce):
- 1 tablespoon cornstarch (or 1.5 teaspoons arrowroot starch)
- 2 tablespoons cold water
- 2 tablespoons fresh parsley, chopped, for garnish
- Lemon slices, for garnish (optional)
### Step-by-Step Instructions
- Prepare the Chicken:
- If your chicken breasts are very thick (over 1 inch), you have two options:
- Pound them: Place chicken breasts between two pieces of plastic wrap or in a zip-top bag and gently pound them to about 1/2-inch thickness using a meat mallet or rolling pin. This ensures even cooking and tender results.
- Cut into cutlets: Alternatively, carefully slice thicker breasts horizontally into two thinner cutlets.
- Pat the chicken pieces thoroughly dry with paper towels. This is crucial for getting a nice sear.
- If your chicken breasts are very thick (over 1 inch), you have two options:
- Dredge the Chicken:
- In a shallow dish or plate, combine the flour, 1/2 teaspoon salt, 1/4 teaspoon pepper, and optional paprika. Mix well.
- Lightly dredge each piece of chicken in the flour mixture, shaking off any excess. You want a thin, even coating.
- Sear the Chicken (Working in Batches):
- Set your Instant Pot to the “Sauté” mode on “More” or “High.”
- Once the display reads “Hot,” add the 1 tablespoon of olive oil (and 1/2 tablespoon of the butter, if using).
- Carefully place 2-3 pieces of chicken (depending on the size of your pot, don’t overcrowd) into the hot pot.
- Sear for 2-3 minutes per side, until lightly golden brown. The chicken will not be cooked through at this stage.
- Remove the seared chicken from the pot and set aside on a clean plate. Repeat with the remaining chicken, adding a little more oil if the pot becomes too dry.
- Build the Sauce Base:
- Once all chicken is seared and removed, if you used butter for searing and have browned bits, you can add the remaining 1/2 tablespoon of butter to the pot now (or a touch more olive oil if needed).
- Add the minced garlic to the pot and sauté for about 30-60 seconds, until fragrant. Be careful not to burn it.
- Pour in the chicken broth, scraping up any browned bits (fond) from the bottom of the pot with a wooden spoon or spatula. These bits are packed with flavor!
- Press “Cancel” to turn off the Sauté mode.
- Pressure Cook the Chicken:
- Stir the fresh lemon juice and drained capers into the broth in the pot.
- Arrange the seared chicken pieces back into the Instant Pot, trying to keep them in a relatively even layer. It’s okay if they overlap slightly. Pour any accumulated juices from the plate over the chicken.
- Secure the lid on the Instant Pot. Ensure the steam release valve is set to the “Sealing” position.
- Select “Pressure Cook” (or “Manual”) mode and set the timer for 5-7 minutes on High Pressure. The exact time will depend on the thickness of your chicken. For 1/2-inch thick cutlets, 5 minutes is usually sufficient. For slightly thicker pieces, aim for 6-7 minutes.
- Release Pressure & Finish:
- Once the cooking cycle is complete, allow the pressure to release naturally for 5 minutes (5-minute NPR). This helps keep the chicken tender.
- After 5 minutes of natural release, carefully perform a Quick Release to vent any remaining steam.
- Once the pin drops, open the lid. Carefully remove the cooked chicken from the pot and transfer it to a serving platter. Tent loosely with foil to keep warm.
- Thicken the Sauce (Optional) & Serve:
- Set the Instant Pot back to “Sauté” mode on “Normal” or “Low.” Bring the sauce to a gentle simmer.
- If using a slurry: In a small bowl, whisk together the cornstarch (or arrowroot) and cold water until smooth. Pour the slurry into the simmering sauce, whisking constantly until the sauce thickens slightly (usually 1-2 minutes).
- Taste the sauce and adjust seasoning if necessary (more salt, pepper, or a tiny squeeze more lemon juice if desired). If you want an extra touch of richness without a full slurry, you can whisk in a small knob (about 1 teaspoon) of cold butter now until it melts and emulsifies into the sauce.
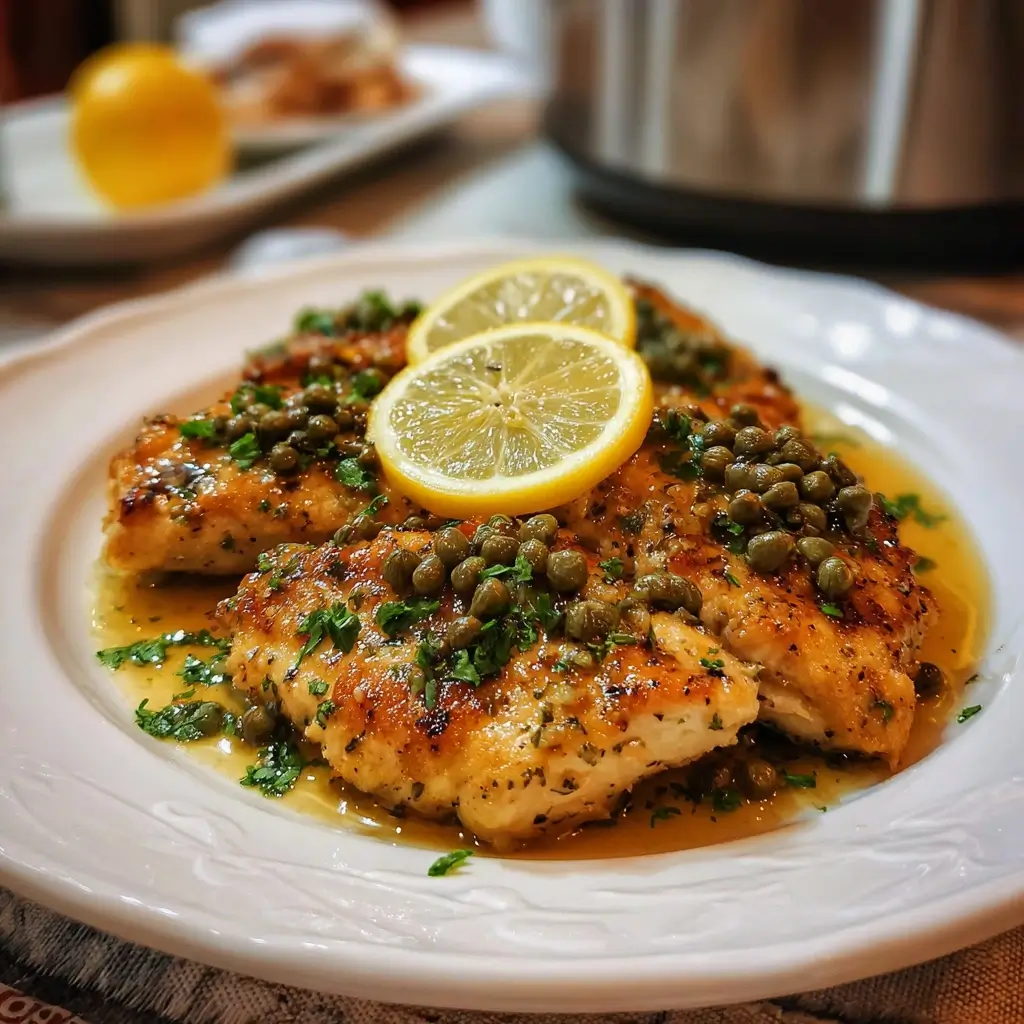
- Pour the luscious lemon-caper sauce over the chicken on the platter.
- Garnish generously with fresh chopped parsley and optional lemon slices. Serve immediately.
Nutrition Facts
- Servings: 4
- Calories per serving (approximate): 350-450 calories.
Disclaimer: Nutritional information is an estimate and can vary depending on specific ingredients used, exact portion sizes, and whether optional ingredients like the cornstarch slurry or extra butter are included. For precise nutritional data, it’s recommended to use a recipe nutrition calculator with your specific ingredients.
This estimate assumes lean chicken breast, minimal oil for searing, and no added heavy cream. The use of almond flour instead of all-purpose flour would slightly alter the carbohydrate and fat content.
Preparation Time
- Prep Time (Chopping, Dredging): 15-20 minutes
- Sauté Time (Chicken & Aromatics): 10-15 minutes (in batches)
- Pressure Building Time: 10-15 minutes (can vary)
- Pressure Cook Time: 5-7 minutes
- Natural Pressure Release: 5 minutes
- Sauce Thickening Time (Optional): 2-3 minutes
- Total Approximate Time: 50 minutes to 1 hour 15 minutes (largely dependent on how quickly your Instant Pot comes to pressure)
While the total time might seem close to an hour, the active “hands-on” time is significantly less, as the Instant Pot does most of the work during the pressure cooking and release phases.
How to Serve Your Delicious Healthy Chicken Piccata
This Healthy Instant Pot Chicken Piccata is wonderfully versatile and pairs beautifully with a variety of sides. Here are some serving suggestions to complete your meal:
- Low-Carb & Keto-Friendly Options:
- Zucchini Noodles (Zoodles): Lightly sautéed or raw, zoodles are a fantastic low-carb “pasta” alternative that soaks up the sauce beautifully.
- Cauliflower Rice: Steamed or lightly pan-fried cauliflower rice is another excellent grain-free choice.
- Steamed Asparagus: The slight bitterness of asparagus complements the tangy piccata sauce.
- Sautéed Spinach or Kale: Wilted greens add a nutritional boost and lovely color.
- Roasted Broccoli or Broccolini: The char from roasting adds another flavor dimension.
- Traditional & Heartier Pairings:
- Whole Wheat Pasta or Regular Pasta: Angel hair, linguine, or fettuccine are classic choices to catch all that delicious sauce.
- Quinoa or Brown Rice: Healthy whole grains that offer a nice textural contrast.
- Mashed Potatoes or Cauliflower Mash: Creamy mash is perfect for soaking up the piccata sauce.
- Crusty Bread: A slice of good quality whole grain or sourdough bread for mopping up every last bit of sauce.
- Garnishes & Finishing Touches:
- Extra Fresh Parsley: A generous sprinkle just before serving adds freshness.
- Lemon Wedges or Slices: For those who like an extra lemony kick.
- A Light Drizzle of Good Quality Olive Oil: Can add a touch of fruity richness if desired.
No matter how you choose to serve it, ensure there’s plenty of that bright, flavorful sauce spooned over both the chicken and your chosen accompaniments!
Additional Tips for Perfect Instant Pot Chicken Piccata (5 Tips)
- Don’t Skip Patting the Chicken Dry: This is a small step with a big impact. Removing excess moisture from the surface of the chicken allows it to get a much better sear when you sauté it. A good sear means more flavor development (thanks to the Maillard reaction) and a more appealing texture.
- Scrape Up the Fond – It’s Flavor Gold! After searing the chicken and sautéing the garlic, when you add the chicken broth to deglaze, make sure to scrape all those lovely browned bits (the fond) from the bottom of the Instant Pot. These bits are concentrated flavor and will make your sauce significantly more delicious. A wooden spoon or a flat-edged spatula works best for this.
- Fresh Lemon Juice is Key: While bottled lemon juice might seem convenient, the flavor of freshly squeezed lemon juice is vastly superior for a dish like piccata where lemon is a star ingredient. The brightness and complexity it brings cannot be replicated. It usually takes 1-2 large lemons to get 1/4 cup of juice.
- Adjust Sauce Consistency to Your Liking: The recipe provides an optional cornstarch (or arrowroot) slurry to thicken the sauce. If you prefer a thinner sauce, you can skip this step entirely. If you want it even thicker, you can increase the amount of slurry slightly. Remember to always mix cornstarch or arrowroot with cold water before adding it to hot liquid to prevent lumps. Simmer gently until thickened.
- Taste and Adjust Seasoning Before Serving: The final taste of your dish depends on proper seasoning. After the sauce is made (and thickened, if you choose), give it a taste. Does it need a pinch more salt? A bit more black pepper? Maybe another tiny squeeze of lemon juice to brighten it up further? Adjusting seasoning at the end is crucial for a perfectly balanced and delicious outcome.
Frequently Asked Questions (FAQ) – Healthy Instant Pot Chicken Piccata
Q1: Can I make this recipe gluten-free?
A1: Absolutely! To make this Chicken Piccata gluten-free, simply replace the all-purpose flour with a good quality gluten-free all-purpose flour blend, or even almond flour for a lower-carb option. When dredging, ensure an even but thin coat. If you opt to thicken the sauce, cornstarch is naturally gluten-free, but you can also use arrowroot starch as an excellent grain-free thickener. Always double-check that your chicken broth is certified gluten-free if you have celiac disease or severe gluten sensitivity.
Q2: How do I store and reheat leftovers?
A2: Leftover Healthy Chicken Piccata can be stored in an airtight container in the refrigerator for up to 3-4 days. To reheat, you can gently warm it on the stovetop in a skillet over medium-low heat until warmed through, adding a splash of chicken broth or water if the sauce has thickened too much. Alternatively, you can microwave it, but be careful not to overcook the chicken, which can make it tough. Reheating in the Instant Pot on the “Sauté” (low) setting or using the “Steam” function with the chicken on a trivet above a little water can also work.
Q3: Can I use frozen chicken breasts for this recipe?
A3: While it’s possible to cook chicken from frozen in the Instant Pot, for this particular recipe, it’s highly recommended to use thawed chicken breasts. Searing is a key step for flavor development in piccata, and you cannot effectively sear frozen chicken. If you must use frozen chicken, you would skip the searing step and likely need to increase the pressure cooking time significantly (e.g., 10-15 minutes depending on thickness), but the texture and flavor will not be the same as seared chicken. For best results, thaw chicken fully in the refrigerator overnight.
Q4: What if I don’t have capers, or don’t like them?
A4: Capers are a traditional and defining ingredient in piccata, providing a unique briny, tangy flavor. If you don’t have them or dislike them, you could try substituting with finely chopped green olives (like pimiento-stuffed or Castelvetrano) for a different kind of briny note. Some people also enjoy adding chopped artichoke hearts. Alternatively, you can omit them entirely. The dish will still be a lovely lemon chicken, but it won’t have that classic piccata punch. You might want to add a little extra salt or a splash of white wine vinegar to compensate for the lost tang.
Q5: My sauce isn’t thickening enough, or it’s too thick. What can I do?
A5: If your sauce isn’t thickening enough after adding the optional cornstarch/arrowroot slurry and simmering, you can make a little more slurry (e.g., 1/2 tablespoon cornstarch mixed with 1 tablespoon cold water) and add it gradually while whisking until it reaches your desired consistency. Remember it will thicken more as it cools slightly. If your sauce becomes too thick, simply whisk in a little more chicken broth or warm water, a tablespoon at a time, until it thins out to your liking. Always do this over low heat (Sauté mode on low) to prevent scorching.

Instant Pot Chicken Piccata Recipe
Ingredients
- 1.5 lbs boneless, skinless chicken breasts (approximately 3–4 medium breasts)
- 1/4 cup all-purpose flour (or almond flour/gluten-free all-purpose blend for GF)
- 1/2 teaspoon kosher salt, plus more to taste
- 1/4 teaspoon black pepper, plus more to taste
- 1/4 teaspoon paprika (optional, for color and subtle flavor)
- 1 tablespoon olive oil
- 1 tablespoon unsalted butter (can be divided, or use extra olive oil)
- 3–4 cloves garlic, minced (about 1 tablespoon)
- 1 cup low-sodium chicken broth
- 1/4 cup fresh lemon juice (from 1–2 large lemons)
- 2–3 tablespoons capers, drained and rinsed
- For slurry (optional, for a thicker sauce):
- 1 tablespoon cornstarch (or 1.5 teaspoons arrowroot starch)
- 2 tablespoons cold water
- 2 tablespoons fresh parsley, chopped, for garnish
- Lemon slices, for garnish (optional)
Instructions
- Prepare the Chicken:
- If your chicken breasts are very thick (over 1 inch), you have two options:
- Pound them: Place chicken breasts between two pieces of plastic wrap or in a zip-top bag and gently pound them to about 1/2-inch thickness using a meat mallet or rolling pin. This ensures even cooking and tender results.
- Cut into cutlets: Alternatively, carefully slice thicker breasts horizontally into two thinner cutlets.
- Pat the chicken pieces thoroughly dry with paper towels. This is crucial for getting a nice sear.
- If your chicken breasts are very thick (over 1 inch), you have two options:
- Dredge the Chicken:
- In a shallow dish or plate, combine the flour, 1/2 teaspoon salt, 1/4 teaspoon pepper, and optional paprika. Mix well.
- Lightly dredge each piece of chicken in the flour mixture, shaking off any excess. You want a thin, even coating.
- Sear the Chicken (Working in Batches):
- Set your Instant Pot to the “Sauté” mode on “More” or “High.”
- Once the display reads “Hot,” add the 1 tablespoon of olive oil (and 1/2 tablespoon of the butter, if using).
- Carefully place 2-3 pieces of chicken (depending on the size of your pot, don’t overcrowd) into the hot pot.
- Sear for 2-3 minutes per side, until lightly golden brown. The chicken will not be cooked through at this stage.
- Remove the seared chicken from the pot and set aside on a clean plate. Repeat with the remaining chicken, adding a little more oil if the pot becomes too dry.
- Build the Sauce Base:
- Once all chicken is seared and removed, if you used butter for searing and have browned bits, you can add the remaining 1/2 tablespoon of butter to the pot now (or a touch more olive oil if needed).
- Add the minced garlic to the pot and sauté for about 30-60 seconds, until fragrant. Be careful not to burn it.
- Pour in the chicken broth, scraping up any browned bits (fond) from the bottom of the pot with a wooden spoon or spatula. These bits are packed with flavor!
- Press “Cancel” to turn off the Sauté mode.
- Pressure Cook the Chicken:
- Stir the fresh lemon juice and drained capers into the broth in the pot.
- Arrange the seared chicken pieces back into the Instant Pot, trying to keep them in a relatively even layer. It’s okay if they overlap slightly. Pour any accumulated juices from the plate over the chicken.
- Secure the lid on the Instant Pot. Ensure the steam release valve is set to the “Sealing” position.
- Select “Pressure Cook” (or “Manual”) mode and set the timer for 5-7 minutes on High Pressure. The exact time will depend on the thickness of your chicken. For 1/2-inch thick cutlets, 5 minutes is usually sufficient. For slightly thicker pieces, aim for 6-7 minutes.
- Release Pressure & Finish:
- Once the cooking cycle is complete, allow the pressure to release naturally for 5 minutes (5-minute NPR). This helps keep the chicken tender.
- After 5 minutes of natural release, carefully perform a Quick Release to vent any remaining steam.
- Once the pin drops, open the lid. Carefully remove the cooked chicken from the pot and transfer it to a serving platter. Tent loosely with foil to keep warm.
- Thicken the Sauce (Optional) & Serve:
- Set the Instant Pot back to “Sauté” mode on “Normal” or “Low.” Bring the sauce to a gentle simmer.
- If using a slurry: In a small bowl, whisk together the cornstarch (or arrowroot) and cold water until smooth. Pour the slurry into the simmering sauce, whisking constantly until the sauce thickens slightly (usually 1-2 minutes).
- Taste the sauce and adjust seasoning if necessary (more salt, pepper, or a tiny squeeze more lemon juice if desired). If you want an extra touch of richness without a full slurry, you can whisk in a small knob (about 1 teaspoon) of cold butter now until it melts and emulsifies into the sauce.
- Pour the luscious lemon-caper sauce over the chicken on the platter.
- Garnish generously with fresh chopped parsley and optional lemon slices. Serve immediately.
Nutrition
- Serving Size: One Normal Portion
- Calories: 350-450