


Of all the aromas that can fill a home, the smell of baking bread intertwined with sizzling garlic and butter is, in my opinion, a top contender for the most comforting scent on earth. I still remember the first time I decided to tackle this Homemade Garlic Knots recipe. It was for a casual Sunday family dinner, the kind where everyone congregates in the kitchen, drawn in by the promise of good food and even better company. I was a little nervous, worried they’d turn out dense or dry. But as I pulled that baking sheet from the oven, revealing a crowded landscape of glistening, golden-brown knots, a hush fell over the room. The air was thick with the rich, savory perfume of garlic, parmesan, and fresh parsley. My nephew, usually a picky eater, was the first to grab one, his eyes wide with anticipation. He took a bite, and the look on his face was pure bliss. “These are better than the pizza place!” he declared, and at that moment, I knew this recipe was a keeper. They vanished in minutes, dunked in marinara sauce, used to mop up pasta sauce, and eaten just as they were. Since that day, these garlic knots have become a legendary part of our family gatherings, a simple indulgence that brings everyone together. They are pillowy soft on the inside, with a slightly crisp, buttery crust, and a garlic punch that’s bold but not overwhelming. This isn’t just a recipe; it’s a guaranteed way to create delicious memories.
The Ultimate Homemade Garlic Knots Recipe
This recipe will guide you through creating the most tender, flavorful, and irresistibly soft garlic knots from scratch. We’ll cover everything from making the perfect dough to whipping up a garlic butter sauce that will have everyone reaching for more. While using store-bought pizza dough is a fantastic shortcut (which we’ll cover in the tips!), taking the time to make your own dough elevates these knots from a simple side dish to a true culinary centerpiece.
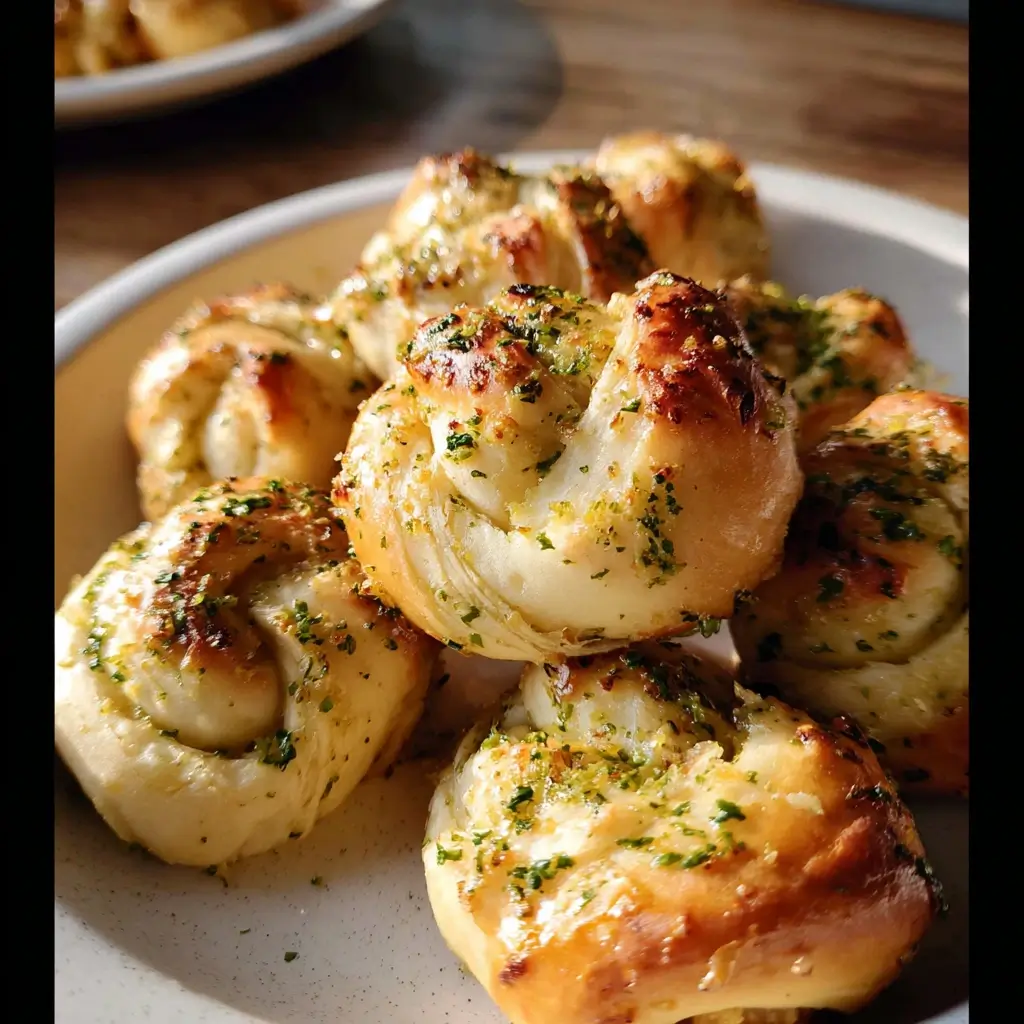
[Image: A rustic wooden board covered with a pile of freshly baked, golden-brown garlic knots, generously brushed with garlic butter and sprinkled with fresh parsley and grated Parmesan cheese.]
Why This Recipe is the Best You’ll Ever Try
In a world of countless online recipes, what makes this one stand out? It’s a combination of a few key elements that ensure foolproof, delicious results every single time.
A Dough Designed for Fluffiness
The foundation of any great garlic knot is the dough. We use bread flour, which has a higher protein content than all-purpose flour. This develops stronger gluten strands, resulting in a dough that is both wonderfully chewy and incredibly light and airy. A touch of sugar feeds the yeast and adds a subtle depth of flavor that balances the savory garlic and salt. The result is a pillowy interior that soaks up the garlic butter like a sponge.
The Two-Part Garlic Butter Method
Many recipes have you brush the knots with garlic butter only after they bake. Our method is different and, we believe, superior. We brush the knots with a portion of the garlic butter before they go into the oven. This allows the garlic-infused butter to bake right into the dough, creating layers of flavor from the inside out. The second brushing after they come out of the oven adds that final, glossy, intensely aromatic coating that makes them truly spectacular.
Perfectly Balanced Flavors
Garlic is the star, but it needs a strong supporting cast. We use a generous amount of fresh garlic, but we also balance it with high-quality unsalted butter, a sprinkle of salt, finely grated Parmesan cheese for a nutty, umami kick, and fresh parsley for a touch of bright, herbaceous freshness. It’s a symphony of classic Italian-American flavors that is both comforting and exciting.
Ingredients for the Perfect Garlic Knots
Accuracy is key in baking. For the best results, we highly recommend using a kitchen scale to measure your flour. However, we have provided cup measurements as well.
For the Dough:
- Bread Flour: 4 cups (500g), plus more for dusting. Bread flour provides a chewier, more professional texture.
- Instant Yeast: 2 ¼ teaspoons (7g), or one standard packet. Instant yeast can be mixed directly with the dry ingredients, simplifying the process.
- Granulated Sugar: 1 tablespoon. This provides food for the yeast and adds a hint of flavor and browning.
- Fine Sea Salt: 1 ½ teaspoons. Salt is crucial for flavor and for controlling the yeast’s activity.
- Warm Water: 1 ½ cups (355ml), at about 110°F / 43°C. It should feel like warm bathwater—too hot and it will kill the yeast.
- Olive Oil: 2 tablespoons. This adds richness and softness to the dough.
For the Garlic Butter Topping:
- Unsalted Butter: ½ cup (1 stick or 113g). Using unsalted butter allows you to control the total salt content of the recipe.
- Fresh Garlic: 5-6 cloves, minced very finely. The key to incredible flavor! Adjust to your personal preference.
- Grated Parmesan Cheese: ½ cup (50g), finely grated, plus more for sprinkling. Use a block of good quality Parmesan and grate it yourself for the best flavor and melting quality.
- Fresh Parsley: ¼ cup, finely chopped. It adds a vibrant color and fresh, peppery flavor that cuts through the richness of the butter.
- Dried Oregano: 1 teaspoon. This adds a classic, aromatic Italian-American pizzeria flavor.
- Fine Sea Salt: ½ teaspoon.
- Optional: Red pepper flakes, ¼ teaspoon for a gentle kick of heat.
[Image: An overhead shot of all the ingredients prepped and ready to go. A bowl of flour, a small bowl of yeast, measuring cups with water and oil, a stick of butter, minced garlic, chopped parsley, and a mound of grated Parmesan.]
Step-by-Step Instructions
Follow these detailed instructions carefully for garlic knot perfection. The process is broken down into making the dough, shaping the knots, and finishing them with that glorious garlic butter.
Part 1: Making and Proofing the Dough
- Activate the Yeast (if using Active Dry): If you are using active dry yeast instead of instant, begin by proofing it. In a small bowl, combine the warm water, sugar, and yeast. Let it sit for 5-10 minutes until it becomes foamy and bubbly. This confirms your yeast is alive and active. If using instant yeast, you can skip this and proceed to the next step.
- Combine Dry Ingredients: In the large bowl of a stand mixer fitted with the dough hook attachment, add the 4 cups of bread flour, 1 ½ teaspoons of salt, and the instant yeast (if using). Give it a quick mix on low speed to combine.
- Add Wet Ingredients: With the mixer on low, slowly pour in the warm water (or the proofed yeast mixture) and the 2 tablespoons of olive oil.
- Knead the Dough: Continue to mix on low speed until a shaggy dough forms. Then, increase the speed to medium-low and let the mixer knead the dough for 7-8 minutes. The dough should become smooth, elastic, and pull away cleanly from the sides of the bowl. If the dough is too sticky, add a tablespoon of flour at a time. If it’s too dry, add a teaspoon of water.
- Kneading by Hand (Alternative): If you don’t have a stand mixer, you can knead by hand. Combine the ingredients in a large bowl with a wooden spoon until a shaggy dough forms. Turn the dough out onto a lightly floured surface and knead for 10-12 minutes, until it is smooth and elastic. It’s a great workout!
- First Rise: Lightly oil a large, clean bowl. Form your dough into a ball and place it in the bowl, turning it over once to coat the top with oil. This prevents a dry skin from forming. Cover the bowl tightly with plastic wrap or a damp kitchen towel.
- Let it Rise: Place the bowl in a warm, draft-free spot for 60-90 minutes, or until the dough has doubled in size. A good test is to poke it gently with a floured finger; if the indentation remains, it’s ready.
Part 2: Shaping the Knots
- Prepare Your Workstation: Line two large baking sheets with parchment paper. This prevents sticking and makes cleanup a breeze.
- Divide the Dough: Gently punch down the risen dough to release the air. Transfer it to a lightly floured work surface. Divide the dough into two equal halves. Work with one half at a time, keeping the other covered so it doesn’t dry out.
- Roll and Cut: Roll one half of the dough into a large rectangle, approximately 9×12 inches and about ¼ inch thick. Using a pizza cutter or a sharp knife, cut the rectangle into 12 long strips, each about 1 inch wide.
- Tie the Knots: Take one strip of dough and gently stretch it to about 8-9 inches long. Tie it into a simple knot, just like you would tie a shoelace. Tuck the two ends underneath the knot. Don’t worry about them being perfect; their rustic, unique shapes are part of their charm.
- Arrange for the Second Rise: Place the shaped knot onto the prepared baking sheet. Repeat with the remaining strips, placing them about 2 inches apart to give them room to expand. Repeat the entire process with the second half of the dough. You should have about 24 knots in total.
Part 3: The Second Rise and Baking
- Prepare the Garlic Butter: While the knots are being shaped, prepare the garlic butter. In a small saucepan, melt the ½ cup of butter over low heat. Once melted, add the minced garlic and cook for just 1-2 minutes until fragrant. You don’t want to brown or burn the garlic, just lightly cook it to mellow its raw bite. Remove from heat and stir in the chopped parsley, grated Parmesan, dried oregano, ½ teaspoon of salt, and optional red pepper flakes.
- First Butter Brush: Gently brush the tops and sides of the unbaked knots with about one-third of the garlic butter mixture. This initial layer bakes flavor directly into the bread.
- Second Rise: Loosely cover the baking sheets with plastic wrap. Let the knots rise in a warm place for another 20-30 minutes, or until they look puffy. While they are rising, preheat your oven to 400°F (200°C).
- Bake to Perfection: Uncover the knots and bake in the preheated oven for 12-15 minutes, or until they are a deep golden brown on top and cooked through. If you have two racks, rotate the baking sheets halfway through baking for even browning.
- The Final Butter Bath: As soon as the garlic knots come out of the oven, immediately brush them generously with the remaining garlic butter mixture. Don’t be shy! This is what makes them so decadent and flavorful. The heat from the knots will sizzle the butter and release an incredible aroma.
- Serve: For an extra flourish, sprinkle with a bit more fresh parsley and grated Parmesan cheese. Serve them warm.
[Image: A step-by-step collage showing the process: dough being kneaded, dough risen in a bowl, dough rolled out and cut into strips, a hand tying a strip into a knot, knots arranged on a baking sheet, and the final baked knots being brushed with butter.]
Nutrition Facts
- Servings: 24 knots
- Calories per serving (1 knot): Approximately 155 kcal
Disclaimer: The nutritional information provided is an estimate and can vary based on the specific ingredients and brands used. This calculation is for one knot, but it’s hard to eat just one!
Preparation Time
- Active Time: 30 minutes (mixing, kneading, shaping)
- Rising Time: 1 hour 30 minutes (for both rises)
- Baking Time: 12-15 minutes
- Total Time: Approximately 2 hours 15 minutes
How to Serve Your Homemade Garlic Knots
These garlic knots are incredibly versatile. They can be the star of an appetizer spread or the perfect companion to a hearty meal. Here are some of our favorite ways to serve them:
- As a Classic Appetizer:
- Arrange them warm on a large platter or in a bread basket.
- Serve with a side of high-quality marinara sauce for dipping. A warm, simple tomato sauce is the perfect acidic counterpoint to the rich, buttery knots.
- Create a dipping sauce trio: classic marinara, creamy Alfredo sauce, and a basil pesto dip.
- Alongside a Main Course:
- Pasta Night: They are an absolute must-have for sopping up the last bits of sauce from any pasta dish. They pair beautifully with:
- Hearty Lasagna or Baked Ziti
- Classic Spaghetti and Meatballs
- Creamy Fettuccine Alfredo
- With Soups and Salads: Use them in place of crackers or a standard dinner roll. They are fantastic for dipping into:
- Creamy Tomato Basil Soup
- Hearty Minestrone or Lentil Soup
- Serve alongside a large Caesar Salad or an Italian chopped salad for a complete lunch.
- With Grilled Meats or Roasts: Serve them with a Sunday roast chicken or a grilled steak as a delicious, carb-loaded side dish.
- Pasta Night: They are an absolute must-have for sopping up the last bits of sauce from any pasta dish. They pair beautifully with:
- On a Party Platter:
- Build a beautiful antipasto platter around the garlic knots.
- Include items like cured meats (prosciutto, salami), assorted cheeses (provolone, mozzarella balls), olives, and roasted red peppers.
Additional Tips for Garlic Knot Success (5 Tips)
- The “Cheesy Bomb” Variation: For ultra-cheesy garlic knots, press a small cube of low-moisture mozzarella cheese into the center of each dough strip before tying it into a knot. As it bakes, the cheese will melt, creating a gooey, irresistible center.
- The Ultimate Make-Ahead Hack: You can prepare the dough through the first rise, then punch it down, cover it tightly, and refrigerate it for up to 48 hours. When you’re ready to bake, let the cold dough sit at room temperature for about 30 minutes before proceeding with shaping, the second rise, and baking. This is perfect for breaking up the workload for a party.
- For a Richer, Golden-Brown Color: For an even deeper, glossier finish, make a simple egg wash. Whisk one large egg with a tablespoon of water. Brush this mixture on the knots before the first garlic butter application and before baking. The proteins in the egg will help them brown beautifully.
- Control Your Garlic Intensity: The flavor of garlic can vary. For a milder, sweeter, roasted garlic flavor, roast a whole head of garlic first, squeeze out the soft cloves, mash them, and mix them into the melted butter. For a sharper, more pungent garlic kick, add an extra clove or two of raw minced garlic to the butter mixture just before the final brushing (after they come out of the oven).
- Using Store-Bought Pizza Dough: In a pinch for time? This recipe works wonderfully with store-bought dough! One 1-pound ball of refrigerated pizza dough will yield about 12 knots. Let the dough come to room temperature for about 20-30 minutes to make it easier to work with, then skip to “Part 2: Shaping the Knots.” The texture may be slightly different, but they will still be absolutely delicious and a massive time-saver.
Frequently Asked Questions (FAQ)
1. Can I use all-purpose flour instead of bread flour?
Yes, you absolutely can. The garlic knots will still be delicious! The primary difference is in the texture. All-purpose flour has a lower protein content, which will result in knots that are a bit softer and more tender, like a soft dinner roll, rather than having the characteristic chewiness that bread flour provides. The results will be great either way, so use what you have on hand.
2. My dough didn’t rise. What went wrong?
This is a common baking issue with a few potential culprits. The most likely reason is that your yeast was old or no longer active. Always check the expiration date on your yeast packet. Another possibility is that your water was too hot (which kills the yeast) or too cold (which won’t activate it). It should be warm to the touch, around 110°F / 43°C. Finally, make sure your dough is in a warm, draft-free spot to rise. If your kitchen is cold, you can place the bowl in an oven that is turned off but has the light on.
3. How do I store leftover garlic knots?
Leftover garlic knots are a rare but wonderful thing! To store them, let them cool completely to room temperature. Then, place them in an airtight container or a zip-top bag. They can be stored at room temperature for up to 2-3 days. The garlic butter can make them soften over time. To bring them back to life, reheat them in a 350°F (175°C) oven or a toaster oven for 5-7 minutes until they are warm and the crust is slightly crisped again. Microwaving can make them tough, so the oven is your best bet.
4. Can I freeze these garlic knots?
Yes, they freeze beautifully! This makes them a fantastic make-ahead option for parties or future meals. You can freeze them either baked or unbaked.
- To Freeze Baked Knots: Let the fully baked and buttered knots cool completely. Arrange them in a single layer on a baking sheet and freeze until solid. Then, transfer them to a freezer-safe zip-top bag. They can be frozen for up to 3 months. Reheat directly from frozen in a 350°F (175°C) oven for 10-12 minutes.
- To Freeze Unbaked Knots: Shape the knots and place them on a parchment-lined baking sheet. Freeze until solid, then transfer to a freezer bag. When ready to bake, place the frozen knots on a baking sheet, cover, and let them thaw and rise at room temperature for 3-4 hours, or until doubled in size. Then, brush with butter and bake as directed.
5. I don’t have a stand mixer. Is it difficult to make the dough by hand?
Not at all! Making dough by hand is a very rewarding and not overly difficult process. It just requires a bit more elbow grease. Follow the recipe instructions for combining the ingredients in a large bowl. Once a shaggy dough forms, turn it out onto a lightly floured counter and knead for 10-12 minutes. You’re looking for the dough to transform from a sticky, lumpy mass into a smooth, elastic, and slightly tacky ball. It’s a great way to connect with the baking process and is how bread has been made for centuries

Homemade Garlic Knots Recipe
Ingredients
For the Dough:
- Bread Flour: 4 cups (500g), plus more for dusting. Bread flour provides a chewier, more professional texture.
- Instant Yeast: 2 ¼ teaspoons (7g), or one standard packet. Instant yeast can be mixed directly with the dry ingredients, simplifying the process.
- Granulated Sugar: 1 tablespoon. This provides food for the yeast and adds a hint of flavor and browning.
- Fine Sea Salt: 1 ½ teaspoons. Salt is crucial for flavor and for controlling the yeast’s activity.
- Warm Water: 1 ½ cups (355ml), at about 110°F / 43°C. It should feel like warm bathwater—too hot and it will kill the yeast.
- Olive Oil: 2 tablespoons. This adds richness and softness to the dough.
For the Garlic Butter Topping:
- Unsalted Butter: ½ cup (1 stick or 113g). Using unsalted butter allows you to control the total salt content of the recipe.
- Fresh Garlic: 5-6 cloves, minced very finely. The key to incredible flavor! Adjust to your personal preference.
- Grated Parmesan Cheese: ½ cup (50g), finely grated, plus more for sprinkling. Use a block of good quality Parmesan and grate it yourself for the best flavor and melting quality.
- Fresh Parsley: ¼ cup, finely chopped. It adds a vibrant color and fresh, peppery flavor that cuts through the richness of the butter.
- Dried Oregano: 1 teaspoon. This adds a classic, aromatic Italian-American pizzeria flavor.
- Fine Sea Salt: ½ teaspoon.
- Optional: Red pepper flakes, ¼ teaspoon for a gentle kick of heat.
Instructions
Part 1: Making and Proofing the Dough
- Activate the Yeast (if using Active Dry): If you are using active dry yeast instead of instant, begin by proofing it. In a small bowl, combine the warm water, sugar, and yeast. Let it sit for 5-10 minutes until it becomes foamy and bubbly. This confirms your yeast is alive and active. If using instant yeast, you can skip this and proceed to the next step.
- Combine Dry Ingredients: In the large bowl of a stand mixer fitted with the dough hook attachment, add the 4 cups of bread flour, 1 ½ teaspoons of salt, and the instant yeast (if using). Give it a quick mix on low speed to combine.
- Add Wet Ingredients: With the mixer on low, slowly pour in the warm water (or the proofed yeast mixture) and the 2 tablespoons of olive oil.
- Knead the Dough: Continue to mix on low speed until a shaggy dough forms. Then, increase the speed to medium-low and let the mixer knead the dough for 7-8 minutes. The dough should become smooth, elastic, and pull away cleanly from the sides of the bowl. If the dough is too sticky, add a tablespoon of flour at a time. If it’s too dry, add a teaspoon of water.
- Kneading by Hand (Alternative): If you don’t have a stand mixer, you can knead by hand. Combine the ingredients in a large bowl with a wooden spoon until a shaggy dough forms. Turn the dough out onto a lightly floured surface and knead for 10-12 minutes, until it is smooth and elastic. It’s a great workout!
- First Rise: Lightly oil a large, clean bowl. Form your dough into a ball and place it in the bowl, turning it over once to coat the top with oil. This prevents a dry skin from forming. Cover the bowl tightly with plastic wrap or a damp kitchen towel.
- Let it Rise: Place the bowl in a warm, draft-free spot for 60-90 minutes, or until the dough has doubled in size. A good test is to poke it gently with a floured finger; if the indentation remains, it’s ready.
Part 2: Shaping the Knots
- Prepare Your Workstation: Line two large baking sheets with parchment paper. This prevents sticking and makes cleanup a breeze.
- Divide the Dough: Gently punch down the risen dough to release the air. Transfer it to a lightly floured work surface. Divide the dough into two equal halves. Work with one half at a time, keeping the other covered so it doesn’t dry out.
- Roll and Cut: Roll one half of the dough into a large rectangle, approximately 9×12 inches and about ¼ inch thick. Using a pizza cutter or a sharp knife, cut the rectangle into 12 long strips, each about 1 inch wide.
- Tie the Knots: Take one strip of dough and gently stretch it to about 8-9 inches long. Tie it into a simple knot, just like you would tie a shoelace. Tuck the two ends underneath the knot. Don’t worry about them being perfect; their rustic, unique shapes are part of their charm.
- Arrange for the Second Rise: Place the shaped knot onto the prepared baking sheet. Repeat with the remaining strips, placing them about 2 inches apart to give them room to expand. Repeat the entire process with the second half of the dough. You should have about 24 knots in total.
Part 3: The Second Rise and Baking
- Prepare the Garlic Butter: While the knots are being shaped, prepare the garlic butter. In a small saucepan, melt the ½ cup of butter over low heat. Once melted, add the minced garlic and cook for just 1-2 minutes until fragrant. You don’t want to brown or burn the garlic, just lightly cook it to mellow its raw bite. Remove from heat and stir in the chopped parsley, grated Parmesan, dried oregano, ½ teaspoon of salt, and optional red pepper flakes.
- First Butter Brush: Gently brush the tops and sides of the unbaked knots with about one-third of the garlic butter mixture. This initial layer bakes flavor directly into the bread.
- Second Rise: Loosely cover the baking sheets with plastic wrap. Let the knots rise in a warm place for another 20-30 minutes, or until they look puffy. While they are rising, preheat your oven to 400°F (200°C).
- Bake to Perfection: Uncover the knots and bake in the preheated oven for 12-15 minutes, or until they are a deep golden brown on top and cooked through. If you have two racks, rotate the baking sheets halfway through baking for even browning.
- The Final Butter Bath: As soon as the garlic knots come out of the oven, immediately brush them generously with the remaining garlic butter mixture. Don’t be shy! This is what makes them so decadent and flavorful. The heat from the knots will sizzle the butter and release an incredible aroma.
- Serve: For an extra flourish, sprinkle with a bit more fresh parsley and grated Parmesan cheese. Serve them warm.
Nutrition
- Serving Size: One Normal Portion
- Calories: 155


