

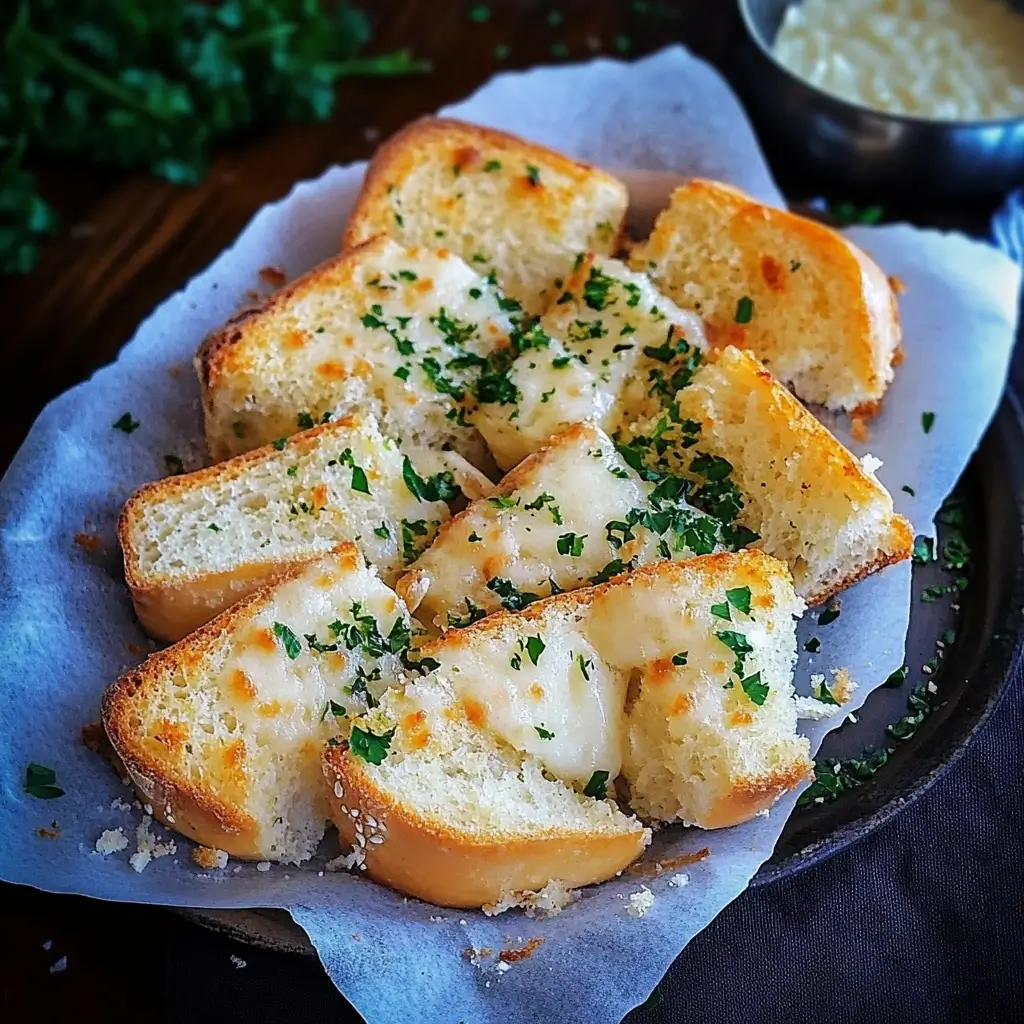
There’s something undeniably comforting and universally appealing about garlic bread. In our home, the mere mention of it sends ripples of excitement through the family. It’s become our go-to side dish for pasta nights, a welcome addition to cozy soup evenings, and even a delightful snack on its own. This isn’t just any garlic bread recipe; it’s our garlic bread recipe, honed and perfected over countless batches. The crisp, golden-brown crust gives way to a soft, pillowy interior, infused with the rich, savory aroma of garlic and butter. Every bite is an explosion of flavor, a delightful balance of salty, garlicky goodness that leaves you wanting more. Honestly, sometimes I think we make meals just as an excuse to have this garlic bread on the side. It’s simple, yes, but the magic lies in the quality of ingredients and a few key techniques that elevate it from ordinary to extraordinary. If you’re looking to create garlic bread that will have your family and friends raving, look no further. This recipe is your gateway to garlic bread perfection.
Ingredients: The Foundation of Flavor
The beauty of garlic bread lies in its simplicity. However, using high-quality ingredients truly makes a difference in the final taste and texture. Here’s what you’ll need to create the most delectable garlic bread:
- 1 Loaf of Italian or French Bread (About 12-16 inches long): The type of bread is crucial. Italian or French loaves, with their slightly open crumb and sturdy crust, are ideal. They hold up well to the garlic butter and bake to a perfect crispness. Avoid softer breads like sandwich bread, which can become soggy. Day-old bread works even better as it’s slightly drier and absorbs the garlic butter beautifully without becoming mushy.
- 1 Cup (2 sticks or 226g) Unsalted Butter, Softened: Unsalted butter is preferred as it allows you to control the saltiness of the garlic butter mixture. Ensure the butter is properly softened – not melted, but easily spreadable. This is key to achieving a smooth and even garlic butter. If you only have salted butter, reduce the amount of added salt later in the recipe.
- 8-10 Cloves Fresh Garlic, Minced: Fresh garlic is non-negotiable for authentic garlic bread flavor. Pre-minced garlic in jars often lacks the pungent aroma and fresh taste that freshly minced cloves provide. The quantity can be adjusted to your garlic preference; 8 cloves will give a pronounced garlic flavor, while 10 will be bolder. Mincing the garlic finely is important to ensure it distributes evenly in the butter and cooks through without burning.
- 1/4 Cup Fresh Parsley, Finely Chopped (Optional, but highly recommended): Fresh parsley adds a touch of brightness, color, and herbaceousness that complements the richness of the garlic butter. It’s not essential, but it definitely elevates the flavor profile and visual appeal. Other fresh herbs like chives, oregano, or basil can also be used for variations.
- 1/2 Teaspoon Salt, or to taste: Salt is crucial for balancing the flavors and enhancing the garlic and butter. Adjust the amount according to your preference and whether you are using salted or unsalted butter.
- 1/4 Teaspoon Black Pepper, freshly ground: Freshly ground black pepper adds a subtle warmth and depth of flavor.
- Optional Additions (for variations):
- 1/2 Cup Grated Parmesan Cheese: For cheesy garlic bread, Parmesan adds a salty, nutty flavor and a beautiful golden crust. Add it during the last few minutes of baking. Other cheeses like mozzarella, cheddar, or provolone can also be used.
- Pinch of Red Pepper Flakes: For a touch of heat, a pinch of red pepper flakes adds a subtle kick.
- 1 Tablespoon Olive Oil: Adding a tablespoon of olive oil to the butter mixture can enhance the flavor and make the garlic butter slightly easier to spread.
- Garlic Powder (optional, for extra garlic boost): If you are a true garlic lover, a teaspoon of garlic powder can intensify the garlic flavor even further. Use it sparingly, as too much can make it bitter.
Instructions: Crafting Garlic Bread Perfection Step-by-Step
Making delicious garlic bread is surprisingly simple, but following these steps will ensure you achieve the best results every time:
- Preheat Your Oven to 400°F (200°C): Preheating the oven to the correct temperature is essential for even baking and a crispy crust. Ensure your oven is fully preheated before placing the garlic bread inside.
- Prepare the Garlic Butter: In a medium-sized bowl, combine the softened butter, minced garlic, chopped parsley (if using), salt, and black pepper.
- Mince the Garlic Properly: For the best flavor and to prevent burning, mince the garlic cloves very finely. You can use a garlic press, a sharp knife to mince by hand, or finely grate the garlic using a microplane. Finely minced garlic distributes flavor more evenly and cooks through properly.
- Cream the Garlic Butter: Use a fork or a rubber spatula to thoroughly cream together the butter and garlic mixture. Mix until the garlic and herbs are evenly distributed throughout the butter and the mixture is light and fluffy. This ensures that every bite of your garlic bread is infused with garlicky goodness. Taste and adjust salt and pepper to your liking at this stage.
- Slice the Bread: Carefully slice the loaf of Italian or French bread lengthwise, creating two long halves. You can also slice it into individual slices, but lengthwise halves are easier to manage and bake evenly. If using individual slices, you may need to adjust the baking time slightly.
- Spread the Garlic Butter Generously: Using a butter knife or spatula, generously spread the garlic butter mixture evenly over the cut sides of both bread halves. Ensure you cover every nook and cranny for maximum flavor in every bite. Don’t be shy with the garlic butter – it’s what makes garlic bread so delicious! If you are adding cheese, reserve it for later.
- Bake on a Baking Sheet: Place the buttered bread halves, cut-side up, on a baking sheet. You can line the baking sheet with parchment paper for easier cleanup, but it’s not strictly necessary.
- Bake Until Golden and Crispy: Bake in the preheated oven for 10-12 minutes, or until the bread is golden brown and crispy around the edges and the garlic butter is melted and fragrant. Keep a close eye on it during the last few minutes of baking to prevent burning, as oven temperatures can vary.
- Add Cheese (Optional): If you are making cheesy garlic bread, sprinkle the grated Parmesan cheese (or your cheese of choice) evenly over the garlic buttered bread during the last 2-3 minutes of baking. Return to the oven until the cheese is melted, bubbly, and lightly golden brown.
- Broil for Extra Crispness (Optional): For an extra crispy top and beautifully browned cheese, you can broil the garlic bread for the last 1-2 minutes. Watch it very carefully under the broiler, as it can burn quickly. Broiling is optional but adds a nice textural contrast.
- Rest and Slice (if needed): Once baked to your liking, remove the garlic bread from the oven and let it rest for a minute or two before slicing into serving pieces if you baked it in halves. This allows the flavors to meld together and makes it easier to handle.
- Serve Immediately: Garlic bread is best enjoyed fresh and warm. Serve immediately as a side dish or appetizer. The aroma will be irresistible!
Nutrition Facts: A Delicious Indulgence (per serving, approximate)
Please note that nutritional values are estimates and can vary based on ingredient brands, bread type, and serving size. This is an approximation per serving, assuming the recipe makes about 12 servings:
- Serving Size: 1 slice (approximately 1/12th of the loaf, depending on slicing)
- Calories per Serving: Approximately 200-250 calories
- Fat: 15-20g (primarily from butter)
- Saturated Fat: 9-12g
- Cholesterol: 45-60mg
- Sodium: 200-300mg (depending on salt added and butter used)
- Carbohydrates: 15-20g
- Fiber: 1-2g
- Sugar: 1-2g
- Protein: 3-4g
Important Disclaimer: These nutritional values are estimates only. For precise nutritional information, use a nutrition calculator with the specific brands and quantities of ingredients you use. Garlic bread, due to its butter content, is a relatively calorie-dense food. Enjoy it in moderation as part of a balanced diet.
Preparation Time: Quick and Easy Garlic Bread
Garlic bread is a fantastic option when you need a delicious side dish in a hurry. Here’s a breakdown of the preparation and cooking times:
- Prep Time: 15 minutes (This includes softening butter, mincing garlic, chopping parsley, and preparing the garlic butter mixture).
- Cook Time: 10-12 minutes (Baking time in the oven).
- Total Time: Approximately 25-27 minutes
This recipe is incredibly efficient, making it perfect for weeknight meals or when you have unexpected guests. Most of the time is hands-off baking time, allowing you to focus on other aspects of your meal preparation.
How to Serve Garlic Bread: Complementing Your Meal
Garlic bread is incredibly versatile and pairs beautifully with a wide range of dishes. Here are some delicious ways to serve it:
- Alongside Pasta Dishes:
- Classic Pasta Pairings: Garlic bread is a quintessential accompaniment to pasta dishes like spaghetti and meatballs, lasagna, fettuccine Alfredo, marinara sauce-based pasta, and baked ziti. It’s perfect for soaking up extra sauce.
- Creamy Pasta Dishes: It complements creamy pasta sauces beautifully, providing a textural and flavor contrast.
- Pesto Pasta: Garlic bread enhances the garlicky notes in pesto pasta dishes.
- With Soups and Stews:
- Hearty Soups: Serve garlic bread with hearty soups like tomato soup, minestrone, French onion soup, or creamy vegetable soups. It’s ideal for dipping into the soup.
- Chili: Garlic bread is a fantastic side for chili, offering a comforting and flavorful contrast to the spicy stew.
- Stewed Dishes: Serve with beef stew, chicken stew, or lentil stew for a complete and satisfying meal.
- As an Appetizer:
- Pre-Dinner Nibble: Cut garlic bread into smaller slices or sticks and serve as an appetizer before a meal.
- Party Food: Garlic bread is a crowd-pleasing appetizer for parties and gatherings.
- Bruschetta Style: Top garlic bread slices with chopped tomatoes, basil, and balsamic glaze for a simple bruschetta variation.
- With Salads:
- Side Salad Companion: Serve garlic bread alongside a large salad for a light yet satisfying lunch or dinner.
- Caesar Salad: Garlic bread is a classic pairing with Caesar salad, complementing the creamy dressing and romaine lettuce.
- With Grilled Meats and Vegetables:
- BBQ Side: Garlic bread is a great addition to barbecues, serving alongside grilled chicken, steak, burgers, or vegetables.
- Grilled Vegetables: It pairs well with grilled vegetables like asparagus, zucchini, and bell peppers.
- On Its Own (as a snack):
- Garlic Bread Sticks: Cut the loaf into sticks before baking for easy snacking.
- Quick Bite: Enjoy a slice of warm garlic bread as a comforting snack anytime.
Additional Tips for Perfect Garlic Bread
Elevate your garlic bread game with these helpful tips and tricks:
- Roast Your Garlic for a Milder, Sweeter Flavor: For a less pungent and sweeter garlic flavor, try roasting the garlic cloves before mincing them. Wrap whole garlic cloves in foil with a drizzle of olive oil and roast at 400°F (200°C) for about 30-40 minutes, or until soft and caramelized. Roasted garlic adds a depth of flavor that’s truly exceptional.
- Use Fresh Herbs Liberally: Don’t be afraid to experiment with different fresh herbs. Besides parsley, try adding chopped chives, oregano, thyme, rosemary, or basil to your garlic butter. A combination of herbs can create a more complex and aromatic garlic bread.
- Adjust Garlic Quantity to Your Preference: The recipe calls for 8-10 cloves of garlic, but you can adjust this based on your personal preference. If you love a strong garlic flavor, use more; if you prefer a milder taste, use less. Start with 8 cloves and taste the garlic butter mixture before spreading it on the bread.
- Don’t Overbake: Overbaking garlic bread can make it dry and hard. Bake just until it’s golden brown and crispy around the edges. The center should still be slightly soft and pillowy. Keep a close eye on it, especially during the last few minutes of baking.
- Make Garlic Butter Ahead of Time: You can prepare the garlic butter mixture ahead of time and store it in the refrigerator for up to 3 days. This is a great time-saver when you’re preparing for a larger meal or gathering. Just bring the garlic butter to room temperature before spreading it on the bread.
Frequently Asked Questions (FAQ) About Garlic Bread
Here are some common questions people have about making and enjoying garlic bread:
Q1: Can I use pre-minced garlic from a jar?
A: While you can use pre-minced garlic for convenience, fresh garlic is highly recommended for the best flavor. Pre-minced garlic often lacks the pungent aroma and fresh taste of freshly minced cloves and can sometimes have a slightly metallic or bitter aftertaste. Fresh garlic truly makes a difference in the overall quality of your garlic bread.
Q2: Can I make garlic bread with frozen bread?
A: Yes, you can make garlic bread with frozen bread, but you’ll need to thaw it completely first. Frozen bread can sometimes become slightly drier after thawing, so it might absorb the garlic butter even better. Ensure the bread is fully thawed and at room temperature before slicing and buttering. You might need to adjust the baking time slightly.
Q3: How do I store leftover garlic bread?
A: Leftover garlic bread is best stored at room temperature in an airtight container for up to 2-3 days. To reheat, wrap it loosely in foil and warm it in a preheated oven at 350°F (175°C) for about 5-10 minutes, or until heated through. Reheating in the microwave can make it soggy.
Q4: Can I make vegan garlic bread?
A: Absolutely! To make vegan garlic bread, simply substitute the butter with a good quality vegan butter or margarine. Ensure the vegan butter is designed for baking and has a good flavor. The rest of the recipe remains the same. You can also use olive oil as a base, though it will have a slightly different texture and flavor than butter-based garlic bread. For cheesy vegan garlic bread, use your favorite vegan cheese shreds.
Q5: What if my garlic bread is burning on the bottom but not cooked on top?
A: If your garlic bread is browning too quickly on the bottom, it could be due to the baking sheet or oven temperature. Try placing another baking sheet underneath the first one to insulate the bottom of the bread. You can also lower the oven temperature slightly (to 375°F or 190°C) and bake for a bit longer. Make sure your oven rack is positioned in the center of the oven for even heat distribution. If you have a convection oven, using convection bake can help with even browning.
Enjoy making and savoring this incredibly flavorful and easy garlic bread recipe! It’s sure to become a beloved staple in your kitchen, just as it has in ours.
Print
Homemade Garlic Bread Recipe
Ingredients
- 1 Loaf of Italian or French Bread (About 12–16 inches long): The type of bread is crucial. Italian or French loaves, with their slightly open crumb and sturdy crust, are ideal. They hold up well to the garlic butter and bake to a perfect crispness. Avoid softer breads like sandwich bread, which can become soggy. Day-old bread works even better as it’s slightly drier and absorbs the garlic butter beautifully without becoming mushy.
- 1 Cup (2 sticks or 226g) Unsalted Butter, Softened: Unsalted butter is preferred as it allows you to control the saltiness of the garlic butter mixture. Ensure the butter is properly softened – not melted, but easily spreadable. This is key to achieving a smooth and even garlic butter. If you only have salted butter, reduce the amount of added salt later in the recipe.
- 8–10 Cloves Fresh Garlic, Minced: Fresh garlic is non-negotiable for authentic garlic bread flavor. Pre-minced garlic in jars often lacks the pungent aroma and fresh taste that freshly minced cloves provide. The quantity can be adjusted to your garlic preference; 8 cloves will give a pronounced garlic flavor, while 10 will be bolder. Mincing the garlic finely is important to ensure it distributes evenly in the butter and cooks through without burning.
- 1/4 Cup Fresh Parsley, Finely Chopped (Optional, but highly recommended): Fresh parsley adds a touch of brightness, color, and herbaceousness that complements the richness of the garlic butter. It’s not essential, but it definitely elevates the flavor profile and visual appeal. Other fresh herbs like chives, oregano, or basil can also be used for variations.
- 1/2 Teaspoon Salt, or to taste: Salt is crucial for balancing the flavors and enhancing the garlic and butter. Adjust the amount according to your preference and whether you are using salted or unsalted butter.
- 1/4 Teaspoon Black Pepper, freshly ground: Freshly ground black pepper adds a subtle warmth and depth of flavor.
Instructions
- Preheat Your Oven to 400°F (200°C): Preheating the oven to the correct temperature is essential for even baking and a crispy crust. Ensure your oven is fully preheated before placing the garlic bread inside.
- Prepare the Garlic Butter: In a medium-sized bowl, combine the softened butter, minced garlic, chopped parsley (if using), salt, and black pepper.
- Mince the Garlic Properly: For the best flavor and to prevent burning, mince the garlic cloves very finely. You can use a garlic press, a sharp knife to mince by hand, or finely grate the garlic using a microplane. Finely minced garlic distributes flavor more evenly and cooks through properly.
- Cream the Garlic Butter: Use a fork or a rubber spatula to thoroughly cream together the butter and garlic mixture. Mix until the garlic and herbs are evenly distributed throughout the butter and the mixture is light and fluffy. This ensures that every bite of your garlic bread is infused with garlicky goodness. Taste and adjust salt and pepper to your liking at this stage.
- Slice the Bread: Carefully slice the loaf of Italian or French bread lengthwise, creating two long halves. You can also slice it into individual slices, but lengthwise halves are easier to manage and bake evenly. If using individual slices, you may need to adjust the baking time slightly.
- Spread the Garlic Butter Generously: Using a butter knife or spatula, generously spread the garlic butter mixture evenly over the cut sides of both bread halves. Ensure you cover every nook and cranny for maximum flavor in every bite. Don’t be shy with the garlic butter – it’s what makes garlic bread so delicious! If you are adding cheese, reserve it for later.
- Bake on a Baking Sheet: Place the buttered bread halves, cut-side up, on a baking sheet. You can line the baking sheet with parchment paper for easier cleanup, but it’s not strictly necessary.
- Bake Until Golden and Crispy: Bake in the preheated oven for 10-12 minutes, or until the bread is golden brown and crispy around the edges and the garlic butter is melted and fragrant. Keep a close eye on it during the last few minutes of baking to prevent burning, as oven temperatures can vary.
- Add Cheese (Optional): If you are making cheesy garlic bread, sprinkle the grated Parmesan cheese (or your cheese of choice) evenly over the garlic buttered bread during the last 2-3 minutes of baking. Return to the oven until the cheese is melted, bubbly, and lightly golden brown.
- Broil for Extra Crispness (Optional): For an extra crispy top and beautifully browned cheese, you can broil the garlic bread for the last 1-2 minutes. Watch it very carefully under the broiler, as it can burn quickly. Broiling is optional but adds a nice textural contrast.
- Rest and Slice (if needed): Once baked to your liking, remove the garlic bread from the oven and let it rest for a minute or two before slicing into serving pieces if you baked it in halves. This allows the flavors to meld together and makes it easier to handle.
- Serve Immediately: Garlic bread is best enjoyed fresh and warm. Serve immediately as a side dish or appetizer. The aroma will be irresistible!
Nutrition
- Serving Size: one normal portion
- Calories: 200-250
- Sugar: 1-2g
- Sodium: 200-300mg
- Fat: 15-20g
- Saturated Fat: 9-12g
- Carbohydrates: 15-20g
- Fiber: 1-2g
- Protein: 3-4g
- Cholesterol: 45-60mg