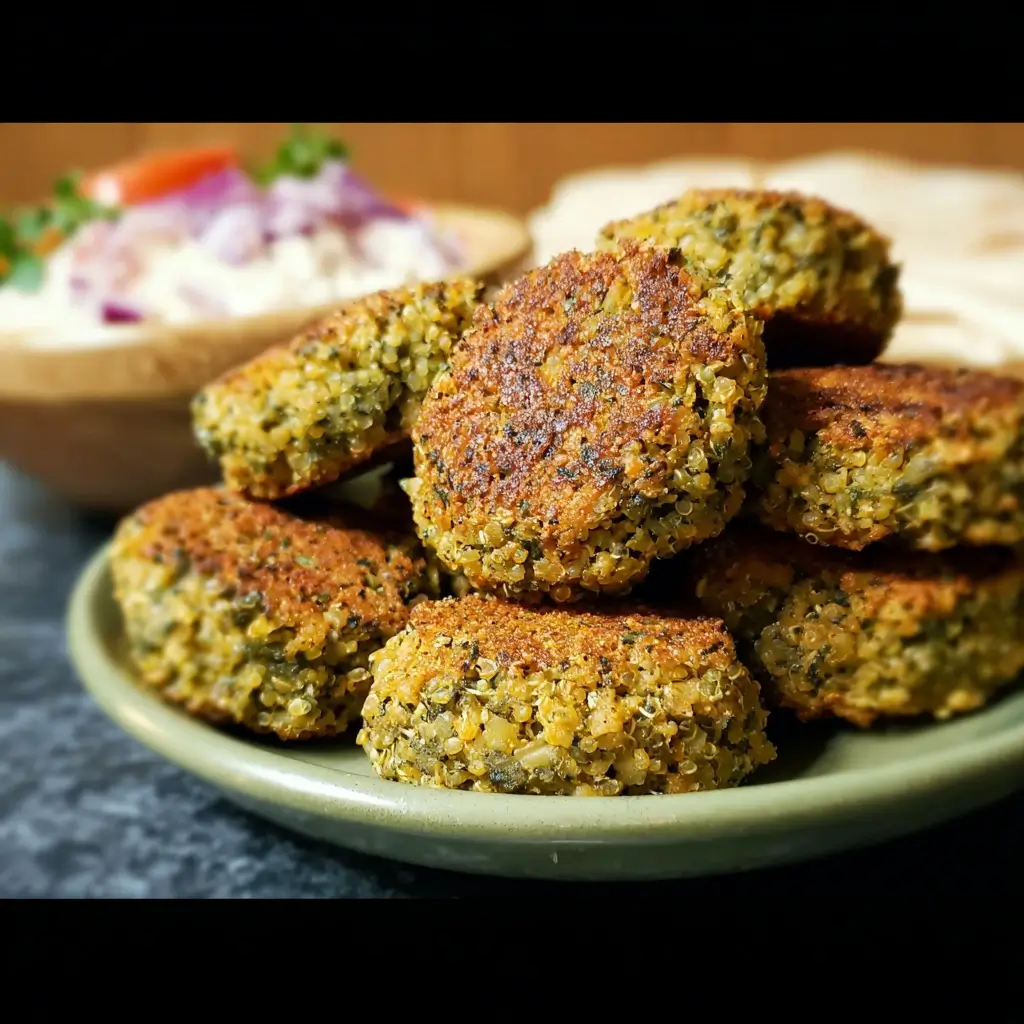

Of all the vibrant, flavor-packed dishes from the Middle East, falafel holds a special place in my heart and my kitchen. For years, I was captivated by the crispy, golden-brown orbs I’d get from street vendors and local restaurants, but I always felt a twinge of guilt about the deep-frying. My attempts to recreate them at home often ended in one of two ways: either a greasy, oil-splattered mess or sad, dry pucks that tasted more like cardboard than a culinary delight. I was on a mission to crack the code. After countless batches and a kitchen filled with the fragrant aroma of cumin and coriander, I finally perfected it. This is not just any recipe; this is the recipe for Healthy Baked Falafel that has become a legend in my family. It’s crispy on the outside, tender and vibrant green on the inside, and packed with so much fresh herb and spice flavor that you will never, ever miss the deep fryer. It’s the recipe that my kids devour, that I proudly serve to guests, and that makes meal-prepping for the week feel like a genuine treat.
Why This Healthy Baked Falafel Recipe Will Change Your Life
Before we dive into the nuts and bolts, let’s talk about what makes this recipe truly exceptional. It’s designed to solve the most common problems people face when baking falafel, turning a potentially tricky process into a foolproof culinary success.
- Unbelievably Crispy Without Frying: The secret lies in a combination of high heat, a touch of oil brushed on the outside, and the right consistency of the mixture. You get that satisfying crunch you crave without the excess calories, fat, and messy cleanup of deep-frying.
- Moist and Flavorful, Never Dry: The number one complaint about baked falafel is that it can be dry. We combat this by using a generous amount of fresh herbs (parsley and cilantro), which add moisture and an incredible depth of flavor. The chilling step is also crucial, as it allows the mixture to hydrate and bind properly.
- Vibrantly Green and Beautiful: A great falafel should be as beautiful on the inside as it is on the outside. Using a food processor to break down the fresh herbs creates that stunning, bright green interior that signals a truly fresh and authentic-tasting falafel.
- Naturally Vegan and Gluten-Free adaptable: This recipe is inherently plant-based and can easily be made gluten-free by using chickpea flour or oat flour, making it an incredibly versatile and inclusive meal for everyone at your table.
The Single Most Important Secret: Dried Chickpeas
If you take only one piece of advice from this entire article, let it be this: You must use dried chickpeas that have been soaked; do not use canned chickpeas. This is a non-negotiable rule for authentic falafel texture.
- Why Not Canned? Canned chickpeas are cooked and packed in liquid, which makes them soft and waterlogged. If you use them to make falafel, the mixture will be far too wet and pasty. The result will be mushy falafel that won’t hold its shape, won’t get crispy, and will have a disappointing, pasty texture inside.
- Why Soaked Dried Chickpeas are Perfect: Soaking dried chickpeas overnight rehydrates them and softens them just enough to be broken down in a food processor. However, they remain uncooked and retain a firm, starchy structure. This structure is what gives falafel its signature light, crumbly, and tender interior that is completely different from a chickpea paste. Soaking is a simple, passive step that makes all the difference between failure and perfection.
Ingredients for Perfectly Crispy Baked Falafel
Gathering the right ingredients is the first step to success. This recipe relies on fresh, aromatic components to build its incredible flavor profile.
Yields: Approximately 24-28 falafel
Servings: 6 (4-5 falafel per serving)
- 1 cup (200g) dried chickpeas
- 1 medium yellow onion, roughly chopped
- 4-6 cloves garlic, peeled
- 1 cup packed fresh parsley (stems and leaves)
- 1 cup packed fresh cilantro (stems and leaves)
- 1 ½ teaspoons ground cumin
- 1 teaspoon ground coriander
- ½ teaspoon cayenne pepper (or to taste)
- 1 teaspoon fine sea salt
- ½ teaspoon black pepper, freshly ground
- 1 ½ teaspoons baking powder
- 2 tablespoons chickpea flour (or all-purpose flour, or oat flour for gluten-free)
- 2-3 tablespoons olive oil, for brushing
Step-by-Step Instructions for Flawless Baked Falafel
Follow these steps carefully, and you’ll be rewarded with falafel that rivals the best you’ve ever had. We’ll break it down into four key stages: Soaking, Processing, Chilling, and Baking.
Stage 1: The Crucial Soaking Process
Time: 8-24 hours (passive time)
- Rinse the Chickpeas: Place your dried chickpeas in a colander and rinse them thoroughly under cold running water. Pick out any discolored stones or debris.
- Soak: Transfer the rinsed chickpeas to a large bowl. Cover them with at least 3-4 inches of cold water. They will triple in size as they soak, so it’s essential to use a large enough bowl and plenty of water.
- Wait: Leave the chickpeas to soak on your counter for a minimum of 8 hours, but ideally overnight or up to 24 hours. If you are soaking for longer than 12 hours, it’s a good idea to change the water once. You’ll know they’re ready when you can easily split one in half with your fingernail.
- Drain and Dry: Once soaked, drain the chickpeas thoroughly in a colander. It’s important to get them as dry as possible. You can pat them dry with a clean kitchen towel or paper towels to remove excess surface moisture.
Stage 2: Processing the Falafel Mixture
Equipment: A food processor is essential for this step.
- Combine Aromatics: Add the chopped onion, garlic cloves, fresh parsley, and fresh cilantro to the bowl of your food processor. Pulse 5-7 times until the ingredients are coarsely chopped and well-distributed.
- Add Chickpeas and Spices: Add the soaked and drained chickpeas to the food processor along with the ground cumin, ground coriander, cayenne pepper, sea salt, and black pepper.
- Process to Perfection: This is a key moment. Pulse the mixture in 1-second intervals. Scrape down the sides of the bowl frequently with a spatula. You want to achieve a texture that resembles coarse sand or couscous. Be very careful not to over-process into a smooth paste like hummus. The mixture should still have visible texture and be able to clump together when you squeeze it in your hand. This texture is what creates a light, fluffy interior.
- Transfer and Rest: Scrape the mixture out of the food processor and into a large bowl.
Stage 3: The Mandatory Chilling Period
Time: 1-2 hours
- Add Binder and Leavening: Sprinkle the baking powder and chickpea flour over the falafel mixture. Use a fork or your hands to gently mix them in until just combined. The baking powder helps to make the falafel light and airy, while the flour acts as a binder.
- Cover and Chill: Cover the bowl tightly with plastic wrap or a reusable lid. Place the mixture in the refrigerator to chill for at least 1 hour, and up to 2 hours. Do not skip this step! Chilling allows the flavors to meld, the flour to hydrate, and the mixture to firm up, which is critical for preventing the falafel from falling apart during shaping and baking.
Stage 4: Shaping and Baking to Crispy-Golden Perfection
Time: 25-30 minutes
- Preheat and Prepare: Preheat your oven to 425°F (220°C). Line a large baking sheet with parchment paper for easy cleanup.
- Shape the Falafel: Remove the chilled mixture from the fridge. Scoop out about 2 tablespoons of the mixture for each falafel. You can use a small cookie scoop for uniform size. Gently roll the mixture into a ball between your palms, then slightly flatten it into a small patty, about ½-inch thick. Compacting it gently ensures it holds together, but don’t press too hard. Place the shaped patties onto the prepared baking sheet, leaving a little space between each one.
- Brush with Oil: Pour 2-3 tablespoons of olive oil into a small bowl. Using a pastry brush, gently brush the tops and sides of each falafel patty with a light coating of oil. This is the secret to getting a beautifully golden-brown and crispy exterior without frying.
- Bake: Place the baking sheet in the preheated oven and bake for 15-18 minutes. The bottoms should be golden brown and firm.
- Flip and Finish: Carefully remove the baking sheet from the oven. Use a thin spatula or tongs to flip each falafel over. Brush the new tops with the remaining olive oil. Return the sheet to the oven and bake for another 10-15 minutes, or until the falafel are deeply golden brown, crispy on the outside, and firm to the touch.
Nutrition Facts
The nutritional information is an estimate and can vary based on the exact size of your falafel and ingredients used.
- Servings: 6
- Serving Size: 4-5 falafel patties
- Calories per serving: Approximately 210 kcal
- Protein: 8g
- Fat: 9g
- Carbohydrates: 26g
- Fiber: 8g
This recipe is a fantastic source of plant-based protein and dietary fiber, making it a filling and satisfying meal.
Preparation & Cook Time
Understanding the timeline will help you plan your meal perfectly.
- Soaking Time: 8 to 24 hours (passive)
- Preparation Time: 20 minutes (chopping, processing, shaping)
- Chilling Time: 1 to 2 hours (passive)
- Cook Time: 25 to 30 minutes
- Total Active Time: Approximately 45 minutes
- Total Time: Approximately 10 to 27 hours (including passive soaking and chilling)
How to Serve Your Healthy Baked Falafel
The beauty of falafel is its versatility. Once you have a batch of these perfect baked falafels, the meal possibilities are endless. Here are some of our favorite ways to serve them:
- The Classic Falafel Pita Sandwich:
- Bread: Warm, soft pita bread (whole wheat or white).
- Sauce: A generous drizzle of creamy lemon-tahini sauce (recipe in tips!) or a dollop of hummus.
- Veggies: Stuffed with crisp lettuce, sliced tomatoes, cucumbers, and thinly sliced red onion.
- Pickles: Add a tangy kick with Israeli pickles, pickled turnips, or pickled red cabbage.
- Heat: A dash of your favorite hot sauce like s-chug or harissa.
- The Nourishing Falafel Bowl (Mezze Bowl):
- Base: Start with a bed of fluffy quinoa, couscous, or brown rice.
- Greens: Add a handful of mixed greens or arugula.
- Toppings: Arrange 4-5 falafel balls alongside scoops of hummus, baba ghanoush, and a fresh Israeli salad (diced tomatoes, cucumbers, onions, and parsley).
- Extras: Include Kalamata olives, feta cheese (if not vegan), and toasted pine nuts for extra texture and flavor. Drizzle everything with tahini sauce.
- The Vibrant Falafel Salad:
- Base: A large bowl of crisp romaine lettuce, spinach, or your favorite salad greens.
- Add-ins: Toss with cherry tomatoes, sliced cucumbers, bell peppers, and chopped red onion.
- Protein: Crumble 3-4 warm falafel patties over the top.
- Dressing: Use a simple lemon-herb vinaigrette or thin out your tahini sauce with a little extra water and lemon juice to create a creamy dressing.
- As a Crowd-Pleasing Appetizer:
- Arrange the warm baked falafel on a platter.
- Serve with an assortment of dipping sauces:
- Classic Tahini Sauce
- Spicy Harissa Yogurt Dip
- Cool and refreshing Tzatziki
- Rich and flavorful Hummus
5 Essential Tips for Falafel Perfection
- Toast Your Spices for Deeper Flavor: For an extra layer of complexity, toast your whole cumin and coriander seeds in a dry skillet over medium heat for 1-2 minutes until fragrant. Let them cool, then grind them fresh before adding to the food processor. This small step makes a huge difference in the aromatic quality of your falafel.
- Make a Quick Lemon-Tahini Sauce: A good falafel needs a great sauce. To make a simple, classic tahini sauce, whisk together: ½ cup tahini, ½ cup lukewarm water, ¼ cup fresh lemon juice, 1 minced garlic clove, and a pinch of salt. Whisk until smooth and creamy. It will seize up at first, but keep whisking and it will come together beautifully.
- Don’t Crowd the Pan: Give your falafel space to breathe on the baking sheet. If they are too close together, they will steam instead of roast, preventing them from getting that desirable crispy exterior. Use two baking sheets if necessary.
- For Extra-Crispy Falafel: For an even crunchier crust, try preheating your parchment-lined baking sheet in the oven for a few minutes before placing the falafel on it. The immediate sizzle when the cold patty hits the hot pan helps to jump-start the crisping process.
- Make-Ahead and Freezing Instructions: Falafel is fantastic for meal prep. You can prepare the mixture and store it in the fridge for up to 2 days before baking. You can also shape the patties, place them on a baking sheet, and freeze them until solid. Once frozen, transfer them to a freezer-safe bag or container. You can bake them directly from frozen, just add 10-15 minutes to the total baking time.
Frequently Asked Questions (FAQ)
1. Why are my baked falafel falling apart?
This is the most common issue and usually has one of two causes. First, you may have used canned chickpeas, which are too wet. Stick to soaked, dried chickpeas. Second, you may have skipped or shortened the chilling time. The 1-2 hour chill in the refrigerator is absolutely critical for firming up the mixture and allowing the binder (flour) to work its magic.
2. Can I make this recipe in an air fryer?
Absolutely! An air fryer is perfect for making baked falafel. Preheat your air fryer to 375°F (190°C). Arrange the falafel patties in a single layer in the basket (you may need to work in batches). Spray or brush them lightly with oil. Air fry for 12-15 minutes, flipping halfway through, until they are golden brown and crispy.
3. My falafel mixture seems too dry/too wet. How can I fix it?
If the mixture seems too dry and isn’t holding together when squeezed, you can add a tablespoon of water or lemon juice and pulse a few more times. If the mixture seems too wet (which is rare with dried chickpeas), the culprit is usually insufficient draining. You can try adding another tablespoon of chickpea flour to help absorb some of the excess moisture. Always let it chill after making an adjustment.
4. How do I store and reheat leftover falafel?
Store leftover baked falafel in an airtight container in the refrigerator for up to 5 days. They will lose their crispness in the fridge. To bring them back to life, the best way to reheat them is in an oven or air fryer at 375°F (190°C) for 5-8 minutes until warmed through and crispy again. Avoid the microwave, as it will make them soft and soggy.
5. Is this recipe gluten-free and vegan?
This recipe is 100% vegan as written. To make it completely gluten-free, simply ensure you use a certified gluten-free flour as your binder. Chickpea flour is an excellent, traditional choice that is naturally gluten-free. Oat flour also works wonderfully. If you use all-purpose flour, it will not be gluten-free.

Healthy Baked Falafel Recipe
Ingredients
- 1 cup (200g) dried chickpeas
- 1 medium yellow onion, roughly chopped
- 4–6 cloves garlic, peeled
- 1 cup packed fresh parsley (stems and leaves)
- 1 cup packed fresh cilantro (stems and leaves)
- 1 ½ teaspoons ground cumin
- 1 teaspoon ground coriander
- ½ teaspoon cayenne pepper (or to taste)
- 1 teaspoon fine sea salt
- ½ teaspoon black pepper, freshly ground
- 1 ½ teaspoons baking powder
- 2 tablespoons chickpea flour (or all-purpose flour, or oat flour for gluten-free)
- 2–3 tablespoons olive oil, for brushing
Instructions
Stage 1: The Crucial Soaking Process
Time: 8-24 hours (passive time)
- Rinse the Chickpeas: Place your dried chickpeas in a colander and rinse them thoroughly under cold running water. Pick out any discolored stones or debris.
- Soak: Transfer the rinsed chickpeas to a large bowl. Cover them with at least 3-4 inches of cold water. They will triple in size as they soak, so it’s essential to use a large enough bowl and plenty of water.
- Wait: Leave the chickpeas to soak on your counter for a minimum of 8 hours, but ideally overnight or up to 24 hours. If you are soaking for longer than 12 hours, it’s a good idea to change the water once. You’ll know they’re ready when you can easily split one in half with your fingernail.
- Drain and Dry: Once soaked, drain the chickpeas thoroughly in a colander. It’s important to get them as dry as possible. You can pat them dry with a clean kitchen towel or paper towels to remove excess surface moisture.
Stage 2: Processing the Falafel Mixture
Equipment: A food processor is essential for this step.
- Combine Aromatics: Add the chopped onion, garlic cloves, fresh parsley, and fresh cilantro to the bowl of your food processor. Pulse 5-7 times until the ingredients are coarsely chopped and well-distributed.
- Add Chickpeas and Spices: Add the soaked and drained chickpeas to the food processor along with the ground cumin, ground coriander, cayenne pepper, sea salt, and black pepper.
- Process to Perfection: This is a key moment. Pulse the mixture in 1-second intervals. Scrape down the sides of the bowl frequently with a spatula. You want to achieve a texture that resembles coarse sand or couscous. Be very careful not to over-process into a smooth paste like hummus. The mixture should still have visible texture and be able to clump together when you squeeze it in your hand. This texture is what creates a light, fluffy interior.
- Transfer and Rest: Scrape the mixture out of the food processor and into a large bowl.
Stage 3: The Mandatory Chilling Period
Time: 1-2 hours
- Add Binder and Leavening: Sprinkle the baking powder and chickpea flour over the falafel mixture. Use a fork or your hands to gently mix them in until just combined. The baking powder helps to make the falafel light and airy, while the flour acts as a binder.
- Cover and Chill: Cover the bowl tightly with plastic wrap or a reusable lid. Place the mixture in the refrigerator to chill for at least 1 hour, and up to 2 hours. Do not skip this step! Chilling allows the flavors to meld, the flour to hydrate, and the mixture to firm up, which is critical for preventing the falafel from falling apart during shaping and baking.
Stage 4: Shaping and Baking to Crispy-Golden Perfection
Time: 25-30 minutes
- Preheat and Prepare: Preheat your oven to 425°F (220°C). Line a large baking sheet with parchment paper for easy cleanup.
- Shape the Falafel: Remove the chilled mixture from the fridge. Scoop out about 2 tablespoons of the mixture for each falafel. You can use a small cookie scoop for uniform size. Gently roll the mixture into a ball between your palms, then slightly flatten it into a small patty, about ½-inch thick. Compacting it gently ensures it holds together, but don’t press too hard. Place the shaped patties onto the prepared baking sheet, leaving a little space between each one.
- Brush with Oil: Pour 2-3 tablespoons of olive oil into a small bowl. Using a pastry brush, gently brush the tops and sides of each falafel patty with a light coating of oil. This is the secret to getting a beautifully golden-brown and crispy exterior without frying.
- Bake: Place the baking sheet in the preheated oven and bake for 15-18 minutes. The bottoms should be golden brown and firm.
- Flip and Finish: Carefully remove the baking sheet from the oven. Use a thin spatula or tongs to flip each falafel over. Brush the new tops with the remaining olive oil. Return the sheet to the oven and bake for another 10-15 minutes, or until the falafel are deeply golden brown, crispy on the outside, and firm to the touch.
Nutrition
- Serving Size: One Normal Portion
- Calories: 210 kcal