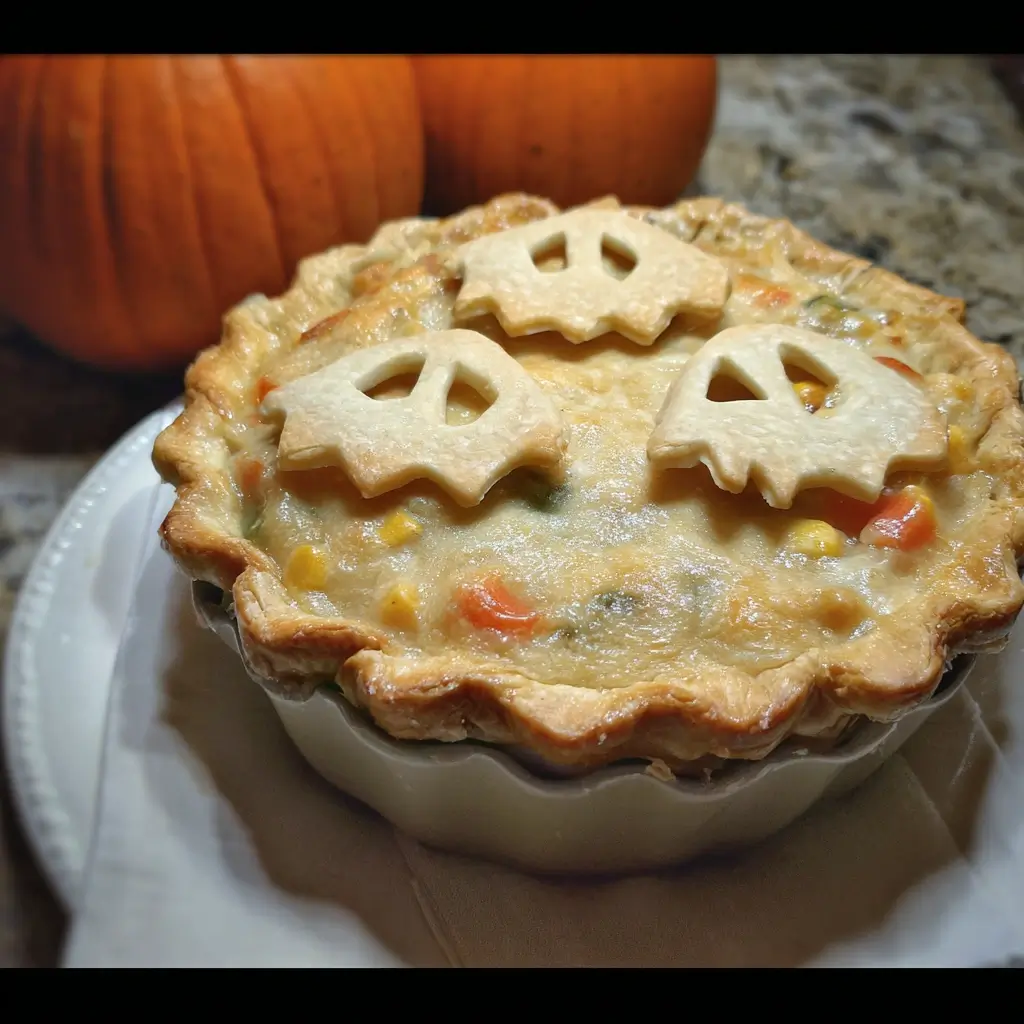
Of all the nights of the year, Halloween holds a special kind of chaotic magic in our house. It’s a whirlwind of last-minute costume adjustments, excited shrieks, and the inevitable sugar rush that looms on the horizon. For years, I struggled to find the perfect pre-trick-or-treating meal. It needed to be substantial enough to counteract the impending candy feast, yet festive enough to feel like part of the celebration. Pizza was easy but felt uninspired. Spooky-themed snacks were fun but not a real dinner. Then, one year, I decided to combine the ultimate comfort food—a classic chicken pot pie—with a touch of Halloween enchantment. The Ghost Pot Pie was born, and it instantly became a non-negotiable family tradition. Watching my kids’ eyes light up as they saw the golden, puffy ghosts floating on a sea of creamy filling was pure joy. It wasn’t just a meal; it was an experience. This recipe transforms a simple, hearty dinner into the centerpiece of your Halloween night, a warm and savory anchor in a sea of sweets and spooks.
Hauntingly Delicious Ghost Pot Pie: The Ultimate Recipe
This recipe breaks down the classic pot pie into simple, manageable steps. The result is a rich, flavorful filling packed with tender chicken and vegetables, all tucked under a flaky, buttery, and utterly adorable puff pastry ghost topping.
Ingredients for Your Spooky Feast
For the Creamy Chicken Filling:
- Butter: 4 tablespoons, unsalted
- Yellow Onion: 1 large, finely diced
- Carrots: 2 medium, peeled and diced (about 1 cup)
- Celery: 2 ribs, finely diced (about 1 cup)
- All-Purpose Flour: 1/3 cup (this will thicken our sauce)
- Chicken Broth: 2 cups, low-sodium
- Heavy Cream or Half-and-Half: 1 cup
- Shredded Cooked Chicken: 3 cups (a rotisserie chicken is perfect for this!)
- Frozen Peas: 1 cup
- Dried Thyme: 1 teaspoon
- Salt: 1 teaspoon (adjust to taste)
- Black Pepper: 1/2 teaspoon, freshly ground
- Fresh Parsley: 2 tablespoons, chopped (optional, for freshness)
For the Spooky Ghost Topping:
- Puff Pastry: 1 sheet (from a 17.3-ounce package), thawed according to package directions
- Large Egg: 1, beaten with 1 tablespoon of water (for the egg wash)
- Black Sesame Seeds or Poppy Seeds: For the ghost eyes
Step-by-Step Instructions to Create Your Masterpiece
Follow these detailed instructions for a flawless Ghost Pot Pie. We’ll first create the savory filling and then move on to the fun part—crafting our puff pastry ghosts!
Part 1: Cooking the Rich and Creamy Filling
- Melt and Sauté: In a large Dutch oven or heavy-bottomed pot, melt the 4 tablespoons of butter over medium heat. Once it’s shimmering, add the diced onion, carrots, and celery. Sauté the vegetables for about 8-10 minutes, stirring occasionally, until they have softened and the onion is translucent. This step builds the foundational flavor base, so don’t rush it!
- Create the Roux: Sprinkle the 1/3 cup of all-purpose flour over the softened vegetables. Stir continuously for about 2 minutes. The flour will coat the vegetables and cook slightly, which is crucial for getting rid of any raw flour taste. This mixture of fat (butter) and flour is called a “roux,” and it’s the secret to a thick, luscious sauce.
- Build the Sauce: Slowly, while whisking constantly, pour in the 2 cups of chicken broth. Pouring slowly and whisking prevents lumps from forming. Once the broth is incorporated, the mixture will begin to thicken. Now, switch to a spoon and bring the mixture to a gentle simmer.
- Add the Creaminess: Reduce the heat to low and stir in the 1 cup of heavy cream or half-and-half. Let it gently warm through, but do not let it boil after adding the cream.
- Combine the Final Ingredients: Remove the pot from the heat. Stir in the 3 cups of shredded cooked chicken, 1 cup of frozen peas (no need to thaw them), 1 teaspoon of dried thyme, salt, and freshly ground black pepper. If you’re using it, add the chopped fresh parsley. Give everything a good stir to combine.
- Taste and Adjust: This is your last chance to perfect the filling. Taste it and adjust the seasoning if necessary. Does it need a pinch more salt? A bit more pepper? Now is the time to add it.
- Transfer to Baking Dish: Pour the finished filling into a 9×13-inch baking dish or a similar 3-quart casserole dish. Spread it out into an even layer. Set aside while you prepare the topping.
Part 2: Crafting the Puff Pastry Ghosts
- Preheat Your Oven: Position a rack in the center of your oven and preheat it to 400°F (200°C).
- Prepare the Pastry: Gently unfold your thawed sheet of puff pastry on a lightly floured work surface. If it seems sticky, sprinkle a tiny bit of flour on top. Use a rolling pin to gently roll it out just a bit, to smooth any creases.
- Cut Out Your Ghosts: Using a ghost-shaped cookie cutter (about 3-4 inches tall), cut out as many ghosts as you can from the puff pastry. You should be able to get 8-10 ghosts. Don’t worry about spacing them perfectly on the baking dish yet. You can re-roll the scraps once to cut out a few more smaller ghosts if you wish.
- Arrange the Topping: Carefully arrange the puff pastry ghosts on top of the chicken pot pie filling in the baking dish. You can overlap them slightly. They will puff up as they bake, creating a beautiful, cohesive topping.
- The Golden Touch: In a small bowl, whisk together the egg and 1 tablespoon of water to create an egg wash. Using a pastry brush, gently brush the tops of the puff pastry ghosts with the egg wash. This is what will give them that gorgeous, deep golden-brown color and a beautiful shine. Be careful not to let the egg wash drip down the sides of the pastry, as it can seal the layers and prevent them from puffing up to their full potential.
- Give Them Eyes: Using your fingers or a pair of tweezers for precision, place two black sesame seeds or poppy seeds on each ghost to create the eyes.
- Bake to Perfection: Place the baking dish on a baking sheet to catch any potential drips. Bake in the preheated 400°F oven for 20-25 minutes, or until the puff pastry is puffed, golden brown, and cooked through, and the filling is hot and bubbly around the edges.
- Rest and Serve: Carefully remove the Ghost Pot Pie from the oven. Let it rest for at least 10 minutes before serving. This is a crucial step! It allows the filling to set up and thicken slightly, so it doesn’t run all over the plate.
Nutrition Facts
- Servings: 8
- Calories per serving: Approximately 580 kcal (This can vary based on the specific puff pastry and cream used).
Preparation Time
- Active Preparation Time: 25 minutes
- Baking Time: 25 minutes
- Resting Time: 10 minutes
- Total Time: 1 hour
How to Serve Your Ghost Pot Pie
This spooky centerpiece deserves a presentation that matches its festive spirit. Move beyond just scooping it onto a plate and turn it into a memorable Halloween dining experience.
- The Main Event: Make the Ghost Pot Pie the star of your pre-trick-or-treating dinner. Serve it directly from the beautiful baking dish at the center of the table.
- Spooky Side Dishes: Complement the rich pie with some themed sides.
- Ghoulish Green Salad: A simple salad of mixed greens, cucumber, and green bell peppers with a vibrant green goddess dressing.
- Witch’s Finger Breadsticks: Serve with simple breadsticks, or get creative and shape them into gnarled “fingers” with an almond sliver for a fingernail before baking.
- Roasted “Pumpkin Guts”: Roasted butternut squash or sweet potato cubes tossed with a little cinnamon and maple syrup.
- Festive Drink Pairings:
- For Kids: A “Witches’ Brew” punch made from green Hawaiian Punch, lemon-lime soda, and a few drops of green food coloring, served with gummy worms.
- For Adults: A crisp, dry cider complements the creamy filling beautifully. A light-bodied white wine like a Sauvignon Blanc or an unoaked Chardonnay also works well.
- Individual Servings: For a Halloween party, you can bake the filling and ghost topping in individual ramekins. This makes for easy serving and a beautiful presentation for each guest. Adjust baking time down to 15-20 minutes for smaller portions.
Additional Tips for a Perfect Pot Pie
Here are five tips to ensure your Ghost Pot Pie is a screaming success every time.
- The Rotisserie Chicken Shortcut: Don’t have time to poach and shred your own chicken? A store-bought rotisserie chicken is your best friend. It’s perfectly seasoned, tender, and a massive time-saver. You’ll need about one whole chicken to get the 3 cups of shredded meat required.
- Keep Your Puff Pastry Cold: The key to a flaky, puffy crust is cold pastry hitting a hot oven. Thaw your pastry in the refrigerator as per the package instructions, not on the counter. Work with it quickly, and if it becomes soft or sticky while you’re cutting out the ghosts, pop it back in the fridge for 10-15 minutes to firm up.
- Veggie Variations: Feel free to customize the vegetables based on what you have on hand or what your family loves. Diced potatoes (par-boil them first), green beans, corn, or mushrooms are all fantastic additions. For mushrooms, sauté them with the other vegetables at the beginning to cook out their moisture.
- Make-Ahead Strategy: You can prepare the entire filling a day or two in advance. Let it cool completely, then store it in an airtight container in the refrigerator. When you’re ready to bake, simply pour the cold filling into your baking dish, top with the freshly cut puff pastry ghosts, and bake. You may need to add 5-10 minutes to the baking time since the filling is starting from cold.
- Don’t Skip the Rest: It’s tempting to dig in the moment it comes out of the oven, but the 10-minute resting period is non-negotiable. The molten hot filling needs this time to cool slightly and congeal. Skipping this step will result in a soupy pie. Use this time to gather everyone to the table and admire your spooky creation!
Frequently Asked Questions (FAQ)
1. Can I make this Ghost Pot Pie vegetarian?
Absolutely! To make a vegetarian version, simply omit the chicken and chicken broth. Use 4 cups of vegetable broth instead. For the filling, bulk it up with heartier vegetables. An excellent combination is 8 ounces of sliced cremini mushrooms (sautéed with the onions), a diced potato (parboiled for 5 minutes), and a cup of frozen corn. This creates a rich and satisfying vegetarian pot pie that’s just as delicious.
2. My puff pastry ghosts didn’t puff up. What went wrong?
There are a few common culprits. First, your pastry may have gotten too warm before baking. It needs to be cold to create the steam that makes the layers separate and puff. Second, ensure your oven is fully preheated to 400°F. If the oven isn’t hot enough, the fat will melt out before it can create steam. Finally, be careful with the egg wash. If it drips down the cut sides of the pastry, it can act like glue, sealing the layers together and preventing them from rising.
3. Can I use a different topping, like a regular pie crust?
Yes, you can. If using a refrigerated pie crust, you can lay the entire sheet over the top, crimp the edges, and cut a few slits in the top for steam to escape. You can still use the ghost cookie cutter to cut shapes out of a second pie crust and lay them on top for a decorative effect. However, you won’t get the same light, airy, and dramatic “puff” that you get from puff pastry, which is part of the Ghost Pot Pie’s signature charm.
4. How do I store and reheat leftovers?
Store any leftovers in an airtight container in the refrigerator for up to 3-4 days. The best way to reheat pot pie is in the oven or a toaster oven. Place it in an oven-safe dish and heat at 350°F (175°C) for 15-20 minutes, or until the filling is hot and the pastry has re-crisped. Reheating in the microwave will work for the filling, but it will make the puff pastry topping soft and soggy.
5. Can I freeze the Ghost Pot Pie?
Yes, this recipe freezes well. For best results, freeze it unbaked. Assemble the entire pie in a freezer-safe baking dish, but do not apply the egg wash. Cover it tightly with a layer of plastic wrap and then a layer of aluminum foil. It can be frozen for up to 3 months. When ready to bake, do not thaw. Remove the plastic wrap and foil, brush with the egg wash, and bake directly from frozen at 400°F (200°C), adding about 20-30 minutes to the original baking time. Bake until the crust is golden and the filling is bubbly.

Hauntingly Delicious Ghost Pot Pie Recipe
Ingredients
For the Creamy Chicken Filling:
- Butter: 4 tablespoons, unsalted
- Yellow Onion: 1 large, finely diced
- Carrots: 2 medium, peeled and diced (about 1 cup)
- Celery: 2 ribs, finely diced (about 1 cup)
- All-Purpose Flour: 1/3 cup (this will thicken our sauce)
- Chicken Broth: 2 cups, low-sodium
- Heavy Cream or Half-and-Half: 1 cup
- Shredded Cooked Chicken: 3 cups (a rotisserie chicken is perfect for this!)
- Frozen Peas: 1 cup
- Dried Thyme: 1 teaspoon
- Salt: 1 teaspoon (adjust to taste)
- Black Pepper: 1/2 teaspoon, freshly ground
- Fresh Parsley: 2 tablespoons, chopped (optional, for freshness)
For the Spooky Ghost Topping:
- Puff Pastry: 1 sheet (from a 17.3-ounce package), thawed according to package directions
- Large Egg: 1, beaten with 1 tablespoon of water (for the egg wash)
- Black Sesame Seeds or Poppy Seeds: For the ghost eyes
Instructions
Part 1: Cooking the Rich and Creamy Filling
- Melt and Sauté: In a large Dutch oven or heavy-bottomed pot, melt the 4 tablespoons of butter over medium heat. Once it’s shimmering, add the diced onion, carrots, and celery. Sauté the vegetables for about 8-10 minutes, stirring occasionally, until they have softened and the onion is translucent. This step builds the foundational flavor base, so don’t rush it!
- Create the Roux: Sprinkle the 1/3 cup of all-purpose flour over the softened vegetables. Stir continuously for about 2 minutes. The flour will coat the vegetables and cook slightly, which is crucial for getting rid of any raw flour taste. This mixture of fat (butter) and flour is called a “roux,” and it’s the secret to a thick, luscious sauce.
- Build the Sauce: Slowly, while whisking constantly, pour in the 2 cups of chicken broth. Pouring slowly and whisking prevents lumps from forming. Once the broth is incorporated, the mixture will begin to thicken. Now, switch to a spoon and bring the mixture to a gentle simmer.
- Add the Creaminess: Reduce the heat to low and stir in the 1 cup of heavy cream or half-and-half. Let it gently warm through, but do not let it boil after adding the cream.
- Combine the Final Ingredients: Remove the pot from the heat. Stir in the 3 cups of shredded cooked chicken, 1 cup of frozen peas (no need to thaw them), 1 teaspoon of dried thyme, salt, and freshly ground black pepper. If you’re using it, add the chopped fresh parsley. Give everything a good stir to combine.
- Taste and Adjust: This is your last chance to perfect the filling. Taste it and adjust the seasoning if necessary. Does it need a pinch more salt? A bit more pepper? Now is the time to add it.
- Transfer to Baking Dish: Pour the finished filling into a 9×13-inch baking dish or a similar 3-quart casserole dish. Spread it out into an even layer. Set aside while you prepare the topping.
Part 2: Crafting the Puff Pastry Ghosts
- Preheat Your Oven: Position a rack in the center of your oven and preheat it to 400°F (200°C).
- Prepare the Pastry: Gently unfold your thawed sheet of puff pastry on a lightly floured work surface. If it seems sticky, sprinkle a tiny bit of flour on top. Use a rolling pin to gently roll it out just a bit, to smooth any creases.
- Cut Out Your Ghosts: Using a ghost-shaped cookie cutter (about 3-4 inches tall), cut out as many ghosts as you can from the puff pastry. You should be able to get 8-10 ghosts. Don’t worry about spacing them perfectly on the baking dish yet. You can re-roll the scraps once to cut out a few more smaller ghosts if you wish.
- Arrange the Topping: Carefully arrange the puff pastry ghosts on top of the chicken pot pie filling in the baking dish. You can overlap them slightly. They will puff up as they bake, creating a beautiful, cohesive topping.
- The Golden Touch: In a small bowl, whisk together the egg and 1 tablespoon of water to create an egg wash. Using a pastry brush, gently brush the tops of the puff pastry ghosts with the egg wash. This is what will give them that gorgeous, deep golden-brown color and a beautiful shine. Be careful not to let the egg wash drip down the sides of the pastry, as it can seal the layers and prevent them from puffing up to their full potential.
- Give Them Eyes: Using your fingers or a pair of tweezers for precision, place two black sesame seeds or poppy seeds on each ghost to create the eyes.
- Bake to Perfection: Place the baking dish on a baking sheet to catch any potential drips. Bake in the preheated 400°F oven for 20-25 minutes, or until the puff pastry is puffed, golden brown, and cooked through, and the filling is hot and bubbly around the edges.
- Rest and Serve: Carefully remove the Ghost Pot Pie from the oven. Let it rest for at least 10 minutes before serving. This is a crucial step! It allows the filling to set up and thicken slightly, so it doesn’t run all over the plate.
Nutrition
- Serving Size: One Normal Portion
- Calories: 580 kcal


