


Finding that perfect weekend breakfast that everyone in the family can enjoy can feel like searching for a unicorn, especially when dealing with dietary restrictions like gluten and dairy sensitivities. For the longest time, our weekend mornings were a bit of a juggling act. Someone always felt like they were missing out on the “fun” breakfast foods. Pancakes and waffles, the quintessential comfort breakfast, seemed off-limits or resulted in complicated separate batches. Then, one sunny Saturday morning, armed with determination and a desperate craving for a truly satisfying waffle, this recipe was born. The first time I pulled these Gluten-Free Dairy-Free Waffles off the iron, the aroma alone was promising. But the real test? The family taste test. Seeing the surprised and delighted faces as they bit into waffles that were unbelievably crispy on the outside, yet light and fluffy on the inside – without any gluten or dairy – was a moment of pure triumph. They weren’t just “good for gluten-free,” they were genuinely good. These waffles have since become a beloved staple in our home, a recipe requested week after week, proving that delicious, inclusive eating is absolutely possible and incredibly rewarding.
The Best Gluten-Free Dairy-Free Waffles You’ll Ever Make
This recipe is designed to deliver everything you crave in a classic waffle – golden-brown crispiness, a tender interior, and a subtle sweetness – all while being completely free from gluten and dairy. It relies on a carefully balanced blend of gluten-free flours and common pantry staples to achieve that perfect texture and taste. Whether you’re navigating allergies, intolerances, or simply choosing a different dietary path, these waffles ensure no one misses out on weekend breakfast magic.
Ingredients You’ll Need
Getting the ingredients right is crucial for gluten-free and dairy-free baking. Here’s what you’ll need to create waffle perfection:
- 1 ¾ cups Gluten-Free All-Purpose Flour Blend (with xanthan gum): This is the foundation. Choose a high-quality blend specifically designed for baking, typically containing a mix of rice flour, potato starch, and tapioca starch. Crucially, ensure your blend contains xanthan gum. Xanthan gum acts as a binder and emulsifier, mimicking gluten’s role in providing structure and preventing crumbliness. If your blend doesn’t include it, you’ll need to add 1 teaspoon of xanthan gum separately to the dry ingredients. Using just one type of gluten-free flour (like only rice flour) will likely result in a dense or gritty texture. The blend is key!
- 2 tbsp Granulated Sugar (or Coconut Sugar/Maple Syrup): Adds a touch of sweetness and helps with browning. You can substitute with coconut sugar for a slightly deeper flavour, or use an equal amount of maple syrup (add it with the wet ingredients if using liquid sweetener). Adjust the amount slightly based on your preference and what toppings you plan to use.
- 2 tsp Baking Powder: This is the primary leavening agent, responsible for making the waffles light and fluffy by creating carbon dioxide bubbles when mixed with liquid and heat. Ensure your baking powder is fresh (check the expiration date) and certified gluten-free if necessary.
- ½ tsp Baking Soda: Working alongside the baking powder, baking soda (sodium bicarbonate) reacts with acidity (even the slight acidity present in the batter) to create more lift and, importantly, contributes to better browning and crispiness on the waffle’s exterior.
- ½ tsp Salt: Salt doesn’t just add flavour; it balances the sweetness and enhances the overall taste profile of the waffles. Fine sea salt or regular table salt works well.
- 2 Large Eggs (Room Temperature Recommended): Eggs act as a binder, add richness, contribute moisture, and help with leavening. Using room temperature eggs helps them incorporate more smoothly into the batter. (See FAQ for a vegan/egg-free option using flax eggs).
- 1 ½ cups Unsweetened Non-Dairy Milk (Almond, Soy, Oat, or Coconut): Provides the necessary liquid for the batter. Choose your favorite unsweetened variety.
- Almond Milk: Neutral flavor, readily available.
- Soy Milk: Slightly richer, higher protein content. Ensure it’s plain/unsweetened.
- Oat Milk: Creamy texture, mild flavor. Ensure it’s certified gluten-free if needed, as cross-contamination can be an issue.
- Coconut Milk (Beverage, not canned): Adds a subtle coconut flavor which can be lovely. Canned full-fat coconut milk is too thick and fatty for this recipe unless significantly diluted.
The consistency of the batter might vary slightly depending on the milk used; adjust with a tiny bit more milk or flour if needed to reach a thick but pourable consistency.
- ⅓ cup Melted Coconut Oil (or other neutral oil/dairy-free butter): Fat is essential for tenderness, flavour, and preventing sticking. Melted coconut oil adds a very subtle richness. You can also use other neutral-flavored oils like avocado oil, grapeseed oil, or a light olive oil. Melted dairy-free butter alternative (like Miyoko’s Kitchen or Melt Organic) also works beautifully and adds a buttery flavour. Ensure the oil/butter isn’t piping hot when adding it to the wet ingredients, to avoid cooking the eggs.
- 1 tsp Vanilla Extract: Enhances the overall flavour profile, adding warmth and depth. Use pure vanilla extract for the best taste.
Optional Add-ins (Mix into batter at the end):
- ½ tsp Cinnamon or other spices (nutmeg, cardamom)
- ¼ – ½ cup Dairy-Free Chocolate Chips
- Zest of ½ an Orange or Lemon
- 2-3 tbsp Sprinkles (check for gluten/dairy) for funfetti waffles!
Step-by-Step Instructions for Perfect Waffles
Follow these steps carefully for the best results. Gluten-free batters behave slightly differently than traditional ones, so paying attention to technique matters!
- Preheat Your Waffle Iron: This is arguably one of the most crucial steps for crispy waffles. Turn on your waffle iron before you start mixing the batter. Allow it to heat up fully according to the manufacturer’s instructions. Most irons have an indicator light that signals when it’s ready. A properly hot iron sears the outside of the waffle immediately, creating that desirable crust and preventing sticking.
- Whisk the Dry Ingredients: In a large mixing bowl, combine the gluten-free flour blend, sugar, baking powder, baking soda, and salt. If your flour blend does not contain xanthan gum, add 1 teaspoon now. Whisk everything together thoroughly for at least 30 seconds. This ensures the leavening agents, salt, and xanthan gum (if added) are evenly distributed, which is vital for consistent texture and rise. Clumps of baking powder or soda can lead to unpleasant metallic tastes or unevenly cooked waffles.
- Mix the Wet Ingredients: In a separate medium-sized bowl, whisk together the eggs until lightly beaten. Then, add the unsweetened non-dairy milk, melted (and slightly cooled) coconut oil or other fat source, and the vanilla extract. Whisk until well combined. Ensuring the melted oil/butter isn’t too hot prevents scrambling the eggs upon contact.
- Combine Wet and Dry: Pour the wet ingredients into the bowl containing the dry ingredients. Using a whisk or a spatula, mix gently until just combined. It’s important not to overmix gluten-free batter. Unlike wheat flour, there’s no gluten to develop, but overmixing can still make the waffles tough or dense, potentially by over-activating the xanthan gum or developing the starches too much. Mix only until you no longer see large streaks of dry flour. A few small lumps are perfectly fine – they will cook out. The batter should be relatively thick, but still pourable. If it seems excessively thick (like paste), add another tablespoon or two of non-dairy milk. If it seems too thin (like crepe batter), add a tablespoon of gluten-free flour.
- Let the Batter Rest (Optional but Recommended): If you have time, let the batter sit for 5-10 minutes. This allows the gluten-free flours to fully hydrate and can improve the texture of the final waffles, making them slightly more tender.
- Grease the Waffle Iron (If Necessary): Even if your waffle iron is non-stick, lightly greasing it with cooking spray or a bit more melted coconut oil/dairy-free butter before the first waffle (and possibly between batches if sticking occurs) is a good insurance policy, especially with gluten-free batters. Use a pastry brush or paper towel to spread it evenly.
- Cook the Waffles: Pour the recommended amount of batter onto the center of the hot waffle iron grids (consult your waffle iron’s manual – usually ½ to ¾ cup per standard waffle). Close the lid gently but firmly.
- Cooking Time: Cook according to your waffle iron’s instructions, typically for 4-7 minutes. Cooking time varies greatly depending on the iron’s wattage and heat settings. Look for visual cues: the steaming should slow down significantly, and the waffle should be golden brown and slightly crisp. Avoid opening the iron too early, as this can cause the waffle to tear or cook unevenly. Most modern waffle irons have an indicator light to tell you when it’s done.
- Remove and Serve/Keep Warm: Carefully remove the cooked waffle using a fork or heat-resistant spatula (avoid metal utensils on non-stick surfaces). Serve immediately for the best texture.
- Keeping Waffles Warm & Crispy: If making multiple batches, don’t stack the cooked waffles directly on a plate, as the trapped steam will make them soggy. Instead, place them in a single layer on a wire rack set over a baking sheet in a warm oven (around 200°F or 95°C). This allows air to circulate, keeping them warm and preserving their crispness until ready to serve.
- Repeat: Repeat steps 6-9 with the remaining batter, re-greasing the iron lightly between batches if needed.
Nutrition Facts (Estimated)
- Servings: This recipe makes approximately 6 standard-sized waffles (depending on your waffle iron).
- Calories per serving (per waffle): Approximately 280-320 kcal.
Disclaimer: Please note that these nutritional values are estimates only. The exact nutritional information will vary based on the specific brands of ingredients used (especially the gluten-free flour blend and non-dairy milk), the exact size of your waffles, and any chosen add-ins or toppings. This estimate assumes standard ingredients as listed and does not include toppings. These waffles are primarily a source of carbohydrates, with moderate amounts of fat and protein.
Preparation Time Breakdown
Making these delicious waffles is quicker than you might think:
- Prep time: 10-15 minutes (Measuring ingredients, mixing batter, preheating iron)
- Cook time: 15-25 minutes (Cooking the waffles in batches, typically 4-7 minutes per batch)
- Total time: Approximately 25-40 minutes from start to serving the first waffle.
The total time can vary slightly depending on how quickly your waffle iron heats up and cooks, and how many waffles you make in each batch.
How to Serve Your Delicious Gluten-Free Dairy-Free Waffles
The beauty of waffles lies in their versatility! Here are some serving ideas to elevate your gluten-free, dairy-free waffle experience:
- The Classic Comfort:
- A drizzle of pure Maple Syrup (Grade B or Dark Robust for more flavor).
- A pat of Dairy-Free Butter (Melt, Miyoko’s Kitchen, Earth Balance are popular options).
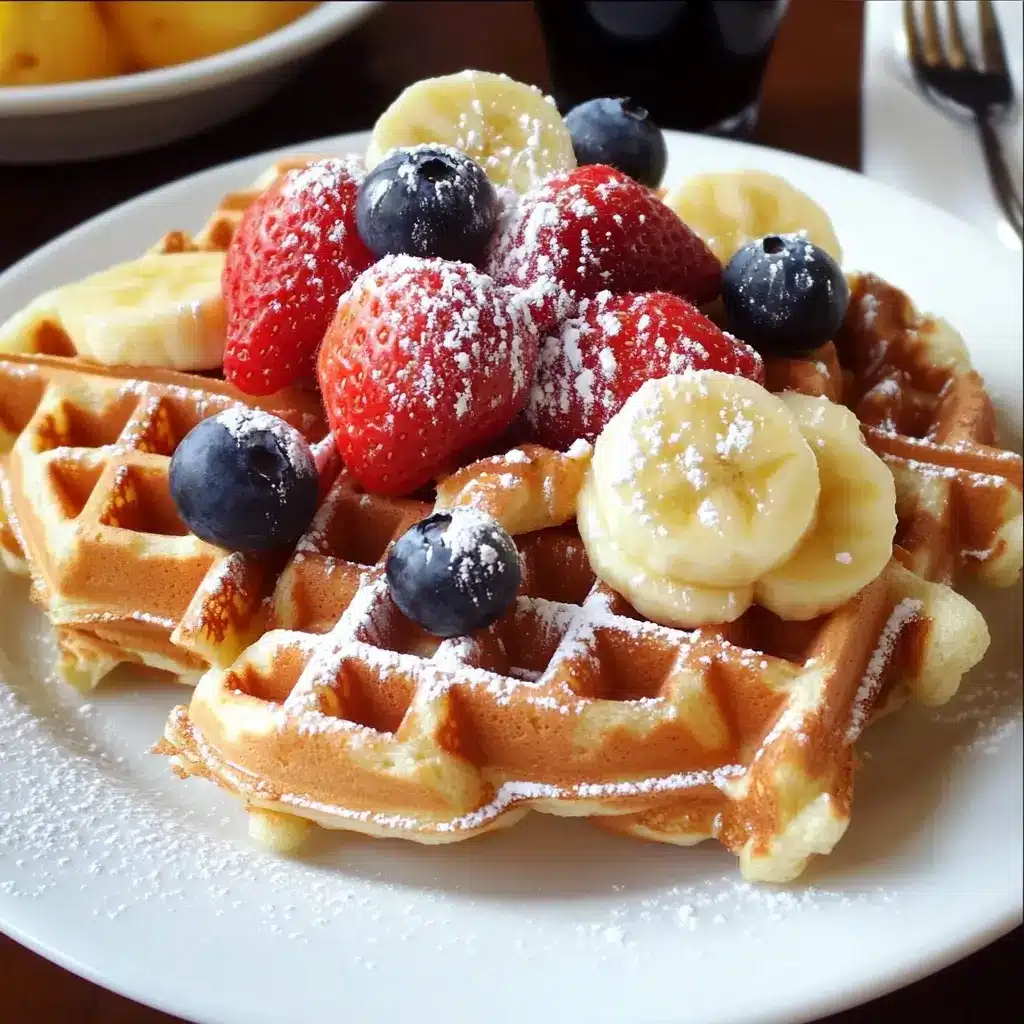
- Fresh Fruit Fiesta:
- A generous topping of Mixed Berries (strawberries, blueberries, raspberries) – fresh or thawed frozen.
- Sliced Bananas and a sprinkle of chopped walnuts or pecans (if no nut allergies).
- Warm Compote: Gently heat berries or sliced peaches/apples with a splash of water/orange juice and a touch of maple syrup until softened.
- Decadent Delights:
- A dollop of Dairy-Free Whipped Cream (coconut cream-based or store-bought almond/oat whip).
- A drizzle of Dairy-Free Chocolate Sauce or melted dairy-free chocolate chips.
- A sprinkle of toasted Shredded Coconut.
- A scoop of your favorite Dairy-Free Ice Cream for a truly indulgent brunch or dessert.
- Nut Butter Boost:
- Spread with Almond Butter, Peanut Butter, or SunButter (sunflower seed butter for nut-free).
- Add sliced bananas or a sprinkle of chia seeds or hemp hearts for extra nutrients.
- Yogurt Parfait Style:
- Layer broken waffle pieces with Dairy-Free Yogurt (coconut, almond, soy, or oat-based) and granola (ensure it’s gluten-free).
- Savory Sensations (Yes, really!):
- Reduce the sugar in the batter slightly (use 1 tbsp or omit).
- Top with Avocado slices, a sprinkle of everything bagel seasoning, and maybe some red pepper flakes.
- Serve alongside Scrambled Tofu or plant-based sausages.
- Go for a “chicken” and waffles vibe using crispy baked tofu or store-bought plant-based “chicken” tenders and maple syrup.
Additional Tips for Waffle Perfection
Mastering gluten-free, dairy-free waffles involves a few extra tricks. Here are five tips to ensure success every time:
- Don’t Overmix the Batter: We mentioned it in the instructions, but it bears repeating. Unlike traditional waffle batter where some mixing develops gluten for structure, gluten-free batters rely on the balance of flours and binders like xanthan gum. Overmixing can make the xanthan gum gummy or overdevelop the starches, leading to waffles that are tough, dense, or chewy instead of light and crispy. Mix only until the ingredients are just combined. A few lumps are perfectly okay.
- Get Your Waffle Iron HOT and Keep it Hot: A piping hot waffle iron is non-negotiable for crispy waffles. The instant heat seals the exterior, creating the crust while steaming the interior for fluffiness. If the iron isn’t hot enough, the batter will slowly heat up, absorb more fat, and result in a pale, soggy, or greasy waffle. Ensure the “ready” light is on before adding batter, and allow the iron to reheat fully between batches if necessary (most maintain temperature well, but older models might need a minute).
- Choosing Your Gluten-Free Flour Blend Matters: Not all GF flour blends are created equal. For waffles, you want a blend designed for all-purpose baking, usually containing a mix of lighter flours/starches (like white/brown rice flour, tapioca starch, potato starch). Avoid heavy blends dominated by bean flours unless specified for waffles, as they can impart a strong flavor or dense texture. Always check if your blend includes xanthan gum; if not, you must add it. Experimenting with different reputable brands (like Bob’s Red Mill 1-to-1, King Arthur Measure for Measure, Cup4Cup – check for dairy if using Cup4Cup original) can help you find your favorite texture.
- Master Making Ahead & Freezing: These waffles freeze beautifully! This is perfect for busy mornings. Cook the waffles fully, then let them cool completely on a wire rack (this prevents ice crystals from sogginess). Once cool, place them in a single layer on a baking sheet and freeze until solid (about 1-2 hours). Transfer the frozen waffles to a freezer-safe bag or container, placing parchment paper between layers if desired to prevent sticking. They’ll keep well for up to 2-3 months. To reheat, skip the microwave (it makes them soft). Instead, pop them directly from the freezer into a toaster or toaster oven until heated through and crispy again (usually requires a medium setting or a couple of cycles). You can also reheat them on a baking sheet in a 350°F (175°C) oven for 5-10 minutes.
- Customize Your Flavor Profile: Don’t be afraid to play with the base recipe! Add warmth with ½ teaspoon of ground cinnamon or a pinch of nutmeg. Introduce brightness with the zest of half an orange or lemon added to the wet ingredients. Fold in ¼ to ½ cup of dairy-free chocolate chips or fresh blueberries just before cooking (gently fold, don’t overmix). For a hint of savory, you could even add a pinch of black pepper or finely chopped herbs (like chives, reducing sugar) for unique savory waffle creations.
Frequently Asked Questions (FAQ)
Here are answers to some common questions about making gluten-free, dairy-free waffles:
Q1: Can I make these waffles vegan (egg-free)?
A: Absolutely! To make these waffles vegan, simply replace the two large eggs with two “flax eggs.” To make one flax egg, whisk together 1 tablespoon of flaxseed meal (ground flaxseed) with 3 tablespoons of water. Let this mixture sit for 5-10 minutes until it becomes gelatinous and thick, resembling the consistency of a raw egg. Use two of these flax egg mixtures in place of the regular eggs in the recipe. Ensure your sugar isn’t processed with bone char if strict veganism is a concern (look for organic or beet sugar). The rest of the ingredients (using non-dairy milk and oil/dairy-free butter) are already vegan-friendly. The texture might be slightly denser than with eggs, but still delicious.
Q2: My waffles came out soggy or soft, not crispy. What went wrong?
A: Soggy waffles are usually due to one or more factors:
* Waffle Iron Not Hot Enough: This is the most common culprit. Ensure your iron is fully preheated before adding batter and reheats between batches if needed.
* Overcrowding the Iron: Putting too much batter in the iron can lower its temperature and prevent proper crisping. Use the amount recommended for your specific iron.
* Batter Consistency: If the batter is too thin, it may create more steam and less structure, leading to softness. If it seems watery, try adding another tablespoon of GF flour. Conversely, if too thick, it might not cook through properly.
* Not Cooking Long Enough: Gluten-free waffles sometimes need a minute or two longer than traditional ones to crisp up. Rely on visual cues (golden brown, reduced steam) rather than just the timer or indicator light.
* Stacking Hot Waffles: Never stack freshly cooked waffles directly on top of each other on a plate. The trapped steam will immediately make them soggy. Place them in a single layer on a wire rack, ideally in a warm oven, as described in the instructions.
* Too Much Fat/Liquid: Double-check your measurements. Excess oil or milk can sometimes hinder crisping.
Q3: Can I use a different type of non-dairy milk than the ones listed?
A: Yes, most unsweetened non-dairy milks should work interchangeably in this recipe. Rice milk, cashew milk, or even hemp milk can be used. Keep in mind that different milks have slightly different fat contents, protein levels, and flavors, which might subtly affect the final taste and texture. For instance, richer milks like soy or some oat milks might yield a slightly more tender waffle, while thinner ones like rice milk might result in a slightly lighter one. Always choose an unsweetened, plain variety unless you want the added flavor (like vanilla-flavored milk, in which case you might reduce the added vanilla extract). Adjust batter consistency with a tiny bit more flour or milk if needed.
Q4: What is the absolute best gluten-free flour blend to use for this recipe?
A: There isn’t one single “best” blend, as preference for texture can vary, and different brands perform slightly differently. However, for consistently good results in waffles, look for blends that:
* Are designed as an all-purpose or 1-to-1 baking replacement for wheat flour.
* Contain a mix of rice flour (white or brown), potato starch, and tapioca starch/flour. This combination usually provides a good balance of structure, tenderness, and lightness.
* Include xanthan gum. This is crucial for binding. If yours doesn’t, add it separately.
* Popular, reliable brands often recommended for texture include Bob’s Red Mill Gluten Free 1-to-1 Baking Flour (blue bag), King Arthur Baking Gluten-Free Measure for Measure Flour, and Cup4Cup Multipurpose Gluten Free Flour (check ingredients as the original contains milk powder; they may have dairy-free versions). Avoid single-ingredient flours (like only almond or coconut flour) or blends meant specifically for bread, as they won’t produce the desired waffle texture.
Q5: How should I store leftover waffles? Can they be reheated?
A: Yes, leftover waffles store and reheat very well!
* Refrigeration: If you plan to eat them within 2-3 days, let the waffles cool completely on a wire rack. Store them in an airtight container or zip-top bag in the refrigerator.
* Freezing (Recommended for longer storage): For longer storage (up to 2-3 months), freezing is the best method. Cool waffles completely on a wire rack. Place them in a single layer on a baking sheet and freeze until solid (flash freezing). Transfer the frozen waffles to a freezer-safe airtight container or zip-top bag. Separating layers with parchment paper can prevent sticking.
* Reheating: The best way to reheat and restore crispiness is using a toaster or toaster oven. Place refrigerated or frozen waffles directly into the slots/onto the rack and toast on a medium setting until hot and crispy. You may need to toast frozen waffles slightly longer or use a defrost setting if available. Alternatively, reheat on a wire rack set on a baking sheet in a 350°F (175°C) oven for 5-10 minutes. Avoid reheating in the microwave, as this tends to make them soft and rubbery.

Gluten-Free Dairy-Free Waffles Recipe
Ingredients
- 1 ¾ cups Gluten-Free All-Purpose Flour Blend (with xanthan gum): This is the foundation. Choose a high-quality blend specifically designed for baking, typically containing a mix of rice flour, potato starch, and tapioca starch. Crucially, ensure your blend contains xanthan gum. Xanthan gum acts as a binder and emulsifier, mimicking gluten’s role in providing structure and preventing crumbliness. If your blend doesn’t include it, you’ll need to add 1 teaspoon of xanthan gum separately to the dry ingredients. Using just one type of gluten-free flour (like only rice flour) will likely result in a dense or gritty texture. The blend is key!
- 2 tbsp Granulated Sugar (or Coconut Sugar/Maple Syrup): Adds a touch of sweetness and helps with browning. You can substitute with coconut sugar for a slightly deeper flavour, or use an equal amount of maple syrup (add it with the wet ingredients if using liquid sweetener). Adjust the amount slightly based on your preference and what toppings you plan to use.
- 2 tsp Baking Powder: This is the primary leavening agent, responsible for making the waffles light and fluffy by creating carbon dioxide bubbles when mixed with liquid and heat. Ensure your baking powder is fresh (check the expiration date) and certified gluten-free if necessary.
- ½ tsp Baking Soda: Working alongside the baking powder, baking soda (sodium bicarbonate) reacts with acidity (even the slight acidity present in the batter) to create more lift and, importantly, contributes to better browning and crispiness on the waffle’s exterior.
- ½ tsp Salt: Salt doesn’t just add flavour; it balances the sweetness and enhances the overall taste profile of the waffles. Fine sea salt or regular table salt works well.
- 2 Large Eggs (Room Temperature Recommended): Eggs act as a binder, add richness, contribute moisture, and help with leavening. Using room temperature eggs helps them incorporate more smoothly into the batter. (See FAQ for a vegan/egg-free option using flax eggs).
- 1 ½ cups Unsweetened Non-Dairy Milk (Almond, Soy, Oat, or Coconut): Provides the necessary liquid for the batter. Choose your favorite unsweetened variety.
- Almond Milk: Neutral flavor, readily available.
- Soy Milk: Slightly richer, higher protein content. Ensure it’s plain/unsweetened.
- Oat Milk: Creamy texture, mild flavor. Ensure it’s certified gluten-free if needed, as cross-contamination can be an issue.
- Coconut Milk (Beverage, not canned): Adds a subtle coconut flavor which can be lovely. Canned full-fat coconut milk is too thick and fatty for this recipe unless significantly diluted.
The consistency of the batter might vary slightly depending on the milk used; adjust with a tiny bit more milk or flour if needed to reach a thick but pourable consistency.
- ⅓ cup Melted Coconut Oil (or other neutral oil/dairy-free butter): Fat is essential for tenderness, flavour, and preventing sticking. Melted coconut oil adds a very subtle richness. You can also use other neutral-flavored oils like avocado oil, grapeseed oil, or a light olive oil. Melted dairy-free butter alternative (like Miyoko’s Kitchen or Melt Organic) also works beautifully and adds a buttery flavour. Ensure the oil/butter isn’t piping hot when adding it to the wet ingredients, to avoid cooking the eggs.
- 1 tsp Vanilla Extract: Enhances the overall flavour profile, adding warmth and depth. Use pure vanilla extract for the best taste.
Instructions
- Preheat Your Waffle Iron: This is arguably one of the most crucial steps for crispy waffles. Turn on your waffle iron before you start mixing the batter. Allow it to heat up fully according to the manufacturer’s instructions. Most irons have an indicator light that signals when it’s ready. A properly hot iron sears the outside of the waffle immediately, creating that desirable crust and preventing sticking.
- Whisk the Dry Ingredients: In a large mixing bowl, combine the gluten-free flour blend, sugar, baking powder, baking soda, and salt. If your flour blend does not contain xanthan gum, add 1 teaspoon now. Whisk everything together thoroughly for at least 30 seconds. This ensures the leavening agents, salt, and xanthan gum (if added) are evenly distributed, which is vital for consistent texture and rise. Clumps of baking powder or soda can lead to unpleasant metallic tastes or unevenly cooked waffles.
- Mix the Wet Ingredients: In a separate medium-sized bowl, whisk together the eggs until lightly beaten. Then, add the unsweetened non-dairy milk, melted (and slightly cooled) coconut oil or other fat source, and the vanilla extract. Whisk until well combined. Ensuring the melted oil/butter isn’t too hot prevents scrambling the eggs upon contact.
- Combine Wet and Dry: Pour the wet ingredients into the bowl containing the dry ingredients. Using a whisk or a spatula, mix gently until just combined. It’s important not to overmix gluten-free batter. Unlike wheat flour, there’s no gluten to develop, but overmixing can still make the waffles tough or dense, potentially by over-activating the xanthan gum or developing the starches too much. Mix only until you no longer see large streaks of dry flour. A few small lumps are perfectly fine – they will cook out. The batter should be relatively thick, but still pourable. If it seems excessively thick (like paste), add another tablespoon or two of non-dairy milk. If it seems too thin (like crepe batter), add a tablespoon of gluten-free flour.
- Let the Batter Rest (Optional but Recommended): If you have time, let the batter sit for 5-10 minutes. This allows the gluten-free flours to fully hydrate and can improve the texture of the final waffles, making them slightly more tender.
- Grease the Waffle Iron (If Necessary): Even if your waffle iron is non-stick, lightly greasing it with cooking spray or a bit more melted coconut oil/dairy-free butter before the first waffle (and possibly between batches if sticking occurs) is a good insurance policy, especially with gluten-free batters. Use a pastry brush or paper towel to spread it evenly.
- Cook the Waffles: Pour the recommended amount of batter onto the center of the hot waffle iron grids (consult your waffle iron’s manual – usually ½ to ¾ cup per standard waffle). Close the lid gently but firmly.
- Cooking Time: Cook according to your waffle iron’s instructions, typically for 4-7 minutes. Cooking time varies greatly depending on the iron’s wattage and heat settings. Look for visual cues: the steaming should slow down significantly, and the waffle should be golden brown and slightly crisp. Avoid opening the iron too early, as this can cause the waffle to tear or cook unevenly. Most modern waffle irons have an indicator light to tell you when it’s done.
- Remove and Serve/Keep Warm: Carefully remove the cooked waffle using a fork or heat-resistant spatula (avoid metal utensils on non-stick surfaces). Serve immediately for the best texture.
- Keeping Waffles Warm & Crispy: If making multiple batches, don’t stack the cooked waffles directly on a plate, as the trapped steam will make them soggy. Instead, place them in a single layer on a wire rack set over a baking sheet in a warm oven (around 200°F or 95°C). This allows air to circulate, keeping them warm and preserving their crispness until ready to serve.
- Repeat: Repeat steps 6-9 with the remaining batter, re-greasing the iron lightly between batches if needed.
Nutrition
- Serving Size: One Normal Portion
- Calories: 280-320


