


Of all the classic comfort foods my family craves, Chicken Parmesan sits right at the top of the list. For years, after my Celiac diagnosis, I thought this beloved dish was a thing of the past. The thought of a crispy, golden-brown chicken cutlet, smothered in rich marinara and blanketed with bubbly, melted cheese, felt like a distant memory. I tried countless gluten-free versions, but they always fell short. They were either soggy, bland, or the breading would slide right off in a sad, gloopy mess. It was culinary heartbreak. That is until I finally cracked the code. This recipe isn’t just a gluten-free alternative; it’s a culinary upgrade. The first time I served this version, my husband, a notorious gluten-loving purist, took a bite and his eyes went wide. He didn’t say, “This is good for gluten-free.” He said, “This is the best Chicken Parmesan I’ve ever had.” The chicken is unbelievably juicy on the inside, with a shatteringly crisp, savory crust on the outside that holds up perfectly under the sauce and cheese. It’s the kind of meal that silences the dinner table, followed by requests for seconds. Now, it’s our go-to for special Sunday dinners, cozy weeknights, and even for impressing guests who would never guess our delicious secret. This is the recipe that brought a cherished classic back to our family table, better than ever before.
The Ultimate Gluten-Free Chicken Parmesan Recipe
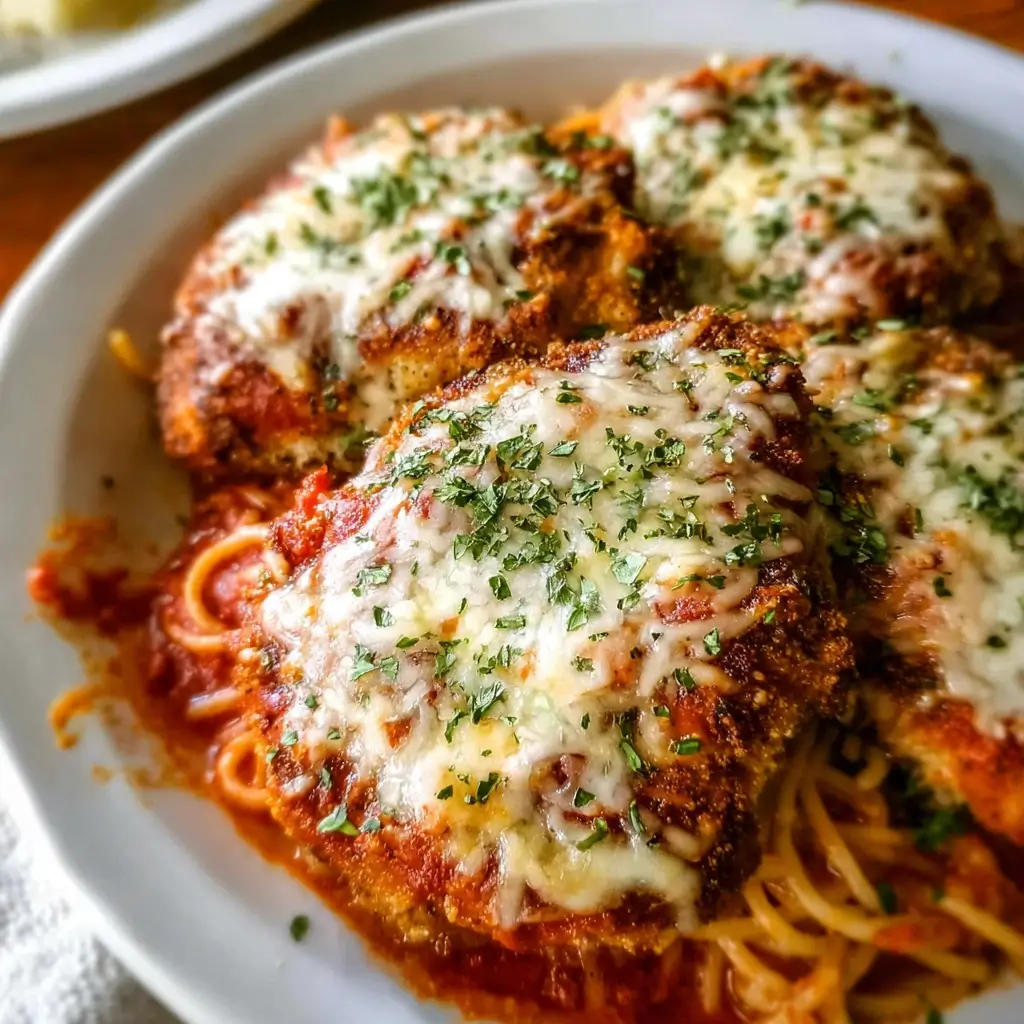
This recipe has been meticulously tested and perfected to ensure a crispy, flavorful crust and a juicy, tender interior. We achieve this by using a specific combination of almond flour and Parmesan cheese for the breading and a pan-sear-to-bake method that guarantees a perfect result every time.
Ingredients
- For the Chicken:
- 4 (about 1.5 lbs total) boneless, skinless chicken breasts, pounded to ½-inch thickness
- 1 teaspoon sea salt
- ½ teaspoon black pepper
- 2 large eggs
- 2 tablespoons milk or unsweetened almond milk
- For the Gluten-Free Breading:
- 1 ½ cups fine almond flour
- ¾ cup grated Parmesan cheese, plus more for topping
- 2 teaspoons Italian seasoning
- 1 teaspoon garlic powder
- 1 teaspoon onion powder
- ½ teaspoon paprika
- For Assembly and Baking:
- ¼ cup avocado oil or light olive oil, for frying
- 2 cups high-quality marinara sauce (check for no added sugar and gluten-free)
- 8 ounces fresh mozzarella, sliced or shredded
- Fresh basil or parsley, for garnish
Instructions
- Preheat and Prepare: Preheat your oven to 400°F (200°C). Place a wire rack inside a large baking sheet and set it aside. This setup is crucial for keeping the bottom of the chicken crispy.
- Season the Chicken: Pat the pounded chicken breasts completely dry with paper towels. This is a critical step for a crispy coating. Season both sides generously with the 1 teaspoon of salt and ½ teaspoon of black pepper.
- Set Up the Breading Station: You will need three shallow dishes or bowls.
- Dish 1: You can leave this one empty or add a little extra almond flour, but the key is the egg wash.
- Dish 2 (Egg Wash): In the second shallow dish, whisk together the 2 large eggs and 2 tablespoons of milk until smooth and uniform.
- Dish 3 (GF Breading): In the third shallow dish, combine the 1 ½ cups of almond flour, ¾ cup of grated Parmesan cheese, Italian seasoning, garlic powder, onion powder, and paprika. Mix thoroughly with a fork until all the ingredients are evenly distributed.
- Bread the Chicken: Working with one chicken breast at a time, dredge it in the egg wash, making sure it’s fully coated on both sides. Allow any excess egg to drip off. Immediately transfer the chicken to the almond flour mixture. Press the breading firmly onto both sides of the chicken, ensuring a thick, even coating. This pressing action is what helps the crust adhere. Place the breaded chicken on a clean plate and repeat with the remaining pieces.
- Pan-Sear for a Golden Crust: Heat the ¼ cup of avocado oil in a large skillet (cast iron works wonderfully) over medium-high heat. The oil is ready when it shimmers. Carefully place two chicken cutlets in the skillet, ensuring not to overcrowd the pan. Fry for 2-3 minutes per side, or until the crust is a deep golden brown and crispy. This step is purely for creating the crust, not for cooking the chicken through.
- Transfer and Repeat: Using tongs, transfer the seared chicken to the prepared wire rack on your baking sheet. Add the remaining chicken to the skillet (adding a bit more oil if needed) and repeat the searing process.
- Assemble for Baking: Now for the fun part. Spoon a generous layer of marinara sauce over the top of each seared chicken cutlet. Be careful not to drench it completely; you want the crispy edges to remain exposed. Top the sauce with a generous layer of mozzarella cheese and a final sprinkle of grated Parmesan.
- Bake to Perfection: Place the baking sheet in the preheated 400°F oven. Bake for 15-20 minutes, or until the chicken is cooked through (internal temperature reaches 165°F or 74°C) and the cheese is melted, bubbly, and starting to brown.
- Garnish and Rest: Remove the chicken parmesan from the oven and let it rest on the baking sheet for 5 minutes. This allows the juices to redistribute, ensuring a tender bite. Garnish with freshly chopped basil or parsley before serving.
Nutrition Facts
- Servings: 4
- Calories per serving: Approximately 750 kcal (This is an estimate and can vary based on the specific brands of cheese, sauce, and the size of chicken breasts used).
Preparation Time
- Prep time: 20 minutes
- Cook time: 30 minutes
- Total time: 50 minutes
How to Serve Your Gluten-Free Masterpiece
Chicken Parmesan is a versatile dish that pairs beautifully with a variety of sides. Elevate your meal from simply delicious to truly unforgettable with these serving suggestions.
- The Classic Italian Experience:
- Gluten-Free Pasta: Serve a generous portion of your favorite gluten-free spaghetti or linguine, tossed with a little extra warm marinara sauce.
- Garlic Bread: Use a high-quality gluten-free baguette, slather it with garlic butter and parsley, and toast it until golden for dipping and scooping.
- Low-Carb and Keto-Friendly Pairings:
- Zucchini Noodles (“Zoodles”): A light and healthy alternative. Sauté the zoodles with a little garlic and olive oil until just tender-crisp.
- Spaghetti Squash: Roast a spaghetti squash and use a fork to scrape out the spaghetti-like strands. It provides a satisfying base that soaks up the sauce wonderfully.
- Cauliflower Rice: A fantastic low-carb grain substitute. Steam or sauté it with herbs to complement the Italian flavors.
- Vegetable-Forward Sides:
- Roasted Broccoli or Asparagus: Toss the vegetables with olive oil, salt, and pepper, and roast them alongside the chicken for an easy, one-pan meal solution. The roasted flavor is a perfect counterpoint to the rich cheese and sauce.
- Simple Arugula Salad: A peppery arugula salad with a simple lemon vinaigrette, cherry tomatoes, and shaved Parmesan cuts through the richness of the dish and adds a fresh, vibrant element.
- Sautéed Spinach and Garlic: A quick and nutritious side that comes together in minutes.
- Hearty and Comforting Companions:
- Creamy Polenta: The soft, creamy texture of polenta is an incredible base for the crispy chicken and savory sauce.
- Roasted Potatoes: Dice potatoes, toss with olive oil and Italian herbs, and roast until crispy. They provide a satisfying, starchy component to round out the meal.
Additional Tips for Perfect Gluten-Free Chicken Parm
Mastering this recipe is easy, but these five professional tips will take your dish from great to absolutely restaurant-quality.
- Don’t Skip Pounding the Chicken: This is arguably the most important non-negotiable step. Pounding the chicken to an even ½-inch thickness does two things: it tenderizes the muscle fibers, resulting in incredibly tender chicken, and it ensures the cutlet cooks evenly. A thick, uneven breast will result in dry, overcooked thin parts and undercooked thick parts.
- The Secret to a Truly Adherent Crust: The enemy of any breaded cutlet is a crust that slides off. To prevent this, ensure you pat the chicken extremely dry before starting. Moisture is the number one reason breading fails to stick. Secondly, when you press the chicken into the almond flour mixture, use the heel of your hand to press firmly. This mechanically bonds the breading to the chicken.
- Pan-Searing is Non-Negotiable for Crispiness: You might be tempted to skip the pan-searing and go straight to baking to save a step. Don’t do it! Baking alone will simply steam the breading, leading to a soft, often soggy result. Pan-searing in hot oil creates a foundational, deep-golden crust through the Maillard reaction, which is responsible for immense flavor and that signature crispy texture. This crust acts as a barrier, protecting the chicken from the sauce and ensuring it stays crisp even after baking.
- Strategic Sauciness: It’s tempting to completely drown the chicken in marinara, but this is a common mistake that leads to a soggy bottom. Apply the sauce only to the top surface of the chicken cutlet. Leave the sides and especially the bottom of the chicken free of sauce. This way, the bottom, which is elevated on the wire rack, stays perfectly crisp.
- Finish with the Broiler for a Pizzeria-Style Top: For that final, irresistible touch, turn your oven’s broiler on high for the last 1-2 minutes of cooking. Keep a very close eye on it, as things can go from golden to burnt in seconds. The intense heat from the broiler will give your mozzarella that beautiful, bubbly, golden-brown-spotted look you see in the best Italian restaurants.
Frequently Asked Questions (FAQ)
Here are answers to some of the most common questions about making gluten-free chicken parmesan.
- Q1: Can I make this in an air fryer?
- A: Absolutely! An air fryer is a fantastic tool for this recipe. Follow all the steps for breading the chicken. Preheat your air fryer to 375°F (190°C). Spray the basket with cooking spray and place the breaded chicken in a single layer. Air fry for 10-12 minutes, flipping halfway through. Then, top with sauce and cheese and air fry for another 3-4 minutes, or until the cheese is melted and bubbly. You may need to work in batches.
- Q2: How do I store and reheat leftovers for the best results?
- A: Store leftovers in an airtight container in the refrigerator for up to 3 days. The key to reheating is to avoid the microwave, which will make the crust soggy. For best results, reheat in an oven or toaster oven at 350°F (175°C) for 10-15 minutes, or until warmed through and the crust has re-crisped. An air fryer also works wonderfully for reheating.
- Q3: This recipe uses almond flour. Can I use a different gluten-free flour?
- A: Yes, but with varying results. Almond flour is preferred because its high fat content creates a rich, golden, and very crispy crust. A 1:1 gluten-free all-purpose flour blend can work, but the crust may be paler and less crisp. For a super-crunchy alternative, you can use crushed gluten-free cornflakes or even crushed pork rinds (for a keto/zero-carb version). Avoid coconut flour, as it is highly absorbent and will result in a dry outcome.
- Q4: How can I make this recipe dairy-free as well?
- A: This recipe is easily adaptable to be dairy-free.
- In the egg wash, use a dairy-free milk alternative like unsweetened almond milk (which is already an option).
- For the breading, use a high-quality dairy-free Parmesan alternative. Many brands make excellent versions from nuts or soy.
- For the topping, use your favorite brand of dairy-free mozzarella shreds or slices.
- A: This recipe is easily adaptable to be dairy-free.
- Q5: Can I prepare this ahead of time to make it a quicker weeknight meal?
- A: Yes, you can do most of the prep in advance. You can pound and season the chicken, and mix the dry breading ingredients and store them in separate airtight containers in the fridge for up to 24 hours. When you’re ready to cook, simply set up your breading station and proceed with the recipe. You can even bread the chicken ahead of time and store it on a parchment-lined baking sheet in the fridge for a few hours before cooking.

Gluten-Free Chicken Parmesan Recipe
Ingredients
- For the Chicken:
- 4 (about 1.5 lbs total) boneless, skinless chicken breasts, pounded to ½-inch thickness
- 1 teaspoon sea salt
- ½ teaspoon black pepper
- 2 large eggs
- 2 tablespoons milk or unsweetened almond milk
- For the Gluten-Free Breading:
- 1 ½ cups fine almond flour
- ¾ cup grated Parmesan cheese, plus more for topping
- 2 teaspoons Italian seasoning
- 1 teaspoon garlic powder
- 1 teaspoon onion powder
- ½ teaspoon paprika
- For Assembly and Baking:
- ¼ cup avocado oil or light olive oil, for frying
- 2 cups high-quality marinara sauce (check for no added sugar and gluten-free)
- 8 ounces fresh mozzarella, sliced or shredded
- Fresh basil or parsley, for garnish
Instructions
- Preheat and Prepare: Preheat your oven to 400°F (200°C). Place a wire rack inside a large baking sheet and set it aside. This setup is crucial for keeping the bottom of the chicken crispy.
- Season the Chicken: Pat the pounded chicken breasts completely dry with paper towels. This is a critical step for a crispy coating. Season both sides generously with the 1 teaspoon of salt and ½ teaspoon of black pepper.
- Set Up the Breading Station: You will need three shallow dishes or bowls.
- Dish 1: You can leave this one empty or add a little extra almond flour, but the key is the egg wash.
- Dish 2 (Egg Wash): In the second shallow dish, whisk together the 2 large eggs and 2 tablespoons of milk until smooth and uniform.
- Dish 3 (GF Breading): In the third shallow dish, combine the 1 ½ cups of almond flour, ¾ cup of grated Parmesan cheese, Italian seasoning, garlic powder, onion powder, and paprika. Mix thoroughly with a fork until all the ingredients are evenly distributed.
- Bread the Chicken: Working with one chicken breast at a time, dredge it in the egg wash, making sure it’s fully coated on both sides. Allow any excess egg to drip off. Immediately transfer the chicken to the almond flour mixture. Press the breading firmly onto both sides of the chicken, ensuring a thick, even coating. This pressing action is what helps the crust adhere. Place the breaded chicken on a clean plate and repeat with the remaining pieces.
- Pan-Sear for a Golden Crust: Heat the ¼ cup of avocado oil in a large skillet (cast iron works wonderfully) over medium-high heat. The oil is ready when it shimmers. Carefully place two chicken cutlets in the skillet, ensuring not to overcrowd the pan. Fry for 2-3 minutes per side, or until the crust is a deep golden brown and crispy. This step is purely for creating the crust, not for cooking the chicken through.
- Transfer and Repeat: Using tongs, transfer the seared chicken to the prepared wire rack on your baking sheet. Add the remaining chicken to the skillet (adding a bit more oil if needed) and repeat the searing process.
- Assemble for Baking: Now for the fun part. Spoon a generous layer of marinara sauce over the top of each seared chicken cutlet. Be careful not to drench it completely; you want the crispy edges to remain exposed. Top the sauce with a generous layer of mozzarella cheese and a final sprinkle of grated Parmesan.
- Bake to Perfection: Place the baking sheet in the preheated 400°F oven. Bake for 15-20 minutes, or until the chicken is cooked through (internal temperature reaches 165°F or 74°C) and the cheese is melted, bubbly, and starting to brown.
- Garnish and Rest: Remove the chicken parmesan from the oven and let it rest on the baking sheet for 5 minutes. This allows the juices to redistribute, ensuring a tender bite. Garnish with freshly chopped basil or parsley before serving.
Nutrition
- Serving Size: One Normal Portion
- Calories: 750 kcal


