
Of all the traditions our family has adopted for Halloween, from carving pumpkins to our annual scary movie marathon, the creation of our Ghostly Banana Pops has become the most cherished. The first time I suggested making them, my kids, high on the prospect of mountains of candy, were skeptical. “Fruit? For Halloween?” my son asked, his face a perfect picture of betrayal. But something magical happened as we peeled the bananas, melted the creamy white chocolate, and watched our little yellow fruits transform into a spooky, silly army of ghosts. The kitchen was a mess, with drips of white chocolate on the counter and more mini chocolate chips on the floor than on the bananas, but the laughter was non-stop. Now, it’s the first thing they ask to make when October rolls around. These pops are more than just a treat; they’re an activity, a memory-maker, and, to my secret delight, a wonderfully healthy alternative to the endless parade of sugar. They are, without a doubt, the friendliest ghosts you’ll ever meet.
The Ultimate Ghostly Banana Pops: Your New Favorite Halloween Treat
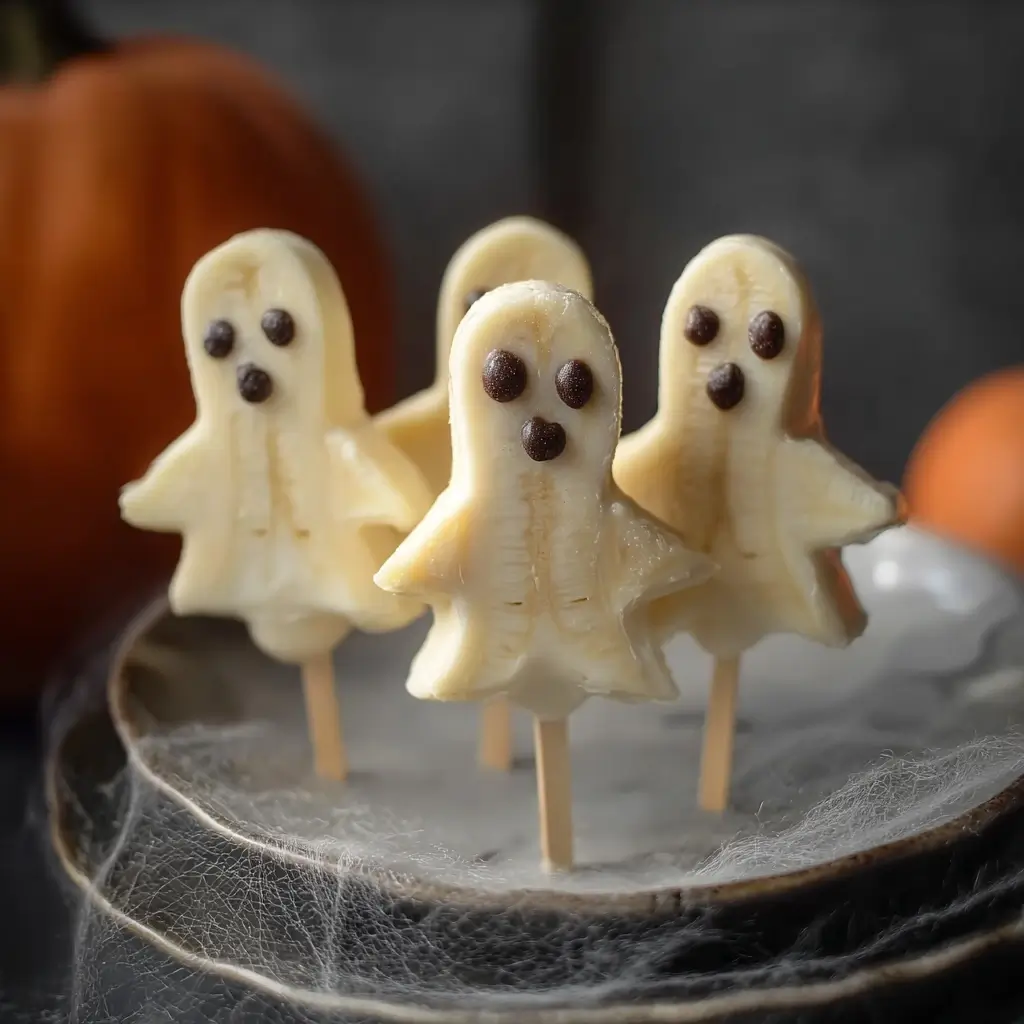
Welcome to the most spooktacularly simple and delightfully delicious Halloween recipe you’ll find this season! These Ghostly Banana Pops are the perfect combination of fun, health, and festive spirit. They are essentially frozen bananas on a stick, dipped in a luscious white chocolate coating and given a ghostly face with mini chocolate chips. It’s a no-bake, minimal-ingredient recipe that delivers maximum impact on any Halloween party spread. Whether you’re a seasoned baker or someone who considers boiling water a culinary achievement, you can master these ghoulishly good treats with ease.
Why You’ll Love This Spooktacular Recipe
Before we dive into the ghostly-good details, let’s talk about why this recipe is about to become a permanent fixture in your Halloween celebrations.
A Healthier Haunt
Let’s be honest, Halloween is a minefield of sugar. While we all love a good candy binge, it’s refreshing to have an option that feels indulgent but is secretly packed with goodness. Bananas are a fantastic source of potassium, vitamin C, and fiber. By using fruit as the base, you’re offering a naturally sweet treat that provides actual nutritional value. It’s the perfect way to balance out the candy haul and give kids (and adults!) a healthier option they’ll be genuinely excited to eat.
Wickedly Easy to Make
This recipe’s beauty lies in its simplicity. There’s no complex baking, no precise measurements for flour or sugar, and no fancy equipment required. If you can melt chocolate and put a stick in a banana, you have all the skills you need. This makes it the perfect recipe for last-minute party preparations or for when you want to create something festive without spending hours in the kitchen.
A Fun Activity for Little Ghouls
More than just a recipe, this is a hands-on project. Getting kids involved in the kitchen is a fantastic way to teach them basic skills, build their confidence, and create lasting memories. They can help peel the bananas, insert the sticks, and, the best part, give each ghost its own unique personality by placing the chocolate chip eyes. Prepare for a little mess, but embrace it—the fun and laughter are well worth a few stray chocolate drips.
Infinitely Customizable
While the classic white ghost is a crowd-pleaser, these banana pops are a blank canvas for your creativity. You can tint the white chocolate with food coloring to create a monster mash of different colored ghouls, use different types of chocolate, or add spooky sprinkles. We’ll explore a whole host of variations later in this article, allowing you to tailor the recipe to your theme and preferences.
Ingredients for Your Ghostly Banana Pops
Simplicity is key here. You only need a few core ingredients to bring this ghostly crew to life.
- Bananas: 4 large, firm bananas
- White Chocolate: 12 ounces (about 2 cups) of good quality white chocolate melting wafers or chopped white chocolate
- Coconut Oil: 1 tablespoon (optional, but highly recommended)
- Mini Chocolate Chips: 24-30 mini semi-sweet chocolate chips
- Popsicle Sticks: 8 wide popsicle sticks or lollipop sticks
A Closer Look at Your Ingredients
The quality of your ingredients can make a big difference in the final product. Here’s a breakdown of what to look for:
- The Bananas: The star of the show! You want bananas that are ripe but still very firm. Avoid bananas with many brown spots, as they will be too soft and mushy to hold their shape on the stick, especially after freezing and dipping. Slightly green-tipped bananas are actually ideal for this recipe. The size is also a factor; larger, straighter bananas are easier to cut in half and handle.
- The White Chocolate: This is not the time to skimp on quality. High-quality white chocolate melting wafers (like Ghirardelli or a similar brand) are your best bet. They are specifically designed to melt smoothly and set up with a nice, crisp shell. You can also use a high-quality white chocolate baking bar, chopped into small, even pieces. Avoid using white chocolate chips intended for baking cookies, as they often contain stabilizers that prevent them from melting into a smooth, fluid consistency. For a vegan option, look for dairy-free white chocolate brands.
- The Coconut Oil: This is my secret weapon for the perfect dipping consistency. Adding a tablespoon of coconut oil (refined, if you don’t want a coconut flavor) to the melting white chocolate makes it smoother and more fluid. This helps you get a thin, even coating on the banana without it being too thick or clumpy. It also helps the chocolate set with a lovely sheen.
- The “Eyes”: Mini semi-sweet chocolate chips are the perfect size and shape for creating the classic “ghost” eyes and mouth. The pointed end makes them easy to press gently into the still-wet white chocolate. You could also use black decorating icing, candy eyeballs, or even black sesame seeds for a different look.
- The Sticks: Standard popsicle sticks work wonderfully. Their flat, wide shape provides good stability for the banana half. You can also use sturdy lollipop sticks or even festive paper straws cut in half for a more decorative touch.
Step-by-Step Instructions: Bringing Your Banana Ghosts to Life
Follow these simple steps, and you’ll have a spooky squadron of banana pops in no time.
Step 1: Prepare the Bananas and the Pan
- First, prepare your landing zone. Line a large baking sheet or tray with parchment paper or a silicone baking mat. This is crucial—it will prevent your ghosts from sticking to the pan after dipping. Make sure the baking sheet will fit flat in your freezer!
- Peel your 4 bananas. Cut each banana in half crosswise.
- Gently but firmly, insert a popsicle stick into the cut end of each banana half, pushing it about halfway through. Be careful not to push it all the way through the other side. You now have 8 banana “pops.”
- Arrange the banana pops in a single layer on the prepared baking sheet, ensuring they aren’t touching.
Step 2: The First Freeze (The Most Important Step!)
- Place the baking sheet with the banana pops into the freezer. Freeze them for at least 1-2 hours, or until they are completely firm to the touch.
- Why this step is critical: Do not skip this! Freezing the bananas solid is the secret to success. A frozen banana provides a cold, hard surface for the warm chocolate to cling to. When the warm chocolate hits the frozen banana, it begins to set almost instantly. This prevents the banana from getting mushy and falling off the stick during the dipping process.
Step 3: Melt the White Chocolate
- When your bananas are almost done freezing, it’s time to melt the chocolate. You can use a microwave or a double boiler.
- Microwave Method: Place the white chocolate melting wafers (and the coconut oil, if using) in a microwave-safe bowl or, even better, a tall, narrow glass or measuring cup. A taller container makes dipping the long bananas much easier. Microwave in 30-second intervals, stirring well after each interval. Be very careful not to overheat the white chocolate, as it can seize up and become a clumpy, unusable mess. Stop heating when there are still a few small lumps left, and just continue to stir until they melt from the residual heat.
- Double Boiler Method: If you don’t have a microwave or prefer this method, fill a small saucepan with about an inch of water and bring it to a gentle simmer. Place a heatproof bowl on top of the saucepan, ensuring the bottom of the bowl does not touch the water. Add the white chocolate and coconut oil to the bowl and stir continuously until it’s smooth and completely melted.
Step 4: The Ghostly Dip and Decoration
- This is the fun part, and you need to work relatively quickly! Take the bananas out of the freezer.
- Hold one banana pop by the stick and dip it into the melted white chocolate, tilting the glass and turning the banana to coat it completely.
- Lift the banana pop out of the chocolate and let any excess drip off. You can gently scrape one side on the lip of the glass. The slight “drips” at the bottom actually create a perfect, ghostly, tapered shape!
- Immediately lay the chocolate-coated banana back on the parchment-lined baking sheet.
- While the chocolate is still wet, quickly and gently press two mini chocolate chips in place for the eyes. You can also add a third chip below the eyes to create a spooky, open-mouthed “O” shape, like a classic ghost saying “Booo!”
- Repeat this process with the remaining banana pops.
Step 5: The Final Freeze
- Once all your ghosts have been created, place the baking sheet back into the freezer.
- Freeze for at least another 30-60 minutes, or until the chocolate shell is completely hard and set.
- Once fully frozen, they are ready to serve or can be transferred to an airtight container for storage in the freezer.
Nutritional Information (An Educated Estimate)
Please note that this is an approximation. The exact nutritional values will vary depending on the size of your bananas and the specific brands of ingredients used.
- Servings: 8 pops
- Calories per serving (per pop): Approximately 220-250 calories
This treat offers a good balance of carbohydrates for energy from the banana and fat from the chocolate, with the added benefit of potassium and vitamins from the fruit itself, making it a far more satisfying and nutrient-dense option than most candies.
Preparation & Total Time
Understanding the time commitment helps with party planning. The majority of the time here is inactive freezing time.
- Active Preparation Time: 15-20 minutes
- First Freeze Time: 1-2 hours
- Final Freeze Time: 30-60 minutes
- Total Time: Approximately 2 hours 45 minutes
How to Serve Your Ghostly Creations
Presentation is part of the fun! Don’t just hand them out—display your spooky crew to get the full “wow” effect at your Halloween gathering.
- The Ghostly Graveyard: Crush chocolate sandwich cookies (like Oreos) to create “dirt” and spread it over a platter or a shallow rectangular dish. Stand the banana ghosts up in the cookie dirt to create a spooky and edible graveyard scene. You can even add gummy worms crawling through the “dirt” for an extra creepy touch.
- The Pumpkin Patch Stand: For a fun and stable display, take a small styrofoam block (you can find these at craft stores) and wrap it in orange paper or paint it to look like a pumpkin. You can then easily stick the banana pops’ sticks into the styrofoam, creating a “pumpkin patch” of ghosts that’s easy for guests to grab.
- The Classic Platter: Simply arrange the ghost pops lying flat on a festive Halloween-themed platter. Garnish the platter with candy corn, gummy spiders, or a scattering of orange and black sprinkles to enhance the theme.
- Individual Servings: If serving at a sit-down meal, place a single ghost pop on each person’s dessert plate, perhaps next to a small scoop of ice cream or a dollop of whipped cream (or a non-dairy alternative).
Ghoulishly Good Variations and Customizations
The basic ghost is just the beginning. Use these ideas as a jumping-off point for your own monstrous creations.
Make it a Mummy
Instead of a smooth dip, create a mummy pop! After dipping the banana in white chocolate and letting it set, put some remaining melted white chocolate into a small plastic bag and snip off a tiny corner. Drizzle the chocolate back and forth over the banana pop to create “bandages.” Add two candy eyeballs before the drizzles set.
Create a Monster Mash
Who says ghosts have to be white? Divide your melted white chocolate into a few small bowls and add a drop of different gel food colorings to each (green for Frankenstein’s monster, purple for a silly monster, etc.). Dip the bananas and decorate with a variety of sprinkles, candy eyeballs, and other edible decorations to create a whole monster crew.
Go Nuts (and Seeds)
For a different texture and a boost of protein, after dipping the banana in chocolate, immediately sprinkle it with finely chopped nuts (like peanuts or almonds), seeds (like sunflower or pumpkin seeds), or shredded coconut. The coconut can even give the ghost a more textured, ethereal look.
A Vegan-Friendly Phantom
This recipe is incredibly easy to make vegan! The only swaps you need are:
- Use a high-quality dairy-free white chocolate. Many brands now offer excellent vegan white chocolate made with ingredients like cocoa butter, rice powder, and soy lecithin.
- Ensure your mini chocolate chips are also dairy-free (most semi-sweet and dark chocolate chips are).
The Yogurt Ghost (Lower Sugar Option)
For an even healthier, lower-sugar version, you can substitute the white chocolate with a thick Greek yogurt. Choose a plain or vanilla-flavored thick-style yogurt (like Greek or Icelandic skyr). The process is slightly different: dip the frozen bananas in the yogurt, place them on the parchment, and freeze immediately. You may need to apply two coats (freezing in between) to get an opaque white color. Note that these will be less sweet and have a tangier flavor, and they must be kept frozen right up until serving as the yogurt will melt much faster than chocolate.
My Top 5 Additional Tips for Perfect Pops
After making dozens of these ghostly pops over the years, I’ve picked up a few tricks to ensure they come out perfectly every time.
- Work Quickly and in Batches: Once the frozen bananas come out of the freezer, the clock is ticking. They will start to thaw, and the chocolate will start to set. It’s best to work with only 3-4 bananas at a time, leaving the rest in the freezer until you are ready to dip them. This keeps everything at the optimal temperature.
- Parchment Paper is Your Best Friend: I mentioned it in the instructions, but it bears repeating. Do not try to place a wet, chocolate-covered banana directly onto a bare metal or glass pan. It will freeze solid to the surface, and you will break your ghost trying to pry it off. Parchment paper or a silicone mat is non-negotiable for a frustration-free experience.
- Don’t Overheat Your Chocolate: The biggest pitfall with white chocolate is “seizing.” If it gets too hot or a single drop of water gets into it, it will turn into a thick, grainy, unusable paste. Melt it low and slow, stir frequently, and pull it from the heat source before it’s fully melted, letting the residual heat do the last bit of work.
- Use a Tall, Narrow Glass for Dipping: Trying to dip a long banana pop into a wide, shallow bowl is a recipe for a mess and uneven coverage. By melting your chocolate in a tall, narrow drinking glass or a glass measuring cup, you create a deep dipping well. This allows you to submerge most of the banana in one go for a smooth, professional-looking coat.
- Let Them Freeze Completely Solid: Be patient with the final freeze. If the chocolate shell isn’t completely hardened, it will be soft and smudge easily when handled. A fully frozen pop is also a more refreshing and satisfying treat to eat, with a great contrast between the crisp chocolate shell and the creamy, frozen banana inside.
Frequently Asked Questions (FAQ)
1. Can I make Ghostly Banana Pops ahead of time?
Absolutely! This is one of the best things about this recipe for party planning. You can make them up to a week in advance. Prepare them completely, let them freeze solid, and then transfer them to a single layer in a freezer-safe, airtight container. Placing a small sheet of parchment paper between layers can help prevent any sticking or breakage.
2. My white chocolate got thick and clumpy! What did I do wrong and can I fix it?
This is called “seizing.” It happens when white chocolate is overheated or comes into contact with even a tiny amount of water. Unfortunately, once it has fully seized, it’s very difficult to salvage for dipping. The best cure is prevention: melt it slowly and in short bursts. If it’s just a little too thick, you can try stirring in a tiny bit more coconut oil or vegetable shortening (not butter or water!) to see if you can smooth it out.
3. Are these banana pops gluten-free?
Yes, as long as you use ingredients that are certified gluten-free, this recipe is naturally gluten-free. Bananas, pure chocolate, and coconut oil do not contain gluten. Always double-check the labels on your chocolate and any sprinkles or decorations if you are serving someone with a severe allergy or celiac disease.
4. What are some good alternatives to white chocolate?
If you’re not a fan of white chocolate, you have plenty of options! You can create “shadow” ghosts using semi-sweet or dark chocolate. Milk chocolate also works well for a sweeter, brown-colored pop. For a completely different take, you could make “monster” pops using candy melts, which come in every color of the rainbow.
5. How do I stop the bananas from turning brown?
The freezing process helps significantly with this. Because you peel, cut, and freeze the bananas right away, they don’t have much time to oxidize and turn brown. Once they are coated in the airtight chocolate shell, they are protected from the air. You shouldn’t have any issues with browning as long as you follow the steps and freeze them promptly.

Ghostly Banana Pops Recipe
Ingredients
- Bananas: 4 large, firm bananas
- White Chocolate: 12 ounces (about 2 cups) of good quality white chocolate melting wafers or chopped white chocolate
- Coconut Oil: 1 tablespoon (optional, but highly recommended)
- Mini Chocolate Chips: 24-30 mini semi-sweet chocolate chips
- Popsicle Sticks: 8 wide popsicle sticks or lollipop sticks
Instructions
Step 1: Prepare the Bananas and the Pan
- First, prepare your landing zone. Line a large baking sheet or tray with parchment paper or a silicone baking mat. This is crucial—it will prevent your ghosts from sticking to the pan after dipping. Make sure the baking sheet will fit flat in your freezer!
- Peel your 4 bananas. Cut each banana in half crosswise.
- Gently but firmly, insert a popsicle stick into the cut end of each banana half, pushing it about halfway through. Be careful not to push it all the way through the other side. You now have 8 banana “pops.”
- Arrange the banana pops in a single layer on the prepared baking sheet, ensuring they aren’t touching.
Step 2: The First Freeze (The Most Important Step!)
- Place the baking sheet with the banana pops into the freezer. Freeze them for at least 1-2 hours, or until they are completely firm to the touch.
- Why this step is critical: Do not skip this! Freezing the bananas solid is the secret to success. A frozen banana provides a cold, hard surface for the warm chocolate to cling to. When the warm chocolate hits the frozen banana, it begins to set almost instantly. This prevents the banana from getting mushy and falling off the stick during the dipping process.
Step 3: Melt the White Chocolate
- When your bananas are almost done freezing, it’s time to melt the chocolate. You can use a microwave or a double boiler.
- Microwave Method: Place the white chocolate melting wafers (and the coconut oil, if using) in a microwave-safe bowl or, even better, a tall, narrow glass or measuring cup. A taller container makes dipping the long bananas much easier. Microwave in 30-second intervals, stirring well after each interval. Be very careful not to overheat the white chocolate, as it can seize up and become a clumpy, unusable mess. Stop heating when there are still a few small lumps left, and just continue to stir until they melt from the residual heat.
- Double Boiler Method: If you don’t have a microwave or prefer this method, fill a small saucepan with about an inch of water and bring it to a gentle simmer. Place a heatproof bowl on top of the saucepan, ensuring the bottom of the bowl does not touch the water. Add the white chocolate and coconut oil to the bowl and stir continuously until it’s smooth and completely melted.
Step 4: The Ghostly Dip and Decoration
- This is the fun part, and you need to work relatively quickly! Take the bananas out of the freezer.
- Hold one banana pop by the stick and dip it into the melted white chocolate, tilting the glass and turning the banana to coat it completely.
- Lift the banana pop out of the chocolate and let any excess drip off. You can gently scrape one side on the lip of the glass. The slight “drips” at the bottom actually create a perfect, ghostly, tapered shape!
- Immediately lay the chocolate-coated banana back on the parchment-lined baking sheet.
- While the chocolate is still wet, quickly and gently press two mini chocolate chips in place for the eyes. You can also add a third chip below the eyes to create a spooky, open-mouthed “O” shape, like a classic ghost saying “Booo!”
- Repeat this process with the remaining banana pops.
Step 5: The Final Freeze
- Once all your ghosts have been created, place the baking sheet back into the freezer.
- Freeze for at least another 30-60 minutes, or until the chocolate shell is completely hard and set.
- Once fully frozen, they are ready to serve or can be transferred to an airtight container for storage in the freezer.
Nutrition
- Serving Size: One Normal Portion
- Calories: 220-250