

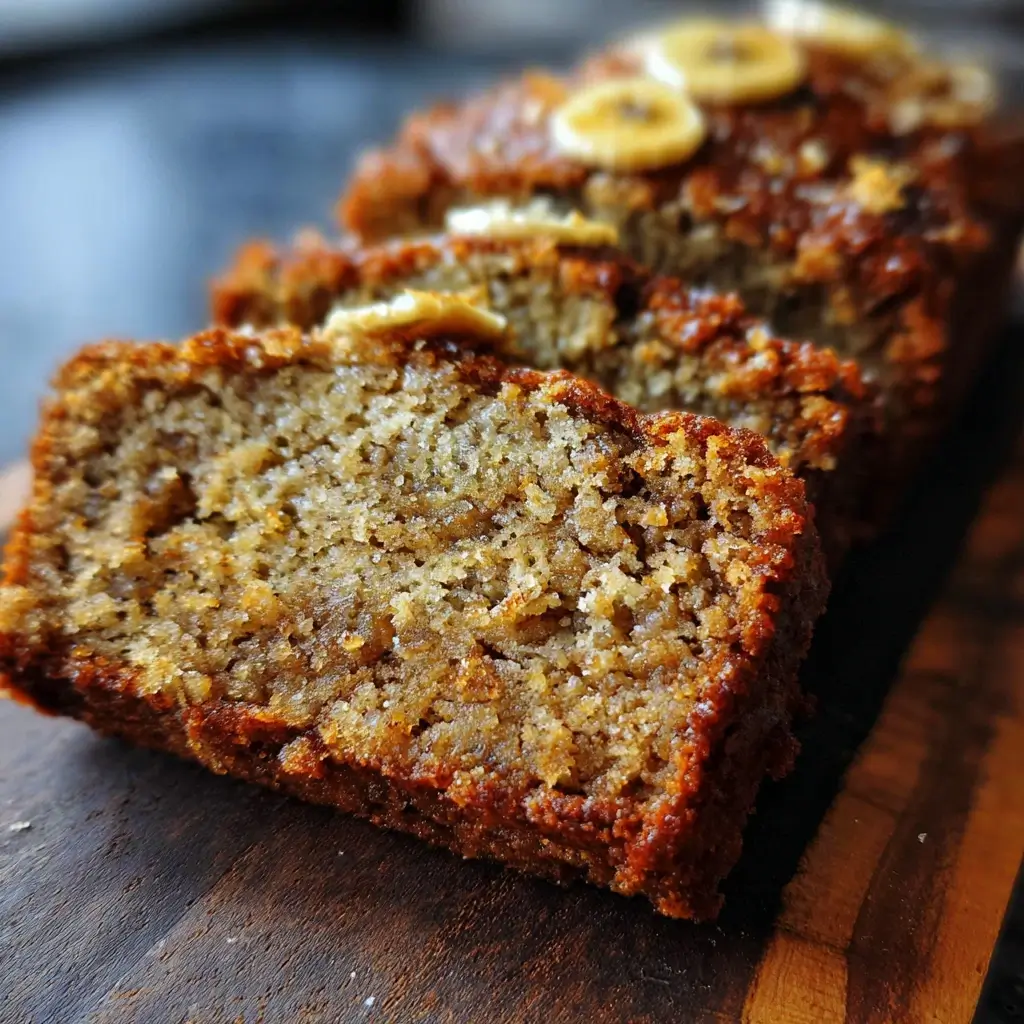

For years, the quest for the perfect vegan gluten-free banana bread was a running joke in our house. We’d try recipes that promised the world but delivered loaves that were either disappointingly dry, frustratingly gummy, or so dense they could be used as a doorstop. My family, ever the supportive taste-testers, would offer polite smiles and a hesitant, “It’s… interesting!” But everything changed with this recipe. This isn’t just “good for gluten-free” bread; this is genuinely, unbelievably delicious banana bread, period. The first time I pulled this loaf from the oven, the entire house filled with that intoxicating, sweet-and-spicy aroma of caramelized bananas and warm cinnamon. The first slice was a revelation—impossibly moist, tender, with a perfect crumb and a rich, deep banana flavor that wasn’t overly sweet. My partner, a notorious banana bread connoisseur, took one bite and his eyes widened. “Okay,” he said, reaching for a second slice, “you’ve cracked the code.” Now, this recipe is our go-to for lazy Sunday mornings, a wholesome afternoon snack, and the perfect homemade gift. It’s the recipe that silenced the critics and made our home the official headquarters for banana bread that everyone, regardless of dietary needs, can’t get enough of.
The Ultimate Easy Vegan Gluten-Free Banana Bread Recipe
This recipe has been meticulously tested to ensure a perfect balance of moisture, flavor, and texture. It relies on a simple blend of wholesome ingredients to create a loaf that is both nourishing and indulgent.
Ingredients You’ll Need
Wet Ingredients:
- 3 large, very ripe bananas (about 1 ½ cups mashed)
- 1/3 cup (80ml) melted and cooled coconut oil (or another neutral oil like light olive oil or avocado oil)
- 1/2 cup (120ml) pure maple syrup (or agave nectar)
- 2 “flax eggs” (2 tablespoons ground flaxseed meal + 5 tablespoons water)
- 1 teaspoon pure vanilla extract
Dry Ingredients:
- 1 ½ cups (180g) certified gluten-free all-purpose flour blend (one that contains xanthan gum is recommended)
- 1/2 cup (60g) almond flour (for moisture and texture)
- 1 teaspoon baking soda
- 1/2 teaspoon baking powder
- 1 teaspoon ground cinnamon
- 1/2 teaspoon ground nutmeg
- 1/2 teaspoon fine sea salt
Optional Mix-ins:
- 1/2 cup (90g) vegan chocolate chips
- 1/2 cup (60g) chopped walnuts or pecans
Step-by-Step Instructions for Perfect Banana Bread
Following these steps precisely is the key to achieving a moist, well-risen loaf. The secret lies in not over-mixing the batter, which is especially important in gluten-free baking.
- Preheat and Prepare: First, preheat your oven to 350°F (175°C). Grease a standard 9×5 inch loaf pan thoroughly with coconut oil or line it with parchment paper, leaving some overhang on the sides to act as handles. This will make it much easier to lift the bread out later.
- Make the Flax Eggs: In a small bowl, whisk together the 2 tablespoons of ground flaxseed meal and 5 tablespoons of water. Set it aside for 5-10 minutes to thicken. It should develop a gel-like, egg-like consistency. This is your crucial binder.
- Mash the Bananas: In a large mixing bowl, add your peeled, overripe bananas. Using a fork or a potato masher, mash them well. It’s okay to leave a few small lumps; these will create lovely little pockets of moist banana flavor in the finished loaf.
- Combine Wet Ingredients: To the bowl with the mashed bananas, add the melted and cooled coconut oil, pure maple syrup, the prepared flax eggs, and the vanilla extract. Whisk everything together until it’s well combined and the mixture is smooth.
- Whisk Dry Ingredients: In a separate medium-sized bowl, add all your dry ingredients: the gluten-free flour blend, almond flour, baking soda, baking powder, ground cinnamon, nutmeg, and salt. Use a whisk to combine them thoroughly. This step is more important than it seems—it ensures the leavening agents and spices are evenly distributed, preventing any salty or bitter bites and helping the bread rise evenly.
- Combine Wet and Dry: Pour the dry ingredients into the large bowl with the wet ingredients. Using a spatula or wooden spoon, gently fold the mixture together until just combined. Be very careful not to overmix. A few streaks of flour are perfectly fine. Over-mixing can develop the gums in the flour blend too much, leading to a tough or gummy texture.
- Add Mix-ins (Optional): If you’re using chocolate chips or nuts, gently fold them into the batter now. Again, mix as little as possible to incorporate them.
- Pour and Bake: Scrape the batter into your prepared loaf pan and use your spatula to smooth the top. If desired, you can place a few extra chocolate chips or a sprinkle of chopped nuts on top for a beautiful finish.
- Bake the Loaf: Place the loaf pan in the center rack of your preheated oven. Bake for 50-60 minutes. Baking times can vary depending on your oven and the exact moisture content of your bananas. The bread is done when a toothpick or skewer inserted into the center comes out clean or with a few moist crumbs attached (but no wet batter). The top should be a deep golden brown and feel firm to the touch.
- Cool Completely: This is a critical step for gluten-free baking! Remove the loaf from the oven and let it cool in the pan on a wire rack for at least 20 minutes. Then, use the parchment paper handles to lift it out of the pan and place it directly on the wire rack to cool completely. Allowing it to cool fully (at least 1-2 hours) lets the internal structure set. Slicing into it while it’s still warm can cause it to be gummy and fall apart. Patience is key!
Nutrition Facts
- Servings: 12 slices
- Calories Per Serving: Approximately 210-240 kcal (This can vary based on the specific GF flour blend used and if mix-ins are added).
Disclaimer: This is an estimated nutritional value. Actual values may vary based on the specific brands and ingredients used.
Preparation and Cooking Time
- Preparation Time: 15 minutes
- Cooking Time: 50-60 minutes
- Cooling Time: 1-2 hours (essential)
- Total Time: Approximately 2 hours 25 minutes
Why You’ll Fall in Love with This Banana Bread
This isn’t just another recipe; it’s a solution for anyone who thought delicious, moist banana bread was out of reach on a vegan and gluten-free diet.
Unbelievably Moist and Tender
The biggest complaint about gluten-free baked goods is that they can be dry and crumbly. We combat this on multiple fronts. The overripe bananas provide a huge amount of natural moisture. The addition of almond flour brings healthy fats and a tender, soft crumb that mimics traditional recipes. Finally, the coconut oil adds a richness that keeps every slice decadent and satisfying.
Incredibly Easy to Make
This is a one-bowl (okay, technically two if you count the dry ingredients) recipe that doesn’t require any fancy equipment. No stand mixers or electric beaters are needed. Just a couple of bowls, a whisk, and a spatula. The steps are straightforward and forgiving, making it a perfect recipe for novice bakers and seasoned pros alike.
Wholesome and Nourishing Ingredients
You can feel good about every ingredient in this loaf. It’s free from dairy, eggs, and refined white flour. Instead, it’s packed with fruit (bananas), healthy fats (coconut oil, almond flour, flaxseed), and is naturally sweetened with maple syrup instead of refined sugar. It’s a treat that feels both indulgent and nourishing.
Perfectly Sweet, Naturally
The secret to the deep, authentic banana flavor is using bananas that are almost black. The riper the banana, the more its starches have converted to sugars, lending an intense, natural sweetness to the bread. This allows us to use less added sweetener. The pure maple syrup complements this perfectly, adding a subtle, complex caramel note that refined sugar just can’t match.
A Deep Dive into Our Key Ingredients
Understanding the role of each ingredient helps you understand why this recipe works so well and empowers you to make smart substitutions if needed.
The Star of the Show: Overripe Bananas
This is non-negotiable. For the best banana bread, you need bananas that are heavily speckled with brown and black spots. These bananas are not only sweeter, but they are also softer and much easier to mash into a smooth puree, which integrates better into the batter. They are the primary source of moisture and the backbone of the flavor profile.
The Gluten-Free Flour Blend
Choosing the right gluten-free flour is critical. Look for an “all-purpose” or “baking” blend that is designed as a 1-to-1 replacement for regular flour. Critically, check if it contains xanthan gum. Xanthan gum is a binder and emulsifier that mimics the structural properties of gluten, preventing your bread from being a crumbly mess. If your blend doesn’t have it, you’ll need to add about 1 teaspoon yourself.
The Magic Binder: The Flax Egg
In vegan baking, replacing eggs is the biggest challenge. Eggs provide structure, leavening, and binding. The “flax egg” is a brilliant and simple solution. When ground flaxseed is mixed with water, it creates a viscous, gelatinous mixture called mucilage. This mucilage traps air bubbles and binds the ingredients together, providing the structure this bread needs to hold its shape.
Natural Sweetness: Pure Maple Syrup
While other liquid sweeteners can work, pure maple syrup is the champion here. Its flavor is robust and pairs beautifully with banana and cinnamon. It also contributes to the moist texture of the final loaf. Always use pure maple syrup, not pancake syrup, which is just corn syrup with artificial flavoring.
Richness and Moisture: Coconut Oil
Fat is flavor, and it’s also essential for a tender texture. Melted coconut oil adds a wonderful richness. Using it in its melted (but not hot) form allows it to integrate seamlessly into the batter. If you’re not a fan of the coconut flavor, you can use refined coconut oil (which is neutral-tasting) or substitute it with another liquid fat like light olive oil, avocado oil, or even a melted vegan butter.
The Leavening Agents: Baking Soda & Baking Powder
We use both for a reason. Baking soda is an alkali that reacts with the acidic components in the batter (like the bananas and maple syrup) to create carbon dioxide, which helps the bread rise. Baking powder is a complete leavening agent containing both an acid and a base, providing an extra “lift” to ensure the dense, wet batter doesn’t turn out heavy.
How to Serve Your Vegan Gluten-Free Banana Bread
This banana bread is spectacular on its own, but it can also be a canvas for all sorts of delicious toppings and pairings.
- The Classic Slice: Enjoy a simple, thick slice, either at room temperature or gently warmed in a toaster or microwave.
- With a Schmear: Elevate a slice with a spread of:
- Vegan butter
- Creamy almond or peanut butter
- Vegan cream cheese
- A drizzle of honey or more maple syrup
- Apple butter or fruit jam
- As a Decadent Dessert: Turn it into a dessert masterpiece.
- Top a warm slice with a scoop of vegan vanilla ice cream and a drizzle of vegan caramel sauce.
- Toast a slice and top it with sliced fresh bananas and a sprinkle of cinnamon.
- Crumble it over a bowl of vegan yogurt with berries for a parfait-style treat.
- French Toast Style: Use thick, day-old slices to make the most incredible banana bread French toast. Simply dip in a vegan French toast batter (made with plant milk, cornstarch, and spices) and pan-fry until golden.
5 Essential Tips for Flawless Results
- Measure Your Flour Correctly: This is the most common baking mistake. Do not scoop the flour directly out of the bag with your measuring cup. This compacts the flour, and you’ll end up using too much, resulting in dry bread. Instead, use the “spoon and level” method: use a spoon to fluff up the flour in its container, then spoon it into your measuring cup until it’s overflowing. Use the back of a knife to level it off. For ultimate accuracy, use a kitchen scale.
- Do Not Overmix: I’m repeating this because it is the single most important rule for this recipe. Once you combine the wet and dry ingredients, you are activating the xanthan gum. Over-mixing will make the gum tough and the resulting bread dense and gummy. Fold until you no longer see large pockets of dry flour, and then stop.
- Trust the Toothpick Test: Ovens vary. The 50-60 minute baking time is a guideline. Start checking your bread at the 50-minute mark. If the top is browning too quickly but the center is still wet, you can loosely tent a piece of aluminum foil over the top of the pan for the last 10-15 minutes of baking.
- Embrace the Ugly Banana: Seriously, the uglier, the better. Bananas that are soft, fragrant, and covered in black spots are your best friend. If your bananas are still yellow, you can speed up the ripening process by placing them on a baking sheet in a 300°F (150°C) oven for 15-20 minutes, or until the peels turn black and shiny. Let them cool before mashing.
- Let It Cool Completely: I cannot stress this enough. Gluten-free baked goods are delicate when they first come out of the oven. The starches and gums need time to cool and set, which is what creates the final structure and crumb. Slicing into a warm loaf is a recipe for a crumbly, gummy disaster. Your patience will be rewarded with perfect slices.
Frequently Asked Questions (FAQ)
1. Can I use a different flour, like just oat flour or coconut flour?
While you can experiment, I don’t recommend substituting the entire flour blend with a single-ingredient flour. This recipe is balanced for a specific blend. Using only oat flour can make the bread very dense and gummy, while using only coconut flour would make it extremely dry, as it absorbs a huge amount of liquid. If you want to experiment, try replacing only a small portion (e.g., 1/4 cup) of the GF blend with oat flour for a different flavor.
2. My banana bread turned out gummy and dense. What went wrong?
This is the most common issue in gluten-free baking and usually stems from one of three things:
- Over-mixing: You mixed the batter too much after combining the wet and dry ingredients.
- Under-baking: The center didn’t have enough time to cook through. Always use the toothpick test.
- Slicing too soon: You sliced it while it was still warm, before the structure had time to fully set.
3. Can I substitute the maple syrup with something else?
Yes, you can substitute the maple syrup with an equal amount of agave nectar. You could also try coconut sugar or brown sugar, but you may need to add a couple of extra tablespoons of plant milk or water to the wet ingredients to compensate for the lost liquid. The flavor profile will change slightly.
4. Can I make this recipe into muffins?
Absolutely! This recipe works beautifully for muffins. Simply line a muffin tin with paper liners, fill each one about ¾ of the way full, and bake at 350°F (175°C) for 20-25 minutes, or until a toothpick inserted into the center comes out clean. This recipe should yield about 12 standard-sized muffins.
5. My bananas aren’t ripe enough. What can I do in a pinch?
If you need ripe bananas now, you can use the oven trick! Place your unpeeled yellow bananas on a baking sheet and bake them at 300°F (150°C) for about 15-20 minutes. The peels will turn black and the fruit inside will become soft and sweet. Just be sure to let them cool down completely before you mash and use them in the recipe.
Easy Vegan Gluten-Free Banana Bread Recipe
Ingredients
Wet Ingredients:
- 3 large, very ripe bananas (about 1 ½ cups mashed)
- 1/3 cup (80ml) melted and cooled coconut oil (or another neutral oil like light olive oil or avocado oil)
- 1/2 cup (120ml) pure maple syrup (or agave nectar)
- 2 “flax eggs” (2 tablespoons ground flaxseed meal + 5 tablespoons water)
- 1 teaspoon pure vanilla extract
Dry Ingredients:
- 1 ½ cups (180g) certified gluten-free all-purpose flour blend (one that contains xanthan gum is recommended)
- 1/2 cup (60g) almond flour (for moisture and texture)
- 1 teaspoon baking soda
- 1/2 teaspoon baking powder
- 1 teaspoon ground cinnamon
- 1/2 teaspoon ground nutmeg
- 1/2 teaspoon fine sea salt
Optional Mix-ins:
- 1/2 cup (90g) vegan chocolate chips
- 1/2 cup (60g) chopped walnuts or pecans
Instructions
- Preheat and Prepare: First, preheat your oven to 350°F (175°C). Grease a standard 9×5 inch loaf pan thoroughly with coconut oil or line it with parchment paper, leaving some overhang on the sides to act as handles. This will make it much easier to lift the bread out later.
- Make the Flax Eggs: In a small bowl, whisk together the 2 tablespoons of ground flaxseed meal and 5 tablespoons of water. Set it aside for 5-10 minutes to thicken. It should develop a gel-like, egg-like consistency. This is your crucial binder.
- Mash the Bananas: In a large mixing bowl, add your peeled, overripe bananas. Using a fork or a potato masher, mash them well. It’s okay to leave a few small lumps; these will create lovely little pockets of moist banana flavor in the finished loaf.
- Combine Wet Ingredients: To the bowl with the mashed bananas, add the melted and cooled coconut oil, pure maple syrup, the prepared flax eggs, and the vanilla extract. Whisk everything together until it’s well combined and the mixture is smooth.
- Whisk Dry Ingredients: In a separate medium-sized bowl, add all your dry ingredients: the gluten-free flour blend, almond flour, baking soda, baking powder, ground cinnamon, nutmeg, and salt. Use a whisk to combine them thoroughly. This step is more important than it seems—it ensures the leavening agents and spices are evenly distributed, preventing any salty or bitter bites and helping the bread rise evenly.
- Combine Wet and Dry: Pour the dry ingredients into the large bowl with the wet ingredients. Using a spatula or wooden spoon, gently fold the mixture together until just combined. Be very careful not to overmix. A few streaks of flour are perfectly fine. Over-mixing can develop the gums in the flour blend too much, leading to a tough or gummy texture.
- Add Mix-ins (Optional): If you’re using chocolate chips or nuts, gently fold them into the batter now. Again, mix as little as possible to incorporate them.
- Pour and Bake: Scrape the batter into your prepared loaf pan and use your spatula to smooth the top. If desired, you can place a few extra chocolate chips or a sprinkle of chopped nuts on top for a beautiful finish.
- Bake the Loaf: Place the loaf pan in the center rack of your preheated oven. Bake for 50-60 minutes. Baking times can vary depending on your oven and the exact moisture content of your bananas. The bread is done when a toothpick or skewer inserted into the center comes out clean or with a few moist crumbs attached (but no wet batter). The top should be a deep golden brown and feel firm to the touch.
- Cool Completely: This is a critical step for gluten-free baking! Remove the loaf from the oven and let it cool in the pan on a wire rack for at least 20 minutes. Then, use the parchment paper handles to lift it out of the pan and place it directly on the wire rack to cool completely. Allowing it to cool fully (at least 1-2 hours) lets the internal structure set. Slicing into it while it’s still warm can cause it to be gummy and fall apart. Patience is key!
Nutrition
- Serving Size: One Normal Portion
- Calories: 210-240 kcal


