


There are some recipes that just feel like a warm hug, and these Easy Jam Squares are firmly in that category for my family. I remember the first time I baked a batch; the aroma of buttery shortbread mingling with sweet, bubbling jam filled the entire house, drawing everyone to the kitchen before they were even out of the oven. My kids’ eyes lit up when they saw the golden, crumbly tops, and their delighted “Mmmm!” sounds after the first bite were all the validation I needed. Since then, these squares have become a staple. They’re my go-to for potlucks because they travel well and disappear fast, my comfort bake on a grey afternoon, and the perfect simple treat to whip up when unexpected guests drop by. What I adore most, beyond the ridiculously delicious taste – that perfect balance of rich, tender base, vibrant fruit filling, and satisfyingly crunchy crumble – is just how easy they are. Seriously, even on a busy weeknight, you can have these mixed and in the oven with minimal fuss. They taste like they took hours, but our little secret is they’re wonderfully straightforward, delivering maximum flavour payoff for minimal effort. They’re forgiving, endlessly adaptable with different jams, and consistently produce rave reviews. Honestly, baking these feels less like a chore and more like creating a little square of edible happiness.
The Ultimate Easy Jam Squares Recipe
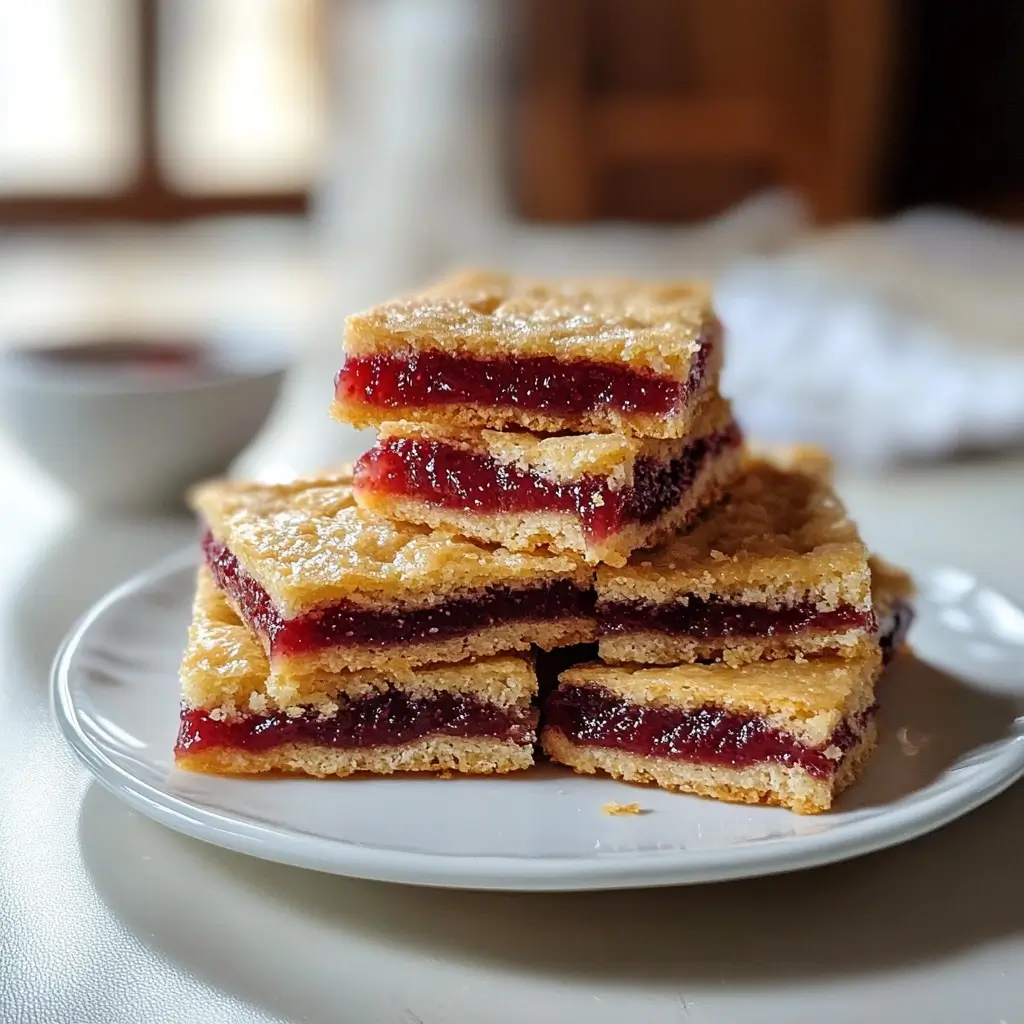
This recipe focuses on simplicity and classic flavour, yielding perfectly tender, buttery squares with a generous layer of your favourite jam and a delightful crumble topping. It uses standard pantry ingredients and comes together quickly.
Ingredients You’ll Need
Getting the best results starts with the right ingredients. Here’s what you’ll need for a standard 9×13 inch (23×33 cm) baking pan:
- Unsalted Butter: 1 cup (2 sticks or 226g), cold and cut into small cubes. Using cold butter is key for achieving that desirable shortbread-like, crumbly texture in both the base and the topping. If you only have salted butter, you can use it, but omit the added salt later in the recipe.
- Granulated Sugar: 1 cup (200g). This provides the perfect sweetness to complement the tartness of the jam and the richness of the butter. You can slightly reduce this (e.g., to 3/4 cup) if using a very sweet jam or if you prefer a less sweet dessert, but 1 cup yields a classic flavour profile.
- All-Purpose Flour: 3 cups (360g). Standard all-purpose flour provides the structure for the squares. Ensure you measure it correctly – spoon the flour into your measuring cup and level it off with a straight edge, rather than scooping directly from the bag, which can compact the flour and lead to a denser result.
- Salt: 1/2 teaspoon (3g). Salt is crucial in baking, even in sweet recipes. It balances the sweetness and enhances the overall flavour profile, making the butter and jam notes pop.
- Vanilla Extract: 1 teaspoon (5ml). Use pure vanilla extract for the best flavour. It adds warmth and depth, complementing both the buttery base and the fruity jam.
- Your Favourite Jam: 1 ½ cups (approx. 480g or a standard 16-oz jar). The star of the show! Choose a good quality jam. Raspberry, strawberry, apricot, and blackberry are classic choices, but feel free to experiment. A slightly thicker jam generally works best to prevent it from becoming too runny during baking. Seedless or seeded is purely personal preference. You might need slightly more or less depending on the consistency of your jam and how thick you like the jam layer.
- Optional: Large Egg Yolk: 1 (approx. 18g). While not strictly necessary for a basic shortbread crust, adding an egg yolk can enrich the dough slightly, add a touch of tenderness, and help bind it together, particularly if your butter/flour mixture seems overly dry.
Step-by-Step Instructions
Follow these simple steps for foolproof Jam Squares every time:
- Preheat and Prepare: Preheat your oven to 375°F (190°C). Grease a 9×13 inch (23×33 cm) baking pan thoroughly with butter or cooking spray. For easier removal and cleanup, line the pan with parchment paper, leaving an overhang on two opposite sides to act as “handles.” Grease the parchment paper as well. This extra step is well worth it when it comes time to lift the cooled squares out for cutting.
- Combine Dry Ingredients: In a large mixing bowl, whisk together the 3 cups (360g) of all-purpose flour and the 1/2 teaspoon (3g) of salt. Whisking helps to evenly distribute the salt and aerate the flour slightly.
- Cut in the Butter: Add the 1 cup (226g) of cold, cubed unsalted butter to the flour mixture. Using a pastry blender, two knives, or your fingertips, cut the butter into the flour until the mixture resembles coarse crumbs or small peas. Work relatively quickly to keep the butter cold. If using your fingertips, rub the butter into the flour between your thumbs and fingers. Some larger pea-sized butter pieces remaining are perfectly fine – they contribute to the tender texture. Alternatively, you can use a food processor: Pulse the flour, salt, and cold butter cubes together until the mixture looks like coarse meal. Be careful not to over-process; you want distinct crumbs, not a paste.
- Add Sugar and Vanilla (and Egg Yolk, if using): Stir the 1 cup (200g) of granulated sugar and the 1 teaspoon (5ml) of vanilla extract into the butter-flour mixture. If you’re using the optional egg yolk for added richness, lightly whisk it in a small bowl first, then add it to the mixture. Mix gently with a fork or your hands just until the ingredients are combined and the mixture remains crumbly. Do not overmix. Overmixing develops the gluten in the flour, which can make your squares tough instead of tender and crumbly. The mixture should look like slightly damp, sandy crumbs.
- Reserve the Topping: Measure out approximately 1 ½ cups of the crumb mixture and set it aside in a separate bowl. This will be your delicious crumble topping.
- Press the Base: Take the remaining larger portion of the crumb mixture (everything not reserved for the topping) and press it evenly into the bottom of your prepared 9×13 inch baking pan. Use the bottom of a measuring cup or your clean hands to compact it firmly and create a smooth, even base layer. Ensure it goes right to the edges. A solid base prevents the jam from leaking through excessively.
- Spread the Jam: Carefully spoon the 1 ½ cups (approx. 480g) of your chosen jam over the pressed base. Using an offset spatula or the back of a spoon, spread the jam evenly, leaving a small border (about ¼ to ½ inch or 0.5-1 cm) around the edges. This helps prevent the jam from bubbling over the sides and burning onto the pan during baking. If your jam is very thick, you might warm it slightly (just a few seconds in the microwave) to make it easier to spread, but don’t make it hot or runny.
- Add the Crumble Topping: Sprinkle the reserved 1 ½ cups of crumb mixture evenly over the jam layer. Gently distribute it so the entire surface is covered with crumbles. Don’t press the topping down; just let it sit loosely on top of the jam.
- Bake to Golden Perfection: Place the pan in the preheated oven at 375°F (190°C). Bake for 30 to 40 minutes, or until the crumble topping is lightly golden brown and the edges are slightly browned and set. The jam may be bubbling gently around the edges – this is normal. Ovens vary, so start checking around the 30-minute mark. The visual cue is key: look for that appealing golden colour across the topping.
- Cool Completely (Crucial!): Remove the pan from the oven and place it on a wire rack. Now comes the most important step for clean cutting: allow the jam squares to cool completely in the pan before cutting. This usually takes at least 2-3 hours at room temperature, sometimes longer. Attempting to cut them while warm will result in a crumbly mess, as the base, jam, and topping need time to fully set. Patience here is rewarded with beautifully neat squares.
- Cut and Serve: Once completely cool, use the parchment paper overhangs (if you used them) to carefully lift the entire slab out of the pan onto a cutting board. Using a large, sharp knife, cut into squares or bars. A typical 9×13 inch pan yields 20-24 squares, depending on your desired size. Wipe the knife clean between cuts, especially if jam sticks, for the neatest edges. Now, they are ready to be enjoyed!
Nutrition Facts (Estimated)
Please note that these values are estimates and can vary based on the specific ingredients used (especially the type of jam and its sugar content) and the final serving size.
- Servings: Approximately 24 squares (when cut from a 9×13 inch pan)
- Calories per serving (1 square): Roughly 180-220 kcal
This estimate assumes standard granulated sugar, all-purpose flour, unsalted butter, and a typical fruit jam. Using lower-sugar jam or butter substitutes will alter the nutritional profile. These squares are a delightful treat, best enjoyed as part of a balanced diet.
Preparation and Baking Time
Understanding the time commitment helps plan your baking session:
- Preparation Time: 15-20 minutes (Mixing the dough, pressing the base, adding jam and topping)
- Baking Time: 30-40 minutes
- Cooling Time: 2-3 hours (Essential for proper setting and cutting)
- Total Time (Excluding Cooling): Approximately 50-60 minutes
- Total Time (Including Minimum Cooling): Approximately 3 – 4 hours
While the hands-on time is relatively short, factor in the crucial cooling period before you plan to serve them.
How to Serve Your Delicious Jam Squares
These Easy Jam Squares are wonderfully versatile. Here are some delightful ways to serve them:
- Simply As Is: Let the classic flavours shine! They are perfect at room temperature just as they are, perhaps alongside a cup of tea or coffee for a lovely afternoon break or simple dessert.
- With a Dusting of Powdered Sugar: Once cooled and cut, a light dusting of confectioners’ sugar adds an elegant touch and a hint of extra sweetness. Use a fine-mesh sieve for an even coating.
- Warm with Ice Cream: Gently warm individual squares (a few seconds in the microwave does the trick) and serve with a scoop of vanilla bean ice cream. The contrast between the warm, buttery square, gooey jam, and cold, creamy ice cream is heavenly.
- Alongside Custard: Serve slightly warmed squares with a drizzle of warm vanilla custard (crème anglaise) for a comforting and classic British-style dessert.
- With Whipped Cream or Yogurt: A dollop of freshly whipped cream (lightly sweetened or unsweetened) or a spoonful of thick Greek yogurt can provide a creamy counterpoint to the sweet jam and rich base. A sprinkle of fresh berries on the side adds freshness.
- As Part of a Dessert Platter: Cut the squares into smaller, bite-sized pieces (mini-bars) and include them on a dessert platter with other treats like cookies, brownies, and fresh fruit for parties or gatherings.
- Pack for Picnics and Lunchboxes: Once cooled and cut, these squares hold their shape well, making them ideal for packing into lunchboxes or taking along on picnics. They are less messy than frosted cakes or cupcakes.
Additional Tips for Perfect Jam Squares Every Time
Elevate your Jam Squares from great to absolutely perfect with these extra tips:
- Chill Your Dough (Optional Boost): While the recipe works beautifully without this step, for an even more tender and less crumbly base, you can chill the pressed base in the pan for about 15-20 minutes in the refrigerator before adding the jam and topping. Chilling the reserved topping crumbles briefly can also help them hold their shape better during baking, resulting in a crunchier topping. This is especially helpful on warm days.
- Jam Selection Matters: Opt for a good quality, thick jam or fruit preserves. Runnier jellies or jams with very high water content can make the base soggy and seep out too much. If your favourite jam seems a bit thin, you can gently simmer it on the stovetop for a few minutes to thicken it slightly (let it cool before using), or stir in a teaspoon of cornstarch before heating it briefly. Consider flavours that offer a nice sweet-tart balance, like raspberry, apricot, blackcurrant, or cherry.
- Don’t Overbake: Keep a close eye on the squares towards the end of the baking time. You want the topping golden brown, not dark brown. Overbaking can lead to a dry, hard base and topping. The edges should look set and lightly browned. Remember they will continue to firm up as they cool.
- Embrace Variations: Don’t be afraid to customize! Add ½ cup of rolled oats or chopped nuts (like walnuts or pecans) to the reserved crumble mixture for extra texture and flavour. A pinch of spice, like cinnamon or cardamom, can be whisked into the dry ingredients or added to the crumble. You could even add a little lemon or orange zest to the base dough for a citrusy note that pairs well with berry jams.
- Storage Smarts: Store completely cooled jam squares in an airtight container at room temperature for up to 3-4 days. If your kitchen is very warm or humid, or if you want them to last longer (up to a week), store them in the refrigerator. Let them come to room temperature for about 15-20 minutes before serving for the best texture, or gently warm them if preferred.
Frequently Asked Questions (FAQ)
Here are answers to some common questions about making Easy Jam Squares:
- Q: Can I use a different size pan?
- A: Yes, but you’ll need to adjust the baking time. An 8×8 inch or 9×9 inch square pan will result in thicker squares and will likely require a longer baking time (start checking around 40-45 minutes). A larger pan, like a half-sheet pan, would yield much thinner squares needing less baking time. The 9×13 inch pan offers a good balance of thickness and quantity. Ensure you adjust the amount of base pressed down and topping reserved proportionally if changing thickness significantly.
- Q: Can I make these Jam Squares gluten-free?
- A: Yes, you can substitute the all-purpose flour with a good quality measure-for-measure gluten-free flour blend (one that contains xanthan gum). The texture might be slightly different – potentially a bit sandier or more delicate – but still delicious. Keep all other ingredients and steps the same. Ensure your vanilla extract and jam are also certified gluten-free if necessary.
- Q: My jam leaked out significantly / the base seems soggy. What went wrong?
- A: This could be due to a few factors. Your jam might have been too thin or runny; try using a thicker preserve next time or thickening your jam slightly (see Tips section). Ensure you leave that small border around the edge when spreading the jam. Also, make sure you pressed the base down firmly and evenly to create a good seal. Finally, ensure the squares were fully baked – an underbaked base can be softer and more prone to sogginess.
- Q: Can I freeze Jam Squares?
- A: Absolutely! Jam Squares freeze beautifully. Allow them to cool completely first. You can freeze the entire slab (before cutting) or individual squares. Wrap them tightly in plastic wrap, then again in aluminum foil, or place the wrapped squares in an airtight freezer container or bag. They can be frozen for up to 3 months. Thaw them at room temperature before serving. You can thaw the whole slab and then cut, or thaw individual squares as needed.
- Q: Why did my squares crumble completely when I tried to cut them?
- A: The most common reason is not allowing them to cool completely before cutting. The melted butter and sugars need time to solidify and set the structure. Cutting them warm, even slightly warm, will almost always lead to crumbling. Ensure they are fully cooled, ideally for several hours. Other less common reasons could include not pressing the base firmly enough, or perhaps slightly altering ingredient ratios (e.g., too much butter or not enough flour). Patience during the cooling stage is key!
These Easy Jam Squares truly live up to their name while delivering a taste that feels special occasion-worthy. They are a testament to the magic of simple ingredients combined well. Give them a try, and they might just become a beloved staple in your home too! Happy baking!
Print
Easy Jam Squares Recipe
Ingredients
- Unsalted Butter: 1 cup (2 sticks or 226g), cold and cut into small cubes. Using cold butter is key for achieving that desirable shortbread-like, crumbly texture in both the base and the topping. If you only have salted butter, you can use it, but omit the added salt later in the recipe.
- Granulated Sugar: 1 cup (200g). This provides the perfect sweetness to complement the tartness of the jam and the richness of the butter. You can slightly reduce this (e.g., to 3/4 cup) if using a very sweet jam or if you prefer a less sweet dessert, but 1 cup yields a classic flavour profile.
- All-Purpose Flour: 3 cups (360g). Standard all-purpose flour provides the structure for the squares. Ensure you measure it correctly – spoon the flour into your measuring cup and level it off with a straight edge, rather than scooping directly from the bag, which can compact the flour and lead to a denser result.
- Salt: 1/2 teaspoon (3g). Salt is crucial in baking, even in sweet recipes. It balances the sweetness and enhances the overall flavour profile, making the butter and jam notes pop.
- Vanilla Extract: 1 teaspoon (5ml). Use pure vanilla extract for the best flavour. It adds warmth and depth, complementing both the buttery base and the fruity jam.
- Your Favourite Jam: 1 ½ cups (approx. 480g or a standard 16-oz jar). The star of the show! Choose a good quality jam. Raspberry, strawberry, apricot, and blackberry are classic choices, but feel free to experiment. A slightly thicker jam generally works best to prevent it from becoming too runny during baking. Seedless or seeded is purely personal preference. You might need slightly more or less depending on the consistency of your jam and how thick you like the jam layer.
- Optional: Large Egg Yolk: 1 (approx. 18g). While not strictly necessary for a basic shortbread crust, adding an egg yolk can enrich the dough slightly, add a touch of tenderness, and help bind it together, particularly if your butter/flour mixture seems overly dry.
Instructions
- Preheat and Prepare: Preheat your oven to 375°F (190°C). Grease a 9×13 inch (23×33 cm) baking pan thoroughly with butter or cooking spray. For easier removal and cleanup, line the pan with parchment paper, leaving an overhang on two opposite sides to act as “handles.” Grease the parchment paper as well. This extra step is well worth it when it comes time to lift the cooled squares out for cutting.
- Combine Dry Ingredients: In a large mixing bowl, whisk together the 3 cups (360g) of all-purpose flour and the 1/2 teaspoon (3g) of salt. Whisking helps to evenly distribute the salt and aerate the flour slightly.
- Cut in the Butter: Add the 1 cup (226g) of cold, cubed unsalted butter to the flour mixture. Using a pastry blender, two knives, or your fingertips, cut the butter into the flour until the mixture resembles coarse crumbs or small peas. Work relatively quickly to keep the butter cold. If using your fingertips, rub the butter into the flour between your thumbs and fingers. Some larger pea-sized butter pieces remaining are perfectly fine – they contribute to the tender texture. Alternatively, you can use a food processor: Pulse the flour, salt, and cold butter cubes together until the mixture looks like coarse meal. Be careful not to over-process; you want distinct crumbs, not a paste.
- Add Sugar and Vanilla (and Egg Yolk, if using): Stir the 1 cup (200g) of granulated sugar and the 1 teaspoon (5ml) of vanilla extract into the butter-flour mixture. If you’re using the optional egg yolk for added richness, lightly whisk it in a small bowl first, then add it to the mixture. Mix gently with a fork or your hands just until the ingredients are combined and the mixture remains crumbly. Do not overmix. Overmixing develops the gluten in the flour, which can make your squares tough instead of tender and crumbly. The mixture should look like slightly damp, sandy crumbs.
- Reserve the Topping: Measure out approximately 1 ½ cups of the crumb mixture and set it aside in a separate bowl. This will be your delicious crumble topping.
- Press the Base: Take the remaining larger portion of the crumb mixture (everything not reserved for the topping) and press it evenly into the bottom of your prepared 9×13 inch baking pan. Use the bottom of a measuring cup or your clean hands to compact it firmly and create a smooth, even base layer. Ensure it goes right to the edges. A solid base prevents the jam from leaking through excessively.
- Spread the Jam: Carefully spoon the 1 ½ cups (approx. 480g) of your chosen jam over the pressed base. Using an offset spatula or the back of a spoon, spread the jam evenly, leaving a small border (about ¼ to ½ inch or 0.5-1 cm) around the edges. This helps prevent the jam from bubbling over the sides and burning onto the pan during baking. If your jam is very thick, you might warm it slightly (just a few seconds in the microwave) to make it easier to spread, but don’t make it hot or runny.
- Add the Crumble Topping: Sprinkle the reserved 1 ½ cups of crumb mixture evenly over the jam layer. Gently distribute it so the entire surface is covered with crumbles. Don’t press the topping down; just let it sit loosely on top of the jam.
- Bake to Golden Perfection: Place the pan in the preheated oven at 375°F (190°C). Bake for 30 to 40 minutes, or until the crumble topping is lightly golden brown and the edges are slightly browned and set. The jam may be bubbling gently around the edges – this is normal. Ovens vary, so start checking around the 30-minute mark. The visual cue is key: look for that appealing golden colour across the topping.
- Cool Completely (Crucial!): Remove the pan from the oven and place it on a wire rack. Now comes the most important step for clean cutting: allow the jam squares to cool completely in the pan before cutting. This usually takes at least 2-3 hours at room temperature, sometimes longer. Attempting to cut them while warm will result in a crumbly mess, as the base, jam, and topping need time to fully set. Patience here is rewarded with beautifully neat squares.
- Cut and Serve: Once completely cool, use the parchment paper overhangs (if you used them) to carefully lift the entire slab out of the pan onto a cutting board. Using a large, sharp knife, cut into squares or bars. A typical 9×13 inch pan yields 20-24 squares, depending on your desired size. Wipe the knife clean between cuts, especially if jam sticks, for the neatest edges. Now, they are ready to be enjoyed!
Nutrition
- Serving Size: one normal portion
- Calories: 180-220


