


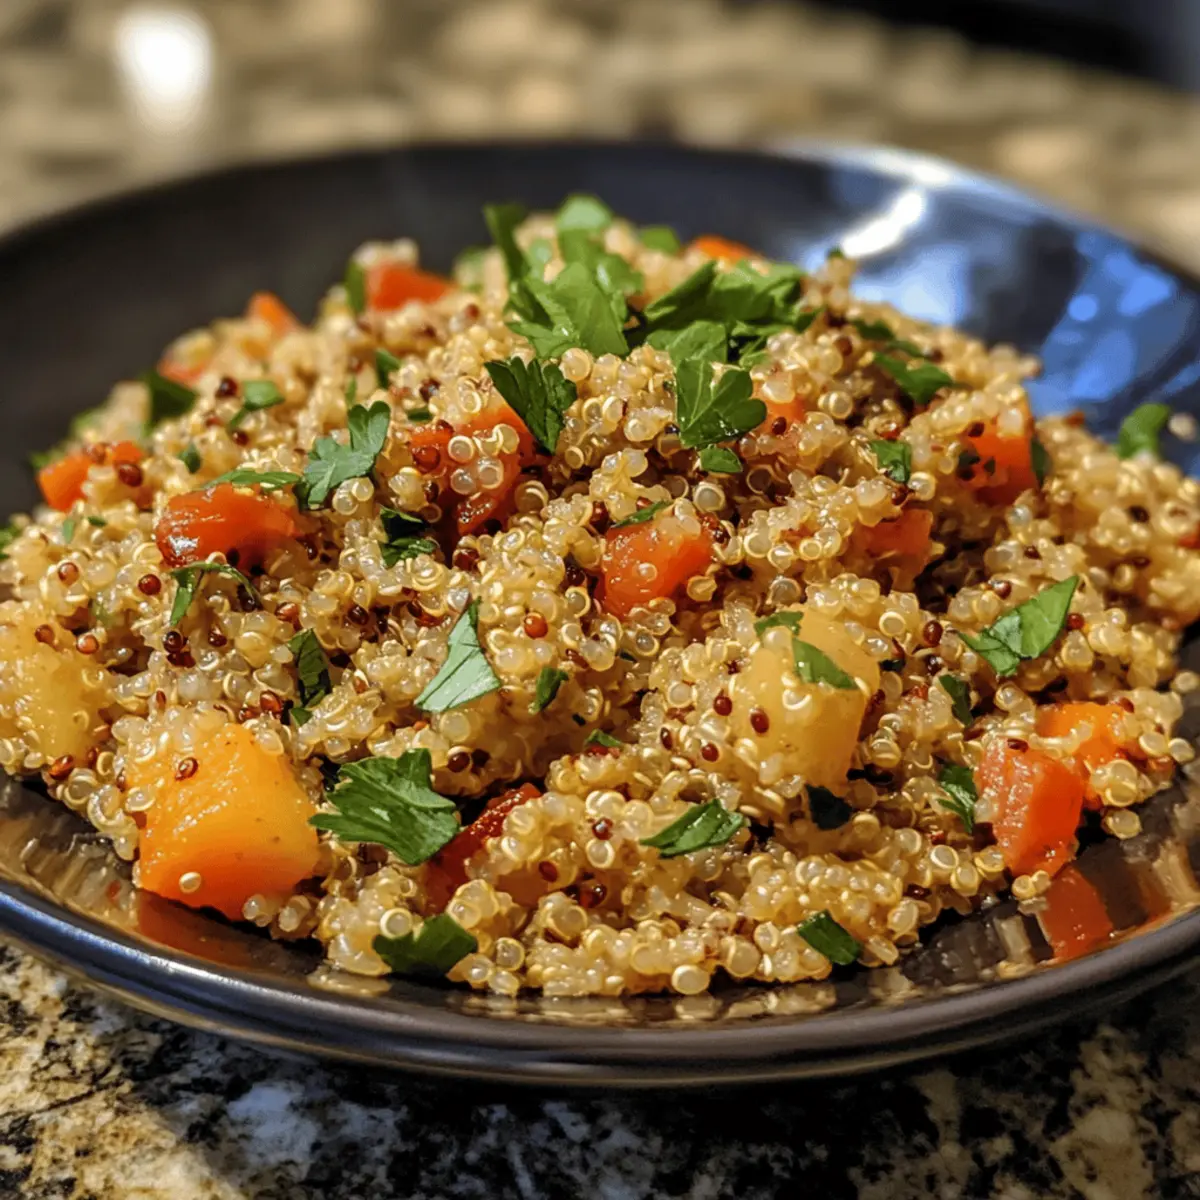
There’s something incredibly satisfying about a dish that’s both nourishing and effortless—and that’s exactly what this Instant Pot Quinoa Pilaf delivers. I discovered this recipe on a hectic weeknight when I needed something wholesome but fast, and the Instant Pot made it a breeze. Fluffy, fragrant quinoa cooked with a colorful medley of veggies and savory spices turns a simple grain into a meal that feels like a warm hug. Whether you’re tired of the usual fast food or looking to impress at your next dinner, this pilaf is a game-changer—ready in under 30 minutes and endlessly adaptable. Trust me, once you try it, this quick, comforting recipe will become your new kitchen staple.

Why choose Instant Pot Quinoa Pilaf?
Effortless Cooking: The Instant Pot simplifies meal prep, letting you enjoy a wholesome dish without fuss. Vibrant Flavors: Fresh veggies and fragrant spices infuse each bite with satisfying taste. Nutritious and Filling: Packed with protein and fiber, it’s perfect for a health-conscious lifestyle. Versatile Meal: Serve it as a side or a main—customize with your favorite add-ins. Time-Saving: Ready in under 30 minutes, ideal for busy weeknights or last-minute guests.
Instant Pot Quinoa Pilaf Ingredients
For the Quinoa Base
- Quinoa – Rinse thoroughly to remove bitterness and ensure fluffy texture.
- Vegetable broth – Use instead of water for deeper, savory flavor in your Instant Pot quinoa pilaf.
- Olive oil – Adds richness and helps sauté aromatics evenly.
For the Aromatics & Veggies
- Onion – Finely chopped for a subtle sweetness that enhances the pilaf’s flavor.
- Garlic cloves – Minced to infuse the dish with warm, inviting aroma.
- Carrot – Diced small to add natural sweetness and a pop of color.
- Bell pepper – Choose red or yellow for vibrant color and mild crunch.
- Peas – Frozen or fresh, stirred in last for a fresh burst of green and texture.
For Seasoning & Finishing Touches
- Ground cumin – Adds earthiness and a hint of warmth to the pilaf.
- Salt and black pepper – Adjust to taste for balanced seasoning.
- Fresh parsley or cilantro – Chopped and sprinkled on top for brightness and freshness.
- Lemon juice – A squeeze at the end elevates the flavors with a tangy lift.
How to Make Instant Pot Quinoa Pilaf
- Sauté Aromatics: Preheat the Instant Pot on Sauté, add olive oil, then cook onion and garlic until translucent and fragrant, about 2 minutes.
- Toast Quinoa: Stir in rinsed quinoa and ground cumin, toasting for 1 minute so grains absorb flavor and become nutty.
- Add Broth & Veggies: Pour in vegetable broth, then fold in diced carrot and bell pepper until submerged in liquid.
- Pressure Cook: Secure the lid, set to high pressure for 1 minute, then let it naturally release pressure for 10 minutes.
- Stir in Peas: Quick-release remaining steam, open lid, add peas and lemon juice, stirring gently until bright green and warmed through.
- Garnish and Serve: Fluff the pilaf with a fork, season to taste, and top with chopped parsley or cilantro for color and freshness.
Optional: Drizzle extra lemon juice for a zesty finish.
Exact quantities are listed in the recipe card below.

Expert Tips for Instant Pot Quinoa Pilaf
- Rinse Quinoa Well: Always rinse quinoa thoroughly to wash away its natural coating, which can taste bitter and affect the pilaf’s flavor and texture.
- Use Fresh Broth: Opt for a good-quality vegetable broth instead of water to boost the flavor depth in your Instant Pot quinoa pilaf.
- Sauté Aromatics Properly: Don’t rush the sauté step—allow onions and garlic to soften and release their aromas to create a rich base.
- Avoid Overcooking: Stick to the recommended 1-minute pressure cook time plus natural release to keep quinoa fluffy, not mushy.
- Add Peas Last: Stir peas in after cooking to keep their fresh color and slight crunch, enhancing the pilaf’s texture.
- Brighten with Lemon: Finish with lemon juice just before serving to lift and balance the savory flavors beautifully.
How to Store and Freeze Instant Pot Quinoa Pilaf
Fridge: Store leftover pilaf in an airtight container for up to 3 days. Allow it to cool to room temperature before sealing to maintain freshness.
Freezer: For longer storage, place cooled quinoa pilaf in freezer-safe bags or containers, where it will keep for up to 2 months. Label with the date for easy tracking.
Reheating: Thaw frozen pilaf in the fridge overnight, then reheat gently in the microwave or on the stovetop with a splash of vegetable broth to maintain moisture.
Room Temperature: If serving at a gathering, don’t leave quinoa pilaf out for more than 2 hours to ensure its quality and safety.
What to Serve with Instant Pot Quinoa Pilaf?
Elevate your dining experience with delightful pairings that complement the warm, savory notes of your quinoa pilaf.
-
Grilled Lemon Chicken: Juicy, tangy chicken perfectly contrasts the earthiness of quinoa, enhancing every bite with zesty flavors.
-
Roasted Vegetable Medley: A colorful assortment of seasonal veggies adds a sweet caramelization that balances the softness of the pilaf beautifully.
-
Creamy Avocado Salad: The cool creaminess of ripe avocado, topped with a light citrus vinaigrette, brings a fresh, vibrant element to your meal.
-
Stuffed Bell Peppers: Filled with spiced meat or beans, they bring heartiness that complements quinoa while delivering a punch of flavor.
-
Cucumber Yogurt Sauce: A refreshing sauce made with yogurt and cucumbers’ coolness cuts through the richness of the meal. Perfect for drizzling over everything!
-
Crusty Bread: Serve a warm loaf of crusty bread on the side to soak up every drop of flavor, adding a delightful texture that completes the meal.
-
Chardonnay or Sauvignon Blanc: A chilled glass of either of these wines lifts the flavors of the dish while keeping the meal classy and light.
-
Fruit Sorbet: For a light dessert, a scoop of fruit sorbet provides a refreshing end, cleansing the palate after a savory pilaf.
Variations & Substitutions for Instant Pot Quinoa Pilaf
Feel free to play and personalize this pilaf to suit your taste buds and dietary needs!
- Gluten-Free: Use certified gluten-free vegetable broth to ensure this dish remains completely gluten-free for everyone to enjoy.
- Protein Boost: Add cooked chickpeas or shredded rotisserie chicken for added heartiness—perfect for a meal that satisfies.
- Herb Infusion: Substitute fresh herbs like dill or thyme instead of parsley or cilantro for a different flavor profile, giving your pilaf a fresh twist.
- Nutty Delight: Stir in toasted pine nuts or slivered almonds at the end for a delightful crunch that contrasts beautifully with the fluffy quinoa.
- Spicy Kick: Add a pinch of red pepper flakes or chopped jalapeños during the sauté step for a warming heat that elevates the dish.
- Veggie Medley: Experiment with seasonal vegetables like zucchini or spinach—just fold them in during the pressure cooking stage for vibrant color and nutrients.
- Savory Variation: Swap olive oil for coconut oil for a creamy richness that subtly complements the quinoa and veggies.
- Cheesy Finish: Stir in parmesan or feta just before serving so it melts slightly, enriching each bite with a creamy, savory depth.
There’s no limit to the creativity you can bring to this dish! Explore these variations and make it your own.
Make Ahead Options
These Instant Pot Quinoa Pilaf preparations are perfect for busy weeknights! You can chop the veggies and sauté the aromatics up to 24 hours in advance, storing them in an airtight container in the refrigerator to maintain freshness. Additionally, rinse and toast the quinoa ahead of time and keep it stored separately, preventing it from becoming mushy. When you’re ready to enjoy this dish, simply add the prepped ingredients along with vegetable broth into the Instant Pot, and pressure cook as directed. This way, you’ll save precious time, and the pilaf will be just as delicious and nutritious as if made fresh!

Instant Pot Quinoa Pilaf Recipe FAQs
How do I select the best quinoa for this recipe?
Look for quinoa that’s dry and free of dark spots or moisture clumps. White or tri-color quinoa both work well, but make sure to rinse it thoroughly to remove the natural bitter coating called saponin, which can affect flavor and texture.
Can I store Instant Pot Quinoa Pilaf in the fridge and for how long?
Absolutely! Store leftovers in an airtight container once the pilaf has cooled to room temperature. It will stay fresh and tasty for up to 3 to 4 days in the refrigerator. Just reheat it gently with a splash of broth to keep it fluffy.
Is it possible to freeze this quinoa pilaf, and what’s the best method?
Yes, freezing works great and helps extend its shelf life up to 2 to 3 months. To freeze, let the pilaf cool completely, then transfer to freezer-safe bags or containers, removing as much air as possible to prevent freezer burn. When ready, thaw overnight in the fridge and reheat with a little vegetable broth to bring back moisture.
What if my quinoa turns out mushy or undercooked?
Mushy quinoa usually means it was overcooked or too much liquid was used. Make sure to follow the 1-minute high-pressure cooking time precisely and use the natural release to avoid sogginess. If it’s undercooked, add a splash of broth and sauté briefly in the Instant Pot to finish cooking without losing texture.
Is this recipe safe for pets or suitable for common allergies?
This pilaf is vegetarian and naturally gluten-free, which is great for many diets. However, avoid feeding it to pets as some ingredients—like onions and garlic—are toxic to dogs and cats. For allergy concerns, always check seasoning and broth labels for hidden allergens and consider swapping ingredients to suit your needs.
Easy Instant Pot Quinoa Pilaf That’s Packed with Flavor
Ingredients
Equipment
Method
- Preheat the Instant Pot on Sauté, add olive oil, then cook onion and garlic until translucent and fragrant, about 2 minutes.
- Stir in rinsed quinoa and ground cumin, toasting for 1 minute.
- Pour in vegetable broth, then fold in diced carrot and bell pepper until submerged in liquid.
- Secure the lid, set to high pressure for 1 minute, then let it naturally release pressure for 10 minutes.
- Quick-release remaining steam, open lid, add peas and lemon juice, stirring gently.
- Fluff the pilaf with a fork, season to taste, and top with chopped parsley or cilantro.


