The quest for the perfect gluten-free pizza crust can feel like searching for a culinary unicorn. For years, Friday pizza night in our house was a source of slight disappointment for me. While the family happily munched on their traditional wheat-based pizzas, I’d often be left with a store-bought gluten-free base that was either too crumbly, too dense, or tasted faintly of cardboard. I experimented with countless recipes, some complicated, some yielding okay-ish results, but nothing truly wowed me. That was until I stumbled upon and tweaked what has now become our gold-standard: this Easy Gluten-Free Pizza Crust. The first time I made it, the reaction was unanimous – even the gluten-eaters in my family were reaching for seconds! It achieves that delightful balance: a slightly crispy edge, a satisfyingly chewy interior, and a flavor that beautifully complements any topping without tasting distinctly “gluten-free.” It’s transformed our pizza nights from a compromise into a celebration, and I’m thrilled to share the magic with you. This isn’t just a recipe; it’s a ticket to delicious, inclusive pizza joy.
The Ultimate Easy Gluten-Free Pizza Crust Recipe
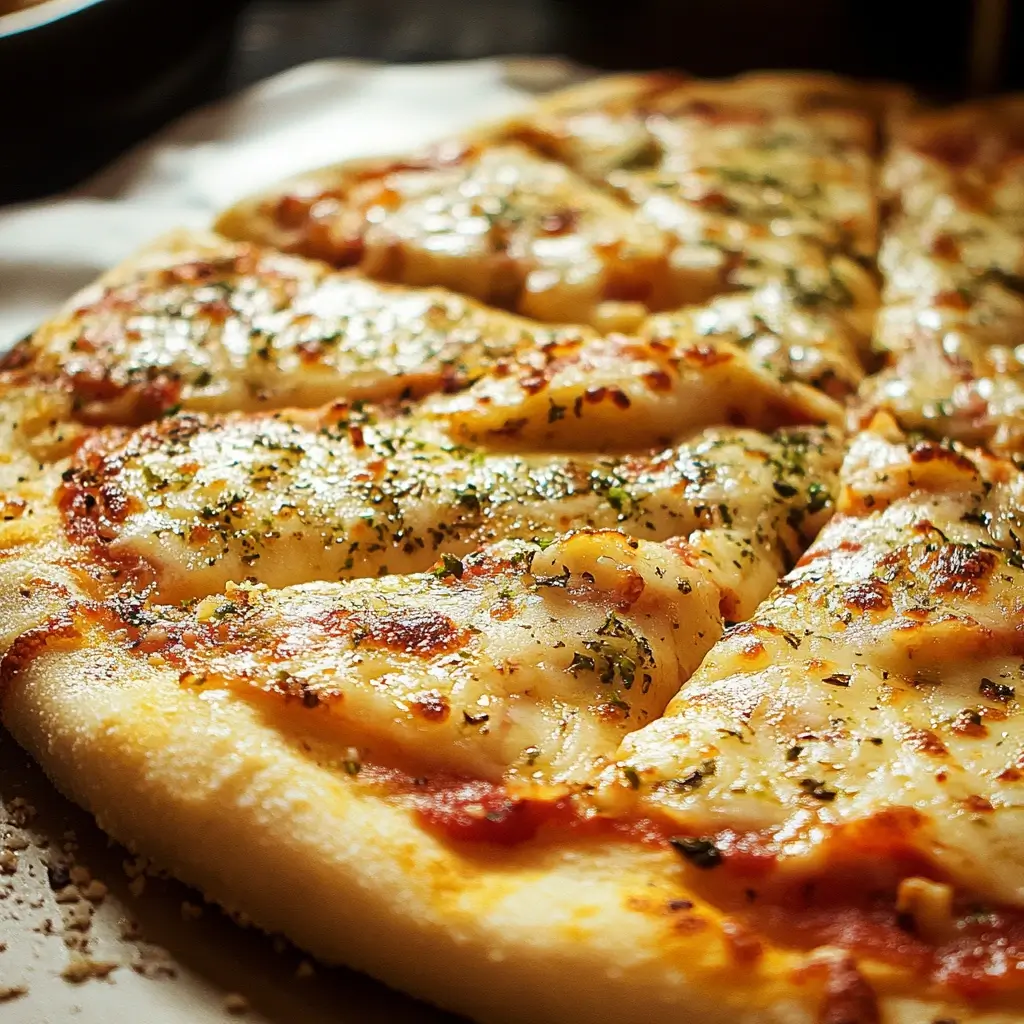
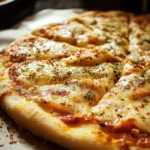
This recipe is designed for simplicity and deliciousness, creating a versatile crust that forms the perfect canvas for your favorite pizza creations. It yields a crust that is both wonderfully chewy and satisfyingly crisp at the edges.
Ingredients:
- 1 ½ cups (240g) high-quality all-purpose gluten-free flour blend (ensure it contains xanthan gum, or see tip below)
- 1 teaspoon xanthan gum (omit if your flour blend already contains it)
- 1 teaspoon instant yeast (or active dry yeast, see activation note below)
- 1 teaspoon granulated sugar (or honey/maple syrup)
- ½ teaspoon salt
- 1 tablespoon olive oil (plus extra for greasing)
- ¾ cup (180ml) warm water (around 105-115°F or 40-46°C – like warm bathwater)
- Optional: 1 teaspoon Italian seasoning or ½ teaspoon garlic powder for flavored crust
Instructions: Crafting Your Perfect Gluten-Free Pizza Base
Follow these steps carefully for the best results. Gluten-free dough behaves differently from wheat dough, so attention to detail is key!
- Prepare Your Yeast (if using Active Dry Yeast): If you’re using instant yeast, you can skip this step and add it directly with the dry ingredients. If using active dry yeast, dissolve the sugar in the warm water. Sprinkle the yeast over the top and let it sit for 5-10 minutes until it becomes foamy. This indicates the yeast is active.
- Combine Dry Ingredients: In a large mixing bowl, whisk together the gluten-free flour blend, xanthan gum (if using), salt, and instant yeast (if not activated separately). If you’re adding Italian seasoning or garlic powder, mix it in here too. Whisking helps to aerate the flour and distribute the ingredients evenly, which is crucial for a good texture.
- Add Wet Ingredients: Pour the warm water (with activated yeast, if applicable) and olive oil into the dry ingredients.
- Mix the Dough: Using a stand mixer with a paddle attachment or a hand mixer with dough hooks (or even a sturdy spoon and some elbow grease), mix on low speed until the ingredients are just combined. Then, increase the speed to medium and beat for 3-5 minutes. The “dough” will be more like a very thick, sticky batter than a traditional wheat dough – this is completely normal for gluten-free pizza crusts. Don’t be tempted to add too much extra flour, as this can make the crust dry and crumbly.
- First Rise (Optional but Recommended): Lightly grease the same bowl (or a clean one) with olive oil. Scrape the sticky dough into the center of the bowl. Cover the bowl with plastic wrap or a damp tea towel. Let the dough rise in a warm, draft-free place for 30-60 minutes. It may not double in size like wheat dough, but it should become slightly puffier and airier. This step helps develop flavor and improve texture. If you’re short on time, you can skip this, but the texture will be a bit denser.
- Preheat Oven and Prepare Pan: About 20 minutes before you’re ready to bake, preheat your oven to 425°F (220°C). If you have a pizza stone or baking steel, place it in the oven while it preheats. Otherwise, lightly grease a 12-inch pizza pan or a baking sheet. You can also line it with parchment paper for easy cleanup and to prevent sticking.
- Shape the Crust: This is where gluten-free dough handling differs significantly.
- Parchment Paper Method (Recommended): Lightly dust a sheet of parchment paper with gluten-free flour or cornmeal. Scrape the dough onto the center of the parchment. Lightly wet your hands or dust them with gluten-free flour. Gently press and spread the dough outwards from the center into a 10 to 12-inch circle, about ¼ to ½ inch thick. It might be sticky, so take your time. You can also place another sheet of parchment on top and use a rolling pin. Create a slightly thicker rim for the crust if desired.
- Directly on Pan Method: If using a greased pizza pan, scrape the dough directly onto the pan and use wet or floured fingers to spread it.
- Pre-Bake the Crust (Crucial for Crispness): Prick the surface of the dough all over with a fork. This prevents large air bubbles from forming. If using a pizza stone, carefully slide the parchment paper with the crust onto the hot stone. Otherwise, place your pizza pan in the preheated oven. Bake for 8-12 minutes, or until the crust is set, lightly puffed, and just beginning to turn golden at the edges. Pre-baking is essential for a crispy gluten-free crust that won’t get soggy under toppings.
- Add Toppings: Remove the partially baked crust from the oven. Spread your favorite pizza sauce evenly over the surface, leaving a small border for the crust. Add your cheese and other desired toppings. Be mindful not to overload a gluten-free crust, as this can make it heavy and prevent it from cooking through properly.
- Final Bake: Return the topped pizza to the oven. Bake for another 10-15 minutes, or until the toppings are bubbly and heated through, and the crust is golden brown and crisp. If you like your cheese extra browned, you can switch to the broiler for the last 1-2 minutes, but watch it very carefully to prevent burning.
- Rest and Serve: Once baked, carefully remove the pizza from the oven. Let it rest for 5 minutes before slicing and serving. This allows the cheese to set slightly and makes for cleaner slices.
Nutrition Facts
- Servings: This recipe makes one 10-12 inch pizza crust, typically serving 2-4 people (or 6-8 slices).
- Calories per serving (1 slice, crust only): Approximately 150-200 calories.
Disclaimer: Nutritional information is an estimate and can vary significantly based on the specific gluten-free flour blend used, brand of ingredients, and especially the toppings added. The values provided are for the crust itself.
Understanding the nutritional profile of your homemade gluten-free pizza crust can be empowering. While “gluten-free” doesn’t automatically mean “healthier,” making your pizza from scratch gives you control over the ingredients. Many commercial gluten-free products can be high in refined starches and sugars. This recipe uses a basic blend, and the olive oil adds healthy monounsaturated fats. The calorie count for the crust alone is quite reasonable, allowing you to make conscious choices with your toppings. Load it up with vegetables for added fiber and nutrients, or choose lean proteins for a more substantial meal.
Preparation Time
Understanding the time commitment helps in planning your pizza night perfectly.
- Active Preparation Time: 20-25 minutes (mixing, shaping)
- Yeast Activation (if using active dry): 5-10 minutes
- First Rise (Optional): 30-60 minutes
- Pre-Baking Time: 8-12 minutes
- Final Baking Time (with toppings): 10-15 minutes
- Total Time (including optional rise): Approximately 1 hour 15 minutes to 2 hours.
- Total Time (excluding optional rise): Approximately 45 minutes to 1 hour.
While the total time might seem long with the optional rise, the actual hands-on time is minimal. This makes it a feasible recipe even for a weeknight, especially if you opt to skip the longer rise.
How to Serve Your Masterpiece: Gluten-Free Pizza Variations
Your delicious, homemade gluten-free pizza crust is a blank canvas! Here are some ideas to inspire your pizza nights:
- Classic Margherita:
- Simple tomato sauce (San Marzano tomatoes are excellent)
- Fresh mozzarella slices or pearls
- Fresh basil leaves (added after baking)
- A drizzle of extra virgin olive oil
- Veggie Supreme:
- Tomato sauce
- Mozzarella cheese
- Bell peppers (various colors, sliced)
- Red onion (thinly sliced)
- Mushrooms (sliced)
- Black olives (sliced)
- Spinach (add fresh or lightly sautéed)
- Pesto Chicken Pizza:
- Pesto base (instead of tomato sauce)
- Cooked, shredded chicken
- Mozzarella or provolone cheese
- Sun-dried tomatoes
- Artichoke hearts
- BBQ Chicken Pizza:
- BBQ sauce base
- Cooked, shredded chicken tossed in more BBQ sauce
- Red onion (thinly sliced)
- Cilantro (added after baking)
- Mozzarella and/or cheddar cheese
- Spicy Sausage & Pepperoni:
- Spicy tomato sauce or arrabbiata
- Cooked Italian sausage (crumbled)
- Pepperoni slices
- Mozzarella cheese
- Optional: Sliced jalapeños or red pepper flakes
- White Pizza (Bianca):
- Olive oil and garlic base (instead of tomato sauce)
- Ricotta cheese (dollops)
- Mozzarella cheese
- Fresh spinach or arugula (added after baking)
- Optional: A sprinkle of Parmesan
- Accompaniments:
- Serve with a side salad with a light vinaigrette.
- Offer gluten-free garlic bread or breadsticks.
- Provide dipping sauces like marinara, ranch, or garlic butter.
The beauty of homemade pizza is customization. Don’t be afraid to experiment with your favorite flavors and ingredients!
Additional Tips for Gluten-Free Pizza Success
Achieving gluten-free baking perfection can sometimes feel like a science experiment. These tips will help you navigate the nuances and ensure your pizza crust is a triumph every time.
- Understanding Gluten-Free Flour Blends: Not all gluten-free all-purpose flour blends are created equal. Some have a higher starch content, others more protein-rich flours like sorghum or brown rice. For pizza crust, a blend that includes flours like brown rice flour, white rice flour, tapioca starch, and potato starch often works well. Experiment with different brands to find your favorite. If your blend doesn’t contain xanthan gum (or another binder like psyllium husk), it’s crucial to add it as per the recipe. Xanthan gum mimics gluten’s binding properties, providing structure and elasticity.
- Mastering Dough Handling: Gluten-free dough is notoriously sticky. Don’t be alarmed by its batter-like consistency. The best way to handle it is with lightly oiled or wet hands. Spreading it on parchment paper is highly recommended, as it prevents sticking to your work surface and makes transferring to the oven (especially onto a hot pizza stone) much easier. Avoid adding too much extra flour during shaping, as this can lead to a dry, dense crust.
- The Power of Pre-Baking: This step is non-negotiable for a good gluten-free pizza crust. Gluten-free doughs absorb moisture readily. If you add sauce and toppings to an unbaked crust, you’ll likely end up with a soggy center. Pre-baking (also called par-baking) sets the crust’s structure, creates a barrier against moisture, and starts the crisping process. Don’t skip it!
- Achieving a Crispy Crust: Besides pre-baking, several other factors contribute to crispiness. Baking at a high temperature (425°F/220°C or even higher if your oven allows) is key. Using a preheated pizza stone or baking steel is fantastic, as they retain and distribute heat evenly, giving you that coveted pizzeria-style crisp bottom. If you don’t have one, a perforated pizza pan or even an overturned baking sheet can help improve air circulation and crisping.
- Storage and Reheating Leftovers (If Any!):
- Storing Baked Pizza: Let leftover pizza cool completely, then store it in an airtight container in the refrigerator for up to 3-4 days.
- Reheating: The best way to reheat gluten-free pizza and revive its crispness is in an oven or toaster oven at 350°F (175°C) for 5-10 minutes. You can also use an air fryer. Microwaving will work but tends to make the crust soft and chewy rather than crispy.
- Freezing Dough: You can freeze the unbaked dough. After the optional first rise, punch it down gently, wrap it tightly in plastic wrap, and then place it in a freezer-safe bag or container. It can be frozen for up to 2-3 months. Thaw overnight in the refrigerator, then let it come to room temperature for about 30-60 minutes before shaping and proceeding with the recipe.
- Freezing Par-Baked Crusts: After pre-baking the crust (step 8), let it cool completely. Wrap well in plastic wrap and then foil, or place in a freezer bag. Freeze for up to 3 months. When ready to use, you can top it frozen and bake, adding a few extra minutes to the baking time.
FAQ: Your Gluten-Free Pizza Crust Questions Answered
Here are answers to some common questions you might have about making this easy gluten-free pizza crust.
Q1: Can I use a different type of gluten-free flour or make my own blend?
A1: Yes, you can, but results will vary. This recipe is optimized for a good quality commercial all-purpose gluten-free flour blend that typically contains a mix of rice flours, starches (like tapioca or potato), and sometimes other flours. If you use a single flour (e.g., only almond flour or only coconut flour), the texture and structure will be significantly different and likely not ideal for pizza. If making your own blend, ensure it has a good balance of whole grain flours and starches, and don’t forget the binder (xanthan gum or psyllium husk). You may need to adjust liquid amounts slightly depending on the absorbency of your chosen flours.
Q2: My gluten-free pizza crust turned out gummy or too dense. What went wrong?
A2: Several factors can contribute to a gummy or dense crust:
* Too much liquid: Gluten-free flours vary in absorbency. If your dough seems overly wet (more like a thin batter), it might have too much liquid.
* Not enough baking time: Gluten-free doughs often require longer baking times to cook through properly. Ensure the crust is truly set and golden before adding toppings, and then bake thoroughly.
* Skipping pre-baking: This can lead to a soggy bottom and a dense interior as the toppings’ moisture seeps into the raw dough.
* Flour blend issues: Some blends are heavier than others.
* Oven temperature too low: Ensure your oven is accurately preheated to the specified temperature.
Q3: Can I make this recipe egg-free or dairy-free (vegan)?
A3: This particular recipe is already naturally egg-free! To make it fully dairy-free and vegan:
* Sugar: Ensure your granulated sugar is vegan (some white sugars are processed with bone char). Maple syrup or agave can be good substitutes for the sugar used to feed the yeast.
* Toppings: Use dairy-free cheese alternatives and plant-based toppings.
The crust itself, with these minor adjustments, is perfectly suitable for a vegan diet.
Q4: Can I prepare the dough ahead of time?
A4: Yes! There are a couple of ways:
* Refrigerator Rise: After mixing the dough, you can cover it and place it in the refrigerator for a slow, cold rise for up to 24 hours. This can even enhance the flavor. Let it sit at room temperature for about 30-60 minutes before shaping.
* Freezing: As mentioned in the tips, you can freeze the unbaked dough or par-baked crusts for longer storage. This is great for meal prepping!
Q5: Why is xanthan gum necessary in many gluten-free recipes? Are there alternatives?
A5: Xanthan gum is a common food additive used as a thickener and stabilizer. In gluten-free baking, it plays a crucial role in mimicking the properties of gluten. Gluten provides elasticity and structure to traditional baked goods, trapping air and allowing dough to stretch. Without gluten, baked goods can be crumbly and dense. Xanthan gum helps bind the ingredients together, improves elasticity, and gives the dough a more workable, less crumbly texture.
If you prefer not to use xanthan gum, psyllium husk (powdered or whole) is a common alternative. You might need to experiment with quantities, but generally, you’d use a similar amount or slightly more psyllium husk powder than xanthan gum. Psyllium husk also absorbs more liquid, so you may need to increase the water in the recipe slightly. Guar gum is another option, though some find it can impart a slight flavor.
Easy Gluten-Free Pizza Crust Recipe
Ingredients
- 1 ½ cups (240g) high-quality all-purpose gluten-free flour blend (ensure it contains xanthan gum, or see tip below)
- 1 teaspoon xanthan gum (omit if your flour blend already contains it)
- 1 teaspoon instant yeast (or active dry yeast, see activation note below)
- 1 teaspoon granulated sugar (or honey/maple syrup)
- ½ teaspoon salt
- 1 tablespoon olive oil (plus extra for greasing)
- ¾ cup (180ml) warm water (around 105-115°F or 40-46°C – like warm bathwater)
- Optional: 1 teaspoon Italian seasoning or ½ teaspoon garlic powder for flavored crust
Instructions
- Prepare Your Yeast (if using Active Dry Yeast): If you’re using instant yeast, you can skip this step and add it directly with the dry ingredients. If using active dry yeast, dissolve the sugar in the warm water. Sprinkle the yeast over the top and let it sit for 5-10 minutes until it becomes foamy. This indicates the yeast is active.
- Combine Dry Ingredients: In a large mixing bowl, whisk together the gluten-free flour blend, xanthan gum (if using), salt, and instant yeast (if not activated separately). If you’re adding Italian seasoning or garlic powder, mix it in here too. Whisking helps to aerate the flour and distribute the ingredients evenly, which is crucial for a good texture.
- Add Wet Ingredients: Pour the warm water (with activated yeast, if applicable) and olive oil into the dry ingredients.
- Mix the Dough: Using a stand mixer with a paddle attachment or a hand mixer with dough hooks (or even a sturdy spoon and some elbow grease), mix on low speed until the ingredients are just combined. Then, increase the speed to medium and beat for 3-5 minutes. The “dough” will be more like a very thick, sticky batter than a traditional wheat dough – this is completely normal for gluten-free pizza crusts. Don’t be tempted to add too much extra flour, as this can make the crust dry and crumbly.
- First Rise (Optional but Recommended): Lightly grease the same bowl (or a clean one) with olive oil. Scrape the sticky dough into the center of the bowl. Cover the bowl with plastic wrap or a damp tea towel. Let the dough rise in a warm, draft-free place for 30-60 minutes. It may not double in size like wheat dough, but it should become slightly puffier and airier. This step helps develop flavor and improve texture. If you’re short on time, you can skip this, but the texture will be a bit denser.
- Preheat Oven and Prepare Pan: About 20 minutes before you’re ready to bake, preheat your oven to 425°F (220°C). If you have a pizza stone or baking steel, place it in the oven while it preheats. Otherwise, lightly grease a 12-inch pizza pan or a baking sheet. You can also line it with parchment paper for easy cleanup and to prevent sticking.
- Shape the Crust: This is where gluten-free dough handling differs significantly.
- Parchment Paper Method (Recommended): Lightly dust a sheet of parchment paper with gluten-free flour or cornmeal. Scrape the dough onto the center of the parchment. Lightly wet your hands or dust them with gluten-free flour. Gently press and spread the dough outwards from the center into a 10 to 12-inch circle, about ¼ to ½ inch thick. It might be sticky, so take your time. You can also place another sheet of parchment on top and use a rolling pin. Create a slightly thicker rim for the crust if desired.
- Directly on Pan Method: If using a greased pizza pan, scrape the dough directly onto the pan and use wet or floured fingers to spread it.
- Pre-Bake the Crust (Crucial for Crispness): Prick the surface of the dough all over with a fork. This prevents large air bubbles from forming. If using a pizza stone, carefully slide the parchment paper with the crust onto the hot stone. Otherwise, place your pizza pan in the preheated oven. Bake for 8-12 minutes, or until the crust is set, lightly puffed, and just beginning to turn golden at the edges. Pre-baking is essential for a crispy gluten-free crust that won’t get soggy under toppings.
- Add Toppings: Remove the partially baked crust from the oven. Spread your favorite pizza sauce evenly over the surface, leaving a small border for the crust. Add your cheese and other desired toppings. Be mindful not to overload a gluten-free crust, as this can make it heavy and prevent it from cooking through properly.
- Final Bake: Return the topped pizza to the oven. Bake for another 10-15 minutes, or until the toppings are bubbly and heated through, and the crust is golden brown and crisp. If you like your cheese extra browned, you can switch to the broiler for the last 1-2 minutes, but watch it very carefully to prevent burning.
- Rest and Serve: Once baked, carefully remove the pizza from the oven. Let it rest for 5 minutes before slicing and serving. This allows the cheese to set slightly and makes for cleaner slices.
Nutrition
- Serving Size: One Normal Portion
- Calories: 150-200