Introduction
Butter cookies, with their delightful simplicity and rich, buttery flavor, have been a beloved treat for generations. These easy-to-make cookies are perfect for any occasion, whether you’re hosting a party, looking for a quick snack, or baking with kids. Their melt-in-your-mouth texture and sweet aroma make them irresistible. In this article, we’ll guide you through a step-by-step process to create these delicious butter cookies using a simple recipe with minimal ingredients. Let’s dive into the world of baking and create these delectable treats!
Ingredients
To make these scrumptious butter cookies, you’ll need the following ingredients:
- 1 cup unsalted butter, softened
- 3/4 cup sugar
- 2 cups all-purpose flour
- 1 tsp vanilla extract
- 1/2 tsp salt
These ingredients are common in most kitchens, making this recipe easy to whip up whenever the craving strikes.
Instructions
Creating these delightful butter cookies is a straightforward process. Follow these simple steps:
- Preheat the Oven
Begin by preheating your oven to 350°F (175°C). A well-preheated oven ensures that your cookies bake evenly. - Cream Butter and Sugar
In a large mixing bowl, cream together the softened butter and sugar until the mixture is smooth and creamy. This step is crucial for achieving the right texture in your cookies. - Add Vanilla Extract and Salt
Stir in the vanilla extract and salt. These ingredients enhance the flavor of the cookies, giving them a delightful aroma and taste. - Mix in the Flour
Gradually incorporate the all-purpose flour into the mixture. Stir until the dough is well combined and smooth. Be careful not to overmix, as this can affect the texture of your cookies. - Shape the Dough
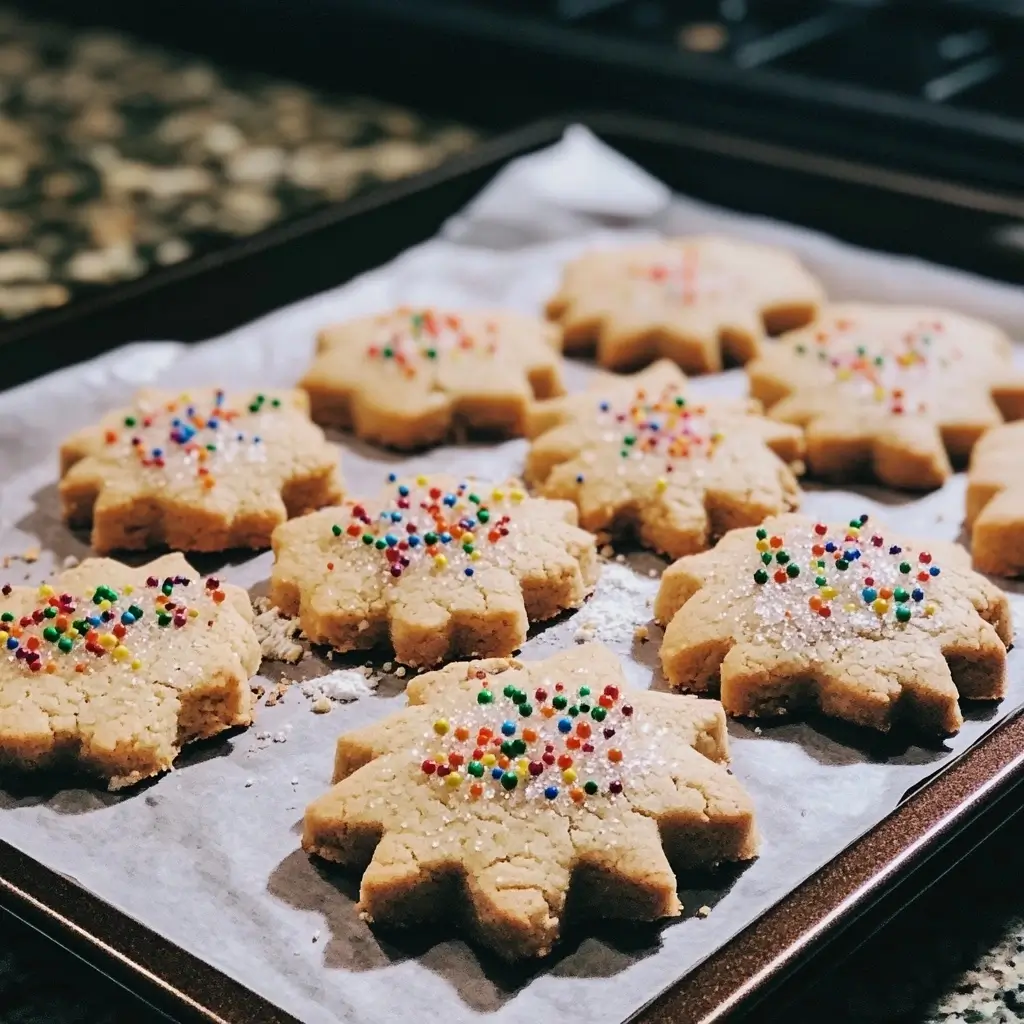
Scoop tablespoon-sized amounts of dough and place them on a baking sheet lined with parchment paper. This helps prevent sticking and makes cleanup easier. - Flatten the Cookies
Using a fork, gently flatten each scoop of dough. This step gives the cookies their classic buttery cookie appearance. - Bake the Cookies
Place the baking sheet in the preheated oven and bake for 10-12 minutes or until the edges of the cookies turn golden brown. Keep an eye on them to prevent overbaking. - Cool and Serve
Allow the cookies to cool on the baking sheet for a few minutes before transferring them to a wire rack to cool completely. Enjoy them fresh out of the oven or store them for later.
Nutrition Facts
Understanding the nutritional content of your homemade treats is important. Here’s a breakdown of the nutrition facts per cookie:
- Calories: 100
- Fat: 6g
- Carbohydrates: 10g
- Protein: 1g
- Sugar: 3g
These cookies offer a balanced treat, perfect for satisfying your sweet tooth without overindulging.
How to Serve
Butter cookies are incredibly versatile and can be enjoyed in numerous ways. Their rich, buttery flavor and crisp texture make them an excellent choice for various occasions, from casual snacks to elegant desserts. Here are several detailed serving suggestions that will enhance your experience of these delightful treats.
Classic Treat
One of the simplest yet most satisfying ways to enjoy butter cookies is to serve them plain. This classic approach allows the rich flavor of the butter to shine through. Pairing them with a glass of cold milk or a warm cup of tea elevates this experience. Consider using whole milk for its creamy texture, or opt for a flavored tea, such as Earl Grey or chamomile, to complement the cookies’ buttery taste. For a bit of fun, try arranging the cookies on a decorative plate, perhaps garnished with a sprig of mint or a few berries for a pop of color. This simple presentation can make even a casual snack feel special.
Holiday Delight
During the holiday season, butter cookies can be transformed into festive treats that delight both the eyes and the palate. One easy yet impactful way to dress them up is by lightly dusting them with powdered sugar. Not only does this add a touch of sweetness, but it also creates a beautiful snowy effect that evokes the winter season. For an even richer flavor, consider dipping the cookies in melted chocolate—dark, milk, or white chocolate all work wonderfully. After dipping, you can sprinkle crushed nuts, sprinkles, or sea salt on top before the chocolate sets for added texture and flavor. These decorated cookies can be beautifully packaged in gift boxes or arranged on a holiday platter, making them perfect for parties, gatherings, or as thoughtful gifts.
Gourmet Experience
For those looking to indulge in a more gourmet experience, butter cookies can be paired with a scoop of your favorite ice cream or served alongside a fresh fruit salad. The contrast between the warm, buttery cookie and the cold, creamy ice cream creates a delightful combination of temperatures and textures. Consider classic flavors like vanilla or chocolate, or opt for something more adventurous like salted caramel or pistachio to enhance the flavor profile.
Alternatively, a fresh fruit salad can bring a refreshing balance to the rich cookies. Combine seasonal fruits such as berries, melon, and citrus for a vibrant and colorful dish. Toss in a drizzle of honey or a squeeze of lime juice to elevate the flavors. Presenting the cookies alongside the fruit salad on a large platter not only makes for an eye-catching display but also offers a light and satisfying dessert option for gatherings or dinner parties.
Creative Pairings
Beyond traditional accompaniments, consider experimenting with other pairings to elevate your butter cookie experience. A rich spread, such as Nutella or homemade fruit preserves, can be served alongside the cookies for dipping or spreading. For a more sophisticated touch, try serving them with a selection of fine cheeses; the creamy texture of brie or the sharpness of aged cheddar can create a delicious contrast.
For a unique twist, consider incorporating butter cookies into a dessert charcuterie board. Arrange the cookies alongside an assortment of nuts, dried fruits, chocolate-covered treats, and artisanal cheeses. This allows guests to mix and match flavors, creating their own delightful combinations.
Conclusion
Butter cookies are not just a treat; they are a canvas for creativity and enjoyment. Whether served simply with milk or tea, dressed up for the holidays, or paired with gourmet accompaniments, the possibilities are endless. With these varied serving suggestions, you can elevate your butter cookie experience to suit any occasion, ensuring that they remain a beloved favorite for all who indulge.
Additional Tips
To ensure your butter cookies turn out perfectly every time, consider the following tips that will enhance your baking experience and lead to delicious results:
1. Butter Consistency: The Key to Texture
The consistency of butter is critical in cookie baking. For the best texture, ensure that your butter is softened but not melted. Softened butter should give slightly when pressed with your finger and should be creamy and pliable, but it should still hold its shape. Leaving your butter out at room temperature for about 30-60 minutes before using it is usually sufficient. If you’re in a hurry, you can cut the butter into small cubes and let it sit for about 10-15 minutes to speed up the softening process. Avoid microwaving the butter, as this can cause it to melt unevenly, resulting in cookies that spread too much when baked.
2. Chilling the Dough: A Simple Solution for Stickiness
If you find the cookie dough too sticky to handle, chilling it can be a game-changer. Refrigerating the dough for about 15-30 minutes will firm it up, making it much easier to shape. This step not only helps in handling the dough but also contributes to better flavor development as the flour hydrates and the butter firms up. Additionally, chilling the dough can help prevent the cookies from spreading too much in the oven, resulting in perfectly shaped, thick cookies. For even easier handling, consider dividing the dough into smaller portions and chilling them separately.
3. Uniform Size: The Importance of Consistency
When baking cookies, uniform size is crucial for even baking. Using a cookie scoop is an excellent way to achieve this. A cookie scoop allows you to portion out the dough consistently, ensuring that each cookie is the same size and shape. This will not only help with even baking but also enhance the presentation of your cookies, making them look professionally made. If you don’t have a cookie scoop, you can also use a tablespoon to measure out your dough. Just be sure to level off the spoon for accuracy.
4. Proper Storage: Keeping Cookies Fresh
Storing your cookies properly is essential for maintaining their freshness and flavor. Once your butter cookies have cooled completely, transfer them to an airtight container. This will help keep them soft and prevent them from becoming stale. You can store your cookies at room temperature for up to a week, but if you want to extend their shelf life, consider freezing them. To freeze, layer the cookies between sheets of parchment paper in an airtight container or freezer bag. They can last up to three months in the freezer. When you’re ready to enjoy them, simply take them out and let them thaw at room temperature—no need to bake again!
5. Experimenting with Flavors and Add-Ins
While classic butter cookies are delicious on their own, don’t hesitate to experiment with different flavors and add-ins. Consider incorporating vanilla extract or almond extract for an extra layer of flavor. You can also add chocolate chips, nuts, dried fruit, or citrus zest to your dough for a delightful twist. Just remember to adjust the amount of flour slightly if you add wet ingredients to maintain the right consistency.
6. Baking Time: Keep an Eye on Them
Every oven is different, and baking times can vary. Start checking your cookies a minute or two before the recommended baking time. The cookies should be lightly golden around the edges but still soft in the center. They will continue to firm up as they cool on the baking sheet. If you prefer a chewier cookie, take them out of the oven slightly earlier.
By following these additional tips, you can ensure that your butter cookies not only taste fantastic but also have the perfect texture and appearance. Happy baking!
FAQs
Q: Can I use salted butter instead of unsalted butter?
A: Yes, you can use salted butter as a substitute for unsalted butter in your recipe. However, it’s important to adjust the amount of additional salt called for in the recipe. If the recipe specifies a certain amount of salt, you should omit or reduce that quantity to prevent the final product from becoming overly salty. Salted butter typically contains about 1/4 teaspoon of salt per stick (about 4 tablespoons), so keep this in mind when measuring out your ingredients. Using salted butter can also add a subtle depth of flavor to your cookies, enhancing the overall taste. Just be sure to taste your dough before baking to ensure the seasoning is to your liking.
Q: Can I add other flavors to the dough?
A: Absolutely! The versatility of cookie dough allows for a wide range of flavor enhancements. You can experiment with various extracts and zests to create unique flavor profiles. For example, adding lemon zest can introduce a bright, citrusy note, perfect for refreshing cookie variations. Almond extract lends a lovely nutty flavor that pairs beautifully with chocolate or vanilla cookies. If you’re looking for a warm, spicy twist, try incorporating a pinch of cinnamon or even nutmeg. Other options include adding vanilla bean seeds for a more intense vanilla flavor, or incorporating chocolate chips, dried fruits, or nuts for added texture and taste. Just remember to balance these additional flavors so they complement rather than overpower the primary taste of the cookie.
Q: How can I make these cookies gluten-free?
A: To adapt your cookie recipe for a gluten-free diet, you can substitute the all-purpose flour with a gluten-free flour blend specifically formulated for baking. Many of these blends contain a mix of rice flour, tapioca flour, and potato starch, which can mimic the properties of traditional wheat flour. It’s crucial to choose a blend that includes a binding agent, such as xanthan gum or guar gum, as this will help the cookies maintain their structure and chewiness. Alternatively, you could also use almond flour or coconut flour, but be aware that these flours have different absorption rates and may require adjustments in the liquid content of your recipe. Always check the packaging of your gluten-free flour for specific recommendations, and consider experimenting with different blends to find the perfect texture and flavor for your gluten-free cookies.
Q: Can I freeze the dough?
A: Yes, freezing cookie dough is a great way to prepare in advance and enjoy fresh-baked cookies whenever you desire. To freeze the dough, shape it into a log or form it into individual cookie balls, depending on your preference. If you choose the log method, wrap it tightly in plastic wrap to prevent freezer burn, and then place it inside a freezer bag for added protection. This method allows you to slice off cookies as needed. If you opt for individual cookie balls, arrange them on a baking sheet lined with parchment paper and freeze until solid before transferring them to a freezer bag. When you’re ready to bake, simply thaw the dough in the refrigerator overnight or allow it to sit at room temperature for about 30 minutes before baking. Keep in mind that baking times may vary slightly for frozen dough, so monitor your cookies closely to avoid overbaking. Freezing cookie dough not only saves time but also allows you to enjoy freshly baked cookies on demand!
Conclusion
Butter cookies are a timeless treat that brings joy to both bakers and those who indulge in their deliciousness. With this easy recipe, you can create a batch of buttery, melt-in-your-mouth cookies that are sure to impress. Whether you’re an experienced baker or just starting out, these cookies are a delightful project that offers immediate gratification. So gather your ingredients, preheat your oven, and enjoy the delightful process of baking these easy butter cookies. Happy baking!
Print
Sweet Potato Hash with Eggs
Ingredients
To create this mouth-watering sweet potato hash with eggs, you will need the following ingredients:
- 2 medium sweet potatoes, diced
- 1 bell pepper, chopped
- 1 small onion, diced
- 2 tbsp olive oil
- Salt and pepper, to taste
- 4 eggs
- Fresh herbs (parsley or cilantro), for garnish
Instructions
Follow these simple steps to prepare the perfect sweet potato hash with eggs:
- Heat the Olive Oil: In a large skillet, heat 2 tablespoons of olive oil over medium heat. The olive oil adds a rich flavor and helps cook the vegetables evenly.
- Cook the Sweet Potatoes: Add the diced sweet potatoes to the skillet. Cook for about 10 minutes, stirring occasionally, until they become tender. The sweet potatoes should be soft enough to be pierced with a fork but still hold their shape.
- Add Bell Pepper and Onion: Stir in the chopped bell pepper and diced onion. Cook for another 5 minutes, or until the vegetables are softened. The bell pepper adds a touch of sweetness, while the onion provides a savory depth of flavor.
- Season with Salt and Pepper: Season the mixture with salt and pepper to taste. Adjust according to your preference.
- Create Wells for Eggs: Make 4 wells in the sweet potato mixture using a spoon or spatula. Crack an egg into each well, ensuring that the eggs are evenly spaced.
- Cook the Eggs: Cover the skillet and cook until the eggs are set, about 5-7 minutes. The eggs should be cooked to your liking, whether you prefer them runny or fully set.
- Garnish and Serve: Once the eggs are cooked, garnish the dish with fresh herbs like parsley or cilantro. Serve immediately and enjoy the delicious flavors of this hearty meal.
Nutrition
- Serving Size: one normal portion
- Calories: 300
- Fat: 15g
- Carbohydrates: 30g
- Fiber: 5g
- Protein: 12g