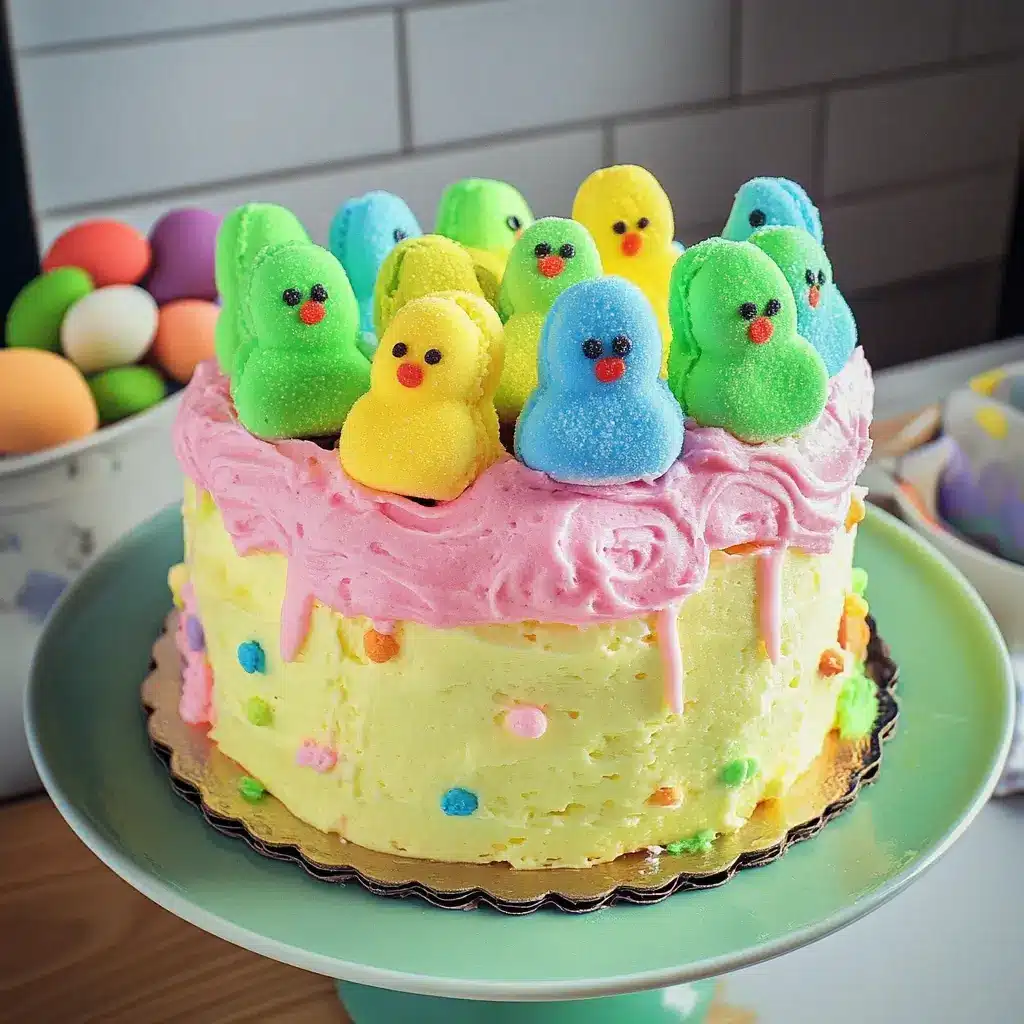
Easter at our house is synonymous with vibrant colors, joyful laughter, and, of course, an abundance of delicious treats. While chocolate bunnies and jelly beans are always welcome, it’s the Easter Peep Cake that truly steals the show. For years, this whimsical creation has been the centerpiece of our dessert table, not just because it’s visually stunning with its fluffy marshmallow Peeps and pastel hues, but because it’s unbelievably delicious and surprisingly easy to make. The moist, tender cake, paired with a sweet, creamy frosting and the playful touch of Peeps, is a combination that delights both young and old. Honestly, every year I wonder if it can be as good as the last, and every year, without fail, it’s devoured within minutes, leaving behind smiles sticky with frosting and the sweet scent of spring. If you’re looking for a show-stopping dessert that embodies the spirit of Easter, look no further – this Easter Peep Cake is guaranteed to become a cherished tradition in your own home.
Ingredients: Gathering Your Springtime Palette
Creating this delightful Easter Peep Cake requires a collection of simple, readily available ingredients. We’ll break down the components into the cake itself, the luscious frosting, and of course, the iconic Peep decorations. Using quality ingredients will significantly enhance the flavor and texture of your final masterpiece.
For the Moist Vanilla Cake:
- 2 ½ cups all-purpose flour: The foundation of our cake, all-purpose flour provides structure. For a slightly softer crumb, you can substitute ¼ cup of all-purpose flour with cake flour. Make sure to measure your flour correctly by spooning it into your measuring cup and leveling it off with a knife, avoiding scooping directly from the bag which can lead to using too much flour and a denser cake.
- 1 ½ cups granulated sugar: Sweetness is key! Granulated sugar not only sweetens the cake but also contributes to its moistness and tenderness. The sugar crystals create air pockets during creaming, leading to a lighter texture.
- 3 ½ teaspoons baking powder: Our leavening agent, baking powder is crucial for creating a light and airy cake. Ensure your baking powder is fresh for optimal rise. To test freshness, place a teaspoon in hot water – it should bubble vigorously.
- 1 teaspoon salt: Don’t underestimate salt in sweet recipes! Salt enhances the flavors of all the other ingredients and balances the sweetness, preventing the cake from being cloying.
- 1 cup (2 sticks) unsalted butter, softened: Butter adds richness, flavor, and tenderness to the cake. Using unsalted butter allows you to control the salt content precisely. Ensure the butter is properly softened – it should be pliable but still cool to the touch. If it’s too melted, the cake may become greasy.
- 1 ¼ cups whole milk: Milk provides moisture and helps to bind the ingredients together. Whole milk contributes to a richer flavor, but you can use 2% milk if preferred. For a dairy-free option, unsweetened almond or oat milk can be substituted, though it may slightly alter the texture.
- 2 large eggs: Eggs add structure, richness, and moisture to the cake. They also contribute to the cake’s golden color. Use large eggs at room temperature for better emulsification and a smoother batter.
- 2 teaspoons pure vanilla extract: Vanilla extract enhances the overall flavor profile of the cake, adding a warm and inviting aroma. Use pure vanilla extract for the best flavor; avoid imitation vanilla, which can taste artificial. For a more intense vanilla flavor, consider using vanilla bean paste.
For the Dreamy Vanilla Frosting:
- 1 cup (2 sticks) unsalted butter, softened: Just like in the cake, butter is the star of our frosting, providing richness and creaminess. Again, ensure it’s properly softened – not melted – for a smooth and fluffy frosting.
- 3 cups powdered sugar: Powdered sugar (also known as confectioners’ sugar) provides sweetness and structure to the frosting. Sifting the powdered sugar before adding it to the butter will prevent lumps and ensure a silky smooth frosting.
- ½ cup heavy cream or milk: Heavy cream will result in a richer and more decadent frosting, while milk will create a slightly lighter version. Add the liquid gradually until you reach your desired consistency.
- 1 teaspoon pure vanilla extract: Enhances the vanilla flavor of the frosting, complementing the cake beautifully.
- Pinch of salt: Balances the sweetness of the frosting and enhances the vanilla flavor.
For the Playful Peep Decoration:
- Marshmallow Peeps: The quintessential Easter treat! Choose your favorite colors and shapes of Peeps to decorate your cake. Classic chick-shaped Peeps are always a hit, but bunny Peeps, flower Peeps, or even Peep bunnies holding carrots can add extra charm. Consider using a variety of pastel colors to create a visually appealing and festive cake.
- Optional Sprinkles and Decorations: For extra flair, you can add pastel sprinkles, edible glitter, shredded coconut tinted green for “grass,” or candy eggs to further enhance the Easter theme. Get creative and personalize your cake!
Instructions: Baking Your Easter Masterpiece, Step-by-Step
Creating this Easter Peep Cake is a rewarding experience, even for novice bakers. Follow these detailed instructions carefully to ensure a perfect and delicious result. Remember, baking is a science, so accurate measurements and following the steps in order are crucial.
Part 1: Baking the Vanilla Cake Layers
- Preheat Oven and Prepare Pans: Preheat your oven to 350°F (175°C). Grease and flour two 9-inch round cake pans. Alternatively, you can use baking spray with flour for easier pan release. Dusting the pans with flour after greasing prevents the cake from sticking and ensures clean removal. Tap out any excess flour. Preparing your pans before you start mixing the batter is essential so that the batter doesn’t sit out for too long while you are prepping the pans.
- Combine Dry Ingredients: In a large bowl, whisk together the all-purpose flour, granulated sugar, baking powder, and salt. Whisking ensures that the baking powder and salt are evenly distributed throughout the flour, which is crucial for consistent leavening and flavor. This step also aerates the flour, contributing to a lighter cake texture.
- Cream Butter and Wet Ingredients: In a separate large bowl or the bowl of a stand mixer fitted with the paddle attachment, cream together the softened butter and milk until smooth and combined. Gradually add the dry ingredients to the wet ingredients, mixing on low speed until just combined. Be careful not to overmix at this stage. Overmixing can develop the gluten in the flour, resulting in a tougher cake. Mix until just incorporated and no streaks of flour remain.
- Incorporate Eggs and Vanilla: Add the eggs one at a time, mixing well after each addition until fully incorporated. Then, stir in the vanilla extract. Mixing eggs one at a time ensures proper emulsification and a smoother batter. Vanilla extract should be added last to prevent its flavor from baking out in the oven.
- Divide Batter and Bake: Divide the cake batter evenly between the prepared cake pans. Use a kitchen scale or measuring cups to ensure even layers, which will bake uniformly. Bake for 25-30 minutes, or until a wooden skewer inserted into the center comes out clean. The baking time may vary depending on your oven, so start checking for doneness at 25 minutes. The cake should be golden brown and spring back lightly when touched.
- Cool Cakes Completely: Let the cakes cool in the pans for 10-15 minutes before inverting them onto a wire rack to cool completely. Cooling in the pans allows the cake to set slightly, preventing it from breaking apart when inverted. Cooling completely before frosting is crucial, as warm cake will melt the frosting and create a messy result.
Part 2: Whipping Up the Dreamy Vanilla Frosting
- Cream Butter: In a large bowl or the bowl of a stand mixer fitted with the paddle attachment, beat the softened butter until light and fluffy. This process incorporates air into the butter, making the frosting light and airy. Beat for several minutes until the butter is pale and creamy.
- Add Powdered Sugar Gradually: Gradually add the sifted powdered sugar, one cup at a time, beating on low speed until combined. Starting on low speed prevents the powdered sugar from flying out of the bowl. Once combined, increase the speed to medium and beat until light and fluffy.
- Incorporate Liquid and Vanilla: Gradually add the heavy cream or milk, vanilla extract, and salt. Beat on medium speed until the frosting is smooth, creamy, and reaches your desired consistency. Add more liquid, a tablespoon at a time, if you prefer a thinner frosting. Taste and adjust sweetness or vanilla extract as needed.
- Tint Frosting (Optional): If desired, divide the frosting into separate bowls and tint each bowl with pastel food coloring to create a colorful ombre effect or different colored accents for your cake. Gel food coloring is recommended as it is more concentrated and won’t thin out the frosting as much as liquid food coloring.
Part 3: Assembling and Decorating Your Peep Cake Masterpiece
- Level Cake Layers (Optional): Once the cake layers are completely cool, use a serrated knife to level the tops if necessary. Leveling ensures that the cake layers stack evenly and the frosting is applied smoothly. This step is optional but recommended for a more professional look.
- Frost the First Layer: Place one cake layer on a serving plate or cake stand. Spread a generous layer of frosting evenly over the top. Use an offset spatula for smooth and even frosting application.
- Add Second Layer and Frost Entire Cake: Carefully place the second cake layer on top of the frosted first layer. Frost the entire cake with the remaining frosting, creating swirls, smooth surfaces, or any desired frosting design. You can use various frosting tips to create different textures and patterns.
- Decorate with Peeps: Arrange the marshmallow Peeps around the top edge of the cake, standing them upright or laying them flat, depending on your desired look. You can create a border of Peeps, cover the entire top, or arrange them in a playful pattern.
- Add Sprinkles and Final Touches (Optional): Sprinkle pastel sprinkles, edible glitter, or other desired decorations over the frosting and around the Peeps. Get creative and have fun with the decorating process!
- Chill and Serve: Refrigerate the cake for at least 30 minutes to allow the frosting to set and the Peeps to adhere to the cake. Chilling also helps to firm up the cake and frosting, making it easier to slice and serve. Serve chilled and enjoy your beautiful and delicious Easter Peep Cake!
Nutrition Facts: Sweetness in Moderation
While the Easter Peep Cake is a delightful treat, it’s important to be mindful of its nutritional content, especially considering the sugar content inherent in both cake and marshmallows. These are approximate values and can vary based on specific ingredient brands and frosting thickness.
- Servings: Approximately 12-16 servings (depending on slice size)
- Calories per serving (estimated): 400-550 calories
Important Considerations:
- Sugar Content: This cake is high in sugar due to the cake itself, the frosting, and the marshmallow Peeps. Enjoy in moderation as part of a balanced diet.
- Fat Content: The frosting and butter in the cake contribute to a higher fat content.
- Nutrient Density: This cake is primarily a source of carbohydrates and fats, with minimal protein and fiber.
- Portion Control: Be mindful of portion sizes to manage calorie and sugar intake.
- Variations: You can reduce the sugar content slightly by using less sugar in the cake batter or opting for a less sweet frosting recipe.
Preparation Time: Planning Your Baking Schedule
Making an Easter Peep Cake is a fun project, but it does require some time. Planning ahead will make the process smoother and less stressful.
- Prep Time: 30-45 minutes (for measuring ingredients, mixing batter, making frosting)
- Bake Time: 25-30 minutes
- Cooling Time: 1-2 hours (for cakes to cool completely)
- Frosting and Decorating Time: 30-45 minutes
- Total Time: Approximately 3-4 hours (excluding chilling time)
Tips for Time Management:
- Bake the cake layers ahead of time: You can bake the cake layers a day in advance and store them tightly wrapped at room temperature or in the refrigerator.
- Make frosting in advance: The frosting can also be made a day ahead and stored in the refrigerator in an airtight container. Bring it to room temperature and re-whip briefly before using.
- Enlist help: Baking with family or friends can make the process faster and more enjoyable.
How to Serve: Presenting Your Easter Delight
The Easter Peep Cake is a visual centerpiece, and how you serve it can further enhance its appeal.
- Chilled: Serve the cake chilled for the best texture and flavor. The frosting will be firm and the cake moist and refreshing.
- Slices: Cut into clean, even slices using a serrated knife. For neat slices, you can dip the knife in warm water and wipe it clean between cuts.
- Garnish:
- Fresh Berries: Serve slices with a side of fresh berries like strawberries, raspberries, or blueberries for a touch of freshness and acidity that complements the sweetness of the cake.
- Whipped Cream: A dollop of lightly sweetened whipped cream adds extra indulgence.
- Mint Sprigs: A sprig of fresh mint can add a pop of color and a refreshing aroma.
- Beverages:
- Milk: A classic pairing, especially for children.
- Coffee or Tea: Pairs well with coffee or tea for adults.
- Sparkling Cider or Juice: Festive and refreshing options for a celebratory Easter meal.
- Occasions:
- Easter Sunday Dessert: The star of your Easter celebration.
- Spring Gatherings: Perfect for any spring-themed party, brunch, or potluck.
- Birthday Parties: Adaptable for birthday celebrations with different Peep themes or decorations.
Additional Tips for Peep Cake Perfection
Here are five essential tips to ensure your Easter Peep Cake is a resounding success:
- Room Temperature Ingredients are Key: Ensure your butter, eggs, and milk are at room temperature. Room temperature ingredients emulsify better, creating a smoother batter and a more tender cake. Softened butter creams more easily, and room temperature eggs incorporate more evenly into the batter.
- Don’t Overmix the Batter: Overmixing develops gluten, leading to a tough cake. Mix the dry and wet ingredients until just combined, and stop mixing as soon as no streaks of flour remain. A few lumps are okay.
- Cool Cakes Completely Before Frosting: Patience is crucial! Frosting a warm cake will cause it to melt and slide off, resulting in a messy cake. Allow the cake layers to cool completely on a wire rack before frosting. You can even speed up the cooling process by placing the layers in the refrigerator for a short period.
- Get Creative with Peep Placement: Don’t be afraid to experiment with different Peep arrangements. Create patterns, color gradients, or even little Peep scenes on top of the cake. You can also cut Peeps into shapes or use different Peep varieties for added visual interest.
- Store Leftovers Properly: Store leftover Easter Peep Cake in an airtight container in the refrigerator for up to 3-4 days. The Peeps may become slightly sticky in the refrigerator, but the cake will remain moist and delicious. Bring to room temperature for about 30 minutes before serving for optimal texture.
FAQ: Your Peep Cake Questions Answered
Here are five frequently asked questions to help you troubleshoot and perfect your Easter Peep Cake:
Q1: Can I use a different type of cake for this recipe?
A: Absolutely! While this recipe is for a classic vanilla cake, you can definitely adapt it to your preferences. Chocolate cake, lemon cake, or even a spice cake would all pair wonderfully with the vanilla frosting and Peep decorations. Just ensure the cake layers are sturdy enough to hold the frosting and Peeps. You can also use store-bought cake mixes in a pinch, but homemade cake will always have a superior flavor and texture.
Q2: My frosting is too thin/thick. How can I fix it?
A: Frosting consistency can be easily adjusted. If your frosting is too thin, gradually add more powdered sugar, one tablespoon at a time, until you reach your desired thickness. If it’s too thick, add a little more heavy cream or milk, a teaspoon at a time, until it thins out. Be sure to beat well after each addition to ensure the frosting is smooth and consistent. Humidity can also affect frosting consistency, so you might need to adjust the liquid slightly depending on the weather.
Q3: Can I make this cake ahead of time?
A: Yes, you can prepare different components of the cake ahead of time. The cake layers can be baked a day or two in advance and stored tightly wrapped at room temperature or in the refrigerator. The frosting can also be made a day ahead and stored in the refrigerator. Assemble and decorate the cake on the day you plan to serve it for the freshest Peep presentation. Avoid decorating with Peeps too far in advance as they can become sticky over time, especially in humid environments.
Q4: Can I use different types of Peeps for decoration?
A: Definitely! The beauty of Peep Cake is its versatility. Feel free to use any type of Peeps you like – bunny Peeps, chick Peeps, flower Peeps, even Peeps in different flavors and colors. You can also incorporate other Easter candies like jelly beans, candy eggs, or chocolate bunnies into your decoration for a truly festive and personalized cake. Get creative and let your imagination run wild!
Q5: How do I prevent my cake layers from sticking to the pan?
A: Properly preparing your cake pans is crucial to prevent sticking. Grease your cake pans thoroughly with shortening or butter, then dust them with flour, tapping out any excess. Alternatively, use baking spray that contains flour. You can also line the bottom of the pans with parchment paper rounds for extra insurance. Allow the cakes to cool in the pans for 10-15 minutes after baking before inverting them onto a wire rack to cool completely. This cooling period allows the cake to set slightly and makes it easier to remove from the pans without breaking.
Print
Easter Peep Cake Recipe
Ingredients
For the Moist Vanilla Cake:
- 2 ½ cups all-purpose flour: The foundation of our cake, all-purpose flour provides structure. For a slightly softer crumb, you can substitute ¼ cup of all-purpose flour with cake flour. Make sure to measure your flour correctly by spooning it into your measuring cup and leveling it off with a knife, avoiding scooping directly from the bag which can lead to using too much flour and a denser cake.
- 1 ½ cups granulated sugar: Sweetness is key! Granulated sugar not only sweetens the cake but also contributes to its moistness and tenderness. The sugar crystals create air pockets during creaming, leading to a lighter texture.
- 3 ½ teaspoons baking powder: Our leavening agent, baking powder is crucial for creating a light and airy cake. Ensure your baking powder is fresh for optimal rise. To test freshness, place a teaspoon in hot water – it should bubble vigorously.
- 1 teaspoon salt: Don’t underestimate salt in sweet recipes! Salt enhances the flavors of all the other ingredients and balances the sweetness, preventing the cake from being cloying.
- 1 cup (2 sticks) unsalted butter, softened: Butter adds richness, flavor, and tenderness to the cake. Using unsalted butter allows you to control the salt content precisely. Ensure the butter is properly softened – it should be pliable but still cool to the touch. If it’s too melted, the cake may become greasy.
- 1 ¼ cups whole milk: Milk provides moisture and helps to bind the ingredients together. Whole milk contributes to a richer flavor, but you can use 2% milk if preferred. For a dairy-free option, unsweetened almond or oat milk can be substituted, though it may slightly alter the texture.
- 2 large eggs: Eggs add structure, richness, and moisture to the cake. They also contribute to the cake’s golden color. Use large eggs at room temperature for better emulsification and a smoother batter.
- 2 teaspoons pure vanilla extract: Vanilla extract enhances the overall flavor profile of the cake, adding a warm and inviting aroma. Use pure vanilla extract for the best flavor; avoid imitation vanilla, which can taste artificial. For a more intense vanilla flavor, consider using vanilla bean paste.
For the Dreamy Vanilla Frosting:
- 1 cup (2 sticks) unsalted butter, softened: Just like in the cake, butter is the star of our frosting, providing richness and creaminess. Again, ensure it’s properly softened – not melted – for a smooth and fluffy frosting.
- 3 cups powdered sugar: Powdered sugar (also known as confectioners’ sugar) provides sweetness and structure to the frosting. Sifting the powdered sugar before adding it to the butter will prevent lumps and ensure a silky smooth frosting.
- ½ cup heavy cream or milk: Heavy cream will result in a richer and more decadent frosting, while milk will create a slightly lighter version. Add the liquid gradually until you reach your desired consistency.
- 1 teaspoon pure vanilla extract: Enhances the vanilla flavor of the frosting, complementing the cake beautifully.
- Pinch of salt: Balances the sweetness of the frosting and enhances the vanilla flavor.
For the Playful Peep Decoration:
- Marshmallow Peeps: The quintessential Easter treat! Choose your favorite colors and shapes of Peeps to decorate your cake. Classic chick-shaped Peeps are always a hit, but bunny Peeps, flower Peeps, or even Peep bunnies holding carrots can add extra charm. Consider using a variety of pastel colors to create a visually appealing and festive cake.
- Optional Sprinkles and Decorations: For extra flair, you can add pastel sprinkles, edible glitter, shredded coconut tinted green for “grass,” or candy eggs to further enhance the Easter theme. Get creative and personalize your cake!
Instructions
Part 1: Baking the Vanilla Cake Layers
- Preheat Oven and Prepare Pans: Preheat your oven to 350°F (175°C). Grease and flour two 9-inch round cake pans. Alternatively, you can use baking spray with flour for easier pan release. Dusting the pans with flour after greasing prevents the cake from sticking and ensures clean removal. Tap out any excess flour. Preparing your pans before you start mixing the batter is essential so that the batter doesn’t sit out for too long while you are prepping the pans.
- Combine Dry Ingredients: In a large bowl, whisk together the all-purpose flour, granulated sugar, baking powder, and salt. Whisking ensures that the baking powder and salt are evenly distributed throughout the flour, which is crucial for consistent leavening and flavor. This step also aerates the flour, contributing to a lighter cake texture.
- Cream Butter and Wet Ingredients: In a separate large bowl or the bowl of a stand mixer fitted with the paddle attachment, cream together the softened butter and milk until smooth and combined. Gradually add the dry ingredients to the wet ingredients, mixing on low speed until just combined. Be careful not to overmix at this stage. Overmixing can develop the gluten in the flour, resulting in a tougher cake. Mix until just incorporated and no streaks of flour remain.
- Incorporate Eggs and Vanilla: Add the eggs one at a time, mixing well after each addition until fully incorporated. Then, stir in the vanilla extract. Mixing eggs one at a time ensures proper emulsification and a smoother batter. Vanilla extract should be added last to prevent its flavor from baking out in the oven.
- Divide Batter and Bake: Divide the cake batter evenly between the prepared cake pans. Use a kitchen scale or measuring cups to ensure even layers, which will bake uniformly. Bake for 25-30 minutes, or until a wooden skewer inserted into the center comes out clean. The baking time may vary depending on your oven, so start checking for doneness at 25 minutes. The cake should be golden brown and spring back lightly when touched.
- Cool Cakes Completely: Let the cakes cool in the pans for 10-15 minutes before inverting them onto a wire rack to cool completely. Cooling in the pans allows the cake to set slightly, preventing it from breaking apart when inverted. Cooling completely before frosting is crucial, as warm cake will melt the frosting and create a messy result.
Part 2: Whipping Up the Dreamy Vanilla Frosting
- Cream Butter: In a large bowl or the bowl of a stand mixer fitted with the paddle attachment, beat the softened butter until light and fluffy. This process incorporates air into the butter, making the frosting light and airy. Beat for several minutes until the butter is pale and creamy.
- Add Powdered Sugar Gradually: Gradually add the sifted powdered sugar, one cup at a time, beating on low speed until combined. Starting on low speed prevents the powdered sugar from flying out of the bowl. Once combined, increase the speed to medium and beat until light and fluffy.
- Incorporate Liquid and Vanilla: Gradually add the heavy cream or milk, vanilla extract, and salt. Beat on medium speed until the frosting is smooth, creamy, and reaches your desired consistency. Add more liquid, a tablespoon at a time, if you prefer a thinner frosting. Taste and adjust sweetness or vanilla extract as needed.
- Tint Frosting (Optional): If desired, divide the frosting into separate bowls and tint each bowl with pastel food coloring to create a colorful ombre effect or different colored accents for your cake. Gel food coloring is recommended as it is more concentrated and won’t thin out the frosting as much as liquid food coloring.
Part 3: Assembling and Decorating Your Peep Cake Masterpiece
- Level Cake Layers (Optional): Once the cake layers are completely cool, use a serrated knife to level the tops if necessary. Leveling ensures that the cake layers stack evenly and the frosting is applied smoothly. This step is optional but recommended for a more professional look.
- Frost the First Layer: Place one cake layer on a serving plate or cake stand. Spread a generous layer of frosting evenly over the top. Use an offset spatula for smooth and even frosting application.
- Add Second Layer and Frost Entire Cake: Carefully place the second cake layer on top of the frosted first layer. Frost the entire cake with the remaining frosting, creating swirls, smooth surfaces, or any desired frosting design. You can use various frosting tips to create different textures and patterns.
- Decorate with Peeps: Arrange the marshmallow Peeps around the top edge of the cake, standing them upright or laying them flat, depending on your desired look. You can create a border of Peeps, cover the entire top, or arrange them in a playful pattern.
- Add Sprinkles and Final Touches (Optional): Sprinkle pastel sprinkles, edible glitter, or other desired decorations over the frosting and around the Peeps. Get creative and have fun with the decorating process!
- Chill and Serve: Refrigerate the cake for at least 30 minutes to allow the frosting to set and the Peeps to adhere to the cake. Chilling also helps to firm up the cake and frosting, making it easier to slice and serve. Serve chilled and enjoy your beautiful and delicious Easter Peep Cake!
Nutrition
- Serving Size: one normal portion
- Calories: 400-550