


For years, Chinese takeout night was a staple in our household. But with dietary restrictions becoming a bigger part of our lives, those delicious, saucy dishes felt increasingly off-limits. Finding truly satisfying gluten-free Chinese food options outside the home? Let’s just say it was a challenge. That’s why discovering this Gluten-Free Chinese Food Recipe was a game-changer! From the first whiff of garlic and ginger hitting the hot pan to the last delectable bite, this recipe has completely transformed our weeknight dinners. Even my pickiest eaters, who usually turn their noses up at anything “healthy” or “different,” devoured this chicken dish. The sweet and savory sauce is perfectly balanced, coating tender pieces of chicken in a way that’s reminiscent of our favorite takeout classics, but without any of the gluten-related worries. Honestly, it’s so good and surprisingly easy to make, it’s become a regular rotation in our meal plan. If you’re craving that authentic Chinese flavor but need to keep it gluten-free, look no further – this recipe is your new best friend!
Ingredients
Here’s everything you’ll need to whip up this flavorful gluten-free Chinese chicken dish. Make sure to gather all your ingredients beforehand to ensure a smooth and efficient cooking process. Using fresh, high-quality ingredients will always elevate the final taste of your meal.
- 1 large egg, whisked: The egg acts as a binder and helps the cornstarch adhere to the chicken, creating a lovely, slightly crispy coating when cooked. Choose a good quality, fresh egg for the best results.
- 1 lb boneless, skinless chicken breasts, cubed: Chicken breast is a lean and versatile protein that works beautifully in this recipe. Cut it into bite-sized cubes, about 1-inch pieces, for even cooking and easy eating. You can also use chicken thighs if you prefer a richer flavor, just be sure to trim any excess fat.
- 3 tablespoons olive oil: Olive oil is used for sautéing the chicken and vegetables. Its mild flavor won’t overpower the other ingredients. You can also use other neutral cooking oils like avocado oil, canola oil, or vegetable oil.
- 1 Thai chili pepper, minced (optional): If you like a bit of heat, a minced Thai chili pepper adds a wonderful kick to the dish. Remember, Thai chili peppers are quite spicy, so adjust the amount to your spice preference. For a milder flavor, you can use a pinch of red pepper flakes instead, or omit it entirely if you prefer no spice. Be careful when handling chili peppers and wash your hands thoroughly afterward.
- 3 cloves garlic, minced: Garlic is a cornerstone of Chinese cuisine, adding a pungent and aromatic flavor to the dish. Freshly minced garlic is always preferred for its superior flavor compared to pre-minced garlic in jars.
- 2 tablespoons diced green onions: Green onions, also known as scallions, provide a fresh, mild onion flavor and a pop of color. They are used both during cooking and as a garnish at the end. Make sure to dice them thinly for even distribution.
- ⅓ cup honey: Honey is the sweetener in this recipe, contributing to the characteristic sweet and savory balance of Chinese sauces. It also adds a beautiful glaze to the chicken. Use a good quality honey for the best flavor. If you are vegan or prefer an alternative sweetener, you can use maple syrup or agave nectar, though the flavor profile will be slightly different.
- 2 tablespoons gluten-free tamari soy sauce: Tamari is a gluten-free alternative to soy sauce, made from fermented soybeans. It offers a rich, umami flavor that is essential to Chinese cooking. Make sure to specifically choose gluten-free tamari to ensure the recipe remains gluten-free. Regular soy sauce contains wheat and is not suitable for those with gluten sensitivities or celiac disease.
- 1 tablespoon apple cider vinegar: Apple cider vinegar adds a touch of acidity to the sauce, balancing the sweetness of the honey and the richness of the tamari. It also helps to tenderize the chicken slightly. You can substitute with rice vinegar if you have it on hand, for a more authentically Asian flavor profile.
- 1 teaspoon sesame oil: Sesame oil is a finishing oil that adds a distinctive nutty aroma and flavor to the dish. A little goes a long way, so just one teaspoon is enough to impart its characteristic taste. Toasted sesame oil is preferred for its more intense flavor.
- ½ teaspoon crushed red pepper flakes: Even if you are using a Thai chili pepper, a pinch of red pepper flakes can add an extra layer of subtle heat and complexity. Adjust the amount to your preference or omit if you are sensitive to spice.
- ½ cup cornstarch: Cornstarch is the key to creating the crispy coating on the chicken and thickening the sauce to a perfect glaze. It is naturally gluten-free and works exceptionally well in this recipe.
- 2 tablespoons brown sugar: Brown sugar adds depth of sweetness and a hint of molasses flavor to the sauce, complementing the honey and tamari. You can use light or dark brown sugar, depending on your preference. Dark brown sugar will provide a richer, more intense molasses flavor.
Instructions
Follow these simple step-by-step instructions to create your own delicious gluten-free Chinese food at home. The process is quick and easy, perfect for a weeknight meal.
- Prepare the Honey Sauce: In a small bowl, whisk together the honey, gluten-free tamari soy sauce, apple cider vinegar, sesame oil, and red pepper flakes. Whisk until all ingredients are well combined and the sauce is smooth. Set aside. This flavorful sauce will be poured over the chicken later to create that signature Chinese takeout taste. Taste the sauce and adjust the red pepper flakes if you prefer more or less heat. Having the sauce prepared in advance streamlines the cooking process once you start stir-frying.
- Combine Cornstarch and Brown Sugar: In a separate medium-sized bowl, combine the cornstarch and brown sugar. Whisk them together thoroughly until they are evenly mixed and there are no lumps of cornstarch. This mixture will be used to coat the chicken, creating a crispy exterior and helping to thicken the sauce later on. Ensuring the cornstarch is well combined with the brown sugar will prevent any clumps from forming when you coat the chicken.
- Prepare the Egg Wash: Place the whisked egg in a separate shallow bowl. The whisked egg serves as a binder, allowing the cornstarch mixture to adhere properly to the chicken pieces. Make sure the egg is well whisked to ensure a smooth and even coating.
- Coat the Chicken: Add the cubed chicken to the bowl with the whisked egg. Toss the chicken to ensure each piece is evenly coated with the egg. Then, transfer the egg-coated chicken to the bowl with the cornstarch and brown sugar mixture. Toss again, making sure each piece of chicken is thoroughly coated in the cornstarch mixture. This coating is crucial for achieving that slightly crispy texture on the chicken and for thickening the sauce. Ensure even coating for best results.
- Heat the Skillet: Add the olive oil to a large skillet or wok. Heat the skillet over medium heat. Allow the oil to heat up properly before adding the chicken. You’ll know the oil is ready when it shimmers slightly or when a drop of water flicked into the pan sizzles immediately. Using a large skillet or wok ensures there’s enough surface area to cook the chicken in a single layer without overcrowding, which is important for proper browning.
- Sauté Aromatics and Chicken: Once the oil is hot, add the minced garlic and minced Thai chili pepper (if using) to the skillet. Sauté for about 30 seconds, or until fragrant. Be careful not to burn the garlic, as it can become bitter. The aroma of garlic and chili pepper infusing the oil is the first sign of the delicious flavors to come. Immediately add the cornstarch-coated chicken to the skillet.
- Brown the Chicken: Cook the chicken, stirring occasionally, until it is slightly browned on all sides. This will take about 5-7 minutes. Browning the chicken adds flavor and texture to the dish. Don’t worry about cooking the chicken all the way through at this stage, as it will continue to cook in the sauce. Ensure the chicken is cooked in a single layer as much as possible for even browning.
- Add the Honey Sauce and Sauté: Pour the prepared honey sauce over the browned chicken in the skillet. Sauté, stirring constantly, for 2-3 minutes. As the sauce heats up, it will begin to thicken and glaze the chicken. Stirring ensures the sauce coats all the chicken pieces evenly and prevents sticking.
- Simmer and Finish: Reduce the heat to low, cover the skillet with a lid, and simmer for another 6-8 minutes, or until the chicken is cooked through and the sauce has thickened to your desired consistency. Simmering allows the chicken to cook completely and the flavors to meld together beautifully. The sauce will reduce and thicken further during simmering. Check the chicken for doneness by cutting into a piece – it should be white and opaque throughout with no pink remaining.
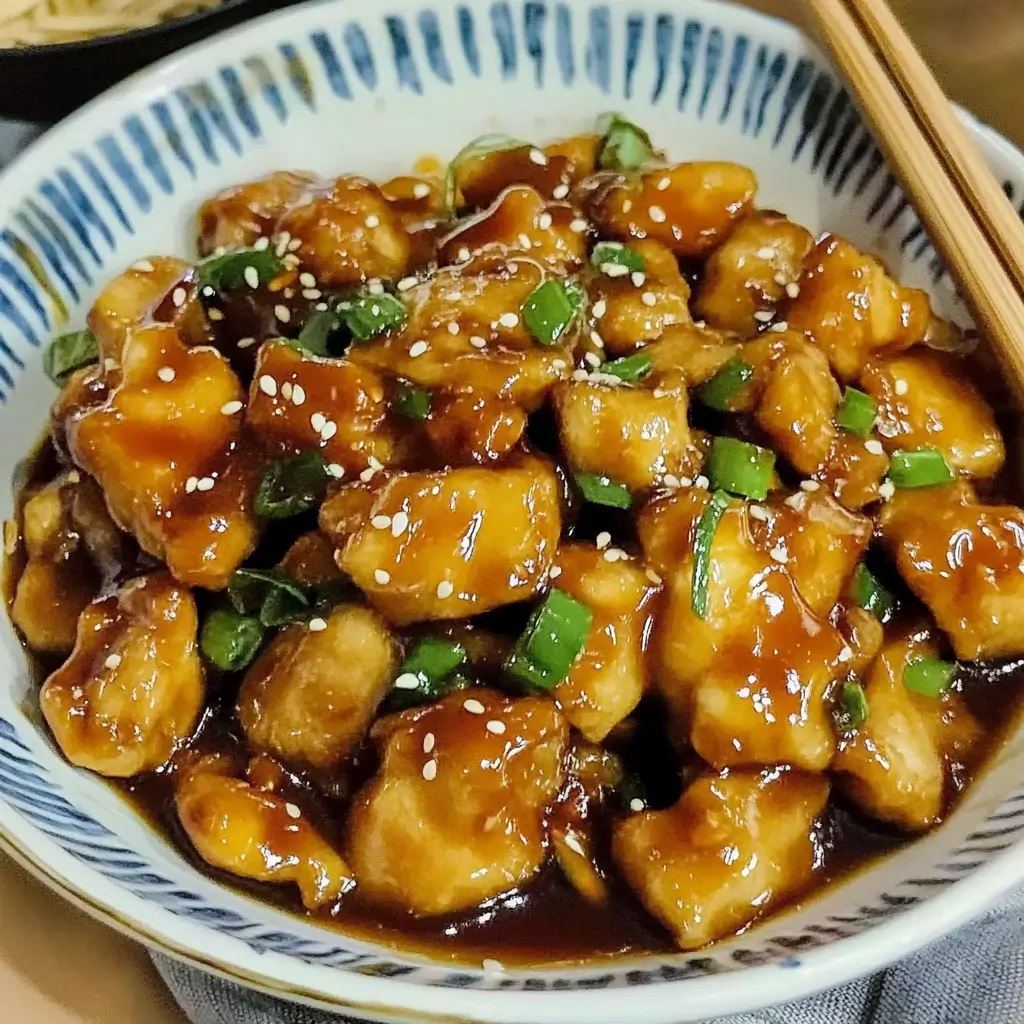
- Garnish and Serve: Remove the lid and garnish the dish with the diced green onions. The green onions add a fresh, vibrant finish and a mild oniony flavor that complements the sweet and savory sauce. Serve immediately while hot.
Nutrition Facts
This recipe is not only delicious but also provides a good balance of nutrients. Here’s a breakdown of the nutritional information per serving, based on estimates and may vary depending on specific ingredient brands and portion sizes.
- Servings: 4 servings
- Calories: Approximately 463 kcal per serving
This calorie count is an estimate and may fluctuate based on the specific brands and measurements of ingredients used. For a more precise nutritional breakdown, you can use online nutritional calculators with the exact brands and quantities you use. This recipe provides a good source of protein from the chicken, and carbohydrates primarily from the honey, brown sugar, and cornstarch. While it contains some fat from the olive oil and sesame oil, it’s relatively lean compared to many takeout options.
Preparation Time
This gluten-free Chinese food recipe is quick and easy to prepare, making it ideal for busy weeknights.
- Prep Time: 10 minutes
- Cook Time: 20 minutes
- Total Time: 30 minutes
The short preparation and cooking times make this recipe a fantastic option for a delicious and satisfying meal that doesn’t require hours in the kitchen. Most of the prep time is spent cubing the chicken and mincing the garlic and chili pepper, which can be done efficiently. The cooking process is relatively quick, primarily involving stir-frying and simmering.
How to Serve
This versatile gluten-free Chinese chicken dish can be enjoyed in various ways. Here are some serving suggestions to make it a complete and satisfying meal:
- Over Rice: The classic and most popular way to serve this dish is over a bed of fluffy cooked rice. White rice, brown rice, or jasmine rice all work well. The rice soaks up the delicious honey sauce, making every bite flavorful and satisfying. For a healthier option, choose brown rice or quinoa.
- With Gluten-Free Noodles: If you prefer noodles over rice, serve this chicken dish with gluten-free noodles. Rice noodles, glass noodles (bean thread noodles), or even gluten-free spaghetti or fettuccine can be used. Toss the noodles with a little sesame oil or soy sauce for extra flavor before topping with the chicken.
- Alongside Steamed Vegetables: For a balanced and nutritious meal, serve this chicken with a side of steamed vegetables. Broccoli, bok choy, snap peas, carrots, and bell peppers are all excellent choices. Steaming vegetables preserves their nutrients and provides a healthy contrast to the richness of the chicken dish. You can lightly season the steamed vegetables with salt, pepper, and a drizzle of sesame oil.
- In Lettuce Wraps: For a lighter and lower-carb option, serve the chicken in lettuce wraps. Use crisp lettuce leaves like butter lettuce or romaine lettuce to create little cups and fill them with the chicken and sauce. This is a fun and interactive way to enjoy the dish, and it’s perfect for appetizers or a light meal. You can add extra toppings to the lettuce wraps like shredded carrots, bean sprouts, or chopped peanuts.
- As a Stir-Fry with Vegetables: To make it a complete stir-fry, you can add vegetables directly to the skillet while cooking the chicken. Bell peppers, onions, broccoli florets, sliced carrots, and mushrooms would all be great additions. Add the vegetables to the skillet after browning the chicken, and sauté them until tender-crisp before adding the honey sauce. This creates a one-pan meal packed with flavor and nutrition.
Additional Tips for Perfect Gluten-Free Chinese Food
To ensure your gluten-free Chinese food is a resounding success, consider these helpful tips:
- Marinate the Chicken for Extra Flavor: For even more flavorful and tender chicken, marinate it in a mixture of gluten-free tamari, a little sesame oil, and minced ginger for at least 30 minutes, or up to a few hours in the refrigerator before cooking. Marinating infuses the chicken with deeper flavor and helps to tenderize it. This step is optional but highly recommended for enhancing the overall taste.
- Adjust the Spice Level to Your Preference: This recipe includes a Thai chili pepper and red pepper flakes for heat. If you prefer a milder dish, reduce or omit these ingredients. For a spicier dish, add more chili pepper or red pepper flakes, or even a dash of chili garlic sauce to the honey sauce. Taste the sauce before adding it to the chicken and adjust the spice level accordingly.
- Add Vegetables for a Heartier Meal: As mentioned in the serving suggestions, you can easily add vegetables to this recipe to make it a more complete and nutritious meal. Stir-fry vegetables like broccoli, bell peppers, onions, carrots, snap peas, or mushrooms along with the chicken. Adding vegetables not only increases the nutritional value but also adds texture and flavor to the dish.
- Don’t Overcrowd the Skillet: When cooking the chicken, make sure not to overcrowd the skillet. Overcrowding can lower the temperature of the pan and cause the chicken to steam instead of brown properly. If necessary, cook the chicken in batches to ensure it browns nicely and cooks evenly. A large skillet or wok is ideal for stir-frying.
- Serve Immediately for Best Texture: This gluten-free Chinese chicken is best served immediately after cooking while the chicken is still crispy and the sauce is glossy and flavorful. While leftovers can be stored in the refrigerator and reheated, the chicken may lose some of its crispiness over time. To reheat, gently warm it in a skillet or microwave, adding a splash of water or broth if the sauce has become too thick.
FAQ Section: Your Questions Answered
Here are some frequently asked questions about this gluten-free Chinese food recipe to help you make it perfectly every time.
Q1: Can I substitute the honey with another sweetener?
A: Yes, you can substitute honey with other liquid sweeteners like maple syrup or agave nectar. However, keep in mind that each sweetener will impart a slightly different flavor profile to the sauce. Maple syrup will add a more caramel-like note, while agave nectar is sweeter and more neutral. If you are using a granulated sweetener like sugar, you may need to add a little water to help it dissolve properly in the sauce. For the best flavor that closely mimics traditional Chinese takeout, honey is recommended.
Q2: Is there a substitute for gluten-free tamari soy sauce?
A: Gluten-free tamari is the best gluten-free alternative to soy sauce for authentic Chinese flavor. If you cannot find tamari, you can use coconut aminos as a soy-free and gluten-free substitute. Coconut aminos are made from coconut sap and salt, and they have a slightly sweeter and less salty flavor than tamari. You may need to adjust the amount of honey or salt in the recipe if using coconut aminos. Avoid using regular soy sauce as it contains wheat and is not gluten-free.
Q3: How long can I store leftovers of this gluten-free Chinese chicken?
A: Leftovers of this gluten-free Chinese chicken can be stored in an airtight container in the refrigerator for up to 3-4 days. For the best quality, consume them within this timeframe. Reheat gently in a skillet or microwave until heated through. As mentioned earlier, the chicken may lose some of its crispiness upon reheating, but the flavor will still be delicious.
Q4: Can I use chicken thighs instead of chicken breasts?
A: Yes, you can definitely use boneless, skinless chicken thighs instead of chicken breasts. Chicken thighs are fattier and have a richer flavor, which some people prefer. They also tend to stay more moist during cooking. If using chicken thighs, trim any excess fat before cubing them. The cooking time will be similar to chicken breasts, but ensure the thighs are cooked through and reach an internal temperature of 165°F (74°C).
Q5: How can I make this recipe spicier?
A: There are several ways to increase the spice level of this recipe. You can add more minced Thai chili pepper or red pepper flakes to the sauce. Alternatively, you can add a dash of chili garlic sauce, sriracha, or your favorite hot sauce to the honey sauce. Another option is to use a spicier type of chili pepper, such as a bird’s eye chili or habanero, but use these sparingly as they are significantly hotter. Always start with a small amount of spice and taste as you go, adding more until you reach your desired level of heat.
Print
Delicious and Easy Gluten-Free Chinese Food Recipe
Ingredients
- 1 large egg, whisked: The egg acts as a binder and helps the cornstarch adhere to the chicken, creating a lovely, slightly crispy coating when cooked. Choose a good quality, fresh egg for the best results.
- 1 lb boneless, skinless chicken breasts, cubed: Chicken breast is a lean and versatile protein that works beautifully in this recipe. Cut it into bite-sized cubes, about 1-inch pieces, for even cooking and easy eating. You can also use chicken thighs if you prefer a richer flavor, just be sure to trim any excess fat.
- 3 tablespoons olive oil: Olive oil is used for sautéing the chicken and vegetables. Its mild flavor won’t overpower the other ingredients. You can also use other neutral cooking oils like avocado oil, canola oil, or vegetable oil.
- 1 Thai chili pepper, minced (optional): If you like a bit of heat, a minced Thai chili pepper adds a wonderful kick to the dish. Remember, Thai chili peppers are quite spicy, so adjust the amount to your spice preference. For a milder flavor, you can use a pinch of red pepper flakes instead, or omit it entirely if you prefer no spice. Be careful when handling chili peppers and wash your hands thoroughly afterward.
- 3 cloves garlic, minced: Garlic is a cornerstone of Chinese cuisine, adding a pungent and aromatic flavor to the dish. Freshly minced garlic is always preferred for its superior flavor compared to pre-minced garlic in jars.
- 2 tablespoons diced green onions: Green onions, also known as scallions, provide a fresh, mild onion flavor and a pop of color. They are used both during cooking and as a garnish at the end. Make sure to dice them thinly for even distribution.
- ⅓ cup honey: Honey is the sweetener in this recipe, contributing to the characteristic sweet and savory balance of Chinese sauces. It also adds a beautiful glaze to the chicken. Use a good quality honey for the best flavor. If you are vegan or prefer an alternative sweetener, you can use maple syrup or agave nectar, though the flavor profile will be slightly different.
- 2 tablespoons gluten-free tamari soy sauce: Tamari is a gluten-free alternative to soy sauce, made from fermented soybeans. It offers a rich, umami flavor that is essential to Chinese cooking. Make sure to specifically choose gluten-free tamari to ensure the recipe remains gluten-free. Regular soy sauce contains wheat and is not suitable for those with gluten sensitivities or celiac disease.
- 1 tablespoon apple cider vinegar: Apple cider vinegar adds a touch of acidity to the sauce, balancing the sweetness of the honey and the richness of the tamari. It also helps to tenderize the chicken slightly. You can substitute with rice vinegar if you have it on hand, for a more authentically Asian flavor profile.
- 1 teaspoon sesame oil: Sesame oil is a finishing oil that adds a distinctive nutty aroma and flavor to the dish. A little goes a long way, so just one teaspoon is enough to impart its characteristic taste. Toasted sesame oil is preferred for its more intense flavor.
- ½ teaspoon crushed red pepper flakes: Even if you are using a Thai chili pepper, a pinch of red pepper flakes can add an extra layer of subtle heat and complexity. Adjust the amount to your preference or omit if you are sensitive to spice.
- ½ cup cornstarch: Cornstarch is the key to creating the crispy coating on the chicken and thickening the sauce to a perfect glaze. It is naturally gluten-free and works exceptionally well in this recipe.
- 2 tablespoons brown sugar: Brown sugar adds depth of sweetness and a hint of molasses flavor to the sauce, complementing the honey and tamari. You can use light or dark brown sugar, depending on your preference. Dark brown sugar will provide a richer, more intense molasses flavor.
Instructions
- Prepare the Honey Sauce: In a small bowl, whisk together the honey, gluten-free tamari soy sauce, apple cider vinegar, sesame oil, and red pepper flakes. Whisk until all ingredients are well combined and the sauce is smooth. Set aside. This flavorful sauce will be poured over the chicken later to create that signature Chinese takeout taste. Taste the sauce and adjust the red pepper flakes if you prefer more or less heat. Having the sauce prepared in advance streamlines the cooking process once you start stir-frying.
- Combine Cornstarch and Brown Sugar: In a separate medium-sized bowl, combine the cornstarch and brown sugar. Whisk them together thoroughly until they are evenly mixed and there are no lumps of cornstarch. This mixture will be used to coat the chicken, creating a crispy exterior and helping to thicken the sauce later on. Ensuring the cornstarch is well combined with the brown sugar will prevent any clumps from forming when you coat the chicken.
- Prepare the Egg Wash: Place the whisked egg in a separate shallow bowl. The whisked egg serves as a binder, allowing the cornstarch mixture to adhere properly to the chicken pieces. Make sure the egg is well whisked to ensure a smooth and even coating.
- Coat the Chicken: Add the cubed chicken to the bowl with the whisked egg. Toss the chicken to ensure each piece is evenly coated with the egg. Then, transfer the egg-coated chicken to the bowl with the cornstarch and brown sugar mixture. Toss again, making sure each piece of chicken is thoroughly coated in the cornstarch mixture. This coating is crucial for achieving that slightly crispy texture on the chicken and for thickening the sauce. Ensure even coating for best results.
- Heat the Skillet: Add the olive oil to a large skillet or wok. Heat the skillet over medium heat. Allow the oil to heat up properly before adding the chicken. You’ll know the oil is ready when it shimmers slightly or when a drop of water flicked into the pan sizzles immediately. Using a large skillet or wok ensures there’s enough surface area to cook the chicken in a single layer without overcrowding, which is important for proper browning.
- Sauté Aromatics and Chicken: Once the oil is hot, add the minced garlic and minced Thai chili pepper (if using) to the skillet. Sauté for about 30 seconds, or until fragrant. Be careful not to burn the garlic, as it can become bitter. The aroma of garlic and chili pepper infusing the oil is the first sign of the delicious flavors to come. Immediately add the cornstarch-coated chicken to the skillet.
- Brown the Chicken: Cook the chicken, stirring occasionally, until it is slightly browned on all sides. This will take about 5-7 minutes. Browning the chicken adds flavor and texture to the dish. Don’t worry about cooking the chicken all the way through at this stage, as it will continue to cook in the sauce. Ensure the chicken is cooked in a single layer as much as possible for even browning.
- Add the Honey Sauce and Sauté: Pour the prepared honey sauce over the browned chicken in the skillet. Sauté, stirring constantly, for 2-3 minutes. As the sauce heats up, it will begin to thicken and glaze the chicken. Stirring ensures the sauce coats all the chicken pieces evenly and prevents sticking.
- Simmer and Finish: Reduce the heat to low, cover the skillet with a lid, and simmer for another 6-8 minutes, or until the chicken is cooked through and the sauce has thickened to your desired consistency. Simmering allows the chicken to cook completely and the flavors to meld together beautifully. The sauce will reduce and thicken further during simmering. Check the chicken for doneness by cutting into a piece – it should be white and opaque throughout with no pink remaining.
- Garnish and Serve: Remove the lid and garnish the dish with the diced green onions. The green onions add a fresh, vibrant finish and a mild oniony flavor that complements the sweet and savory sauce. Serve immediately while hot.
Nutrition
- Serving Size: One Normal Portion
- Calories: 463 kcal


