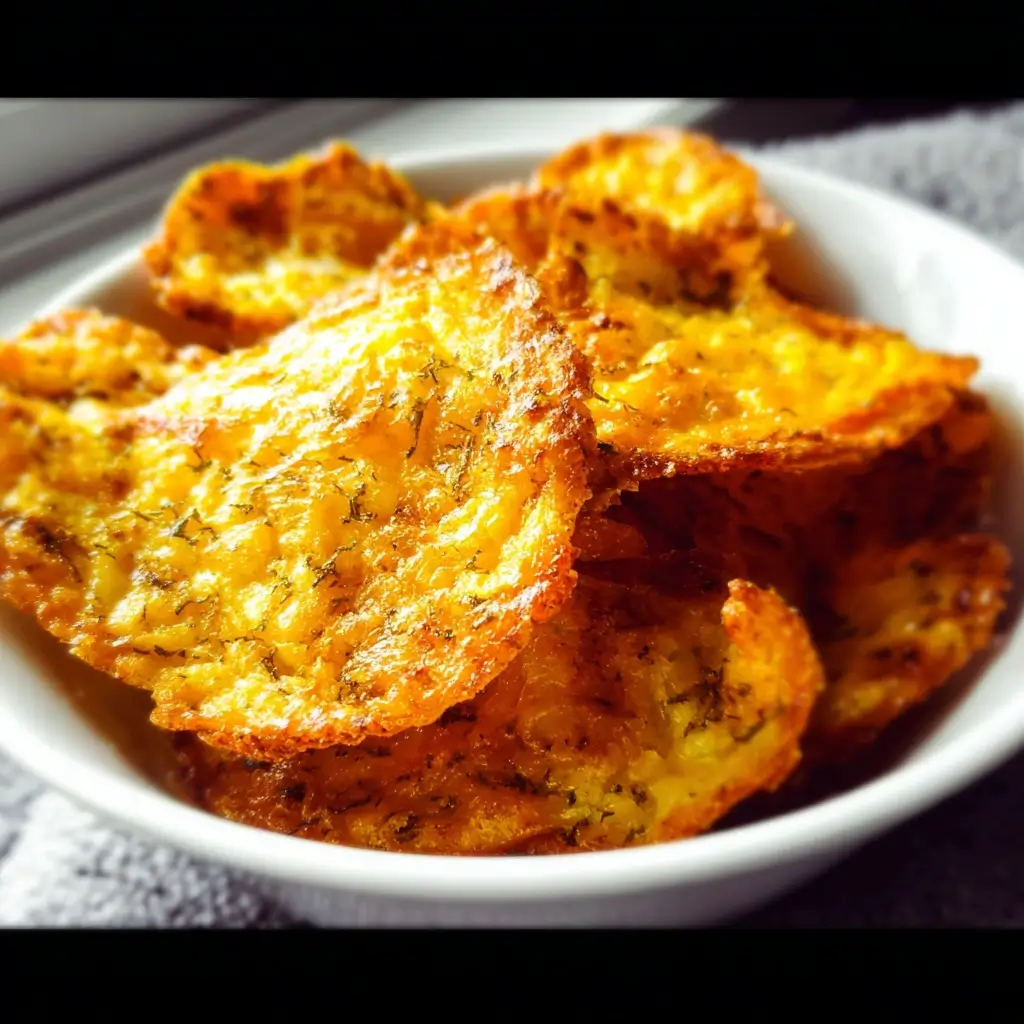
Of all the culinary experiments that have unfolded in my kitchen, few have been met with the same level of unanimous, wide-eyed delight as these Crispy Cheese and Egg Chips. It all started on a lazy Sunday afternoon. The familiar craving for something crunchy, savory, and satisfying struck our family, but the usual suspects—potato chips and crackers—just weren’t going to cut it. I wanted something with more substance, a protein-packed punch that wouldn’t lead to a carb crash. Rummaging through the fridge, my eyes landed on a block of sharp cheddar and a carton of eggs. A lightbulb went off. What if I could combine the crispy, lacy magic of a baked cheese crisp with the rich, binding power of an egg? The idea felt both ridiculously simple and potentially genius. I’ll admit, the first batch was a learning experience. But the second? Absolute perfection. As I pulled the baking sheet from the oven, the air filled with the most intoxicating aroma of toasted cheese and savory goodness. The “chips” were golden-brown, impossibly thin, and bubbled into a beautiful, brittle lattice. My kids, initially skeptical of “egg chips,” were lured in by the smell. The first tentative crunch was followed by a chorus of “Whoa, Mom, what are these?!” They disappeared in under five minutes, dipped in sour cream, crumbled over a bowl of chili we had for dinner, and eaten straight off the cooling rack. Now, these Crispy Cheese and Egg Chips have become a household staple—our go-to for a healthy snack, a gluten-free cracker alternative, and the undisputed champion of movie night treats. They are a testament to the fact that sometimes, the most incredible recipes are born from the simplest ingredients and a spark of curiosity.
The Ultimate Crispy Cheese and Egg Chips Recipe
Here is the complete, perfected recipe that will have you making these incredible snacks on repeat. It’s simple, requires minimal ingredients, and delivers a spectacularly crunchy and flavorful result.
Yields: Approximately 24 chips
Prep time: 10 minutes
Cook time: 10-12 minutes
Total time: 22 minutes
Ingredients
- Cheese (The Foundation of Flavor):
- 1 ½ cups (about 6 oz) freshly shredded Sharp Cheddar Cheese
- ½ cup (about 2 oz) freshly grated Parmesan Cheese
- The Binder and Protein Boost:
- 1 large Egg, lightly whisked
- The Seasoning Blend (For that extra “wow” factor):
- ½ teaspoon Smoked Paprika
- ¼ teaspoon Garlic Powder
- ¼ teaspoon Onion Powder
- ⅛ teaspoon freshly ground Black Pepper
- Optional: A tiny pinch of cayenne pepper for a little heat
- Optional: 1 tablespoon finely chopped fresh chives or parsley
Step-by-Step Instructions for Perfect Crispy Cheese and Egg Chips
Follow these instructions carefully to ensure you get the crispiest, most delicious chips possible. The technique is just as important as the ingredients.
- Preheat and Prepare: Begin by preheating your oven to 400°F (200°C). This high heat is crucial for achieving that snap-worthy crispness. Line a large baking sheet with parchment paper. Do not skip the parchment paper! This is non-negotiable for preventing the cheese from sticking and ensuring easy removal. Do not use aluminum foil, even if greased, as the cheese will likely weld itself to the surface.
- Shred Your Cheese: For the best texture and melt, always shred your cheese from a block. Pre-shredded cheeses are often coated with anti-caking agents like potato starch or cellulose, which can prevent them from melting into a cohesive, crispy lattice. Use the medium holes on a box grater for both the cheddar and the Parmesan.
- Combine the Ingredients: In a medium-sized mixing bowl, add your freshly shredded cheddar and grated Parmesan. Sprinkle the smoked paprika, garlic powder, onion powder, and black pepper over the cheese. If you’re using fresh chives, add them now. Toss everything together with a fork until the seasonings are evenly distributed throughout the cheese.
- Incorporate the Egg: Pour the lightly whisked egg over the cheese mixture. Using your fork (or your hands, for better mixing), combine everything until the cheese is evenly coated with the egg. The mixture shouldn’t be wet or soupy; the egg should act as a binder, just barely moistening all the cheese shreds.
- Portion the Chips: Using a tablespoon, scoop heaping mounds of the cheese and egg mixture onto the prepared parchment-lined baking sheet. Place the mounds about 2 inches apart to allow for spreading. Once you have all your mounds on the sheet, use the back of the spoon or your fingertips to gently flatten each one into a thin, even circle, about 2-3 inches in diameter. The thinner you make them, the crispier they will be. Aim for a delicate, lacy thickness.
- Bake to Golden Perfection: Place the baking sheet in the center rack of your preheated oven. Bake for 10-12 minutes. The baking time can vary slightly depending on your oven and the thickness of your chips. You need to watch them closely during the last few minutes. They are done when the edges are a deep golden brown and the centers are bubbly and set. The difference between perfectly crispy and sadly burnt is only a minute or two.
- Cool for the Crunch: Remove the baking sheet from the oven and place it on a wire cooling rack. Let the chips cool completely on the baking sheet for at least 5-10 minutes. This step is critical. As they cool, they will harden and transform from soft, melted cheese into the firm, crispy chips you desire. Once they are cool and firm, you can easily peel them off the parchment paper.
Nutrition Facts
Please note that these values are an estimate and can vary based on the specific brands of cheese used.
- Servings: This recipe makes approximately 4 servings.
- Serving Size: 6 chips
- Calories per serving: Approximately 210 calories
Breakdown per serving (estimated):
- Fat: 16g
- Protein: 14g
- Total Carbohydrates: 2g
- Net Carbohydrates: 2g
- Sodium: 450mg
These chips are naturally gluten-free, low-carb, and keto-friendly, making them an excellent snack for a wide range of dietary lifestyles.
Preparation Time
One of the best things about this recipe is how quickly it comes together.
- Active Preparation Time: 10 minutes (This includes shredding the cheese and mixing the ingredients).
- Cooking Time: 10-12 minutes.
- Cooling Time: 5-10 minutes.
- Total Time from Start to Finish: Approximately 25-30 minutes.
How to Serve Your Crispy Cheese and Egg Chips
These versatile chips are more than just a snack; they’re a culinary multitool. Here are some of our favorite ways to serve them:
- As a Standalone Snack:
- Serve them warm, fresh from the oven (after cooling, of course) for a satisfying and savory treat.
- Pack them in a container for an on-the-go protein boost for work or school lunches. They are far healthier than traditional potato chips.
- The Perfect Dipping Vessel:
- Their sturdy, crunchy texture makes them ideal for dipping. Pair them with:
- Creamy Guacamole
- Fresh Pico de Gallo or your favorite salsa
- Sour Cream and Chive Dip
- Classic Ranch Dressing
- A savory Greek Yogurt Dip
- Their sturdy, crunchy texture makes them ideal for dipping. Pair them with:
- A Crunchy Garnish for Soups and Salads:
- Forget croutons! Crumble these chips over a bowl of creamy tomato soup, hearty chili, or black bean soup for a burst of cheesy flavor and texture.
- Break them up and sprinkle them over a Caesar salad or a simple green salad as a gluten-free, keto-friendly alternative to croutons.
- Elevate Your Charcuterie or Cheese Board:
- Arrange them on a platter alongside cured meats, olives, fruits, and nuts. They provide a wonderful textural contrast and are a conversation starter.
- Keto and Low-Carb “Nachos”:
- Arrange the finished chips on an oven-safe plate, top with taco meat, jalapeños, and more cheese, then broil for a minute or two until the topping is hot and bubbly. Serve with sour cream and guacamole.
- As a “Cracker” for Toppings:
- Use them as a base for canapés. Top with a dollop of cream cheese and a slice of smoked salmon, or a smear of fig jam and a piece of prosciutto.
Additional Tips for Guaranteed Success
Take your Crispy Cheese and Egg Chip game to the next level with these five professional tips.
- The Thinner, The Winner: The key to a truly crispy chip is thickness. When you flatten the mounds on the parchment paper, be brave. Spread them as thin as you can without creating large holes. A thinner chip allows the fat to render out more effectively, essentially “frying” the cheese and egg into a brittle, crunchy wafer.
- Embrace the Block (Cheese, That Is): We mentioned this in the instructions, but it bears repeating because it’s the single most important tip for texture. Pre-shredded cheese contains additives that create a powdery coating and inhibit a clean, lacy melt. Taking the extra two minutes to shred your own cheese from a block will yield a vastly superior, crispier, and more flavorful chip.
- Don’t Crowd the Pan: Give your chips space to breathe and spread on the baking sheet. Placing them too close together will trap steam between them. Instead of crisping up, the edges of the chips will steam, resulting in a softer, more pliable texture. An inch or two of space all around each chip is ideal. Use two baking sheets if necessary.
- Watch Them Like a Hawk: Ovens have hot spots, and the line between golden brown perfection and a burnt, bitter mess is incredibly fine with a recipe like this. In the final 2-3 minutes of baking, don’t walk away. Keep your eye on the oven. If you notice the chips on one side of the pan are browning faster, rotate the pan 180 degrees to ensure even cooking.
- Experiment with Cheeses and Spices: This recipe is a fantastic template for customization. Don’t be afraid to experiment!
- Cheese: Try swapping the cheddar for Gruyère for a nutty flavor, or Pepper Jack for a spicy kick. A blend of aged white cheddar and Asiago is also phenomenal.
- Spices: Add a pinch of chili powder and cumin for a Tex-Mex flair. Try dried herbs like rosemary or thyme for a more sophisticated, earthy flavor. Everything Bagel Seasoning is another game-changing addition.
Frequently Asked Questions (FAQ)
Here are answers to some common questions you might have about making these incredible chips.
1. Can I make these in an air fryer?
Yes, you absolutely can! The air fryer is excellent for making things crispy. To adapt the recipe, preheat your air fryer to 375°F (190°C). Line the air fryer basket with a piece of parchment paper cut to fit. Place the cheese mounds on the parchment, ensuring you don’t overcrowd the basket (you’ll need to work in batches). Air fry for 5-7 minutes, or until golden and crispy. They cook much faster in an air fryer, so keep a close eye on them.
2. My chips came out soft and chewy, not crispy. What did I do wrong?
This is the most common issue and usually comes down to one of three things:
- They were too thick: If the mounds aren’t flattened enough, the center won’t get hot enough to crisp up, leaving it chewy. Try making them thinner next time.
- Your oven temperature was too low: A hot oven is essential. Ensure your oven is fully preheated to 400°F (200°C). If you suspect your oven runs cool, you might need to increase the temperature slightly or add a minute or two to the bake time.
- You didn’t let them cool completely: This is a crucial step. The chips are still pliable when they first come out of the oven. They achieve their signature crunch as they cool and the rendered fat solidifies. Be patient and let them rest on the pan.
3. Can I use different types of cheese?
Definitely! This recipe is very forgiving when it comes to cheese selection. The best cheeses are hard or semi-hard aged cheeses that have lower moisture content. Great options include: Gruyère, Asiago, Provolone, Monterey Jack, or Pepper Jack. You can even use all Parmesan for an ultra-crispy, salty “frico” style chip. Avoid very soft cheeses like fresh mozzarella or brie, as their high water content will prevent them from crisping.
4. Are these Crispy Cheese and Egg Chips truly keto-friendly?
Yes, they are an ideal snack for anyone following a ketogenic diet. Both cheese and eggs are naturally very low in carbohydrates and high in fats and protein. With an estimated 2g of net carbs per serving, they fit perfectly within keto macros. They provide the satisfying crunch that many people miss on a low-carb diet, without any of the sugar or grains found in traditional chips and crackers.
5. How should I store them and how long do they last?
For maximum crispiness, these chips are best eaten the day they are made. However, you can store them for later. Let them cool completely, then store them in an airtight container at room temperature. Do not refrigerate them, as the moisture in the fridge will make them soft. They should stay reasonably crisp for up to 3 days. If they lose some of their crunch, you can often revive them by placing them on a baking sheet and warming them in a 350°F (175°C) oven for 2-3 minutes, then letting them cool again.

Crispy Cheese and Egg Chips Recipe
Ingredients
- Cheese (The Foundation of Flavor):
- 1 ½ cups (about 6 oz) freshly shredded Sharp Cheddar Cheese
- ½ cup (about 2 oz) freshly grated Parmesan Cheese
- The Binder and Protein Boost:
- 1 large Egg, lightly whisked
- The Seasoning Blend (For that extra “wow” factor):
- ½ teaspoon Smoked Paprika
- ¼ teaspoon Garlic Powder
- ¼ teaspoon Onion Powder
- ⅛ teaspoon freshly ground Black Pepper
- Optional: A tiny pinch of cayenne pepper for a little heat
- Optional: 1 tablespoon finely chopped fresh chives or parsley
Instructions
- Preheat and Prepare: Begin by preheating your oven to 400°F (200°C). This high heat is crucial for achieving that snap-worthy crispness. Line a large baking sheet with parchment paper. Do not skip the parchment paper! This is non-negotiable for preventing the cheese from sticking and ensuring easy removal. Do not use aluminum foil, even if greased, as the cheese will likely weld itself to the surface.
- Shred Your Cheese: For the best texture and melt, always shred your cheese from a block. Pre-shredded cheeses are often coated with anti-caking agents like potato starch or cellulose, which can prevent them from melting into a cohesive, crispy lattice. Use the medium holes on a box grater for both the cheddar and the Parmesan.
- Combine the Ingredients: In a medium-sized mixing bowl, add your freshly shredded cheddar and grated Parmesan. Sprinkle the smoked paprika, garlic powder, onion powder, and black pepper over the cheese. If you’re using fresh chives, add them now. Toss everything together with a fork until the seasonings are evenly distributed throughout the cheese.
- Incorporate the Egg: Pour the lightly whisked egg over the cheese mixture. Using your fork (or your hands, for better mixing), combine everything until the cheese is evenly coated with the egg. The mixture shouldn’t be wet or soupy; the egg should act as a binder, just barely moistening all the cheese shreds.
- Portion the Chips: Using a tablespoon, scoop heaping mounds of the cheese and egg mixture onto the prepared parchment-lined baking sheet. Place the mounds about 2 inches apart to allow for spreading. Once you have all your mounds on the sheet, use the back of the spoon or your fingertips to gently flatten each one into a thin, even circle, about 2-3 inches in diameter. The thinner you make them, the crispier they will be. Aim for a delicate, lacy thickness.
- Bake to Golden Perfection: Place the baking sheet in the center rack of your preheated oven. Bake for 10-12 minutes. The baking time can vary slightly depending on your oven and the thickness of your chips. You need to watch them closely during the last few minutes. They are done when the edges are a deep golden brown and the centers are bubbly and set. The difference between perfectly crispy and sadly burnt is only a minute or two.
- Cool for the Crunch: Remove the baking sheet from the oven and place it on a wire cooling rack. Let the chips cool completely on the baking sheet for at least 5-10 minutes. This step is critical. As they cool, they will harden and transform from soft, melted cheese into the firm, crispy chips you desire. Once they are cool and firm, you can easily peel them off the parchment paper.
Nutrition
- Serving Size: One Normal Portion
- Calories: 210
- Sodium: 450mg
- Fat: 16g
- Carbohydrates: 2g
- Protein: 14g