


There are some treats that just scream “summer,” “childhood,” and “pure, unadulterated joy,” and homemade Cookie Ice Cream Sandwiches are right at the top of that list. I remember the first time I decided to ditch the store-bought versions and make my own. My kids were young, and their eyes lit up like Christmas morning when they saw me pulling freshly baked, giant cookies from the oven, then layering them with their favorite vanilla bean ice cream. The sheer delight on their faces as they took that first messy, delicious bite, ice cream dripping down their chins, was a memory etched forever. It wasn’t just a dessert; it was an event. Since then, these cookie ice cream sandwiches have become a staple for birthday parties, summer barbecues, or just a special weeknight treat. The beauty of this recipe is its versatility and the superior taste of homemade cookies embracing creamy ice cream – it’s a match truly made in heaven, and far better than anything you can buy in a box. The slightly soft, chewy cookie, the cold, smooth ice cream, maybe a playful roll in some sprinkles… it’s a textural and flavor symphony that never fails to impress.
The Ultimate Homemade Cookie Ice Cream Sandwiches: A Step-by-Step Guide
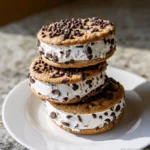
This recipe focuses on creating classic, crowd-pleasing chocolate chip cookie ice cream sandwiches. The cookies are designed to be sturdy enough to hold the ice cream but still delightfully chewy. We’ll walk through every step, ensuring your creations are nothing short of spectacular.
Ingredients for Irresistible Cookie Ice Cream Sandwiches
To make the best cookie ice cream sandwiches, you need quality ingredients. Here’s what you’ll gather:
For the Perfect Chewy Chocolate Chip Cookies (makes approx. 24 large cookies for 12 sandwiches):
- Unsalted Butter: 1 cup (2 sticks or 226g), softened to room temperature. This is crucial for creaming properly.
- Granulated Sugar: 3/4 cup (150g). For sweetness and crisp edges.
- Light Brown Sugar: 1 cup (220g), packed. Adds moisture and chewiness.
- Large Eggs: 2, at room temperature. Binds the dough and adds richness.
- Pure Vanilla Extract: 2 teaspoons. For that classic, warm flavor.
- All-Purpose Flour: 3 cups (375g), spooned and leveled. The backbone of your cookies.
- Cornstarch: 1 tablespoon. A secret weapon for softer, chewier cookies.
- Baking Soda: 1 teaspoon. For leavening.
- Salt: 1 teaspoon. Balances the sweetness and enhances flavors.
- Semi-Sweet Chocolate Chips: 2 cups (340g). Or use a mix of milk and dark chocolate if you prefer.
For the Ice Cream Filling:
- Your Favorite Ice Cream: Approximately 1.5 to 2 quarts (about 1.4 to 1.9 liters). Vanilla bean is classic, but feel free to get creative! Strawberry, chocolate, mint chocolate chip, or even coffee ice cream work wonderfully. Let it soften slightly at room temperature for about 10-15 minutes before assembling.
Optional for Rolling/Dipping (adds extra flair!):
- Mini chocolate chips
- Rainbow or chocolate sprinkles
- Chopped nuts (pecans, walnuts, peanuts)
- Toasted coconut flakes
- Melted chocolate for drizzling
Step-by-Step Instructions for Cookie Ice Cream Sandwich Perfection
Follow these detailed instructions for foolproof, delicious cookie ice cream sandwiches.
Part 1: Making the Irresistible Cookie Dough
- Prepare Baking Sheets: Line two to three large baking sheets with parchment paper or silicone baking mats. This prevents sticking and helps with even baking. Set aside.
- Cream Butter and Sugars: In a large mixing bowl, using a hand mixer or a stand mixer fitted with the paddle attachment, beat the softened unsalted butter, granulated sugar, and packed light brown sugar together on medium speed until the mixture is light, fluffy, and pale in color. This process, called creaming, usually takes about 2-3 minutes. Scrape down the sides and bottom of the bowl occasionally to ensure everything is incorporated. This step is vital as it incorporates air, which contributes to the cookies’ texture.
- Add Eggs and Vanilla: Add the room temperature eggs one at a time, beating well after each addition until fully incorporated. If the eggs are cold, they can cause the butter to seize. Beat in the pure vanilla extract until combined. The mixture should look smooth and emulsified.
- Combine Dry Ingredients: In a separate medium bowl, whisk together the all-purpose flour, cornstarch, baking soda, and salt. Whisking helps to distribute the leavening agent (baking soda) and salt evenly throughout the flour.
- Gradually Add Dry to Wet Ingredients: With the mixer on low speed, gradually add the dry ingredient mixture to the wet ingredient mixture in three or four additions. Mix only until the flour is just combined. Be careful not to overmix at this stage; overmixing develops gluten, which can result in tough cookies. A few streaks of flour remaining are okay, as they will get mixed in with the chocolate chips.
- Fold in Chocolate Chips: Remove the bowl from the mixer (if using a stand mixer) and gently fold in the semi-sweet chocolate chips using a rubber spatula or wooden spoon. Ensure they are evenly distributed throughout the dough.
- Chill the Dough (Highly Recommended): Cover the bowl with plastic wrap and refrigerate the cookie dough for at least 1 hour, or preferably for 2-4 hours, or even overnight. Chilling the dough solidifies the fat, preventing the cookies from spreading too much during baking. It also allows the flavors to meld and deepen, resulting in a more flavorful cookie. For truly thick and chewy cookies, don’t skip this step!
Part 2: Baking the Cookies
- Preheat Oven: About 20 minutes before you’re ready to bake, preheat your oven to 375°F (190°C). Position an oven rack in the center of the oven for even baking.
- Portion the Dough: Once chilled, remove the cookie dough from the refrigerator. For large cookies suitable for ice cream sandwiches, use a large cookie scoop (about 3 tablespoons or 1/4 cup measure) to portion out mounds of dough. Alternatively, you can roll the dough into balls of approximately 2 inches in diameter. Place them about 3 inches apart on the prepared baking sheets to allow for spreading.
- Optional – Flatten Slightly: For flatter cookies that are easier to make sandwiches with, you can gently press down on the tops of the dough balls with the palm of your hand or the bottom of a glass before baking.
- Bake: Bake for 12-15 minutes, or until the edges are golden brown and set, and the centers are still slightly soft. Ovens vary, so keep an eye on them. For chewier cookies, err on the side of slightly underbaking.
- Cool Cookies: Let the cookies cool on the baking sheets for 5-10 minutes. They will continue to cook slightly from the residual heat. This also allows them to firm up enough to be transferred without breaking. Then, carefully transfer the cookies to a wire rack to cool completely. It’s crucial that the cookies are completely cool before you attempt to add ice cream, otherwise, you’ll have a melty mess. This might take at least 1-2 hours at room temperature.
Part 3: Preparing the Ice Cream and Assembling the Sandwiches
- Soften Ice Cream (Slightly): About 10-15 minutes before you plan to assemble the sandwiches, take your ice cream out of the freezer and let it sit at room temperature. You want it to be soft enough to scoop and spread easily, but not melted.
- Match Cookie Pairs: While the ice cream is softening, pair up your cooled cookies by size and shape. You’ll want two similarly sized cookies for each sandwich. Lay one cookie from each pair flat side up on a clean baking sheet lined with parchment paper. This will be the base.
- Scoop Ice Cream: Once the ice cream is slightly softened, use an ice cream scoop (a standard round scoop works well) to place a generous scoop of ice cream onto the flat side of one cookie in each pair (the ones you laid out). For a neater look, you can also use a method where you slice a cylindrical carton of ice cream into discs, but scooping is generally easier for home use.
- Alternative Method for Uniformity: If you want very neat, uniform ice cream layers, you can spread the slightly softened ice cream into a parchment-lined 9×13 inch baking pan to a thickness of about 1-1.5 inches. Freeze until solid (2-3 hours). Then, use a round cookie cutter (similar in size to your cookies) to cut out perfect discs of ice cream. This method requires more planning but gives professional results.
- Top with Second Cookie: Gently place the second cookie of each pair, flat side down, on top of the ice cream. Press down lightly to spread the ice cream to the edges of the cookies, creating a sandwich. Work quickly to prevent the ice cream from melting too much.
- Optional – Roll the Edges: If desired, immediately roll the exposed ice cream edges of each sandwich in your choice of toppings: mini chocolate chips, sprinkles, chopped nuts, or toasted coconut. This adds an extra layer of flavor, texture, and visual appeal.
Part 4: Freezing for Ultimate Firmness
- Wrap and Freeze: Individually wrap each cookie ice cream sandwich tightly in plastic wrap or aluminum foil. Alternatively, place them in a single layer in an airtight, freezer-safe container, using parchment paper between layers if stacking.
- Freeze Until Firm: Place the wrapped sandwiches back into the freezer and freeze for at least 2-4 hours, or preferably overnight, until the ice cream is completely firm and the sandwiches are solid. This step is crucial for preventing them from being too soft or messy to eat. A well-frozen sandwich is a joy to bite into.
Nutrition Facts (Estimated)
- Servings: This recipe makes approximately 12 large cookie ice cream sandwiches.
- Calories per serving (1 sandwich): Approximately 550-750 calories.
Disclaimer: Nutritional information is an estimate and will vary significantly based on the specific brand and type of ice cream used, the exact size of the cookies, and any additional toppings. These are an indulgent treat, best enjoyed in moderation as part of a balanced lifestyle.
Preparation & Total Time
Understanding the time commitment helps in planning:
- Cookie Dough Preparation Time: 20-25 minutes
- Cookie Dough Chilling Time: Minimum 1 hour (preferably 2-4 hours, or up to 24 hours)
- Cookie Baking Time: 12-15 minutes per batch (allow for multiple batches if not baking all at once)
- Cookie Cooling Time: Minimum 1-2 hours (must be completely cool)
- Ice Cream Softening Time: 10-15 minutes
- Assembly Time: 15-20 minutes (depending on how many you make and if you’re rolling in toppings)
- Final Freezing Time: Minimum 2-4 hours (preferably overnight for best results)
Total Estimated Time (Active): Approximately 1 hour
Total Estimated Time (Including Chilling, Baking, Cooling, Freezing): Approximately 6-10 hours, largely dependent on chilling and freezing duration. Making them is often a two-day process if you chill the dough overnight and freeze the assembled sandwiches overnight.
How to Serve Your Glorious Cookie Ice Cream Sandwiches
These homemade delights are fantastic on their own, but here are a few ideas to elevate the serving experience:
- Straight from the Freezer: The classic way! Unwrap and enjoy immediately for that perfect firm-yet-melty bite.
- Party Platter: Arrange a variety of sandwiches (if you’ve used different ice creams or cookie types) on a chilled platter for a stunning dessert display at parties or gatherings.
- With a Drizzle: Before serving, or just before the final freeze, drizzle the tops of the cookies with melted dark, milk, or white chocolate for an extra touch of decadence.
- À la Mode (Sort Of!): While it’s already “à la mode,” you could serve a half-sandwich alongside a small scoop of a contrasting ice cream flavor or a dollop of whipped cream and some fresh berries for a more composed dessert.
- Cut in Half: For smaller appetites or for a dessert buffet where guests might want to try multiple items, cut the sandwiches in half diagonally after they are fully frozen. This also showcases the beautiful layers.
- Outdoor Gatherings: Keep them in a cooler packed with ice packs for picnics or barbecues. They are always a hit on a hot day!
- Personalized Touch: Let kids or guests roll their own freshly assembled sandwiches in their favorite toppings before the final freeze. It makes it interactive and fun.
Additional Tips for Next-Level Cookie Ice Cream Sandwiches
- Cookie Consistency is Key: For uniform sandwiches, try to make your cookies as consistent in size and thickness as possible. Using a cookie scoop is invaluable here. If some cookies spread more than others, pair them accordingly.
- Pre-Scoop Ice Cream: To make assembly faster and less messy, scoop ice cream balls onto a parchment-lined baking sheet and freeze them until solid (about 1-2 hours) before assembling the sandwiches. Then, simply place a frozen ice cream puck between two cookies.
- Don’t Rush Cooling/Freezing: Patience is a virtue! Ensure cookies are completely cool before adding ice cream. Similarly, allow the assembled sandwiches to freeze solid. Rushing these steps will lead to melty, disappointing results.
- Experiment with Cookie Flavors: While chocolate chip is classic, don’t be afraid to try other sturdy cookie types:
- Oatmeal Raisin Cookies
- Peanut Butter Cookies
- Double Chocolate Cookies
- Sugar Cookies (sturdy ones)
- Brownie Cookies (Fudgy and dense)
The key is a cookie that can hold its shape and complement the ice cream.
- Quality Ice Cream Matters: Since the ice cream is half the star of the show, use a good quality brand and flavor that you love. Premium ice creams with a lower overrun (less air) will be denser and hold up better.
Frequently Asked Questions (FAQ)
Q1: Can I use store-bought cookie dough or pre-baked cookies?
A: Absolutely! If you’re short on time, using store-bought cookie dough (bake as per package instructions and cool completely) or even pre-baked store-bought cookies is a great shortcut. Just ensure the cookies are sturdy enough. Homemade cookies generally offer better flavor and texture for this specific purpose, but convenience is sometimes paramount.
Q2: How long can I store cookie ice cream sandwiches in the freezer?
A: When wrapped tightly in plastic wrap and then placed in an airtight freezer bag or container, your homemade cookie ice cream sandwiches can last for up to 1-2 months in the freezer. However, for the best taste and texture (to avoid ice crystals or freezer burn), it’s recommended to enjoy them within 2-4 weeks.
Q3: My ice cream is melting too fast during assembly. What can I do?
A: Work in small batches. Only take out a few cookies and a small amount of ice cream at a time, keeping the rest in the freezer/fridge. Assemble quickly and return the finished sandwiches to the freezer immediately. The pre-scooping ice cream tip mentioned above also helps significantly. Ensure your kitchen isn’t overly warm.
Q4: Can I make these gluten-free or vegan?
A: Yes, with modifications! For gluten-free, use your favorite gluten-free chocolate chip cookie recipe (or a good 1:1 gluten-free flour blend in this recipe, though results may vary slightly). For vegan, use a vegan chocolate chip cookie recipe (with plant-based butter, egg replacers like flax eggs, and dairy-free chocolate chips) and your favorite vegan ice cream. There are many excellent commercial vegan ice creams available now.
Q5: What are some other creative ice cream flavor and cookie combinations?
A: The possibilities are endless!
* Peanut Butter Cookies with Chocolate Ice Cream
* Double Chocolate Cookies with Mint Chocolate Chip Ice Cream
* Oatmeal Cookies with Salted Caramel Ice Cream
* Sugar Cookies (with sprinkles baked in) with Strawberry Ice Cream
* Ginger Molasses Cookies with Vanilla Bean or Eggnog Ice Cream (for a holiday twist)
Think about complementary flavors and textures.
Cookie Ice Cream Sandwich Recipe
Ingredients
For the Perfect Chewy Chocolate Chip Cookies (makes approx. 24 large cookies for 12 sandwiches):
- Unsalted Butter: 1 cup (2 sticks or 226g), softened to room temperature. This is crucial for creaming properly.
- Granulated Sugar: 3/4 cup (150g). For sweetness and crisp edges.
- Light Brown Sugar: 1 cup (220g), packed. Adds moisture and chewiness.
- Large Eggs: 2, at room temperature. Binds the dough and adds richness.
- Pure Vanilla Extract: 2 teaspoons. For that classic, warm flavor.
- All-Purpose Flour: 3 cups (375g), spooned and leveled. The backbone of your cookies.
- Cornstarch: 1 tablespoon. A secret weapon for softer, chewier cookies.
- Baking Soda: 1 teaspoon. For leavening.
- Salt: 1 teaspoon. Balances the sweetness and enhances flavors.
- Semi-Sweet Chocolate Chips: 2 cups (340g). Or use a mix of milk and dark chocolate if you prefer.
For the Ice Cream Filling:
- Your Favorite Ice Cream: Approximately 1.5 to 2 quarts (about 1.4 to 1.9 liters). Vanilla bean is classic, but feel free to get creative! Strawberry, chocolate, mint chocolate chip, or even coffee ice cream work wonderfully. Let it soften slightly at room temperature for about 10-15 minutes before assembling.
Optional for Rolling/Dipping (adds extra flair!):
- Mini chocolate chips
- Rainbow or chocolate sprinkles
- Chopped nuts (pecans, walnuts, peanuts)
- Toasted coconut flakes
- Melted chocolate for drizzling
Instructions
Part 1: Making the Irresistible Cookie Dough
- Prepare Baking Sheets: Line two to three large baking sheets with parchment paper or silicone baking mats. This prevents sticking and helps with even baking. Set aside.
- Cream Butter and Sugars: In a large mixing bowl, using a hand mixer or a stand mixer fitted with the paddle attachment, beat the softened unsalted butter, granulated sugar, and packed light brown sugar together on medium speed until the mixture is light, fluffy, and pale in color. This process, called creaming, usually takes about 2-3 minutes. Scrape down the sides and bottom of the bowl occasionally to ensure everything is incorporated. This step is vital as it incorporates air, which contributes to the cookies’ texture.
- Add Eggs and Vanilla: Add the room temperature eggs one at a time, beating well after each addition until fully incorporated. If the eggs are cold, they can cause the butter to seize. Beat in the pure vanilla extract until combined. The mixture should look smooth and emulsified.
- Combine Dry Ingredients: In a separate medium bowl, whisk together the all-purpose flour, cornstarch, baking soda, and salt. Whisking helps to distribute the leavening agent (baking soda) and salt evenly throughout the flour.
- Gradually Add Dry to Wet Ingredients: With the mixer on low speed, gradually add the dry ingredient mixture to the wet ingredient mixture in three or four additions. Mix only until the flour is just combined. Be careful not to overmix at this stage; overmixing develops gluten, which can result in tough cookies. A few streaks of flour remaining are okay, as they will get mixed in with the chocolate chips.
- Fold in Chocolate Chips: Remove the bowl from the mixer (if using a stand mixer) and gently fold in the semi-sweet chocolate chips using a rubber spatula or wooden spoon. Ensure they are evenly distributed throughout the dough.
- Chill the Dough (Highly Recommended): Cover the bowl with plastic wrap and refrigerate the cookie dough for at least 1 hour, or preferably for 2-4 hours, or even overnight. Chilling the dough solidifies the fat, preventing the cookies from spreading too much during baking. It also allows the flavors to meld and deepen, resulting in a more flavorful cookie. For truly thick and chewy cookies, don’t skip this step!
Part 2: Baking the Cookies
- Preheat Oven: About 20 minutes before you’re ready to bake, preheat your oven to 375°F (190°C). Position an oven rack in the center of the oven for even baking.
- Portion the Dough: Once chilled, remove the cookie dough from the refrigerator. For large cookies suitable for ice cream sandwiches, use a large cookie scoop (about 3 tablespoons or 1/4 cup measure) to portion out mounds of dough. Alternatively, you can roll the dough into balls of approximately 2 inches in diameter. Place them about 3 inches apart on the prepared baking sheets to allow for spreading.
- Optional – Flatten Slightly: For flatter cookies that are easier to make sandwiches with, you can gently press down on the tops of the dough balls with the palm of your hand or the bottom of a glass before baking.
- Bake: Bake for 12-15 minutes, or until the edges are golden brown and set, and the centers are still slightly soft. Ovens vary, so keep an eye on them. For chewier cookies, err on the side of slightly underbaking.
- Cool Cookies: Let the cookies cool on the baking sheets for 5-10 minutes. They will continue to cook slightly from the residual heat. This also allows them to firm up enough to be transferred without breaking. Then, carefully transfer the cookies to a wire rack to cool completely. It’s crucial that the cookies are completely cool before you attempt to add ice cream, otherwise, you’ll have a melty mess. This might take at least 1-2 hours at room temperature.
Part 3: Preparing the Ice Cream and Assembling the Sandwiches
- Soften Ice Cream (Slightly): About 10-15 minutes before you plan to assemble the sandwiches, take your ice cream out of the freezer and let it sit at room temperature. You want it to be soft enough to scoop and spread easily, but not melted.
- Match Cookie Pairs: While the ice cream is softening, pair up your cooled cookies by size and shape. You’ll want two similarly sized cookies for each sandwich. Lay one cookie from each pair flat side up on a clean baking sheet lined with parchment paper. This will be the base.
- Scoop Ice Cream: Once the ice cream is slightly softened, use an ice cream scoop (a standard round scoop works well) to place a generous scoop of ice cream onto the flat side of one cookie in each pair (the ones you laid out). For a neater look, you can also use a method where you slice a cylindrical carton of ice cream into discs, but scooping is generally easier for home use.
- Alternative Method for Uniformity: If you want very neat, uniform ice cream layers, you can spread the slightly softened ice cream into a parchment-lined 9×13 inch baking pan to a thickness of about 1-1.5 inches. Freeze until solid (2-3 hours). Then, use a round cookie cutter (similar in size to your cookies) to cut out perfect discs of ice cream. This method requires more planning but gives professional results.
- Top with Second Cookie: Gently place the second cookie of each pair, flat side down, on top of the ice cream. Press down lightly to spread the ice cream to the edges of the cookies, creating a sandwich. Work quickly to prevent the ice cream from melting too much.
- Optional – Roll the Edges: If desired, immediately roll the exposed ice cream edges of each sandwich in your choice of toppings: mini chocolate chips, sprinkles, chopped nuts, or toasted coconut. This adds an extra layer of flavor, texture, and visual appeal.
Part 4: Freezing for Ultimate Firmness
- Wrap and Freeze: Individually wrap each cookie ice cream sandwich tightly in plastic wrap or aluminum foil. Alternatively, place them in a single layer in an airtight, freezer-safe container, using parchment paper between layers if stacking.
- Freeze Until Firm: Place the wrapped sandwiches back into the freezer and freeze for at least 2-4 hours, or preferably overnight, until the ice cream is completely firm and the sandwiches are solid. This step is crucial for preventing them from being too soft or messy to eat. A well-frozen sandwich is a joy to bite into.
Nutrition
- Serving Size: One Normal Portion
- Calories: 550-750


