


For years, pizza night was a bittersweet occasion in our household. While the aroma of baking dough and melting cheese filled the kitchen with warmth and anticipation, the aftermath often left me feeling sluggish and uncomfortable. Being gluten-sensitive, traditional pizza crusts were simply off the menu for me, and frankly, the gluten-free options we tried always seemed to fall short – either cardboard-like in texture or packed with ingredients I couldn’t quite pronounce. That is until we stumbled upon the magic of coconut flour pizza crust.
Honestly, my initial expectations were low. Coconut flour? In pizza crust? It sounded…different. But desperate for a truly enjoyable pizza experience that wouldn’t compromise my well-being, I decided to give it a shot. And let me tell you, the first bite was a revelation. Light, slightly chewy, and with a subtle hint of sweetness that perfectly complemented savory toppings, this coconut flour crust was a game-changer. Even my pizza-purist kids, initially skeptical, were completely won over. Now, pizza night is a joyous occasion for everyone, and this coconut flour crust recipe has become a beloved staple in our kitchen. It’s not just a gluten-free alternative; it’s a delicious, healthy, and incredibly versatile base for all our pizza creations. If you’re looking for a way to enjoy pizza without the gluten, grains, or heavy carbs, prepare to be amazed. This recipe is about to revolutionize your pizza nights too!
Ingredients: The Building Blocks of Your Perfect Coconut Flour Pizza Crust
Creating a truly exceptional coconut flour pizza crust hinges on using the right ingredients and understanding their roles. Here’s a detailed breakdown of what you’ll need, along with why each ingredient is crucial and potential substitutions if needed.
- Coconut Flour (1 cup): The star of the show! Coconut flour is what makes this crust gluten-free and grain-free. It’s incredibly absorbent, which is why it’s used in smaller quantities compared to traditional flours. Important Note: Coconut flour is not interchangeable with other flours like almond flour or all-purpose flour. It behaves very differently in baking. Using the correct amount and measuring accurately is key to a successful crust. For best results, use a finely ground coconut flour.
- Eggs (4 large): Eggs are the binding agent in this recipe, providing structure and moisture. They help to hold the coconut flour together and create a cohesive dough. Substitution: While it’s tricky to directly substitute eggs in this recipe due to their binding properties, if you have an egg allergy, you could experiment with flax eggs (1 tablespoon flaxseed meal mixed with 3 tablespoons water, let sit for 5 minutes to thicken) as a potential binder, although the texture might be slightly altered. For best results, stick with eggs.
- Olive Oil (1/4 cup): Olive oil adds moisture, flavor, and a touch of richness to the crust. It also helps to create a slightly crispy texture. Substitution: You can substitute olive oil with other healthy oils like avocado oil or melted coconut oil (ensure it’s cooled slightly before adding to avoid cooking the eggs). Butter (melted and cooled) can also be used for a richer flavor, but it will slightly alter the texture.
- Water (1/4 cup): Water is added to help hydrate the coconut flour and bring the dough together. The amount of water might need slight adjustments depending on the humidity and the specific brand of coconut flour you use. Start with 1/4 cup and add a tablespoon at a time if the dough seems too dry.
- Psyllium Husk Powder (2 tablespoons): This is a secret weapon for coconut flour baking! Psyllium husk powder is a soluble fiber that acts as a binder and helps to create a more dough-like texture. It significantly improves the elasticity and chewiness of the crust, preventing it from being crumbly. Important Note: Use psyllium husk powder, not whole husks. If you only have whole husks, you can grind them into a powder using a spice grinder or food processor. This ingredient is highly recommended for the best texture.
- Garlic Powder (1 teaspoon): Garlic powder adds a subtle savory flavor that enhances the overall taste of the crust and complements pizza toppings beautifully. Substitution: You can use onion powder instead, or a combination of both. For a more intense garlic flavor, you can use fresh minced garlic (about 1-2 cloves), but add it carefully as it can add moisture to the dough.
- Italian Seasoning (1 teaspoon): Italian seasoning provides a classic pizza flavor profile. It typically includes a blend of herbs like oregano, basil, rosemary, thyme, and marjoram. Substitution: You can use a mix of your favorite dried Italian herbs if you don’t have Italian seasoning blend. Oregano and basil are particularly important for a traditional pizza taste.
- Salt (1/2 teaspoon): Salt is essential for balancing the flavors and enhancing the taste of all the other ingredients. It also plays a role in the texture of the crust. Use sea salt or kosher salt for best results.
Instructions: Step-by-Step Guide to Baking Your Coconut Flour Pizza Crust Masterpiece
Creating this coconut flour pizza crust is surprisingly simple, even for beginner bakers. Follow these detailed step-by-step instructions to ensure pizza perfection every time:
- Preheat Your Oven and Prepare Baking Sheet: Preheat your oven to 350°F (175°C). Line a large baking sheet with parchment paper. Parchment paper is crucial for preventing sticking and making it easy to remove the baked crust. Alternatively, you can use a silicone baking mat.
- Combine Dry Ingredients: In a large mixing bowl, whisk together the coconut flour, psyllium husk powder, garlic powder, Italian seasoning, and salt. Whisking ensures that the ingredients are evenly distributed and there are no clumps of coconut flour. This step is important for a consistent texture.
- Whisk Wet Ingredients Separately: In a separate bowl, whisk together the eggs, olive oil, and water until well combined and slightly frothy. This pre-mixing of wet ingredients helps to emulsify them and ensures they incorporate smoothly into the dry ingredients.
- Combine Wet and Dry Ingredients: Pour the wet ingredients into the bowl with the dry ingredients. Use a spatula or wooden spoon to stir everything together until a thick dough forms. Initially, the mixture might seem a bit wet, but the psyllium husk and coconut flour will quickly absorb the liquid and thicken the dough. Continue stirring until you have a cohesive, slightly sticky dough.
- Let the Dough Rest (Important!): This is a crucial step for coconut flour recipes. Let the dough rest for 5-10 minutes. This allows the psyllium husk and coconut flour to fully absorb the moisture and bind together, creating a more workable dough. You’ll notice the dough becoming thicker and less sticky as it rests. Don’t skip this step!
- Shape the Crust: Once the dough has rested, lightly dampen your hands with water. This will prevent the dough from sticking to your hands. Place the dough onto the prepared baking sheet. Using your hands or the back of a spoon, gently press and shape the dough into a thin, even circle or rectangle, depending on your preference. Aim for a thickness of about 1/4 inch to 1/2 inch. Remember that coconut flour crusts tend to be a bit thicker than traditional crusts. Don’t make it too thin, or it might become too crispy and brittle.
- Pre-Bake the Crust (Optional but Recommended): For a crispier crust that can hold heavier toppings, pre-bake the crust for 10-15 minutes in the preheated oven. Pre-baking helps to set the crust and prevent it from becoming soggy when you add toppings. If you prefer a softer crust, you can skip pre-baking, but be mindful of not overloading it with wet toppings.
- Add Toppings and Bake: Remove the pre-baked crust (or unbaked crust if you skipped pre-baking) from the oven. Now it’s time for the fun part! Spread your favorite pizza sauce evenly over the crust, leaving a small border for the edge. Top with your desired cheese, vegetables, meats, and any other pizza toppings you love.
- Bake Until Golden Brown and Toppings are Cooked: Return the pizza to the oven and bake for another 15-20 minutes, or until the crust is golden brown around the edges and the cheese is melted and bubbly. The baking time may vary slightly depending on your oven and the thickness of your crust.
- Cool Slightly and Serve: Once baked, carefully remove the pizza from the oven. Let it cool for a few minutes on the baking sheet before slicing and serving. This allows the crust to firm up slightly, making it easier to slice and handle. Enjoy your delicious homemade coconut flour pizza!
Nutrition Facts: Fueling Your Body with Deliciousness
This coconut flour pizza crust isn’t just delicious; it’s also a healthier option compared to traditional pizza crusts. Here’s an estimated nutritional breakdown per serving. Please note that these are approximate values and can vary depending on the specific brands of ingredients used and the size of your servings.
Servings: This recipe typically yields 6-8 servings, depending on how you slice your pizza. For nutritional estimations, we will consider 8 servings.
Approximate Nutrition Facts per Serving (Crust Only):
- Calories: Approximately 150-180 calories
- Total Fat: 10-12g
- Saturated Fat: 3-5g (primarily from coconut flour and olive oil)
- Unsaturated Fat: 7-9g (healthy fats from olive oil and eggs)
- Cholesterol: 100-120mg (from eggs)
- Sodium: 150-200mg (depending on salt added)
- Total Carbohydrates: 8-10g
- Dietary Fiber: 6-8g (primarily from coconut flour and psyllium husk)
- Net Carbs: 2-3g (Total Carbs – Dietary Fiber)
- Protein: 5-7g (from coconut flour and eggs)
Key Nutritional Benefits:
- Gluten-Free and Grain-Free: Perfect for those with gluten sensitivities, celiac disease, or following a grain-free diet.
- Low Carb and Keto-Friendly: Significantly lower in carbohydrates compared to traditional pizza crusts, making it suitable for low-carb and ketogenic diets.
- High in Fiber: Coconut flour and psyllium husk are excellent sources of dietary fiber, promoting digestive health and satiety.
- Good Source of Healthy Fats: Olive oil and eggs provide healthy fats that are beneficial for overall health.
- Moderate Protein: Contributes to your daily protein intake.
Important Note: These nutrition facts are for the crust only. The nutritional content of your pizza will vary depending on the toppings you choose. Opt for lean proteins, plenty of vegetables, and lower-fat cheeses to keep your pizza a healthy and balanced meal.
Preparation Time: From Pantry to Pizza in a Flash
One of the great things about this coconut flour pizza crust recipe is its speed and simplicity. Here’s a breakdown of the preparation time:
- Prep Time: 15-20 minutes (This includes measuring ingredients, mixing the dough, and shaping the crust).
- Resting Time: 5-10 minutes (Allowing the dough to rest is crucial for texture).
- Pre-Bake Time (Optional): 10-15 minutes
- Bake Time (with toppings): 15-20 minutes
- Total Time (including pre-baking): Approximately 45-65 minutes
- Total Time (without pre-baking): Approximately 30-45 minutes
As you can see, from start to finish, you can have a delicious homemade coconut flour pizza on the table in under an hour, and even faster if you skip the pre-baking step. This makes it a perfect option for weeknight dinners or weekend pizza nights when you want a quick and healthy meal.
How to Serve: Unleash Your Pizza Creativity
This coconut flour pizza crust is incredibly versatile and can be served in countless delicious ways. Here are some ideas to get your creative pizza juices flowing:
- Classic Pizza Night:
- Traditional Toppings: Go classic with tomato sauce, mozzarella cheese, pepperoni, mushrooms, onions, peppers, and olives.
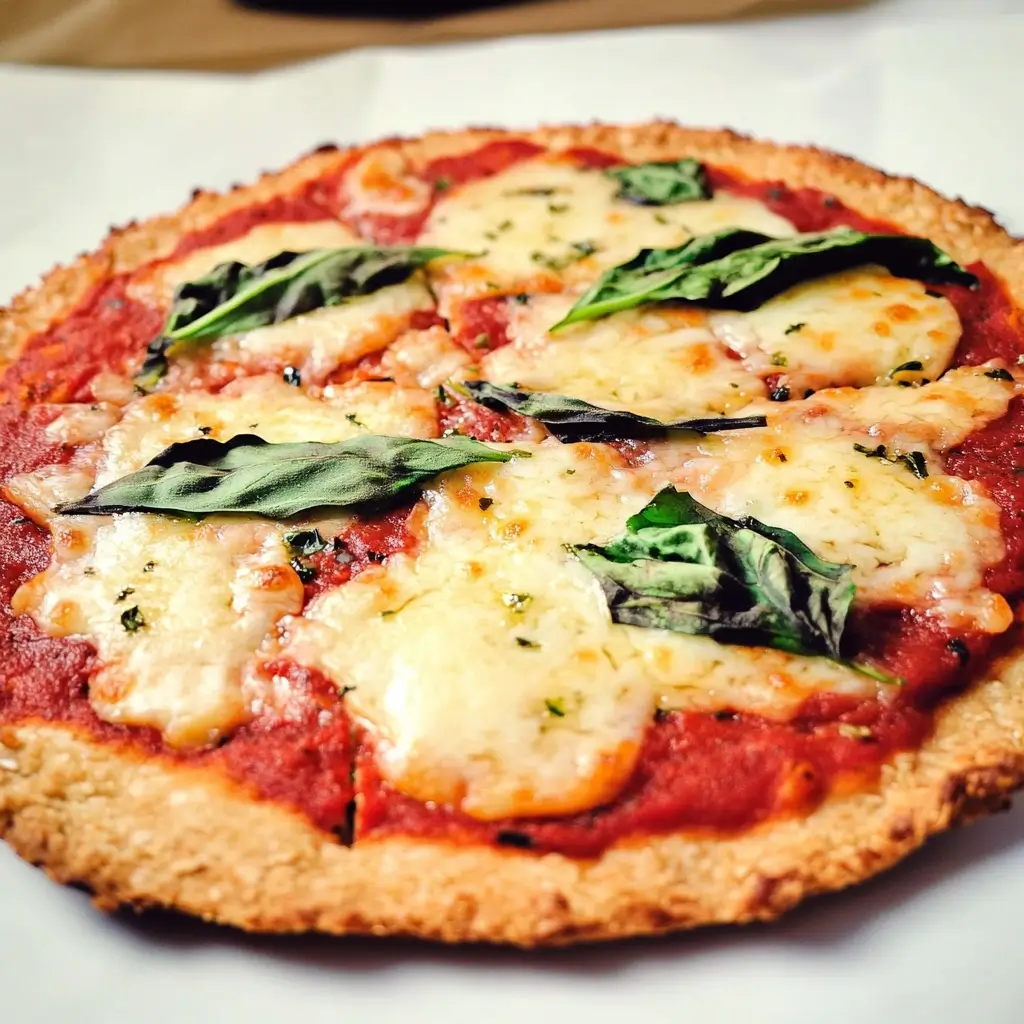
- Margherita Pizza: Simple and elegant with tomato sauce, fresh mozzarella, basil leaves, and a drizzle of olive oil.
- Hawaiian Pizza: A controversial but beloved choice with tomato sauce, ham, and pineapple.
- Gourmet Pizza Creations:
- Pesto Chicken Pizza: Spread pesto sauce instead of tomato sauce, top with grilled chicken, sun-dried tomatoes, artichoke hearts, and feta cheese.
- BBQ Chicken Pizza: Use BBQ sauce as the base, top with shredded BBQ chicken, red onions, cilantro, and cheddar cheese.
- Mediterranean Pizza: Hummus or white garlic sauce base, topped with spinach, Kalamata olives, feta cheese, roasted red peppers, and artichoke hearts.
- Mushroom and Truffle Oil Pizza: White garlic sauce base, sautéed mushrooms, truffle oil, and parmesan cheese.
- Dietary Specific Pizza Options:
- Vegan Pizza: Use vegan cheese alternatives, load up on vegetables, and consider adding plant-based protein like marinated tofu or tempeh.
- Vegetarian Pizza: Explore a rainbow of vegetables like bell peppers, zucchini, eggplant, spinach, broccoli, and artichokes.
- Keto Pizza: Stick to low-carb toppings like meats, cheese, low-carb vegetables (like spinach, mushrooms, peppers), and sugar-free sauces.
- Serving Sides and Accompaniments:
- Fresh Salad: A simple green salad with a light vinaigrette is a perfect complement to pizza.
- Caesar Salad: A classic Caesar salad adds a creamy and flavorful side.
- Garlic Knots (Coconut Flour Version!): Get creative and make mini garlic knots using leftover coconut flour dough for a fun appetizer.
- Steamed Vegetables: Broccoli, asparagus, or green beans are healthy and easy sides.
- Occasions to Serve:
- Weeknight Family Dinner: Quick and easy for a satisfying weeknight meal.
- Weekend Pizza Night: A fun and interactive activity for the whole family to customize their own pizzas.
- Game Day Gathering: Perfect for sharing with friends while watching sports.
- Casual Party or Potluck: A crowd-pleasing dish that caters to various dietary needs.
Additional Tips for Coconut Flour Pizza Crust Perfection
To ensure your coconut flour pizza crust is a resounding success every time, here are five essential tips:
- Measure Coconut Flour Accurately: Coconut flour is incredibly absorbent, and using too much can result in a dry and crumbly crust. Always measure coconut flour accurately using measuring cups and level it off with a knife. Spooning the flour into the cup is recommended to avoid packing it down.
- Don’t Overmix the Dough: Once you combine the wet and dry ingredients, mix just until everything is incorporated and a dough forms. Overmixing can develop the psyllium husk too much and make the crust tough.
- Adjust Water as Needed: The amount of water needed can vary slightly depending on the humidity and the brand of coconut flour. If your dough seems too dry and crumbly, add water one tablespoon at a time until it comes together into a workable dough. If it’s too wet, you might need to add a tiny bit more coconut flour, but start with small adjustments.
- Pre-Bake for Crispier Crust: Pre-baking the crust before adding toppings is highly recommended for a crispier base, especially if you plan to use heavier or wetter toppings. This step helps to set the crust and prevent it from becoming soggy.
- Let the Crust Cool Slightly Before Slicing: Coconut flour crusts are more delicate than traditional crusts when hot. Allowing the pizza to cool for a few minutes after baking will allow the crust to firm up slightly, making it easier to slice and serve without it breaking apart.
FAQ: Your Burning Questions About Coconut Flour Pizza Crust Answered
Still have questions about making coconut flour pizza crust? Here are answers to some frequently asked questions:
Q1: My coconut flour pizza crust is too dry and crumbly. What did I do wrong?
A: The most common reason for a dry and crumbly coconut flour crust is using too much coconut flour or not enough liquid. Double-check your measurements, especially for the coconut flour. Also, ensure you added enough water. Coconut flour is very absorbent, so even a slight imbalance can affect the texture. Next time, try adding a tablespoon of water at a time until the dough reaches the right consistency. Resting the dough adequately is also crucial for hydration.
Q2: Can I make this pizza crust ahead of time?
A: Yes, you can prepare the coconut flour pizza crust ahead of time in a couple of ways. You can pre-bake the crust and then store it in an airtight container at room temperature for up to a day. Alternatively, you can prepare the dough, shape it, and store it covered in the refrigerator for a few hours. Let it come to room temperature slightly before baking. However, for the best texture, it’s generally recommended to bake the crust relatively close to serving time.
Q3: Can I freeze coconut flour pizza crust?
A: Yes, you can freeze pre-baked coconut flour pizza crust. Allow the pre-baked crust to cool completely. Wrap it tightly in plastic wrap and then in foil or place it in a freezer-safe bag. Freeze for up to 2-3 months. To reheat, bake from frozen at 350°F (175°C) for about 10-15 minutes, or until heated through. You can then add toppings and bake until the cheese is melted and bubbly.
Q4: My pizza crust puffed up in the oven. Is this normal?
A: It’s normal for coconut flour pizza crust to puff up slightly in the oven. This is due to the steam created during baking. If it puffs up excessively, it could be because the oven temperature is too high. Try reducing the oven temperature slightly for your next bake. You can also gently poke the puffed-up areas with a fork before adding toppings to deflate them slightly.
Q5: Can I use almond flour instead of coconut flour?
A: No, coconut flour and almond flour are not interchangeable in this recipe. They have very different absorbency levels and behave differently in baking. Almond flour is much less absorbent than coconut flour. Substituting almond flour directly will result in a very wet and unusable dough. If you’re looking for an almond flour pizza crust recipe, you’ll need to find a recipe specifically designed for almond flour. This recipe is formulated specifically for coconut flour.
Print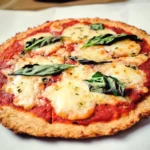
Coconut Flour Pizza Crust Recipe
Ingredients
- Coconut Flour (1 cup): The star of the show! Coconut flour is what makes this crust gluten-free and grain-free. It’s incredibly absorbent, which is why it’s used in smaller quantities compared to traditional flours. Important Note: Coconut flour is not interchangeable with other flours like almond flour or all-purpose flour. It behaves very differently in baking. Using the correct amount and measuring accurately is key to a successful crust. For best results, use a finely ground coconut flour.
- Eggs (4 large): Eggs are the binding agent in this recipe, providing structure and moisture. They help to hold the coconut flour together and create a cohesive dough. Substitution: While it’s tricky to directly substitute eggs in this recipe due to their binding properties, if you have an egg allergy, you could experiment with flax eggs (1 tablespoon flaxseed meal mixed with 3 tablespoons water, let sit for 5 minutes to thicken) as a potential binder, although the texture might be slightly altered. For best results, stick with eggs.
- Olive Oil (1/4 cup): Olive oil adds moisture, flavor, and a touch of richness to the crust. It also helps to create a slightly crispy texture. Substitution: You can substitute olive oil with other healthy oils like avocado oil or melted coconut oil (ensure it’s cooled slightly before adding to avoid cooking the eggs). Butter (melted and cooled) can also be used for a richer flavor, but it will slightly alter the texture.
- Water (1/4 cup): Water is added to help hydrate the coconut flour and bring the dough together. The amount of water might need slight adjustments depending on the humidity and the specific brand of coconut flour you use. Start with 1/4 cup and add a tablespoon at a time if the dough seems too dry.
- Psyllium Husk Powder (2 tablespoons): This is a secret weapon for coconut flour baking! Psyllium husk powder is a soluble fiber that acts as a binder and helps to create a more dough-like texture. It significantly improves the elasticity and chewiness of the crust, preventing it from being crumbly. Important Note: Use psyllium husk powder, not whole husks. If you only have whole husks, you can grind them into a powder using a spice grinder or food processor. This ingredient is highly recommended for the best texture.
- Garlic Powder (1 teaspoon): Garlic powder adds a subtle savory flavor that enhances the overall taste of the crust and complements pizza toppings beautifully. Substitution: You can use onion powder instead, or a combination of both. For a more intense garlic flavor, you can use fresh minced garlic (about 1-2 cloves), but add it carefully as it can add moisture to the dough.
- Italian Seasoning (1 teaspoon): Italian seasoning provides a classic pizza flavor profile. It typically includes a blend of herbs like oregano, basil, rosemary, thyme, and marjoram. Substitution: You can use a mix of your favorite dried Italian herbs if you don’t have Italian seasoning blend. Oregano and basil are particularly important for a traditional pizza taste.
- Salt (1/2 teaspoon): Salt is essential for balancing the flavors and enhancing the taste of all the other ingredients. It also plays a role in the texture of the crust. Use sea salt or kosher salt for best results.
Instructions
- Preheat Your Oven and Prepare Baking Sheet: Preheat your oven to 350°F (175°C). Line a large baking sheet with parchment paper. Parchment paper is crucial for preventing sticking and making it easy to remove the baked crust. Alternatively, you can use a silicone baking mat.
- Combine Dry Ingredients: In a large mixing bowl, whisk together the coconut flour, psyllium husk powder, garlic powder, Italian seasoning, and salt. Whisking ensures that the ingredients are evenly distributed and there are no clumps of coconut flour. This step is important for a consistent texture.
- Whisk Wet Ingredients Separately: In a separate bowl, whisk together the eggs, olive oil, and water until well combined and slightly frothy. This pre-mixing of wet ingredients helps to emulsify them and ensures they incorporate smoothly into the dry ingredients.
- Combine Wet and Dry Ingredients: Pour the wet ingredients into the bowl with the dry ingredients. Use a spatula or wooden spoon to stir everything together until a thick dough forms. Initially, the mixture might seem a bit wet, but the psyllium husk and coconut flour will quickly absorb the liquid and thicken the dough. Continue stirring until you have a cohesive, slightly sticky dough.
- Let the Dough Rest (Important!): This is a crucial step for coconut flour recipes. Let the dough rest for 5-10 minutes. This allows the psyllium husk and coconut flour to fully absorb the moisture and bind together, creating a more workable dough. You’ll notice the dough becoming thicker and less sticky as it rests. Don’t skip this step!
- Shape the Crust: Once the dough has rested, lightly dampen your hands with water. This will prevent the dough from sticking to your hands. Place the dough onto the prepared baking sheet. Using your hands or the back of a spoon, gently press and shape the dough into a thin, even circle or rectangle, depending on your preference. Aim for a thickness of about 1/4 inch to 1/2 inch. Remember that coconut flour crusts tend to be a bit thicker than traditional crusts. Don’t make it too thin, or it might become too crispy and brittle.
- Pre-Bake the Crust (Optional but Recommended): For a crispier crust that can hold heavier toppings, pre-bake the crust for 10-15 minutes in the preheated oven. Pre-baking helps to set the crust and prevent it from becoming soggy when you add toppings. If you prefer a softer crust, you can skip pre-baking, but be mindful of not overloading it with wet toppings.
- Add Toppings and Bake: Remove the pre-baked crust (or unbaked crust if you skipped pre-baking) from the oven. Now it’s time for the fun part! Spread your favorite pizza sauce evenly over the crust, leaving a small border for the edge. Top with your desired cheese, vegetables, meats, and any other pizza toppings you love.
- Bake Until Golden Brown and Toppings are Cooked: Return the pizza to the oven and bake for another 15-20 minutes, or until the crust is golden brown around the edges and the cheese is melted and bubbly. The baking time may vary slightly depending on your oven and the thickness of your crust.
- Cool Slightly and Serve: Once baked, carefully remove the pizza from the oven. Let it cool for a few minutes on the baking sheet before slicing and serving. This allows the crust to firm up slightly, making it easier to slice and handle. Enjoy your delicious homemade coconut flour pizza!
Nutrition
- Serving Size: One Normal Portion
- Calories: 150-180
- Sodium: 150-200mg
- Fat: 10-12g
- Saturated Fat: 3-5g
- Unsaturated Fat: 7-9g
- Carbohydrates: 8-10g
- Fiber: 6-8g
- Protein: 5-7g
- Cholesterol: 100-120mg


